
How to Remove a Toilet Seat With Hidden Bolts: Step-By-Step Fix for Stubborn Fasteners
To remove a toilet seat with hidden bolts, start by exposing the concealed fasteners. Locate and pop off the hinge caps or access the nuts beneath the bowl. If the hardware is seized, apply penetrating oil and let it soak. Use pliers, an adjustable wrench, or a bolt extractor for any stripped heads. Resort to cutting or a rotary tool only as a last option. Remember to protect the porcelain and work carefully. This guide will provide detailed methods, tools, and maintenance tips for your task.
Why hidden-bolt toilet seats are different and when removal is necessary
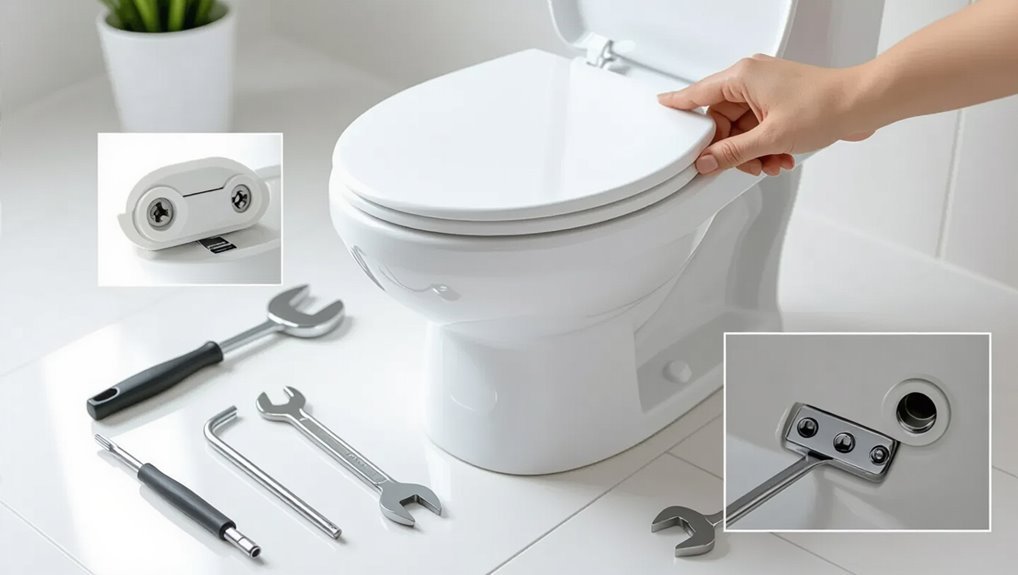
Hidden-bolt toilet seats use concealed fasteners such as snap-covers, torx bolts, or press-fit anchors that differ from exposed-hinge models.
Removal may be required for replacement, hinge repair, or thorough cleaning when grime accumulates around the mounting area.
Before beginning, a safety checklist should be confirmed: turn off nearby water sources if needed, clear the area, and have basic tools and protective gloves on hand.
Common types of hidden-bolt toilet seat fittings
A variety of concealed-fastening systems are used to attach toilet seats, and understanding their differences helps determine the correct removal approach.
Common types include snap-fit hinge caps, push-button quick-release, threaded bolts with keyed nuts, and expansion anchors. Each demands specific tools and steps; searching for “how to remove toilet seat with hidden bolts” guides selection of pry, hex, or screwdriver techniques tailored to the fitting.
Reasons to remove a hidden-bolt toilet seat (replacement, repair, cleaning)
After identifying the type of concealed fastening, the homeowner can decide whether removal is necessary: replacement for worn or mismatched seats, repair of broken hinges or corroded fasteners, or thorough cleaning where grime has built up under caps and around anchors.
Hidden-bolt designs hide hardware, trapping corrosion and debris and complicating hinge access; visible damage, persistent odors, or persistent looseness justify removal.
Safety and bathroom preparation checklist
One clear priority before removing a concealed-bolt toilet seat is ensuring the workspace is safe, dry, and accessible.
The checklist should include turning off nearby water sources, clearing floor clutter, protecting surfaces, wearing gloves and eye protection, and having proper tools and lighting.
Note hidden-bolt seats may require rust-penetrant spray, a small mirror for inspection, and a plan for replacement or repair.
Tools and materials you’ll need before starting
Before beginning, a concise kit of essentials — screwdriver set, pliers, adjustable wrench, utility knife and a lubricant — should be assembled.
For stubborn or corroded fasteners, optional items such as a heat source, rust penetrant, hacksaw or rotary tool may be needed.
Protective gear (gloves, eye protection) and a towel or mat to protect the floor complete the preparation.
Essential tools (screwdrivers, pliers, wrench, utility knife, lubricant)
Gather the right tools to make removing a toilet seat quick and damage-free: a flathead and Phillips screwdriver, adjustable pliers or a small wrench, a utility knife for cutting caulk or loosened plastic, and a penetrating lubricant for rusted or seized fasteners.
Include a small container for removed hardware, a rag for cleanup, and protective gloves to prevent cuts and chemical contact.
Optional tools for stubborn fasteners (heat source, rust penetrant, hacksaw, rotary tool)
For particularly stubborn or corroded fasteners, having a few optional tools on hand can save time and prevent damage.
A heat source (heat gun or propane torch) loosens corrosion; rust penetrant eases frozen threads.
A hacksaw cuts through seized bolts when removal fails.
A rotary tool with cutting or grinding discs trims or splits fasteners for extraction.
Use cautiously and precise control.
Protective gear and surface protection
While removing a toilet seat, wearing basic protective gear and protecting surrounding surfaces reduces injury risk and cleanup time.
Safety glasses, nitrile gloves, and a dust mask protect against debris and cleaners. Use knee pads for comfort during prolonged work.
Lay a drop cloth or old towels over floor and tank, and apply painter’s tape around porcelain to prevent scratches from tools or dropped hardware.
Quick overview: three main removal approaches
Three primary methods are commonly used to remove a toilet seat.
The first involves accessing and unscrewing the bolts from underneath the bowl.
The second releases a hidden cap or hinge cover to reach the fasteners, while the third resorts to cutting or destroying seized hardware if removal by conventional means fails.
Approach A Access and unscrew from underneath
Approach A requires reaching beneath the toilet bowl to access and unscrew the seat fasteners from below, a method commonly used when top-access is obstructed or bolts are corroded.
The technician supports the seat, locates nut heads under the rim, holds the bolt steady, and turns the nut with a wrench or socket.
Corroded hardware may need penetrating oil and steady force.
Approach B Release the hidden cap or hinge cover and unscrew
Lift the hinge covers and expose the mounting screws to remove the seat from above.
The technician pries caps gently with a flat tool, avoids scratching, then uses a screwdriver or socket to loosen screws.
If threads are corroded, apply penetrating oil and wait.
Once fasteners turn freely, remove screws and lift the seat and hinges off, keeping hardware for reinstallation.
Approach C Cut or destroy seized fasteners as last resort
When all standard removal methods fail and fasteners remain seized, cutting or otherwise destroying them becomes the final resort; this involves carefully chosen tools and techniques to avoid damaging the bowl or tank.
Use bolt cutters, a hacksaw, oscillating tool, or rotary cutter with guarded blades. Protect porcelain with tape and a shield, work slowly, clear debris, and replace anchors with corrosion-resistant hardware.
Step-by-step method A: Removing by accessing nuts under the bowl
First, the water is shut off and the seat is positioned to expose the hinges.
Next, hinge covers are removed to reveal the bolts, which are held at the top while the nuts beneath are loosened with the correct wrench.
Once bolts are removed and the seat lifted away, the mounting holes are cleaned before fitting a new seat.
Step 1 Turn off water and position the seat
Shut off the water supply and guarantee the lid and seat are aligned for easy access before beginning.
The person confirms the valve behind the toilet is closed and flushes to drain the tank.
After the tank empties, towels protect the floor.
The seat is centered and lifted slightly to expose hinge bases, preparing for under-bowl nut access without forcing or twisting the plastic.
Step 2 Locate access points and remove hinge covers
Locate the hinge access points by leaning over the bowl and inspecting the underside of the seat where the hinges meet the porcelain; most seats have small plastic caps or covers on top of the hinge that snap or twist off to reveal the mounting bolts.
Carefully pry caps using a flat tool or fingernail, keeping removed pieces safe.
Wipe debris and note bolt orientation before proceeding.
Step 3 Hold the bolt head and loosen the nut with correct wrench
Using pliers or a screwdriver to hold the bolt head steady beneath the rim, the technician positions the correct-sized wrench on the nut above and applies steady counterclockwise pressure to loosen it.
Careful alignment prevents rounded edges; if resistance occurs, a penetrating lubricant and short, controlled taps with a hammer can free corrosion.
Maintain firm grip until threads turn freely.
Step 4 Remove bolts and lift the seat assembly
Once the nut turns freely, the technician unscrews it the rest of the way and withdraws the bolt from beneath the bowl.
Repeating for the second fastener, they slide both bolts down and clear of the mounting holes.
With bolts removed, the technician lifts the seat assembly straight up, checking for hidden clips or adhesive resisting removal.
Then, they set the seat aside for disposal or inspection.
Step 5 Clean mounting holes before installing new seat
Before fitting the replacement seat, the technician clears debris and corrosion from the mounting holes to confirm a secure, flush fit.
They scrape loose material with a small brush or screwdriver, rinse and dry the area, and inspect for damage.
If threads are corroded, they apply a thread chaser or replace anchors.
Final cleaning verifies accurate alignment and prevents future loosening.
Step-by-step method B: Releasing hidden caps or quick-release hinges
The technique for hidden caps or quick-release hinges begins by identifying the type of release mechanism or cap present.
Using a thin plastic pry tool or flat screwdriver with a cloth, caps are opened carefully to avoid chipping the porcelain. Then, release tabs are depressed or hinge components slid as required.
Once disengaged, the bolts and any concealed washers are removed and the seat lifted away.
Step 1 Identify the release mechanism or cap type
Inspect the hinge area to determine how the seat releases: some models have small plastic caps that snap off to expose a screw, others use a spring-loaded quick-release button or latch at the rear of the hinges.
Note hinge shape, visible seams, and any tiny slots or arrows indicating release. Identifying the mechanism guides tool choice and prevents unnecessary force or damage.
Step 2 Pry open caps safely without damaging porcelain
Carefully release hidden caps or quick‑release hinges by applying controlled pressure with a thin, non‑marring tool—such as a plastic pry tool, credit card, or flathead wrapped in tape—to lift seams without contacting the porcelain bowl.
Work clockwise around each cap, easing edges until clips disengage. Stop if resistance is high; switch tools or angle.
Keep hands steady, protect surrounding surfaces, and retain popped caps for reinstallation.
Step 3 Depress release tabs or slide hinge components
Next, depress the release tabs or slide the hinge components to disengage the seat from its mount: the technician locates small plastic or metal tabs at hinge bases, presses inward or slides covers toward the bowl, then lifts slightly to verify detachment.
Gentle, steady pressure prevents snapping. If resistance persists, inspect for secondary locks or concealed levers and adjust accordingly before proceeding.
Step 4 Remove bolts and lift seat; handle concealed washers
With the release tabs disengaged, the technician locates the hidden bolt heads beneath the hinge covers or quick‑release collars and unscrews them using an appropriately sized screwdriver or hex key; if caps conceal the fasteners, they are pried off by sliding or lifting them away to expose the hardware.
Once bolts are removed, the seat and lid lift free; trapped washers or gaskets are retrieved, cleaned, and inspected for replacement.
Step-by-step method C: Removing seized or rusted hidden bolts
When hidden bolts are corroded or seized, a systematic approach improves the chance of removal without damaging the bowl.
Begin with penetrating oil and soak time, then apply heat or percussive shocks to break the corrosion before gripping the bolt with locking pliers or vise grips; if turning fails, consider cutting options such as bolt cutters, a hacksaw, or a rotary tool.
After the head and shank are removed, extract any remaining shank and assess and repair any damaged bolt holes.
Step 1 Apply penetrating oil and allow soak time
Spray a generous coat of penetrating oil onto the exposed parts of the seized bolts and any visible rust on the flange; this loosens corrosion and reduces friction before attempting removal.
Allow at least 10–15 minutes for soak time, longer for heavy rust. Reapply if residue evaporates.
Wipe excess oil and inspect threads for looseness before proceeding to mechanical removal steps.
Step 2 Use heat or shock techniques to break corrosion
Apply controlled heat or sharp impacts to break the rust bond on seized, hidden bolts, taking care to protect surrounding plastic and porcelain.
Use a heat gun at low to moderate setting, avoiding prolonged exposure.
Alternatively, deliver short, firm taps with a small hammer through a punch to shock the joint.
Reapply penetrating oil between attempts and allow brief cooling before testing movement.
Step 3 Use locking pliers or vise grips to turn bolt head
Grab a pair of locking pliers or vise grips sized to firmly clamp the exposed portion of the bolt head or stud.
Clamp securely, then apply steady, controlled torque to unthread the bolt. Work incrementally, releasing and re-clamping if slippage occurs.
Protect porcelain with cloth around jaws. If the head rounds, adjust grip or try alternate angles before resorting to cutting or drilling.
Step 4 Cutting options: bolt cutter, hacksaw, rotary tool techniques
When bolts seize or rust beyond the reach of pliers, cutting them free becomes the practical option; common tools for this are bolt cutters, a hacksaw, or a rotary tool with a cutting wheel, each suited to different bolt sizes and access constraints.
Bolt cutters deliver quick straight cuts for exposed bolts. A hacksaw offers controlled cutting in tight spots. Rotary tools speed cutting but require steady hands and eye protection.
Step 5 Extract remaining shank and repair damaged holes
Having cut the bolt heads away, the remaining shanks must be carefully extracted and any damaged mounting holes repaired to guarantee a secure new seat installation.
Use pliers, an extractor bit, or a screw extractor to back out shanks; apply penetrating oil and gentle heat if seized.
Clean debris, file or ream distorted holes, and fill oversized openings with epoxy or plastic anchor inserts before reinstalling the new seat.
What to do if the hinge or porcelain is damaged during removal
If the hinge or surrounding porcelain is damaged during removal, immediate steps can stabilize the seat and prevent leaks or further breakage.
Temporary fixes such as using silicone sealant, epoxy putty, or rubber washers can secure a loose seat until a permanent repair is made, while small cracks around mounting holes may be filled and reinforced with appropriate porcelain repair kits.
Significant damage, persistent instability, or hairline fractures that risk spreading should prompt contact with a professional plumber or a ceramic repair specialist.
Temporary fixes to secure a loose seat
Assess immediate options to stabilize a loose toilet seat after a hinge or porcelain sustains damage during removal.
Use nylon zip ties threaded through hinge holes or wrap a stainless steel band clamp around the base to hold the seat temporarily.
Add rubber washers or silicone around contact points to reduce movement and protect edges.
Avoid overtightening; plan for permanent repair or replacement soon.
Repairing cracked porcelain around mounting holes
Begin by stopping further damage and cleaning the area: remove loose fragments, dry the surface, and clear debris from the mounting holes before attempting any repair.
Assess crack depth; small chips can be filled with waterproof epoxy or two-part porcelain repair compound. Sand smooth once cured, drill new shallow pilot holes if needed, and reinstall with rubber washers to distribute load and prevent recurrence.
When to call a professional plumber
Recognize when damage exceeds DIY remedies: a bent hinge, stripped bolts, or cracked porcelain that compromises the toilet’s stability or creates leaks warrants a professional plumber.
A plumber assesses structural damage, replaces corroded or misaligned hardware, repairs or replaces porcelain, and guarantees flange and seal integrity.
Seeking professional help prevents worsening leaks, uneven seating, or costly future repairs.
How to choose and install a replacement toilet seat with hidden bolts
The author outlines how to measure bowl length and bolt spacing to guarantee a correct fit for a replacement seat with hidden bolts.
They compare common materials and hinge styles to match durability and comfort needs.
Finally, they summarize a concise installation sequence for hidden-bolt seats and note how to test and make final adjustments for secure alignment.
Measuring for correct fit and bolt spacing
When replacing a toilet seat with hidden bolts, measuring the bowl and bolt spacing accurately confirms the new seat fits securely and looks flush.
Measure overall bowl length from lip to lip, width at the widest point, and center-to-center distance between bolt holes.
Record measurements in millimeters and inches, compare with replacement specifications, and verify hinge clearance before purchasing to guarantee alignment and secure mounting.
Comparing seat materials and hinge types
With accurate measurements in hand to guarantee proper alignment, attention shifts to selecting the seat material and hinge type that match usage needs and the hidden-bolt mounting system.
Choices affect comfort, durability, and maintenance. Consider key trade-offs:
- Plastic: lightweight, affordable, stain-resistant.
- Wood: warmer feel, heavier, prone to swelling.
- Soft-close hinges: reduce noise, add complexity.
Step-by-step installation of a new hidden-bolt seat
Begin by confirming compatibility between the replacement seat and the toilet’s bowl shape and bolt spacing.
Align hidden-bolt hinges over mounting holes, insert bolts through hinge posts, and position seat.
From beneath, thread and hand-tighten nuts or captive fittings to secure alignment.
Use a screwdriver or wrench for final snugness without overtightening.
Conceal bolts with caps and wipe surfaces clean.
Testing and final adjustments
After installation, inspect the seat for proper alignment, secure fit, and smooth operation before declaring the job complete.
Test lid and seat movement, ensuring hinges operate without binding.
Sit gently to confirm stability and retighten hidden bolts if any shift occurs.
Verify even gap around bowl and that quick-release mechanisms engage.
Clean mounting area and document torque settings for future reference.
Troubleshooting common problems and quick fixes
Common problems such as stripped bolt heads, cross-threading, and a persistent wobble are addressed with targeted quick fixes.
Techniques include using extractor tools or locking pliers for damaged bolts, carefully re-threading or replacing fasteners to correct threading issues, and checking hinge alignment, washer condition, and torque sequencing to eliminate looseness.
These practical steps help restore a secure, stable seat without unnecessary replacement.
Stripped bolt heads and how to remove them
Stripped bolt heads are a frequent obstacle when removing a toilet seat: the driver slips or the head spins in the socket, leaving the fastener unusable by conventional tools.
Use locking pliers, rubber grip or a bolt extractor set to gain purchase.
Drill a small pilot and use an extractor if needed.
Protect porcelain, work slowly, and replace damaged bolts with corrosion‑resistant hardware.
Cross-threading and re-threading tips
Cross-threading occurs when a bolt or nut is started at the wrong angle, causing damaged threads that bind or fail to seat properly. Recognizing the problem early—stiff, gritty rotation or resistance after only a turn or two—prevents worsening the damage.
Back out, clean threads with a wire brush, inspect for crosswise gouges, apply light lubricant, and realign by hand before gently tightening with proper tools.
Persistent wobble after installation and tightening strategies
A persistent wobble after tightening typically indicates that one or more components—bolts, nuts, mounting holes, or the seat hinges—are not seating correctly rather than simply being loose.
Inspect plastic anchors and bolt shafts for wear, clean debris, and verify hole alignment.
Replace damaged anchors, use nylon washers or shims to fill gaps, torque evenly in stages, and confirm hinge engagement before final tightening.
Maintenance tips to prevent future stuck hidden bolts
Regular cleaning and a light lubrication schedule can keep hidden bolts free-moving and easy to access.
Choosing corrosion-resistant fasteners, such as stainless steel or nylon-coated options, reduces the chance of seizing over time.
Periodic seasonal checks and simple long-term care routines further prevent buildup and catch early signs of wear.
Regular cleaning and lubrication schedule
Establishes a consistent cleaning and lubrication routine to prevent hidden bolts from seizing.
Monthly inspections remove grime with mild detergent and a soft brush, followed by drying.
Every three months apply a light silicone or PTFE spray to threads and hinge areas; wipe excess.
After heavy use or exposure to moisture, repeat sooner.
Record dates to maintain schedule and detect accelerated corrosion.
Best fastener materials to resist corrosion
Following a consistent cleaning and lubrication routine can extend fastener life, but selecting the right materials provides the most reliable protection against corrosion.
Stainless steel (316) offers excellent resistance in moist bathrooms. Brass resists rust and is easy to service. Nylon or polymer anchors prevent galvanic reaction and won’t seize.
Avoid plain carbon steel; use coated or sacrificial zinc-plated fasteners if budget limits choices.
Seasonal checks and long-term care
Inspect seasonal changes in humidity and temperature to schedule maintenance that prevents hidden bolts from seizing.
Periodic inspection, cleaning, and light lubrication of bolts and hinge areas every three to six months reduces corrosion.
Replace worn rubber washers and use corrosion-resistant fasteners when needed.
Document maintenance dates and note any stiffness or discoloration to prompt timely intervention and avoid emergency removal.
Cost, time, and tool estimate for typical removal scenarios
A straightforward estimate for removing a standard toilet seat typically ranges from 10 to 30 minutes and requires only basic tools—usually a screwdriver and an adjustable wrench—with most homeowners spending $0–$15 if they already own the tools or up to $20–$40 to buy inexpensive replacements; labor costs apply only if a professional is hired, which can add $50–$100 for a brief service call.
| Scenario | Time | Cost |
|---|---|---|
| DIY, tools owned | 10–30 min | $0–$15 |
| DIY, buy tools | 15–40 min | $20–$40 |
| Pro service | 15–45 min | $50–$100 |
Conclusion
Like a locksmith easing a stubborn latch, the final act is calm and precise. The old seat lifts away, revealing clean porcelain like a blank page; new hinges click home with quiet assurance. Hands steady, tools rested, the bowl regains its tidy silhouette. Small victories—tightened bolts, freed caps—leave a ripple of satisfaction. In that simple, domestic closure, routine repair becomes a practiced rhythm, restoring order with minimal fuss and lasting steadiness.
