
How to Rough In a Double Sink Vanity: Step-by-Step Plumbing & Framing Guide
To successfully rough in a double sink vanity, you’ll need to accurately position sink centers, supply stub-outs, drain traps, and vents before installing drywall. Start by coordinating with your framing and permits. Install horizontal blocking and plywood backing at the appropriate heights for the countertop and faucets. Next, run hot and cold lines with shutoff valves, and ensure the 1½” sink drains are set with the correct slope to the main stack. After that, conduct pressure tests on the supply lines and drain tests, then schedule necessary inspections. Follow these steps for comprehensive plumbing, venting, and framing guidance.
Overview of Roughing In a Double Sink Vanity
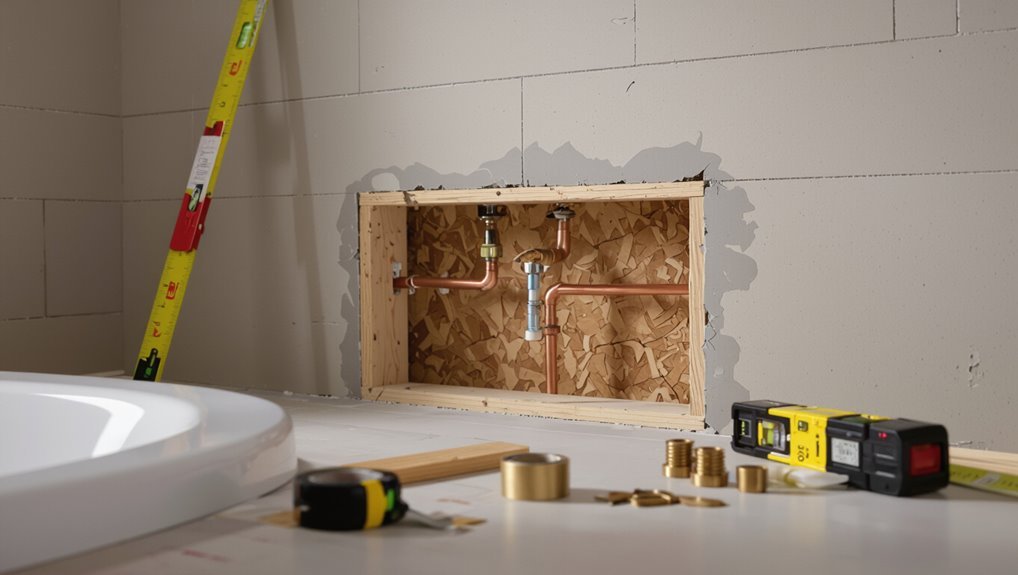
“Roughing in” for a double sink vanity refers to the initial placement and installation of supply lines, drain/waste vents, and the framing that will support the cabinet and fixtures.
This work is scheduled before drywall and final finishes so that plumbing runs and structural supports are correctly located for two sinks.
Required permits, applicable plumbing and building codes, and inspections should be confirmed and obtained prior to rough-in to guarantee compliance.
What “roughing in” means for a bathroom vanity
Begin by preparing the subfloor, wall framing, and utility stubs to accommodate a double sink vanity: “roughing in” refers to placing and securing the plumbing, drain, and electrical penetrations in their correct locations before the vanity, countertops, and finishes are installed.
It defines precise locations, pipe runs, venting, and shutoffs needed for how to rough in a double sink vanity, ensuring fit and code compliance.
When to rough in plumbing and framing for a double sink
After the plumbing, subfloor, and framing are laid out and utility stubs have been positioned, the timing for roughing in a double sink vanity depends on sequencing with structural and finish work: it should occur after framing inspection and before drywall, flooring, or cabinet installation so that drain lines, water supply, vents, and shutoffs are accessible and can be pressure-tested.
Roughing in then coordinates with electrical, venting, and final layout verification.
Required permits, codes, and inspections
Permits, building codes, and inspections form the legal framework that governs rough-in work for a double sink vanity.
Contractors or homeowners must obtain required plumbing and structural permits, follow local code specifications for venting, trap placement, drain slope, and seismic/bracing requirements, and schedule inspections at rough-in and final stages.
Compliance prevents violations, guarantees safety, and avoids costly rework.
Tools, Materials, and Measurements Needed
A concise checklist of plumbing tools, fittings, and supplies frames the practical requirements for roughing in a double sink vanity.
Equally important are the framing and carpentry tools, plus common drain, waste and vent components with their typical sizes.
Clear measurement guidelines—sink center spacing, cabinet width, and required clearances—ensure the layout and parts match before work begins.
Plumbing tools and supplies checklist
Several essential tools, materials, and precise measurements are required to rough in a double sink vanity properly.
A concise plumbing checklist includes fittings, tubing, and fixtures sized to layout dimensions.
Required items:
- P-traps, tailpieces, trap adapters, PVC/ABS pipe, and solvent cement.
- Supply stops, braided flex lines, shutoffs, and compression fittings.
- Pipe cutter, adjustable wrench, plumber’s tape, and level.
Framing and carpentry tools checklist
After plumbing components and measurements are confirmed, attention shifts to the framing and carpentry tools needed to lay out and construct the vanity cabinet and supporting wall blocking.
Essential items include measuring and cutting tools, fastening supplies, and layout aids for accurate placement.
- Tape measure, speed square, circular saw
- Framing hammer, drill, pocket screws
- 2×4 lumber, plywood backing, shims
Common fittings, drain/waste sizes, and venting parts
Plumbing rough‑in for a double sink vanity requires specific fittings, drain sizes, and venting components to guarantee reliable drainage and code compliance.
Required fittings include P-traps, trap arms, slip joints, wye fittings, sanitary tees for vent connections, and cleanouts.
Typical drain sizes are 1½” for sinks; waste branches often tie into 2″ stack piping.
Vent piping usually matches stack size per code.
Measuring guide: sink centers, cabinet width, and clearances
A precise measuring plan is essential before cutting or installing a double sink vanity: it should list sink centerlines, cabinet width, clearances to walls and fixtures, and the tools and materials required.
Measure overall vanity width, mark sink centerlines (standard 30–36 inches apart center-to-center or per manufacturer), guarantee 2–3 inches clearance to side walls, and allow 18–24 inches clearance in front for user access.
Pre-Installation Planning and Layout
Before beginning rough-in work, the installer marks ideal sink locations and spacing to guarantee comfortable use and cabinet fit.
Next, drain and water supply routing are mapped with attention to P-trap placement and vent termination points to maintain code-compliant flow.
Finally, the plumbing layout is coordinated with electrical and HVAC runs to prevent interference and allow final connections.
Choosing sink locations and spacing for a double vanity
Proper sink placement balances user comfort, plumbing practicality, and cabinet design; determining center-to-center spacing, distance from side walls, and alignment with countertop features sets the foundation.
Measure for at least 30–36 inches per user zone, maintain 4–6 inches from side walls, and center sinks relative to mirrors and cabinet doors.
Verify faucet clearances and access for maintenance before committing to cutouts.
Determining drain and water supply routing
With sink locations set, attention turns to routing the drains and water supply so the plumbing aligns with the chosen layout and provides reliable access for use and maintenance.
Plan straight, short runs minimizing turns; group hot and cold lines and position shutoffs near each vanity.
Mark wall studs and rough-in heights, verify slope for waste lines, and coordinate with nearby fixtures and access panels.
Locating the P-trap and vent termination points
Locate the P-trap and vent termination points so waste flows efficiently and vents prevent siphoning under normal and peak use.
Mark trap locations centered under each sink, keeping traps within vanity depth limits.
Align vents to rise vertically to the nearest stack or install individual vent lines; guarantee proper slope to drain, maintain code-required distances, and clear framing for future access and inspection.
Coordinating vanity rough-in with electrical and HVAC
When planning the vanity rough-in, the plumber should coordinate closely with electrical and HVAC trades to prevent conflicts and guarantee required clearances for outlets, switches, lighting, and ductwork.
They must review plans, mark plumbing stub locations relative to electrical boxes and supply/return ducts, adjust heights for code and fixture access, and schedule sequencing to avoid rework and maintain serviceability.
Framing for a Double Sink Vanity
Framing for a double sink vanity requires precise blocking and stud placement to support the cabinet and sinks.
Walls should be reinforced where heavy countertops and faucets will bear load, with planned openings for supply and drain penetrations through prepared studs.
Consider framed access panels or a removable chase to allow future service without compromising structural support.
Blocking and stud placement for vanity support
Plan stud layout and blocking to confirm the double sink vanity is fully supported, level, and tied into the wall structure.
Place studs at cabinet edges and at sink cutouts, adding horizontal 2×4 blocking between studs at mounting height and countertop bearing points.
Confirm blocking aligns with cabinet rails and plumbing access.
Verify plumb and secure blocking with toenails or screws to the studs for rigid attachment.
Reinforcing wall for heavy countertops and faucets
With blocking and studs in place to support cabinet edges and sink cutouts, attention shifts to reinforcing the wall where heavy stone countertops and commercial-style faucets will bear loads.
Install horizontal blocking at countertop height and behind faucet locations, using hardwood or doubled studs.
Anchor blocking to studs with structural screws, add plywood backing where required, and verify load paths to floor framing for secure transfer.
Framing access panels and removable chase options
Several key access points should be laid out before finishing the wall around a double sink vanity to allow future service of plumbing, electrical, and faucet components.
Incorporate framed openings for drain cleanouts, shutoff valve access, and electrical junctions. Use removable chase panels or hinged access doors sized for tools and replacement parts.
Label panel locations and secure framing with backing for repeated removal and reinstallation.
Preparing studs for supply and drain penetrations
Lay out stud locations and mark pipe centers before cutting or drilling to guarantee accurate alignment with vanity fixtures.
The installer drills holes at mid-height for supply lines and lower for drains, maintaining minimum edge distances to preserve stud strength.
Use hole saws or augers, install protective nail plates, and reinforce with blocking or doubled studs where large openings occur to meet code and support wall loads.
Roughing In the Drain and Waste Plumbing
Next, attention turns to marking and cutting precise wall openings for the drain lines and installing the vertical drops and horizontal runs to reach the main stack.
The installer positions dual P-traps or a common trap assembly, maintaining the correct slope for each horizontal drain and secure connections to the waste line.
Finally, the rough-in is pressure-tested for leaks and water flow before closing the wall.
Marking and cutting wall openings for drains
Measure and transfer the drain locations from the vanity to the wall before cutting to guarantee accurate alignment with P-traps and trap arms.
Verify stud positions and avoid hidden wiring or pipes using a detector.
Mark hole centers and outline rough openings sized for chosen fittings and couplings.
Cut the wall with appropriate tools, deburr edges, and prepare backing or nailers for future fixture support.
Installing vertical drops and horizontal drain lines
Begin by setting the vertical drops from the sink tailpieces down to the planned trap locations, making sure each drop is plumb and cut to allow for the correct trap arm slope.
Secure drops to framing with proper hangers.
Run horizontal drain lines from trap locations toward the wall stub, maintaining 1/4″ per foot slope, using clean, accessible fittings and testing for alignment before final support.
Positioning and installing dual P-traps or common trap assembly
With the horizontal drain lines run and supported to the wall stub, attention shifts to arranging the traps for a double-sink vanity.
The installer decides between two individual P-traps or a shared common-trap assembly.
Position traps directly under each tailpiece, align inlet heights, maintain clearance for cabinet storage, and secure trap arms with slip nuts.
Test for proper seal before cabinet finishing.
Ensuring proper slope and connection to main drain
Once the trap assemblies are set, the installer verifies the drain runs slope toward the building waste stack at a consistent 1/4 inch per foot (2% grade) for horizontal piping, increasing to 1/8 inch per foot only where space or existing conditions demand; this guarantees gravity flow, prevents standing water, and avoids siphoning of traps.
The run is aligned, pitched, supported with hangers, and tied into the stack with proper fittings and cleanouts positioned for access.
Testing drain rough-in for leaks and flow
Pressurize and observe the drain rough-in to confirm watertight joints and proper flow before closing walls or installing fixtures.
Introduce water and air tests: plug traps, fill lines, apply air or water pressure per code, then monitor for pressure loss and visible leaks.
Check venting function and fixture drains for proper flow rate.
Repair or tighten any failed connections promptly.
Roughing In Water Supply Lines
Next, attention turns to laying out the cold and hot supply system, choosing between individual feeds or a central manifold.
The installer runs hot and cold lines to each sink, positions shutoff valves and stub-outs at the proper height, and secures and protects pipes through studs to prevent punctures.
Finally, the supply assembly is pressure tested to confirm leak-free operation before closing walls.
Selecting supply layout: individual feeds vs. manifold
When planning the water supply for a double-sink vanity, the installer must choose between individual feeds—separate hot and cold lines to each fixture—or a manifold system that distributes supply from a central hub.
Individual feeds simplify isolation and reduce fittings; manifolds centralize control, ease future changes, and can reduce pressure loss.
Cost, space, access, and maintenance needs determine the ideal layout.
Running hot and cold supply lines to each sink
After choosing between individual feeds and a manifold, the installer lays out the hot and cold runs to each basin, marking routes, valve locations, and stub heights before any framing work begins.
Pipes are measured, cut, and supported; bends kept minimal; crossings coordinated with studs. Connections use appropriate fittings and slope is maintained for drainage avoidance.
Pressure-tested runs confirm integrity prior to wall closure.
Installing shutoff valves and stub-outs at correct height
A precise placement of shutoff valves and stub-outs guarantees serviceability and code compliance before the wall is closed.
Valves should be mounted level, accessible from behind the finished vanity, and positioned at manufacturer-recommended height relative to the faucet and cabinet floor.
Use consistent centerlines for hot and cold, allow clearance for handles and hoses, and mark locations clearly for final trim and fixture hookup.
Securing lines through studs and protecting against punctures
Drill pilot holes through studs and route supply lines so they run centered in the stud bay with at least 1.25 inches of framing between the pipe and the stud face; where that clearance cannot be met, install steel nail plates over the studs to shield the tubing from drywall screws and fasteners.
Secure lines with plastic or metal straps at regular intervals, avoid kinks, and maintain separation from electrical wiring.
Pressure testing supply lines
Begin by isolating the newly run hot and cold lines and connecting them to a reliable pressure source—typically a hand pump or compressor with a gauge—so the system can be brought to the required test pressure (commonly 50–80 psi for residential copper or PEX).
Monitor for pressure decay over 15–30 minutes, inspect all joints and fittings for leaks, and repair any failures before concealment.
Venting and Code Considerations
The text introduces considerations for vent placement when two sinks share a vanity, noting the need to guarantee both fixtures have adequate airflow.
It briefly compares wet venting with separate vents, outlining common advantages and limitations of each approach.
It also mentions typical code constraints on vent height and maximum trap-to-vent distances that must be checked against local regulations.
Proper vent placement for two sinks
Although two sinks share a common drainline, each fixture must be properly vented to prevent siphoning and secure smooth waste flow; local plumbing codes set the allowable distances and vent types.
Vent placement should minimize horizontal run between trap arm and vent, locate vents before any downstream turns, and remain accessible for inspection.
Document local code clearances and routing to guarantee compliance during rough‑in.
Wet venting vs. individual vents: pros and cons
When choosing between wet venting and individual vents, builders must weigh space, materials, and code constraints: Wet venting can save materials and simplify routing but may complicate future repairs and requires correct configuration. Individual vents provide isolation and easier maintenance but use more penetrations and piping. Choose based on layout, inspection feedback, and long‑term access.
| Advantage | Disadvantage |
|---|---|
| Material savings | Complex layout |
| Easier routing | More penetrations |
| Simpler inspection | Higher material cost |
| Space efficient | Repair impact |
| Fewer roof penetrations | Code limitations |
Height and distance limits per common plumbing codes
Builders selecting between wet venting and individual vents must also account for code-mandated height and distance limits that determine vent effectiveness and fixture placement.
Codes specify maximum horizontal distances from trap to vent based on pipe diameter, fixture type and slope, and minimum vent sizes and vertical rise before entering the stack.
Compliance prevents siphoning, guarantees trap seal integrity, and avoids costly rework.
Electrical and Lighting Coordination
Electrical and lighting coordination requires planning outlet placement, with GFCI protection specified for receptacles near the double vanity.
Wiring must accommodate vanity lighting, exhaust heaters or heat lamps, and separate circuits where code or load demands it.
Electrical box locations should be coordinated with plumbing rough-ins to avoid conflicts and simplify final trim.
Outlet placement (GFCI) near double vanity
Several factors determine ideal GFCI outlet placement near a double sink vanity, including code requirements, user convenience, and coordination with plumbing and lighting.
Outlets should be mounted above the backsplash within reach of each sink, spaced to serve both users, and positioned to avoid obstructing cabinets or mirrors.
Locate GFCI devices where accessible for testing and clearly label circuits for bathroom loads.
Wiring considerations for lighting and heaters
When planning wiring for vanity lighting and heaters, the layout must balance code compliance, load capacity, and convenient control locations.
Circuits should separate lighting from high-draw heaters, with dedicated breakers and proper ampacity. Use moisture-rated fixtures and switches, install GFCI where required, and plan switch placement for user convenience.
Document loads for electrician to verify panel capacity and proper labeling.
Coordinating electrical box locations with plumbing
Coordinate electrical box locations with plumbing early in the layout process to prevent clashes between outlet boxes, switch locations, and supply/drain lines.
The designer should map stud bay positions, pipe runs, and fixture centers, locating low-voltage or GFCI outlets clear of drains and traps.
Mark boxes on framing plans, allow service access, maintain code-required clearances, and coordinate trades before drywall.
Common Problems and How to Avoid Them
Common problems include incorrect drain placement and improper slope, which lead to slow or noisy drainage.
Insufficient countertop support can cause sagging or damage, while improper fittings risk cross-connections and backflow.
Practical prevention focuses on precise measuring and sloping, robust framing and bracing, correct venting and backflow devices, and using proper trap and pipe sizes.
Mistakes in drain placement and slope
If drain lines are misaligned or lack proper slope, fixtures can back up, leak, or cause chronic odors that are costly to fix.
Poor placement creates trap interference, awkward tailpiece angles, and increased clogging. Insufficient 1/4″ per foot slope causes standing water; excessive slope speeds flow but risks siphoning traps.
Measure, mark, and dry-fit piping; adjust elevations and use long-turn fittings to maintain consistent grade.
Risks of inadequate support for countertops
Underestimating countertop support can lead to sagging, cracked surfaces, and failed fasteners that jeopardize both appearance and function.
Insufficient framing, inadequate blocking, or improper attachment allow weight from sinks, countertops, and daily use to deform cabinets.
Consequences include uneven seams, loosened fixtures, and water intrusion.
Adequate blocking, reinforcing rails, and correct fasteners distributed per manufacturer specs prevent structural failure and costly repairs.
Cross-connection and backflow prevention issues
While proper framing prevents countertop failure, plumbing mishaps can equally compromise a double sink vanity through cross-connections and backflow.
Cross-connections between potable and waste lines risk contamination; incorrect venting or missing air gaps enables backflow into fixtures.
Install separate trap arms, venting per code, and approved air gaps or backflow preventers.
Test and label lines; follow local codes to eliminate contamination hazards.
How to avoid noisy or slow drains
Address common causes of noisy or slow drains early in the rough-in phase to prevent persistent performance issues after installation.
Inspect and size venting correctly, maintain gradual trap arm slopes, and avoid sharp offsets that create turbulence.
Use properly pitched drain lines, smooth-walled pipe, and adequately sized traps.
Clear debris, test flow under load, and secure piping to minimize vibration and noise before wall finishes are applied.
Inspection Checklist Before Closing Walls
Before closing the wall, a concise inspection checklist guarantees the double sink vanity rough-in meets plumbing, framing, and electrical requirements.
The plumbing rough-in checklist confirms drain, vent, and supply locations and slope; the framing and structural checklist verifies backing and clearance for the cabinet and fixtures.
The electrical coordination checklist checks outlet placement and lighting circuits.
Clear documentation and labeled photos should be prepared for the inspector and kept with project records.
Plumbing rough-in checklist
Once all drain and water lines are set, a concise plumbing rough-in inspection checklist guarantees the double sink vanity will function and pass code before walls are closed.
Verify alignment, slope, and trap placement. Confirm shutoff accessibility and labeling. Pressure-test for leaks.
- Measure drain slope and trap arm lengths.
- Inspect hot/cold supply spacing and shutoffs.
- Perform pressure/leak test and document results.
Framing and structural checklist
A thorough framing and structural checklist verifies that the vanity opening, wall studs, blocking, and floor support are correctly sized and secured to accept a double sink vanity without sagging, twisting, or interfering with plumbing and electrical runs.
- Confirm stud spacing, header size, and level opening.
- Verify blocking for mounting cabinets and faucets.
- Inspect floor joists, subfloor integrity, and fastening to prevent deflection.
Electrical coordination checklist
With framing and blocking confirmed, attention shifts to electrical coordination to secure power, lighting, and controls are placed and protected prior to wall closure.
The checklist verifies outlets, switches, and fixtures align with vanity layout and code, conduit and box protection are installed, and wiring routes avoid plumbing.
- Locate and mark GFCI outlets.
- Confirm vanity lighting placement.
- Protect and label junction boxes.
How to document and prepare for inspection
Begin documenting and preparing for inspection by compiling a concise, itemized checklist that demonstrates compliance and readiness before walls are closed.
Include verified plumbing layout, pipe sizes, slope measurements, vent locations, shutoff valve access, and fixture centers.
Record material specs, permit numbers, photos of rough-ins, and pressure test results.
Confirm notes on electrical coordination, framing clearances, and installer contact information for inspector reference.
Converting Rough-In to Final Install
The contractor locates finished plumbing fixtures by referencing the rough-in marks and verifying dimensions against the vanity layout.
Cutting finished surfaces and exposing stub-outs is done carefully to protect surrounding materials and maintain alignment.
Small adjustments to supply and drain positions are made during the finish stage to guarantee proper fit and leak-free connections.
Locating finished plumbing fixtures from rough-in marks
Shifting from rough-in marks to the finished layout requires careful measurement and verification to assure that sinks, faucets, and drain assemblies align with cabinetry, countertop cutouts, and supply lines.
Technicians confirm centerlines, heights, and clearances, transfer measurements to vanity and counter templates, and mark final fixture positions.
Plumbing offsets, trap locations, and shutoff accessibility are checked to assure compatibility before installation.
Cutting finishes and accessing stub-outs
Carefully cut the finished surfaces to expose stub-outs while preserving surrounding materials and maintaining alignment with the rough-in layout.
Use appropriate blades, templates, and straightedges to create clean openings. Remove tile, drywall, or trim selectively, support adjacent finishes, and label hot/cold and drain lines.
Debris should be contained; inspect stub-outs for correct depth, orientation, and integrity before proceeding to fixture installation.
Tips for adjusting supply/drain positions during finish stage
Adjusting supply and drain positions during the finish stage requires precise measurement and incremental modification to align fixtures without compromising finished surfaces.
Install temporary fixtures to verify fit, mark final locations, and use extension nipples, flexible supply lines, and adjustable trap adapters for minor shifts.
Protect surrounding finishes, test for leaks, and make only small adjustments; larger misalignments require opening access panels or repositioning behind the vanity.
Time, Cost Estimates, and When to Hire a Professional
Typical timeframes for a double sink rough-in vary from a weekend for an experienced DIYer to a day or two for a licensed pro, depending on complexity.
Expected costs should be itemized into materials (pipes, valves, fittings, drain assemblies) and labor, with professionals charging flat fees or hourly rates that can greatly raise the total.
A licensed plumber or carpenter should be engaged if structural changes, hidden framing or joist work, complex drain slopes, or local code permits are involved.
Typical timeframes for DIY vs. pro rough-in
When comparing a DIY rough-in to hiring a professional, the homeowner should expect a wide range: a competent DIYer working with clear plans and basic tools can complete a double-sink rough-in in one to two weekends, while a licensed plumber typically completes the same job in a single day.
DIYers should add time for permit inspections, unexpected obstructions, and learning; pros reduce risk and schedule uncertainty.
Cost breakdown by materials and labor
After weighing time differences between a DIYer and a licensed plumber, attention turns to the financial side: materials, permits, and labor make up the bulk of a double-sink rough-in budget.
Typical material costs range $150–$600 (pipes, valves, trap, venting, fittings). Permit fees vary by locality.
Labor for a licensed plumber commonly adds $400–$1,200 depending on complexity and region.
Signs you should hire a licensed plumber or carpenter
How can a homeowner tell if a double-sink rough-in is a DIY weekend project or requires a licensed pro?
Indicators include limited availability, complex drain-waste-vent alterations, structural framing changes, or local permit requirements.
If estimated labor exceeds a weekend, quoted contractor fees approach DIY budget, or leaks/inspections risk fines, hiring a licensed plumber or carpenter is advisable for safety, code compliance, and warranty.
Practical Tips and Best Practices
The author recommends choosing durable, corrosion-resistant materials and orienting fixtures to accommodate likely future upgrades.
Clear labeling and photographs of the rough-in locations are advised to simplify later repairs or modifications.
Routine checks and simple maintenance steps after installation help preserve function and prevent costly issues.
Durable materials and future-proofing tips
Choose materials that balance longevity, maintenance, and compatibility with plumbing rough‑ins to minimize future repairs and upgrades.
Recommend corrosion‑resistant pipes (PEX or copper), durable drain assemblies, and moisture‑resistant framing like pressure‑treated or engineered lumber.
Use accessible shutoffs, flexible connectors, and standardized fittings to ease replacements.
Seal penetrations, allow service clearance, and plan for potential fixture upgrades to reduce retrofit costs and disruption.
Labeling and photographing rough-ins for future work
Good labeling and clear photographs preserve the advantages gained by using durable materials and standardized fittings, making future service or upgrades faster and less error-prone.
Document pipe locations, shutoff valves, drain slopes, and access panels with time-stamped photos.
Affix waterproof labels indicating pipe type, size, and elevation.
Store images and a brief schematic with project records and share copies with homeowners or contractors for seamless follow-up.
Maintenance tips after installation
Inspecting the installation regularly helps extend its service life and prevent small issues from becoming costly repairs.
Check for leaks, loose fittings, and water stains monthly.
Tighten fasteners, clean drains with noncaustic solutions, and test shutoff valves annually.
Reseal grout or caulk as needed and document maintenance dates.
Promptly address any corrosion or slow drains to avoid structural or mold damage.
Conclusion
Nailed studs and copper lines behind drywall hum like the skeleton of a future bathroom—two sink basins waiting like twin moonlit pools. The rough‑in stage, when measurements, framing, and drains align, turns plans into structure; meticulous layout and secure connections keep water flowing only where planned. With inspections passed and trim installed, the space transforms from blueprint to sanctuary. Careful planning and skilled execution guarantee the vanity’s promise becomes everyday, reliable comfort.
