How to Flush Toilet Without Handle: 7 Easy Fixes You Can Do Now
If your toilet handle is broken, there are several quick and safe ways to flush without it. First, wear gloves and avoid touching your face while you assess the tank. You can flush by lifting the flapper or chain, pressing the flush valve directly, or pouring a bucket of water into the bowl. Alternatively, you can create a temporary pull using string, zip ties, or a smoothed coat hanger. Be gentle with any tools to prevent damage. If issues continue, it’s best to call a plumber. For detailed step-by-step fixes and troubleshooting, keep reading.
What to do immediately when the toilet handle is broken
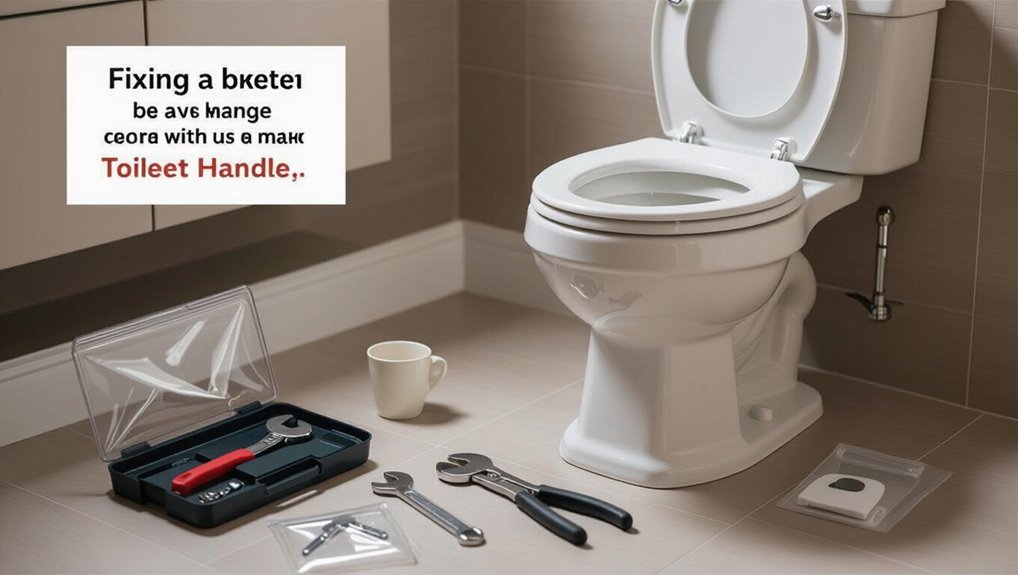
When the toilet handle breaks, the person should first take basic safety and hygiene steps such as avoiding contact with contaminated surfaces and washing hands if touched.
Next, they should assess whether the problem is a simple temporary disconnect or a broken part needing repair.
These initial actions help contain mess and determine whether a quick manual flush is feasible or a plumber is required.
Quick safety and hygiene steps before attempting a manual flush
Normally, one of the first priorities is to minimize contact and contamination before attempting a manual flush after the handle breaks.
Wear disposable gloves, keep hands away from face, and place a towel over nearby surfaces. Prepare disinfectant wipes and hand sanitizer.
If possible, open a window for ventilation. These steps help when learning how to flush toilet without handle and reduce infection risk.
Assessing whether the issue is temporary or requires repair
After taking basic safety and hygiene steps, the next action is to determine if the broken handle is a temporary failure or a problem needing repair.
Inspect the exterior for loose or detached components, then lift the tank lid and observe the arm, chain, and flapper.
If parts are intact but disconnected, reconnect or hold to flush; if broken, note model and source replacement or call a plumber.
7 easy ways to flush a toilet without a handle
When the handle fails, several simple alternatives can restore flushing function quickly and safely.
The following five options cover manual, improvised-tool, and water-only techniques to suit different situations and comfort levels:
- Use the refill tube or lift the flapper chain directly through the tank opening.
- Press down the flush valve or flapper with a gloved hand or suitable tool.
- Scoop and pour: generate enough force with a bucket of water to trigger a flush.
- Use a straightened coat hanger or wire to pull the chain from outside the tank.
- Operate the flapper safely with a disposable plastic bag or glove over the hand.
Use the refill tube (or lift the flapper chain) quick manual method
Access the tank lid and locate the refill tube and flapper chain; either can be used to trigger a flush without a handle.
Gently squeeze the refill tube to direct water into the bowl for a partial flush, or lift the flapper chain upward to open the flapper, allowing a full flush.
Release the chain to reseal. Use caution to avoid dislodging connections.
Press down the flush valve or flapper directly through the tank opening
Reach into the tank opening and press the flush valve or flapper directly to release water into the bowl; this gives a quick, reliable full flush without using the handle.
Use a gloved hand or towel, depress the rubber flapper until water flows, then let go so it reseals.
Avoid forcing plastic parts; check alignment if resistance or leaks occur afterward.
Scoop and pour method: how to create enough force with a bucket of water
Pour a full bucket of water directly into the bowl to generate the siphon needed for a complete flush.
Use a sturdy 1–2 gallon container, lift to waist height, and pour steadily toward the rear rim. Aim for a single, forceful pour to push water through the trap.
Repeat once if necessary. Avoid splashing; clear any floating debris before pouring.
Use a coat hanger or wire to pull the chain from outside the tank
Unbend a coat hanger or straighten a piece of sturdy wire into a long hook, then slip it between the tank lid and the back of the bowl to fish for the flush chain or lever arm; a single, controlled tug on the hooked end will lift the chain and trigger the flapper to open, producing a flush.
Maintain steady pressure, avoid jabbing, and withdraw carefully to prevent damage.
Use a disposable plastic bag or glove to operate the flapper safely
If a coat hanger or wire cannot reach the chain without risking damage, a disposable plastic bag or glove offers a safer way to operate the flapper directly through the tank opening.
Wearing a glove or lining a hand with a bag, one can reach in, lift the flapper or tug the chain gently, then withdraw and dispose of the covering to avoid contamination.
Temporary handle replacement using household tools and materials
Create a quick temporary handle by repurposing common household items—such as a sturdy wire, zip tie, wooden dowel, or a short length of coat hanger—so the flapper chain can be pulled without reaching into the tank.
Secure one end to the chain hook, fashion a comfortable grip, and route the tool through the tank opening.
Test for smooth action and adjust length or attachment as needed.
Use a universal toilet tank flapper tool or replacement trip lever
Install a universal tank flapper tool or replacement trip lever to restore reliable flushing without fashioning makeshift handles.
These kits fit most tanks, connect directly to the flapper or lift chain, and offer adjustable lengths and durable materials.
Installation requires basic tools, a few minutes, and minimal adjustments.
They provide a long-term, inexpensive solution that avoids messing with internal valve assemblies or permanent replacements.
Step-by-step instructions for each method
The following section gives concise, practical steps for each method so a reader can flush the toilet reliably without a handle.
It covers how to lift the flapper or chain safely, how to pour water to avoid splashing and achieve a full flush, how to fashion and operate a temporary handle from common items, and how to use tools like a coat hanger without harming tank components.
Each technique is presented in clear, sequential actions that prioritize safety and protection of the toilet.
How to lift the flapper or chain safely
Begin by evaluating the tank interior to determine whether the flapper lifts via a chain, lift wire, or direct push from the handle assembly, then choose the safest method accordingly.
For chain: grasp chain near flapper and pull upward gently, avoid twisting.
For lift wire: use needle-nose pliers to lift hook carefully.
For direct push: press the arm inward with a gloved finger, release slowly.
How to pour water correctly to avoid splashing and ensure a full flush
After lifting the flapper or manipulating the chain, attention shifts to pouring water in a controlled way so splashes are minimized and the bowl refills enough for a complete flush.
Use a bucket with a spout or a jug, pour steadily toward the center of the bowl at mid-height. Aim for a continuous stream, pause if bubbling occurs, then finish with a faster pour to guarantee siphon action.
How to fashion and use a temporary handle from common items
Fashion a temporary handle from items on hand to restore flushing without parts replacement, using straightforward, secure connections and gentle testing before regular use.
Thread a sturdy string or zip tie through the lever hole, knot below the tank lid, and attach a small stick or keyring as a pull.
Alternatively, loop a shoelace to form a pull tab.
Test gently, adjust length.
How to use tools like a coat hanger without damaging tank components
Using a coat hanger or similar rigid tool requires care to avoid scratching porcelain, bending metal parts, or dislodging the flapper chain. The user should first straighten and smooth any sharp ends, then work with small, controlled movements while supporting the tank lid and avoiding contact with the fill valve, float, and overflow tube.
Insert gently, hook flapper or lift chain, test movement, retract slowly.
When a temporary fix is enough and when to call a plumber
Minor issues—such as a temporarily disconnected chain or a stuck flapper—can often be managed with short-term fixes that typically last days to months.
Persistent signs like slow refills, continuous running, repeated manual resets, or visible corrosion suggest a deeper problem requiring parts replacement or a professional diagnosis.
Comparing expected lifespan of temporary solutions and ballpark costs and time for common repairs versus hiring a plumber helps determine whether to DIY or call a pro.
Signs that indicate a deeper problem with the flush mechanism
When a toilet starts exhibiting unusual behavior beyond a simple stuck handle—such as weak or continuous running, inconsistent flush power, water level drops in the bowl, or repeated clogging—it often signals a deeper issue within the flush mechanism.
Persistent symptoms, foul odors, visible tank leaks, or noisy refilling indicate internal parts failure or valve/seal deterioration; these warrant professional diagnosis and repair rather than temporary fixes.
How long temporary solutions typically last
How long a temporary toilet fix lasts depends on the nature of the problem and the quality of the stopgap repair: simple measures like jigging a stuck flapper or tying up a detached chain can restore function for days to months.
Whereas ad-hoc fixes for worn seals, corroded lift arms, or cracked valves typically fail within days or weeks.
Temporary fixes suffice for short-term use; persistent leaks, recurring failures, or safety concerns warrant professional evaluation promptly.
Cost and time estimates for common repairs vs. professional service
Although many toilet handle failures can be addressed temporarily with simple tools, evaluating cost and time helps determine whether a homeowner should proceed alone or call a professional.
Minor fixes—tightening, replacing a lever or chain—cost $5–30 and take 15–45 minutes.
Complex issues—corroded parts, tank cracks, or inaccessible setups—often justify a plumber: $100–300 and one to three hours, plus parts.
Quick troubleshooting for common causes of handle failure
Common handle failures can usually be traced to a corroded or broken trip lever, a detached or broken chain, a misaligned or damaged flapper, or a loose or stripped handle nut.
A quick inspection of the tank interior typically identifies which component is at fault. Simple adjustments or part replacements often restore function without extensive tools.
Corroded or broken trip lever
Several factors can cause a trip lever to corrode or break, rendering the toilet handle ineffective: mineral buildup from hard water, electrochemical corrosion where dissimilar metals meet, mechanical wear on pivot points, and plastic fatigue from age or repeated stress.
Inspection reveals visible rust, seized movement, wobble at the mounting nut, or fractured metal/plastic.
Replace the lever or its mounting hardware to restore reliable operation.
Detached or broken chain
Check the chain first, since a detached or broken chain is a frequent and easily fixed cause of a nonfunctional handle.
Inspect connection points between handle arm, chain, and flapper.
Reattach a slipped clip or link, replace a corroded or snapped chain with an appropriate length of replacement chain or nylon cord, and guarantee slight slack so the flapper seals fully after flushing.
Misaligned or damaged flapper
Inspect the flapper for correct alignment and visible damage, since a misaligned, warped, or torn flapper is a frequent reason a handle appears to fail.
If the flapper does not seal, water won’t lift properly and the handle seems ineffective.
Clean deposits, reseat or replace the flapper, and guarantee the chain length allows full closure without binding for reliable flushing.
Loose or stripped handle nut
A loose or stripped handle nut can prevent the flush lever from transferring motion to the lift arm, causing a seemingly unresponsive handle.
Inspect the nut inside the tank; if loose, tighten by hand or with pliers, using a rag to protect finish.
If threads are stripped, replace the nut or entire handle assembly; inexpensive kits restore secure connection and reliable flushing.
Tools and supplies to keep on hand for future handle failures
A small prepared kit can prevent a handle failure from becoming an urgent problem and makes quick repairs straightforward.
Essential items span basic tools, spare parts, and sanitary supplies so anyone can respond calmly and safely. Suggested contents include:
- Adjustable wrench, screwdriver set, and needle-nose pliers
- Replacement chain and flapper compatible with common tanks
- Universal replacement handle and mounting hardware
- Disposable gloves and disinfectant wipes
- Absorbent towels or rags for spills and cleanup
Basic toolkit items for toilet repairs
Keep a compact toolkit ready so a missing or broken toilet handle never causes a prolonged annoyance.
Include a small adjustable wrench, slip-joint pliers, flathead and Phillips screwdrivers, needle-nose pliers, and a utility knife.
Add plumber’s tape, a flashlight, disposable gloves, and a few rags.
Store items in a labeled pouch near the bathroom for quick access.
Recommended replacement parts to store (chains, flappers, universal handles)
Having a compact toolkit nearby makes it practical to also store a few spare parts that will fix most common handle-related failures.
Keep spare chains in varying lengths, standard rubber flappers (universal and model-specific), a universal replacement handle with adjustable shank, and a couple of tank-to-lever clip kits.
Small zip bags and labels help organize parts for quick identification and installation.
Safety and sanitary supplies (gloves, disinfectant, towels)
When a handle fails, preparing basic safety and sanitary supplies prevents contamination and speeds repairs: disposable gloves, a bleach-based or EPA-registered disinfectant, absorbent towels or paper towels, and a small waste bag for soiled materials.
Store gloves and disinfectant near the toilet in a sealed container. Include extra towels and a resealable bag for wet or contaminated items, replacing supplies after use.
Preventive maintenance to avoid future handle failures
A concise preventive routine includes a checklist for inspecting the tank, handle, chain, and mounting hardware on a monthly basis.
Simple maintenance—cleaning contacts, applying a suitable lubricant to metal pivots, and removing mineral buildup—helps prevent corrosion and sticking.
Parts that show wear, bending, or persistent corrosion should be replaced proactively before failure occurs.
Routine inspection checklist for the tank and handle
Inspect the tank and handle at regular intervals to catch wear, misalignment, corrosion, or mineral buildup before they cause a failure.
Check handle tightness, lift arm alignment, and chain connection for frays or slack.
Inspect tank interior for cracks, deposits, and proper float movement.
Verify bolts and gaskets are secure and leak-free.
Note any parts needing replacement or cleaning.
How to lubricate and protect metal parts from corrosion
Apply a light, appropriate lubricant to moving metal components and treat exposed surfaces with corrosion-inhibiting products to extend service life and prevent future handle failures.
Clean parts first, remove mineral deposits and old grease, then apply thin film lubricant or silicone spray sparingly.
Protect threads and fasteners with anti-seize.
Reinspect periodically, wiping away moisture and reapplying protection after any cleaning or repairs.
When to replace parts proactively
When wear becomes evident or parts show signs of recurring failure, proactive replacement minimizes downtime and prevents emergency repairs.
Inspect the lever, lift chain, flapper, and mounting hardware every six months. Replace brittle plastic, corroded metal, or stretched chains before complete failure.
Keep spare common parts on hand and document replacements to anticipate future needs and maintain reliable flushing performance.
Comparison of temporary fixes vs. permanent repair options
A concise comparison helps readers weigh temporary fixes against permanent repairs by highlighting effectiveness, cost, ease, and expected longevity. The table below summarizes typical options so readers can quickly assess trade-offs. This comparison frames the decision between quick, low-cost solutions and more durable, higher-investment repairs.
| Method | Typical Cost | Longevity |
|---|---|---|
| Wire/pull tab (temporary) | Low | Days–Weeks |
| Zip-tie or string hack | Very low | Weeks–Months |
| Replace handle or trip lever | Moderate | Years |
| Replace flush assembly (permanent) | Higher | Many years |
Effectiveness, cost, ease, and longevity comparison of each method
Comparing temporary fixes and permanent repairs requires evaluating four key factors—effectiveness, cost, ease, and longevity—so the reader can choose the right approach for their situation.
Temporary fixes (string pull, bucket flush) are low-cost, easy, but short-lived and sometimes unreliable.
DIY part swaps balance cost and durability.
Professional replacement maximizes effectiveness and longevity, with higher cost and lower immediacy.
Common mistakes to avoid when flushing or repairing without a handle
When working without a handle, caution is advised to prevent forcing parts and creating further damage.
Using inappropriate tools can scratch or crack the tank, making a temporary fix into a larger repair.
Attention should also be paid to water waste or a running toilet, as those symptoms indicate underlying issues that require prompt correction.
Forcing parts and causing further damage
Avoid forcing stuck components or yanking on internal parts; doing so commonly fractures plastic clips, bends metal levers, and turns a simple workaround into a costly repair.
Inspect mechanisms visually, test movement gently, and identify the actual obstruction. Use correct replacement parts or temporary tie methods that relieve stress.
When unsure, stop and consult a plumber to prevent escalating damage and higher repair bills.
Using inappropriate tools that scratch or crack the tank
Use a soft, appropriate tool rather than metal or rigid instruments that can scratch porcelain or stress plastic components.
Homeowners often reach for screwdrivers or pliers, causing chips, hairline cracks, or weakened mounting points. Instead, choose rubber-tipped pliers, plastic pry tools, or a padded stick.
Such care prevents costly tank replacement and maintains seal integrity during handle-free adjustments or temporary flush methods.
Ignoring water waste or running toilet symptoms
Damaging the tank with improper tools is only one risk; another common mistake is ignoring signs of water waste or a continuously running toilet when operating or fixing it without a handle.
Overlooking leaks or constant refill noises can double water bills and hide worn flappers, misaligned fill valves, or siphoning issues.
Prompt diagnosis and simple parts replacement prevent waste and further damage.
Final checklist: safely restore normal flushing after a temporary fix
They recommend verifying that the temporary method produces a full, consistent flush and that the tank refills to the correct level without leaks.
If performance is uneven, the next step is to install a permanent replacement handle following manufacturer instructions or secure a professional repair.
A brief safety check of the shutoff valve and visible connections completes the shift back to normal operation.
Verifying flush performance and tank refill
Begin by observing one complete flush cycle to confirm the temporary repair restores normal operation.
Watch water flow, bowl clearance, and refill timing. Ascertain the flapper seals and stops running after refill.
Measure tank refill to the marked waterline and listen for continuous running.
Test multiple flushes to verify consistent performance and note any irregularities before concluding the temporary fix is acceptable.
Steps to install a permanent handle replacement or schedule repair
Proceed to secure a lasting solution by either installing a compatible replacement handle or arranging professional repair, ensuring the temporary fix is not relied upon long-term.
Inspect linkage type, select matching kit, shut off water, drain tank, remove nut and old parts, fit new lever and tighten, test operation and adjust chain length.
If uncertain, contact a plumber for reliable, warranty-backed restoration.
Conclusion
The article’s investigation confirms that improvisation often suffices short-term, but reliance on makeshift flushing methods can mask underlying mechanical failure. Evidence shows temporary fixes restore function immediately yet leave the tank’s chain, lever, or flapper degradation unaddressed. Consequently, while the seven easy fixes reliably avert urgency, the truth is clear: temporary measures should be paired with diagnosis. Prompt replacement or professional repair prevents recurring issues and protects against water waste and further damage.