How to Install a Saddle Valve: Step-by-Step Guide for Homeowners
Installing a saddle valve is a straightforward process that allows you to tap into a water line without soldering, making it ideal for low-flow applications like ice makers or humidifiers. To begin, ensure that your local code permits this installation. Next, turn off and drain the water supply, and inspect the pipe for any issues.
Align the saddle valve, then clamp it securely and tighten it evenly. Create the hole using the piercing spindle or drill, attach the tubing, and test the assembly for leaks. Additional instructions will cover torque specifications, troubleshooting tips, and long-term maintenance options.
What a saddle valve is and when to use one
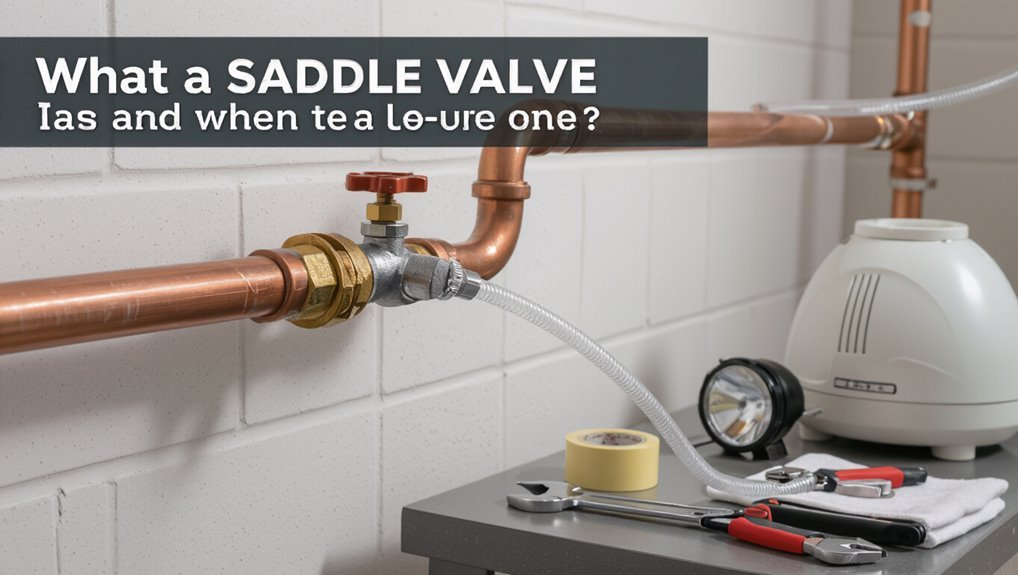
A saddle valve is a clamp-on fitting with a small piercing needle and shutoff handle that taps an existing water line without cutting or replacing pipe.
It is commonly used to supply appliances such as ice makers and humidifiers where a low-flow, temporary, or minimally invasive connection is acceptable.
Compared with full-port shutoff valves, it is quicker and cheaper to install but offers lower flow, greater leak risk, and may not meet code in permanent installations.
Definition and basic components
Saddle valves are compact, clamp-on fittings that pierce an existing water pipe to create a small branch line without cutting or soldering. They consist of a metal clamp, a piercing needle or screw, and a shutoff spindle or packed stem.
The device’s basic components include mounting hardware, a sealing gasket, and a valve body. Instructions on how to install saddle valve emphasize alignment and leak-tight seals.
Common applications in the home (appliances, ice makers, humidifiers)
Small, self-contained valves that clamp onto existing water lines are commonly used to provide low-pressure water feeds for household devices such as ice makers, humidifiers, and some compact appliances.
They enable easy connection without re-piping, supplying consistent flow for automatic ice production, evaporative humidifiers, and small under-sink dispensers.
Installation locations favor accessible, visible sections of copper or plastic tubing.
Pros and cons compared with alternative shutoff valve methods
Although convenient for quick, low-pressure taps, saddle valves are a compromise between ease of installation and long-term reliability: They install without shutting water off, cost little, and suit temporary or low-flow needs.
Downsides include potential leaks, limited durability, reduced flow, and code noncompliance.
Full-stop valves or tee fittings offer greater safety, longevity, and serviceability for permanent, higher-pressure installations.
Legal and safety considerations before installation
Before beginning installation, the installer should verify local plumbing codes and whether permits are required.
They must also consider any water supply restrictions and potential impacts on homeowner insurance coverage.
Appropriate safety gear and precautions—including shutoff procedures and protective equipment—should be identified and planned.
Local plumbing codes and permit requirements
When installing a saddle valve, homeowners should verify applicable local plumbing codes and whether a permit is required, because regulations vary widely by jurisdiction and can affect legality, safety, and insurance coverage.
Contact the municipal building or plumbing department, review code sections for tapping existing water lines, and obtain permits when mandated.
Inspections may be required; failure to comply can lead to fines or mandatory corrective work.
Water supply restrictions and insurance implications
Local plumbing codes and permit requirements often intersect with restrictions on water supply modifications and with homeowner insurance coverage. Therefore, verifying both sets of rules helps prevent conflicts.
Homeowners should confirm municipal bans on saddle valves, required materials, and approved connections. Insurers may deny claims for unauthorized alterations causing leaks or damage. Documented compliance and permits reduce liability and protect coverage.
Safety gear and precautions to take
If municipal codes and insurance policies permit the installation, the installer should assemble personal protective equipment and verify site safety measures prior to cutting into any water line.
Safety gear includes gloves, eye protection, hearing protection if using power tools, and a respirator for confined spaces.
The installer should isolate and depressurize the pipe, confirm shutoff functionality, provide ventilation, and keep a readily accessible spill kit and first-aid supplies.
Tools and materials required
A concise inventory of essential tools and materials is provided to prepare for saddle valve installation.
Guidance is given on selecting a valve that matches pipe material and diameter to guarantee a proper fit and seal.
Criteria for contacting a professional — such as incompatible piping, uncertain sizing, or complex plumbing systems — are outlined.
List of tools and materials
Before beginning the installation, assemble a compact set of tools and materials to guarantee the job proceeds efficiently and safely.
Essential items include a saddle valve kit, adjustable wrench, and plumber’s tape. Safety gear and a marker help placement; a small bucket catches drips.
Visualize the workflow with these clear, minimal components.
- Saddle valve kit
- Adjustable wrench
- Plumber’s tape
How to choose the right saddle valve for pipe type and size
When selecting a saddle valve, the installer should match valve type and size to the pipe material and diameter to guarantee a secure, leak-free fit; copper, PVC, and galvanized pipes each require specific clamp designs and gasket materials, while pipe diameters determine the saddle’s compression range and inlet size.
Verify compatibility, choose corrosion-resistant finishes for metal pipes, and confirm inlet sizing for tubing connections.
When to call a professional instead
How should a homeowner decide whether to call a professional instead of attempting a saddle valve installation?
A professional is advised if plumbing codes apply, pipes are corroded, materials or fittings are unfamiliar, access is limited, or the homeowner lacks experience with soldering, threading, or pressure testing.
Also hire a pro when water damage risk or insurer requirements exist; this guarantees code compliance and reliable sealing.
Preparing the site and shutting off water
Before beginning, the installer locates the building’s main shutoff and isolates the specific line to prevent water flow.
The pipe is then inspected for corrosion, material type, and adequate clearance to guarantee a saddle valve will seat properly.
Finally, the chosen drilling point is cleaned, dried, and clearly marked to guide accurate piercing.
Locating the main shutoff and isolating the line
One essential step is locating the building’s main shutoff valve and isolating the specific supply line to prevent water flow while installing a saddle valve.
Identify the meter, curb stop, or interior shutoff, then turn it off.
Open nearby faucets to drain pressure and verify no flow on the target line.
Use tags or tape to mark the isolated valve before proceeding.
Inspecting the existing pipe for suitability
After the main shutoff is isolated and the target line verified dry, attention turns to inspecting the existing pipe for suitability.
The inspector checks material (copper, CPVC, or compatible metal), wall thickness, diameter, and accessibility.
Corrosion, dents, or previous repairs disqualify the site.
Confirm enough straight length and clearance for the saddle clamp; note nearby fittings or straps that could interfere.
Cleaning and marking the drilling point
With the water supply isolated and the pipe confirmed dry, the installer cleans a short length of pipe where the saddle will sit using a wire brush or emery cloth to remove corrosion, paint, and debris until bare metal is visible.
The installer then measures and marks the drilling center with a fine-tip marker or punch, aligning marks with saddle edges and verifying spacing for secure clamp placement.
Step-by-step saddle valve installation
The installer begins by positioning the saddle valve over the chosen spot and clamping it evenly so the gasket seats flush against the pipe.
Next, the pipe is pierced or drilled according to the valve type, followed by a prescribed tightening sequence and torque to compress the gasket without deforming the pipe.
Finally, the outlet tubing is attached and secured to the valve fitting, with a final check that the gasket remains properly seated and leak-free.
Positioning and clamping the saddle valve
Carefully align the saddle valve over the chosen pipe section so the piercing screw will meet metal at a right angle and the valve body sits flush against the pipe surface.
Center the clamp halves, verify orientation of outlet tubing, then hand-tighten mounting bolts evenly.
Use a torque-limited driver or wrench to finish to manufacturer specs.
Confirm stable, gap-free seating before proceeding.
Drilling or piercing the pipe (method for self-piercing vs. drilled)
Begin by choosing the piercing method appropriate for the pipe material and system pressure: self-piercing valves use an integrated spindle to puncture the pipe without pre-drilling, while drilled installations require creating a clean, sized hole before mounting.
For self-pierce, align saddle and slowly advance the spindle until fluid flows.
For drilled, deburr the hole, clean metal shavings, then position the saddle.
Tightening sequence and torque guidance
After the saddle is positioned and any self-piercing spindle has been set or the drilled hole has been cleaned, attention turns to the tightening sequence and torque guidance.
Tighten clamp bolts evenly, alternating sides to seat the saddle squarely. Use a torque wrench if specified by manufacturer; typical values range 25–45 in-lb for copper/soft metal.
Avoid over-torquing to prevent distortion or leaks.
Connecting the outlet tubing to the appliance
Route the outlet tubing from the saddle valve to the appliance, keeping the run as short and direct as practical while avoiding sharp bends and contact with hot or moving parts.
Secure the tubing with clips or straps at regular intervals to prevent movement and vibration.
Trim tubing squarely, deburr the cut, then connect to the appliance fitting, tightening per manufacturer specifications and checking for leaks.
How to seat and seal the gasket properly
Carefully center the gasket on the saddle valve’s underside so its molded lip aligns with the valve body contour; this guarantees an even compression surface and prevents leaks.
Then seat the saddle evenly on the pipe, tighten clamps progressively and alternatingly to compress the gasket uniformly.
Inspect for gaps, wipe excess sealant if used, and pressure-test the joint for steady, drip-free operation.
Testing the installation
After installation, water is restored slowly while the connection is observed for any immediate seepage.
Once pressurized, flow to the appliance is verified and the line is monitored for sustained pressure and proper operation.
If leaks appear, common points such as the saddle clamp, tubing fittings, and the valve piercing should be inspected and tightened or resealed as needed.
Slowly restoring water and checking for leaks
Begin restoring water slowly to pressurize the line while observing the saddle valve and surrounding fittings for any signs of leakage.
Watch joints, sealant, and tubing for drips or moisture. If a leak appears, shut the main off, drain residual pressure, tighten connections or replace faulty components, then retest.
Record observations and time to verify stability before resuming normal use.
Pressure-testing and verifying flow to the appliance
With the line pressurized and confirmed leak-free, the next step is to pressure-test the connection and verify adequate flow to the appliance.
Open the saddle valve fully, then operate the appliance to observe steady supply.
Measure pressure with a gauge at the tap and check flow rate against manufacturer specs.
Recheck fittings for any sudden pressure drop.
Confirm consistent operation before finishing.
Troubleshooting common leak points
Inspect the entire saddle-valve assembly systematically to locate common leak points during testing.
Check around the clamp saddle, puncture needle entry, ferrule or compression fitting, and shutoff threads.
Tighten fittings incrementally; avoid overtightening.
Apply soapy water to detect bubbles or use a paper towel to spot dampness.
If leaks persist, depressurize, disassemble, replace damaged seals or tubing, then retest.
Maintenance and long-term care
Routine inspections every few months should check the saddle valve and surrounding pipe for leaks, corrosion, and secure mounting.
Instructions for shutting off supply and safely removing the saddle valve if leakage or failure occurs should be explained and documented.
Guidance on signs that warrant replacement with a permanent valve—persistent leaks, frequent adjustments, or code requirements—should be provided.
Routine inspection intervals and what to look for
How often a saddle valve should be checked depends on water quality, usage frequency, and local code requirements. Typically, a visual and functional inspection every 6 to 12 months balances early detection of leaks or corrosion with practical maintenance schedules.
Inspect for dampness, mineral buildup, corrosion, loose fittings, proper valve operation, and any drip stains. Record findings and tighten or clean fittings as needed.
How to shut off and remove a saddle valve if needed
When a periodic check reveals leaks, persistent mineral buildup, or a valve that no longer operates smoothly, the next step is to shut off the saddle valve and remove it for repair or replacement.
Close the main water supply, drain downstream lines, loosen mounting saddle bolts, and detach the valve assembly.
Clean the pipe surface, inspect for corrosion or damage, and cap or temporarily plug the service outlet before reinstalling.
When to replace with a permanent valve
Evaluate replacement of a saddle valve whenever recurring leaks, visible corrosion, reduced flow, or frequent adjustments indicate failure risk or compromised water quality.
Replace with a properly sized, code-compliant permanent valve to guarantee reliability, serviceability, and safer connections.
Hire a licensed plumber if unsure.
Document location and shutoff procedure after replacement, and inspect periodically for signs of wear or leakage to maintain long-term performance.
Common mistakes to avoid
Common mistakes include placing the saddle valve improperly or damaging the pipe during installation.
Over-tightening the clamp can crush the tubing and cause leaks.
Installing a saddle valve where the plumbing code requires a soldered or unioned valve can lead to noncompliance and unsafe connections.
Improper placement and pipe damage
Although a saddle valve may seem convenient, placing it in the wrong spot or installing it on compromised piping can cause leaks, restricted flow, and premature failure.
Installers should avoid near joints, corrosion, or unsupported sections. Choose straight, accessible pipe with adequate wall thickness and clearances.
Inspect for rust, hairline cracks, or previous repairs; replace damaged segments before fitting the valve to guarantee long-term reliability.
Over-tightening and crushing the pipe
After selecting a sound section of pipe, attention must turn to how the saddle valve is tightened.
Excessive torque can deform or crush copper, PVC, or PEX, causing leaks or restricting flow.
Tighten gradually to manufacturer specs, using a torque-limited driver or wrench and checking alignment.
Inspect for pinching, hairline cracks, or distortion before pressurizing the line.
Using a saddle valve where code requires a soldered/unioned valve
When local plumbing codes mandate a soldered or unioned shutoff, installing a saddle valve in its place creates a clear violation that can lead to failed inspections, voided warranties, and increased liability.
The saddle’s pierce-style connection and lack of approved sealing methods are not acceptable substitutes for permanent, code-compliant fittings.
Homeowners should replace saddles with proper valves where required, consult inspectors, and hire licensed plumbers.
Comparison: Saddle valve vs. alternative connection methods
A concise comparison helps readers weigh saddle valves against other connection methods across practical factors. Below is a quick reference summarizing cost, longevity, leak risk, code compliance, and ease of installation for common options:
| Factor | Saddle valve vs. alternatives |
|---|---|
| Cost | Saddle valves are low upfront cost; full fittings cost more |
| Longevity | Shorter service life than welded or soldered joints |
| Leak risk | Higher leak potential if improperly installed |
| Code compliance | Often noncompliant or discouraged by codes |
| Ease of installation | Easier and faster for a temporary tap |
Cost, longevity, leak risk, code compliance, and ease of installation
Compare saddle valves to alternative connection methods by weighing upfront cost, expected lifespan, propensity for leaks, regulatory acceptance, and installation difficulty.
Saddle valves are cheap and quick but prone to leaks, shorter-lived, and often noncompliant with codes.
Compression fittings, tee fittings, or soldered connections cost more and take time but offer greater durability, lower leak risk, and broader code acceptance; professional installation may be required.
Quick reference checklist for homeowners
A concise checklist helps homeowners move from planning to safe completion when installing a saddle valve.
The list covers items to confirm before beginning, clear steps to follow during installation, and checks to perform after the job is done.
Refer to these quick categories as a practical guide.
- Pre-installation checklist
- Step-by-step installation checklist
- Post-installation testing checklist
Pre-installation checklist
Before beginning, verify the workspace is safe and prepared: shut off the main water supply, relieve pressure by opening a nearby faucet, and clear the area around the chosen pipe of debris and obstructions.
Confirm pipe material and diameter, inspect for corrosion or damage, gather required tools and saddle valve kit, have thread sealant and a towel ready, and guarantee adequate lighting and a stable ladder if accessing elevated piping.
Step-by-step installation checklist
Follow these concise steps to install the saddle valve safely and correctly:
Gather tools and parts, shut off the main water supply, drain the line, position the saddle clamp on the pipe, mark the piercing point, tighten clamps evenly, drill or pierce per manufacturer instructions, attach tubing and fittings, apply thread sealant, reopen supply slowly, check for visible leaks, secure tubing to prevent strain.
Post-installation testing checklist
Several quick checks verify the saddle valve functions correctly and safely after installation.
Inspect for leaks at the valve, tubing connection, and compression nut while the system is pressurized.
Operate the valve fully open and closed to confirm smooth action.
Verify downstream device receives expected water flow and no dripping occurs over 15 minutes.
Tighten fittings if any seepage appears, then retest.
Example scenarios and recommended approaches
Typical household uses for saddle valves include feeding a refrigerator ice maker or a furnace humidifier, each with differing flow and placement needs.
Installation strategies should contrast straightforward hookups for new construction with the additional sealing, support, and code considerations required when retrofitting older plumbing.
Recommended approaches prioritize correct valve sizing, secure pipe attachment, and adherence to local plumbing codes.
Installing for a refrigerator ice maker
When installing a saddle valve for a refrigerator ice maker, the installer should prioritize locating a cold-water supply line within a few feet of the appliance and choose a flat, accessible section of copper or CPVC pipe free of insulation or corrosion.
The installer should mount the saddle securely, drill per manufacturer instructions, route tubing with minimal bends, use a compression fitting, and test for leaks before restoring power.
Installing for a humidifier on a furnace line
After locating and tapping a nearby cold-water line for a refrigerator ice maker, installers can apply similar principles to feed a whole-house humidifier from the furnace water line, but the approach and placement differ.
They should choose a furnace condensate or domestic cold feed, position the saddle valve upstream of shutoffs, slope tubing to prevent traps, and secure connections while following manufacturer water-pressure and filtration recommendations.
Retrofitting older plumbing vs. new construction
Because older homes often have rigid pipe layouts, limited access, and mixed materials, retrofitting a saddle valve requires different planning and techniques than installing one in new construction where runs, shutoffs, and access points can be designed around the device.
In retrofit scenarios, inspect pipe material, choose compatible saddle fittings or tee fittings, allow access panels, and prefer soldered or compression tees.
New builds can use dedicated shutoffs and tidy runs.
Visual aids and measurement tips
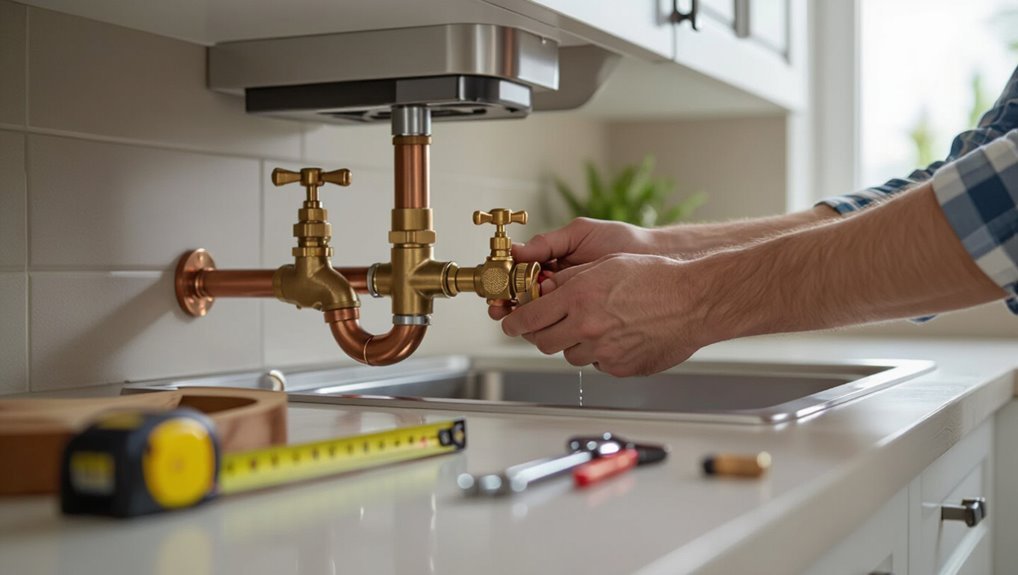
A clear diagram showing the saddle valve and its components—saddle clamp, piercing screw, gasket, and tubing connection—helps readers identify each part before beginning.
A concise measurement guide then explains how to determine pipe diameter and choose compatible valve and tubing sizes, including tolerances for common copper and PVC pipes.
These visuals and measurements together reduce installation errors and guarantee a proper fit.
Typical saddle valve diagram and parts labeled
The diagram presents a clear, labeled view of a typical saddle valve and its components—body, compression screw, rubber gasket, clamp halves, and tubing outlet—arranged to show how each part fits around the supply pipe.
Accompanying callouts highlight fastener positions, gasket sealing face, probe tip, and tubing connection.
Simple exploded and assembled views clarify orientation, sealing surfaces, and tightening sequence for proper installation.
Measurement guide for selecting valve and tubing size
Several key measurements determine the correct saddle valve and tubing size: pipe diameter, available clearance around the pipe, required flow rate, and tubing inner diameter.
Measure pipe outside diameter with calipers or tape. Check surrounding space for saddle clamp and wrench access.
Calculate flow needs (gpm) to choose tubing ID.
Sketch measurements and photograph placement for reference before purchase and installation.
Conclusion
In closing, the homeowner understands that a saddle valve can offer a quick, low-cost way to add a water line for appliances—but only when used appropriately and safely. As the old adage warns, “measure twice, cut once,” so careful planning and adherence to codes prevent costly mistakes. When uncertainty remains, the prudent course is to consult a licensed plumber or choose a more permanent tapping method to guarantee reliability and compliance.