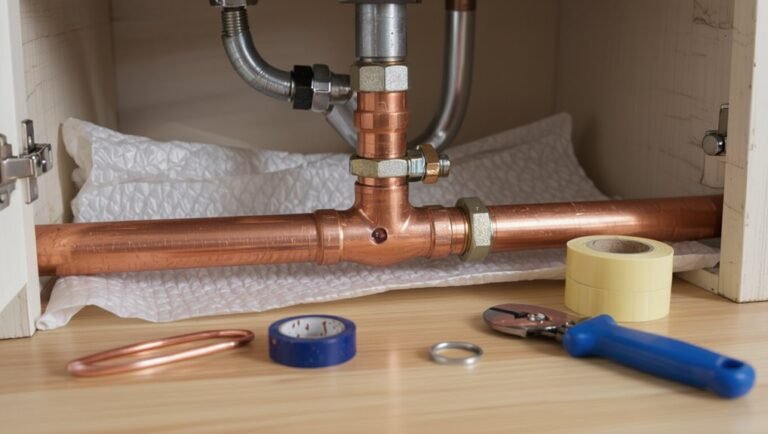
How to Run a Gas Line for a Fireplace Safely: Step-by-Step Guide and Costs
Running a gas line for a fireplace typically costs between $300 and $1,200 or more, depending on factors like distance, materials, labor, and permits. It’s essential to hire professionals who use CSST, black iron, or flexible lines, and who will install shutoff valves, conduct pressure tests, and obtain necessary inspections to ensure compliance with safety codes. Attempting to do it yourself can be illegal and dangerous, potentially voiding your insurance. Key steps include planning the route, shutting off the gas supply, using the proper fittings, and having certified pressure testing. For a comprehensive step-by-step guide, safety checklist, and detailed cost breakdown, read on.
How Much It Typically Costs to Run a Gas Line for a Fireplace
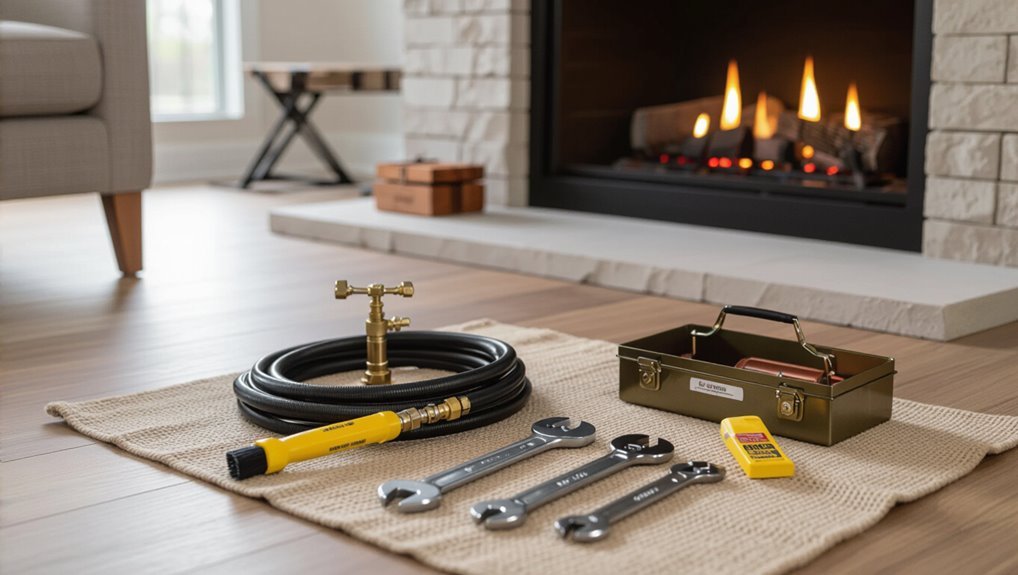
Typical costs for running a fireplace gas line vary widely, with national averages often ranging from a few hundred to several thousand dollars depending on region and project scope.
Key cost factors include linear feet and materials, labor rates, permit and inspection fees, retrofit versus new-construction complexity, and the type of appliance—direct-vent, ventless, or natural gas logs.
A brief breakdown of these components helps homeowners compare quotes and set realistic budgets before hiring a licensed professional.
Average national and regional price ranges
Costs to run a gas line for a fireplace usually fall within a modest but variable range, influenced by factors like distance from the main supply, local labor rates, permit fees, and whether the installation is indoor or outdoor.
National averages commonly span $300–$1,200; metropolitan regions often exceed $1,000, while rural areas trend lower.
Readers seeking how to run a gas line for fireplace should budget regionally.
Cost breakdown by linear feet and materials
Price estimates for running a gas line are most useful when broken down by linear feet and materials, since labor, pipe type, fittings, and permits each contribute predictable per-foot or per-item costs.
Typical material costs:
CSST $4–8/ft,
black iron $2–5/ft,
flexible gas line $3–6/ft.
Common fittings, shutoffs, and connectors add $10–75 each; valves and adapters skew higher.
Labor, permit, inspection, and hookup fees
Permitting, inspection, and labor together make up a substantial portion of the total expense when running a gas line for a fireplace.
Typical charges include permit fees ($50–$300), inspector visits ($75–$200), licensed plumber or gasfitter labor ($200–$800+), and final hookup/testing ($50–$150).
Complexity, local code requirements, and hourly rates drive variability in overall labor and compliance costs.
Cost differences: retrofit vs new construction
When comparing retrofit installations to new construction, the difference in typical expense often comes down to access and added labor: retrofits usually require more cutting, patching, and routing around existing framing or finishes, driving labor and material costs higher, while new builds allow for more direct runs and lower installation time.
Retrofit projects commonly add 30–60% in labor and finish repairs; materials and permits remain similar.
Typical cost for common fireplace types (direct-vent, ventless, natural gas logs)
Costs for running a gas line to a fireplace vary by appliance type, with direct-vent units generally requiring higher installation complexity and expense than ventless or simple natural gas log setups.
Typical ranges:
- direct-vent fireplaces $800–$2,500 (longer runs, venting),
- ventless units $300–$900 (simpler connections),
- and natural gas log inserts $400–$1,200 (moderate labor, possible trim or mantle adjustments).
Is It Safe and Legal to Run a Gas Line Yourself?
Determining whether a homeowner should install a gas line requires careful consideration of safety standards, local building codes, and licensing rules that vary by jurisdiction.
Many municipalities and utility providers prohibit unlicensed individuals from performing gas work or require permits and inspections. Even permitted DIY projects are often strongly discouraged for complex or concealed runs.
Homeowners who bypass regulations or hire unqualified labor risk voiding insurance coverage and assuming personal liability for damages or injuries.
Overview of safety, code, and licensing requirements
Because gas work involves pressurized fuel and fire risk, most jurisdictions restrict who may install or modify gas lines and prescribe specific codes and inspection steps to secure safety.
Licensed professionals must follow national and local codes, use approved materials, obtain permits, and pass inspections.
Compliance guarantees proper venting, leak prevention, pressure testing, and legal liability protection for homeowners and contractors.
When DIY is prohibited or strongly discouraged
In many jurisdictions, homeowners are legally barred or strongly discouraged from installing or altering gas lines themselves due to the risks of leaks, fires, carbon monoxide, and noncompliance with building codes.
Professional installation is required for complex systems, high-pressure lines, meter changes, multi-unit dwellings, or when permits and inspections are mandated.
Unqualified work is unsafe and often unlawful.
Insurance and liability implications
Many homeowners underestimate how insurance policies and local laws intersect with DIY gas-line work, but unauthorized installation can void coverage and create personal liability.
Insurance may deny claims for damage or injury from unpermitted work. Contractors’ licenses, permits, and inspections protect occupants and insurers.
Homeowners face fines, repair mandates, and legal exposure; documented compliance reduces financial and legal risk.
Tools, Materials, and Parts Needed
A clear inventory of materials, tools, and safety equipment is essential before beginning a gas line installation.
Typical materials include black iron pipe, CSST, flexible gas connectors, and appropriate fittings.
Required tools range from pipe threaders and torque wrenches to leak detectors and pipe cutters.
The discussion should also cover personal protective gear, testing equipment, and a brief cost comparison of buying parts and tools versus renting.
Common materials (black iron, CSST, flexible gas line, fittings)
Choosing the proper materials is essential for a safe, code-compliant fireplace gas line installation.
Common options include black iron pipe for durability and threaded joints, CSST for flexible routing with bonding requirements, and corrugated stainless steel tubing (flexible gas line) for short runs.
Appropriate fittings—threaded, compression, or flare—must match material type and local code; use approved valves and connectors only.
Required tools (pipe threader, torque wrench, leak detector, etc.)
Proper tools are essential to install a fireplace gas line safely and to meet code requirements.
Essential items include pipe threader and dies for black iron, torque wrench for accurate connection torque, adjustable and flare wrenches, pipe cutter, reamer, thread sealant rated for gas, tubing bender for CSST, fittings assortment, gas-rated flexible connectors, and a combustible gas leak detector for final inspection.
Safety gear and testing equipment
Several essential items protect installers and verify a safe gas installation: personal protective equipment such as safety glasses, work gloves, hearing protection, and flame-resistant clothing; a gas-rated respirator when working in confined or poorly ventilated spaces; and testing equipment including a combustible gas leak detector, manometer or pressure gauge, soapy leak solution, and a calibrated air/gas analyzer for combustion checks.
Additional essentials: flashlight, non-sparking tools, extension cord, and spare batteries.
Estimated cost of parts and tool rental vs purchase
A basic DIY gas line installation typically requires a modest mix of consumables and tools whose costs can vary widely depending on quality and local prices.
Pipe fittings, shutoff valves, flexible connectors, sealant, and mounting hardware commonly total $100–$400, while specialty components like a code-compliant gas valve or appliance connector can add $50–$200.
Tool rental (pipe threader, flaring tool, pressure tester) runs $30–$80/day; purchasing ranges $50–$400.
Cost-efficiency depends on project scope and future use.
Preparing for the Gas Line Installation
Before any fittings are connected, the homeowner should verify the property’s gas supply capacity and confirm it can meet the fireplace’s BTU demands.
A clear route from the meter to the fireplace must be chosen and measured to determine appropriate pipe sizing and placement.
Finally, necessary permits should be obtained, utilities notified, and inspections scheduled to comply with local codes.
Assessing your home’s gas supply capacity
Evaluating a home’s gas supply capacity requires verifying existing meter size, available pressure, and current appliance demand to guarantee the system can support a new fireplace without unsafe drops in service.
A qualified technician should calculate total BTU demand, check line pressure under load, and confirm meter and regulator capacity.
Any deficiency may require meter upgrade or regulator replacement before installation proceeds.
Choosing the right route from meter to fireplace
Several practical factors determine the best route from the meter to the fireplace, including distance, obstructions, required pipe sizing, and code-mandated clearances.
The chosen path minimizes bends and trenching, avoids utilities and structural members, and provides accessible shutoffs.
Exterior versus interior routing, freeze protection, and future accessibility influence decisions.
Local codes and utility locate services must be consulted before finalizing the route.
Measuring and planning pipe sizing and BTU requirements
Accurate measurement and proper pipe sizing are essential to guarantee the fireplace receives the required BTUs without pressure drop or safety risks.
Measure linear distance, count fittings and elevation changes, and calculate equivalent length.
Determine appliance BTU rating and available supply pressure.
Use manufacturer tables or gas-sizing charts to select pipe diameter and regulator needs.
Verify capacity for concurrent appliances and allow minimal safety margins.
Permits, utility notifications, and scheduling inspections
With pipe sizing and BTU requirements confirmed, attention turns to the administrative steps that legalize and safeguard the installation.
Permit acquisition from the local building department is required; homeowners or contractors must submit plans and fees.
Notify the gas utility to schedule a service tie-in and safe shutoff.
Arrange municipal inspections—rough and final—to verify compliance before gas is activated and the fireplace is used.
Step-by-Step Guide to Running a Gas Line for a Fireplace
The following steps outline the practical sequence for running a gas line to a fireplace, beginning with safety and ending with the appliance connection.
First, the gas supply is shut off and the pipe route is laid out and marked before any cutting or threading of rigid pipe or CSST.
Finally, shutoff valves and unions are installed near the fireplace, and the line is connected to the appliance using the appropriate flex line or adapter.
Step 1 Shut off gas supply and ensure safe work conditions
Before any work begins, confirm the gas supply is fully shut off at the main valve and lock or tag the valve to prevent accidental reactivation; this primary step eliminates immediate ignition risk and sets the baseline for all subsequent safety measures.
Verify absence of pressure with a manometer or gas detector, ventilate the area, de-energize nearby electrical circuits, and wear appropriate PPE before proceeding.
Step 2 Lay out and mark the pipe route
A clear route for the gas pipe should be laid out and marked to minimize bends, avoid obstructions, and comply with code-required clearances.
The installer measures distances, locates studs, joists, and utilities, and marks entry and exit points. Required support locations and valve placements are noted.
Routes through walls, floors, or attics are planned to maintain accessibility, protection, and required separation from ignition sources.
Step 3 Cutting, threading, and assembling rigid pipe or CSST
Cut and thread rigid steel pipe or cut and jacket CSST with exactness, following manufacturer instructions and local code to guarantee leak-free joints and safe routing.
Deburr and clean ends, apply approved thread sealant or fittings, and assemble using proper torque.
Support runs per code, protect against abrasion where crossing framing, and pressure-test the completed assembly for leaks before proceeding to downstream components.
Step 4 Installing shutoff valves and unions near the fireplace
Install shutoff valves and unions close to the fireplace to provide a safe, accessible way to stop gas flow and to allow future appliance removal without disturbing the line.
Position shutoffs within code-required distances, secure valves to framing, apply appropriate thread sealant, and orient handles for easy access.
Use unions or service valves to enable disassembly for maintenance; test and leak-check before concealing.
Step 5 Making connections to the appliance (flex line or adapter)
With shutoff valves and unions secured and tested at the fireplace, the next task is to connect the appliance using the appropriate flex connector or rigid-to-flex adapter.
The installer selects a listed connector of correct length and pressure rating, threads or crimps fittings per manufacturer instructions, guarantees proper alignment without kinks, secures support straps, and verifies appliance inlet torque to prevent stress on joints.
Step 6 Pressure testing and leak detection procedures
Begin pressure testing only after all fittings, valves, and appliance connections have been secured and visually inspected for correct assembly.
Use a calibrated gauge and pressurize system to specified test pressure (per code), isolate test section, and monitor for pressure drop.
Apply approved soapy solution or electronic leak detector at joints.
Repair any leak, re-test, document results, and release pressure safely.
Step 7 Final hook-up, appliance startup, and adjustment
After successful pressure testing and confirmation of leak-free joints, attention turns to the final hook-up and initial appliance start-up.
A qualified technician connects the appliance, opens valves slowly, and purges trapped air.
Ignition is performed per manufacturer instructions while monitoring gas pressure and flame characteristics.
Adjustments to pilot, burner or regulator guarantee proper combustion, efficiency, and safety before leaving the site.
Step 8 Scheduling and passing inspections
Once the installation and final adjustments are complete, the homeowner or contractor must schedule the required inspections to obtain official approval and safe operation clearance.
Inspectors verify code compliance, joint integrity, correct ventilation, shutoff access, and pressure tests.
Address any violations promptly, provide documentation and permits, and obtain a final approval or certificate of compliance before using the fireplace to guarantee safety and legal occupancy.
Choosing Materials: Pros and Cons
Selecting the appropriate gas line material—black iron pipe, CSST, or corrugated flex—depends on installation location, wall construction, and local climate.
Each option carries trade-offs in durability, ease of routing, corrosion resistance, and requirements for bonding/grounding and physical protection.
A clear comparison of suitability for masonry, framed walls, humid or coastal environments, and required safeguards will guide the safest choice.
Black iron pipe vs CSST vs flex gas line
Choosing the right gas piping material is a critical decision that affects safety, installation complexity, and long-term maintenance. Black iron is durable, rigid, and corrosion-resistant but requires threading and fittings. CSST is flexible, easier to route, needs bonding. Corrugated flex is simple for short runs, less durable.
| Material | Pros | Cons |
|---|---|---|
| Black iron | Durable | Rigid |
| CSST | Flexible | Requires bonding |
| Flex | Easy install | Short-run use only |
Best choices for different wall types and climates
Because wall construction and local climate directly affect pipe routing, material selection should be matched to substrate and environmental conditions: black iron works well in masonry or framed interior walls where rigidity and protection are needed.
CSST suits complex runs through studs or across attics when flexibility reduces joints, and corrugated flex is appropriate only for short, protected connections in mild, dry climates.
For exterior walls, insulated runs and weather-rated components minimize thermal stress; sheltered basements favor rigid pipe for durability.
Corrosion, grounding, and protection considerations
When exposed to moisture, dissimilar metals, or stray electrical currents, gas piping materials can deteriorate or pose safety hazards.
Therefore, material selection must account for corrosion resistance, bonding requirements, and physical protection.
Steel needs coatings or dielectric unions to prevent galvanic corrosion.
CSST requires grounding per code.
Flexible connectors need protective sleeves.
Buried lines demand corrosion-resistant pipe or cathodic protection and regular inspection.
Common Problems and How to Fix Them
Common problems with fireplace gas lines include leaks, low pressure or inadequate BTU delivery, improper venting with resulting odors or carbon monoxide risks, and corrosion or mechanical damage.
Each issue presents specific symptoms and safety hazards that require targeted inspection and repair.
The following guidance outlines practical steps for detection, temporary mitigation, and when to call a licensed professional.
Identifying and addressing gas leaks
If a gas odor, hissing sound, or unusually high utility bill is detected near a fireplace or its supply line, a possible leak should be treated as urgent and investigated immediately.
Shut off the gas at the meter, evacuate occupants, ventilate, and avoid flames or electronics.
Call the gas utility or a licensed plumber.
After repair, pressure-test connections and obtain written safety verification.
Low pressure or insufficient BTU delivery
Diagnose low pressure or inadequate BTU delivery by starting with systematic checks of the supply and appliance: verify inlet pressure at the meter or regulator, confirm line sizing and pipe runs match the fireplace’s rated demand, inspect for partial obstructions or closed valves, and guarantee the appliance’s orifice and burner ports are clean and correctly sized.
If deficiencies persist, test pressure under load, replace undersized piping, or consult a certified technician.
Improper venting, odors, and carbon monoxide risks
Why is proper venting essential for a gas fireplace’s safe operation?
Improper venting causes poor combustion, lingering odors, and dangerous carbon monoxide buildup. Symptoms include soot, yellow flames, or headaches.
Fixes: inspect and clear vents, guarantee correct type (direct-vent, B-vent), verify fan operation, and test with a CO detector.
If issues persist, hire a certified technician to repair or reconfigure venting.
Corrosion and mechanical damage
Inspecting for corrosion and mechanical damage is essential to maintaining a gas fireplace’s safety and function.
Regularly check pipes, fittings, and valves for rust, pitting, dents, or abrasion. Minor surface corrosion may be cleaned and treated; compromised components require replacement by a licensed technician.
Protective coatings, proper supports, and avoiding contact with dissimilar metals prevent recurrence and guarantee long-term integrity.
When to Hire a Professional vs DIY
Certain gas-line tasks—major reroutes, work inside walls, permit-required installations, or anything near existing appliances—should be handled by a licensed plumber or HVAC technician.
Homeowners should expect contractors to provide written quotes, timelines, warranties or guarantees, and proof of licensing and insurance.
A brief interview checklist of questions about experience, references, materials, and inspection procedures helps compare bids and guarantee safe, code-compliant work.
Scenarios that require a licensed plumber or HVAC technician
A homeowner should call a licensed plumber or HVAC technician whenever the gas line work involves structural alterations, penetrations through fire-rated assemblies, changes to the appliance type or BTU load, or any work governed by local codes and permit requirements.
Professionals are also required for gas leaks, rerouting lines, installing shutoffs, testing/pressure certification, commercial systems, or when insurance or code enforcement mandates licensed installation.
What to expect from a contractor: quotes, warranties, timelines
When hiring a contractor for a fireplace gas line, homeowners should expect clear, written quotes that break down labor, materials, permit fees, and any subcontracted work, along with a defined timeline and warranty terms covering both parts and labor.
These documents help determine whether the project warrants professional service or can be safely tackled as a DIY job.
Contracts should specify start/end dates, inspection requirements, and warranty duration.
Interview checklist and questions to ask potential contractors
If homeowners decide professional help is likely, they should use a focused interview checklist to vet candidates: verify licensing and insurance, confirm specific experience with fireplace gas lines and local code compliance, request itemized quotes and timelines, ask about permit handling and inspection coordination, and obtain clear warranty and change-order policies.
- Ask for references and recent project photos.
- Confirm permit process ownership.
- Request insurance and license numbers.
- Clarify payment schedule and warranty scope.
Safety Checklist Before Using Your Fireplace
Before first use, a final leak test should be conducted and detectors positioned according to local codes.
Carbon monoxide and smoke alarms must be verified for operation and appropriate placement.
A routine maintenance schedule with defined inspection intervals should be established and recorded.
Final leak test and detector placement
Perform a final leak test and position gas and CO detectors to confirm the installation is airtight and the room safe for operation.
Apply soapy solution or electronic gas detector to all fittings, joints and valves; watch for bubbles or readings. Repair any leaks immediately and retest.
Mount detectors per manufacturer height and clearance recommendations, ensuring unobstructed sensing and audible reach throughout the living space.
Carbon monoxide and smoke alarm verification
Although often overlooked, verifying carbon monoxide and smoke alarms is a critical step in the safety checklist before using a newly installed gas fireplace.
Technicians should confirm alarm placement, battery condition, and audible function. Test CO detectors with approved test buttons and replace units older than manufacturer recommendations.
Document test results and guarantee occupants understand alarm signals and evacuation steps before regular fireplace use.
Routine maintenance schedule and inspection intervals
Confirming alarm function naturally leads to establishing an ongoing maintenance rhythm: a clear routine schedule and defined inspection intervals help preserve safe operation and detect wear or hazards early.
Recommended cadence: monthly homeowner checks, annual professional inspection, immediate servicing after irregular operation, and replacement of aged components per manufacturer life spans.
- Visual gas line check
- Clean burners and pilot
- Safety valve test
- Replace seals and gaskets
Ways to Save Money Without Sacrificing Safety
Cost-conscious planning can reduce expenses without compromising safety by grouping related tasks and scheduling work to minimize labor and inspection fees.
Selecting code-compliant alternative materials and seeking available rebates, permits, or low-interest financing helps control upfront costs while meeting regulations.
Homeowners are encouraged to compare options and confirm approvals with local authorities before proceeding.
Planning and batching projects
Group tasks and schedule related work together to reduce repeated labor costs and inspection fees while maintaining safety standards.
Combine fireplace gas line installation with nearby projects—venting, framing, or electrical—so contractors visit once.
Coordinate permits and inspections to avoid multiple trips.
Batch material orders to lower delivery charges.
Maintain clear timelines and contractor communication to prevent delays and preserve code compliance throughout the combined work.
Material substitutions that are code-compliant
When planning a fireplace gas line, homeowners and contractors can identify code-compliant material substitutions that reduce expense without compromising safety by selecting approved alternatives—such as using CSST in place of rigid black iron where local codes permit, or opting for listed flexible gas connectors for appliance hookups instead of custom-fabricated fittings.
Additional savings may come from approved threaded fittings, durable polyethylene for underground runs, and factory-made shutoffs.
Rebates, permits, and financing options
Although upfront expenses for permits, inspections, and professional labor are unavoidable, homeowners can offset costs through rebates, permit fee waivers, and flexible financing that preserve code compliance and safety.
Utilities, manufacturers, and local governments often offer rebates for high-efficiency appliances or licensed installation.
Low-interest loans, credit programs, and payment plans from contractors spread costs while requiring documented permits and inspections to maintain warranties and legal compliance.
Appendix: Quick Reference Tables and Calculators
The appendix provides compact tools for practical planning: typical BTU requirements by fireplace size, a pipe-sizing quick-reference chart, and a permit and inspection checklist.
These tables and calculators help validate capacity and code compliance before installation. Users are encouraged to cross-check results with local codes and a licensed professional.
Typical BTU requirements by fireplace size
Sizing a fireplace’s gas supply hinges on its BTU rating, which correlates directly with firebox dimensions and planned heat output; installers and homeowners use these figures to choose appropriate pipe diameter and meter capacity. Typical guidelines list BTU ranges by fireplace size and efficiency; local codes and appliance labels determine final requirements.
| Size | Typical BTU |
|---|---|
| Small | 15,000–25,000 |
| Medium | 25,000–40,000 |
Pipe sizing quick-reference chart
After determining the fireplace’s BTU requirements, a concise pipe-sizing quick-reference chart provides installers and homeowners with common pipe diameters, allowable BTU capacities, and typical run-length limits for natural and propane gas. Use as a starting guide; confirm with local code and pressure drop calculations.
| Diameter (in) | Typical BTU Capacity |
|---|---|
| 1/2 | 40,000 |
| 3/4 | 100,000 |
Permit and inspection checklist
Several jurisdictions require permits and inspections before, during, and after installing a gas line for a fireplace; this checklist summarizes typical documents, approvals, and inspection stages to streamline compliance.
- Permit application: site plan, scope, licensed contractor info.
- Rough-in inspection: pressure test, joint integrity, venting layout.
- Final inspection: appliance hookup, operational test, carbon monoxide safety.
- Certificate of compliance: recorded permit closure, homeowner copy, utility notification.
Conclusion
In conclusion, running a gas line for a fireplace demands meticulous planning, code compliance, and respect for the hazards involved. While DIYers may save money on simple runs, many installs require permits, pressure testing, and professional expertise to guarantee safety—risks that are colossal compared with a few hours of labor. Following the outlined steps, using proper materials, and prioritizing inspections will protect property and lives while delivering reliable warmth and comfort.