How to Adjust a Toilet Flapper Chain Quickly (Fix Running Toilet in 5 Minutes)
To quickly adjust a toilet flapper chain and fix a running toilet in just 5 minutes, start by inspecting the tank. Turn off the water supply and flush to drain the tank. Locate the flapper and check the chain for slack, kinks, or connections that may need adjustment. Reattach the chain to the lever, ensuring there are one or two free links, allowing the flapper to seal fully while lifting completely during a flush. Turn the water back on and flush to test; adjust the chain length as needed to eliminate running water or weak flushes. If issues continue, consider replacing the flapper or checking the fill valve for further troubleshooting.
How to Stop a Running Toilet in 5 Minutes
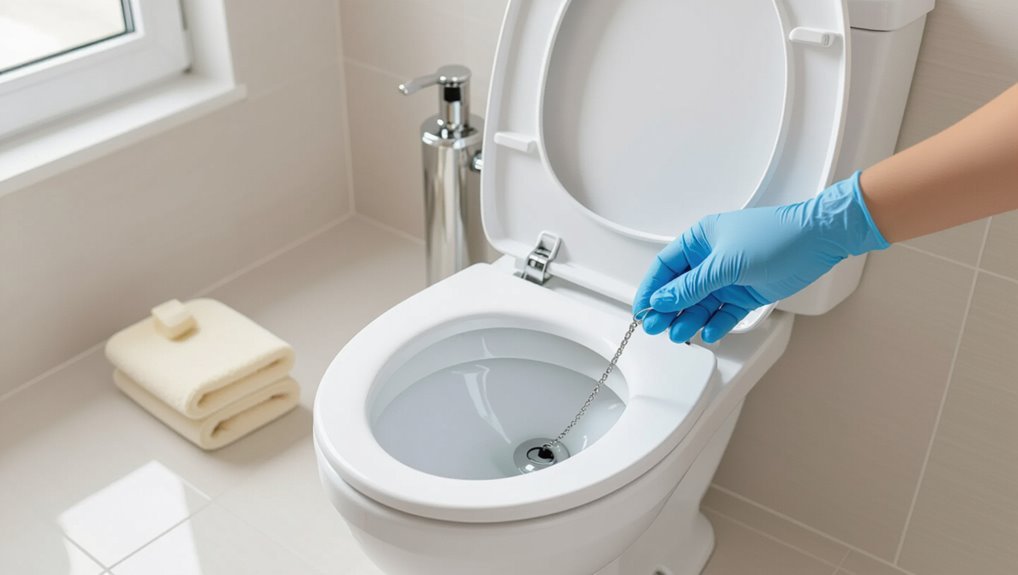
A running toilet is usually caused by a misaligned or worn flapper, an improper chain length, or a faulty fill valve.
Before beginning, gather basic tools and parts such as needle-nose pliers, a screwdriver, replacement flapper or chain, and a towel.
Turn off the water supply and flush to drain the tank, and wear gloves to protect hands while working.
Quick overview of what causes a running toilet
Identify common causes quickly to stop a running toilet in minutes. A running toilet often stems from a worn flapper, misaligned seat, or incorrect chain length; mineral buildup, faulty fill valve, or float issues also contribute.
Knowing how to adjust toilet flapper chain helps resolve seal and lift problems rapidly. Inspect seals, chain slack, and valve alignment to pinpoint the fault efficiently.
What you will need (tools and parts)
Typically, the task requires a few basic tools and a replacement flapper or chain to correct the problem promptly. Essential items allow swift adjustment or swap without guesswork.
- Adjustable pliers or slip-joint wrench
- Replacement flapper (universal or model-specific)
- Short length of chain or spare connector clips
- Towel and small bucket for water catchment
Safety and preparation steps before you start
Before beginning work on the flush mechanism, guarantee the water supply is shut off and the tank is discharged to prevent spills or accidental flushing.
Wear gloves and eye protection, clear the area of children and pets, and place towels or a small bucket by the tank.
Inspect tools and parts for damage, read product instructions, and keep the lid nearby to avoid misplacement.
Identify the Type of Flapper and Chain Setup
The writer notes that flappers commonly encountered include molded rubber, universal replacements, and adjustable designs, each affecting chain length and attachment.
They observe chain attachment styles—hooked, clipped, or looped—to the flush lever arm and advise inspecting these points for wear.
They also recommend checking the flush valve seat and overflow tube for cracks or mineral buildup that can impair sealing.
Common flapper types (rubber, universal, adjustable)
Identifying the flapper type is the first step in adjusting a toilet chain because each design connects and operates differently.
Three common types determine adjustment approach and replacement options.
- Rubber: simple, flexible, common OEM piece
- Universal: fits many valves, clips or tabs
- Adjustable: height or seal tweaks built in
- Worn: material degradation affects seal and timing
Chain attachment styles and where to look
A quick inspection inside the tank reveals where the chain attaches and which style is present, information that dictates how to adjust or replace it.
Chains attach to a lever hook, an S-hook on the flapper, or a built-in clip. Note length, any extra links, and whether the chain runs through a guide or floats free; these details determine simple adjustment steps.
How to check the flush valve and overflow tube condition
Several quick checks reveal whether the flush valve and overflow tube are sound and compatible with the flapper and chain setup.
Inspect for cracks, mineral buildup, or warping around the valve seat and tube.
Verify the overflow tube height matches the fill level and that the flapper seats squarely.
Confirm chain alignment avoids rubbing or snagging, and replace damaged components promptly.
Fast Step-by-Step Chain Adjustment (5-Minute Method)
The following quick procedure guides a five-minute adjustment of a flapper chain, beginning by turning off the water and flushing to empty most of the tank.
With the tank drained, the chain length and slack are inspected, then shortened or lengthened as needed with clear, demonstrable steps before reattaching to the flush lever.
Finally, the flush is tested and the chain fine-tuned to guarantee smooth movement without rubbing or binding.
Step 1 Turn off the water and flush to drain most water
Shut off the toilet’s supply valve by turning it clockwise until it stops, then flush to empty most of the tank water.
Wait for residual flow to cease and press the flush lever again if needed to remove remaining water.
This reduces splash, eases access to the flapper and chain, and prevents accidental refilling while adjustments are made.
Keep a towel nearby for minor drips.
Step 2 Inspect chain length and slack while tank is empty
With the tank drained and the supply valve closed, attention turns to the flapper chain.
The inspector observes chain length, ensuring it neither pulls taut at rest nor hangs excessively into the overflow tube. Slack should allow the flapper to seat fully without obstruction.
Note attachment points, clips, and any twists or corrosion. Record findings before proceeding to adjustment steps.
Step 3 Shorten or lengthen the chain correctly (demonstrated steps)
Begin by positioning the tank lid aside and ensuring the flapper is at rest; this allows a clear view of the chain and its connection points before making adjustments.
Then shorten or lengthen by moving the clip or choosing a different link, keeping slight slack so the flapper seals.
- Unhook gently
- Adjust one link at a time
- Leave minimal slack
- Trim excess chain if needed
Step 4 Reattach chain to the flush lever and test flush
Reattach the chain to the flush lever by hooking the selected link or clip onto the lever arm, ensuring the chain has a slight downward curve but no binding.
Then replace the tank lid and operate the handle to confirm the flapper lifts fully and reseats cleanly.
Observe one or two full flush cycles, watching for delayed release, incomplete lift, or premature reseating, and note if immediate readjustment is required.
Step 5 Fine-tune chain and confirm there is no rubbing or binding
Tighten or loosen the chain in small increments and cycle the handle after each change to verify the flapper lifts fully without dragging against the overflow tube or tank walls.
The chain should have a slight slack so the flapper seals firmly but not so much that it catches under the flapper’s edge or creates friction on moving parts.
Observe for binding during several consecutive flushes, adjust clip position, and trim excess links.
Alternative Quick Fixes If Chain Adjustment Doesn’t Work
If adjusting the chain fails to stop leaks or incomplete flushes, other quick fixes can be tried before calling a plumber.
These include repositioning the float or adjusting the fill height, fashioning a temporary connector from a paperclip or hook, or swapping in a replacement flapper when the old one shows wear.
Each option can be assessed quickly to determine whether a short repair or a part replacement is needed.
Repositioning the float or adjusting fill height
Several simple adjustments to the float or fill-valve height can correct a running or weak flush when flapper chain tweaks fail.
Lowering the float reduces tank water level, preventing overflow into the overflow tube; raising it increases refill volume for a stronger flush.
Adjustments are made via the float clip, screw, or by sliding the cup float on the fill valve.
Test and fine-tune.
Using a paperclip or hook as a temporary chain connector
When a flapper chain detaches or the connecting clip is missing, a straightened paperclip or small hook can serve as a quick, temporary connector to restore flush function until a proper replacement is available.
It should be used briefly, fitted securely, and checked for snagging to avoid forced lifts or leaks.
- Use a sturdy paperclip
- Avoid sharp ends
- Guarantee free movement
- Inspect after each flush
Replacing a worn flapper quickly (when to swap parts)
A temporary paperclip or hook can restore function briefly, but persistent leaks, a flapper that won’t seal, or visible wear signal the need for replacement.
Inspect for cracks, hardening, or warped edges. Match size and material to the toilet model, buy an inexpensive universal flapper if unsure, shut off water, drain tank, swap the part, test for a firm, bubble-free seal.
Common Problems and How to Diagnose Them
Troubles with a flapper chain usually present predictable symptoms that point to specific causes and remedies.
Common issues include chains that are too long or too short, twisted or tangled links that can often be freed without disassembling parts, and flappers that fail to seal even when the chain is correctly adjusted.
Persistent flow into the overflow tube is a distinct sign with its own diagnostic steps and fixes.
Chain too long or too short symptoms and solutions
Inspecting the flapper chain length reveals two common issues: a chain that is too long causes delayed or incomplete lift, while a chain that is too short prevents the flapper from sealing fully.
Symptoms and quick fixes follow.
- Long chain: weak flush, shorten by removing excess links.
- Short chain: constant running, add a link or rebend hook.
- Test adjustments.
- Recheck seal.
Twisted or tangled chain how to untangle without removing parts
Begin by observing the chain from the flush lever to the flapper to identify any twists or loops that restrict movement.
If twisted, gently lift the lever slightly to relieve tension, then run a finger along the chain to rotate links and smooth kinks.
Guide loops free by pulling toward the lever; avoid detaching parts.
Test flush to confirm unrestricted, even travel.
Flapper not sealing signs it’s the flapper, not the chain
A leaking seal often produces specific, observable symptoms that indicate the flapper itself is failing rather than an issue with the chain.
Water trickles into the bowl despite correct chain slack, visible wear or cracking appears on the flapper, mineral buildup prevents full contact, and the flapper sinks or floats improperly.
These signs point to flapper replacement or cleaning, not chain adjustment.
Water continuously flowing into overflow tube causes and fixes
When water continuously flows into the overflow tube, it signals that the tank cannot achieve or maintain the correct water level; common causes include a stuck or misadjusted fill valve, a bent or improperly set float, a worn fill-valve seal, or debris obstructing the valve’s operation.
Inspect and clean the fill valve, straighten or reset the float, replace seals or the valve if worn, and test adjustments until flow stops.
Preventive Maintenance and Quick Tips
Routine inspection of the flapper every 6–12 months and prompt replacement when signs of wear appear can prevent leaks and conserve water.
Choosing flappers made of durable materials like silicone and selecting compatible replacement models guarantees a reliable seal.
After installation, a few simple tests—such as a dye test for slow leaks and observing flush action—confirm the repair will last.
How often to inspect and replace the flapper
Several simple checks each quarter help catch wear before a flapper fails. Inspect for cracking, mineral buildup, deformation, and chain misalignment.
Replace the flapper if it leaks, won’t seal, or shows visible deterioration. Annual replacement is reasonable for older toilets or hard water areas; otherwise replace proactively every 2–3 years or immediately when performance declines to prevent running and water waste.
Best materials and replacement flapper recommendations
Inspecting and replacing the flapper leads naturally to choosing the right replacement; material and design determine longevity and sealing performance.
Durable silicone resists chemicals and lasts, rubber balances cost and flexibility, universal-fit designs simplify swaps, and weighted or molded flappers improve sealing on older valves.
Recommendations focus on compatibility, durable materials, and reputed brands to minimize repeat replacements.
- Silicone
- Rubber
- Universal-fit
- Weighted/molded
Simple tests to ensure lasting repair
Check a repaired flapper with a few quick, repeatable tests to confirm a lasting seal: after refitting, perform a dye test by adding a few drops of food coloring to the tank and waiting ten minutes to catch slow leaks; lift the flapper slightly to guarantee the chain has just enough slack for a full seal but not so much that it catches under the flapper; listen for trickling sounds and monitor water level stability over an hour; and finally cycle the flush several times to verify consistent operation under normal load.
Then inspect for warped edges, confirm chain connection durability, and schedule a brief recheck after 24 hours to ascertain no recurrence.
When to Call a Plumber
If the toilet continues to run, leaks appear at the base, or the flapper and chain show signs of damage beyond simple misadjustment, a professional assessment is warranted.
A plumber can diagnose replacement needs for the flapper, valve seat, or fill mechanism and typically completes such minor repairs in under an hour.
Expect a service call fee plus parts, with common costs for this type of repair usually ranging from a modest flat rate to a few hundred dollars depending on location and complexity.
Signs the issue is more than a simple chain adjustment
When simple chain tweaks fail to stop persistent running or repeated flush problems, it may indicate a deeper malfunction requiring professional attention.
Signs include water continuously flowing despite correct chain tension, intermittent or weak flushes, uncontrollable tank refilling, visible cracks or leaks, mineral buildup on valve components, or a wobbling flush lever.
These suggest faulty fill valves, damaged flappers, or seal failures needing a plumber.
Estimated cost and time for professional repair
How much should be expected to fix a toilet that needs more than a simple chain adjustment depends on the underlying problem and local labor rates. A professional visit typically ranges from a service call fee plus parts: simple repairs $75–$200 (30–60 minutes), valve replacements $150–$350 (45–90 minutes), major drain or tank work $300+ (1–3 hours).
| Repair type | Typical cost | Typical time |
|---|---|---|
| Minor | $75–$200 | 30–60 min |
| Valve | $150–$350 | 45–90 min |
| Major | $300+ | 1–3 hrs |
Conclusion
Fixing a flapper chain is quick, practical, and often effective; it saves water, prevents noise, and avoids small bills. Inspecting the setup, shortening or lengthening the link, and testing the seal restore quiet, steady operation. If adjustment fails, try cleaning the flapper, repositioning the lift arm, or replacing worn parts. Performing simple checks regularly keeps the system reliable, reduces surprises, and postpones costly repairs—until professional help becomes necessary.