How to Protect Sprinkler System in Winter: A Step-by-Step Guide to Prevent Freeze Damage
To effectively protect your sprinkler system during winter and prevent freeze damage, follow these essential steps: first, shut off the main supply and isolate the zones. Next, drain low points in the system. Use a regulated air compressor set at 40–60 psi to clear water from laterals, or simply open manual drains for aboveground sections. Insulate exposed pipes, backflow assemblies, and valves with foam sleeves or covers to safeguard against freezing temperatures. Store any removable components indoors and conduct a thorough check of controllers and fuses. Finally, inspect for cracks or stuck valves and document any necessary repairs. For a comprehensive guide, continue for detailed procedures, required tools, and tips tailored to your climate.
Why Winterizing Your Sprinkler System Matters
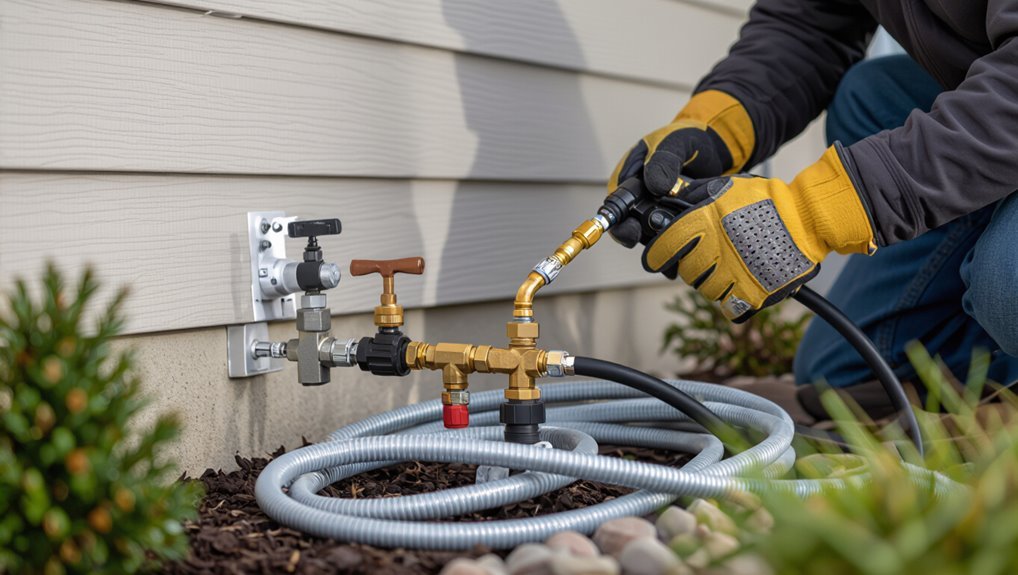
Frozen water can crack pipes, warp valves, and damage sprinkler heads, leading to costly repairs.
Early signs such as bulging or split pipes, nonfunctional valves, and irregular spray patterns indicate freeze damage.
Risk increases in colder climates and in poorly draining or shallow soils that allow water to freeze around components.
Consequences of frozen sprinkler components
When water trapped inside valves, pipes, or sprinkler heads freezes and expands, it can crack plastic fittings, split metal pipes, and warp delicate seals, leading to leaks or total component failure come spring.
Frozen components raise repair costs, disrupt landscaping, and risk water waste and mold from undetected leaks.
Understanding how to protect sprinkler system in winter prevents damage, expense, and downtime.
Signs of freeze damage to pipes, valves, and heads
Inspecting a sprinkler system after winter exposes clear signs that pipes, valves, and heads suffered freeze damage.
Cracked or bulging PVC, visible leaks, and reduced water pressure indicate pipe failure.
Valves may stick, leak at seals, or fail to open.
Sprinkler heads can be cracked, misaligned, clogged with debris from fractures, or spray irregularly, signaling component compromise.
How climate and soil conditions affect freeze risk
Because temperature alone does not determine freeze risk, local climate patterns and soil characteristics together dictate how vulnerable a sprinkler system will be during winter.
Areas with frequent freeze-thaw cycles, strong winds, or sudden cold snaps increase exposure.
Sandy, well-drained soils cool and freeze faster than clay or loam, reducing ground insulation and elevating the likelihood of buried pipe and valve damage.
Quick Checklist: Winterizing Sprinkler System (Direct Action Steps)
Begin with a concise, ordered checklist that outlines the essential steps to winterize a sprinkler system, focusing on shutting off water, draining lines, blowing out remaining moisture, insulating exposed components, and scheduling professional service if needed.
- Shut off main supply and isolate zones.
- Drain valves and low points.
- Use an air compressor to blow out residual water.
- Insulate backflow, timers, and aboveground piping; book professional inspection if uncertain.
Preparing Before the First Freeze
Before the first freeze, homeowners should schedule winterization according to regional climate—earlier in colder zones, later in milder ones.
They should gather essential tools and materials such as a compressor or drain key, pipe caps, gloves, and antifreeze rated for irrigation systems.
Finally, safety steps include shutting off the main water supply, relieving system pressure, and following lockout/tagout practices if needed.
Timing: when to start winterization based on region
When daytime temperatures consistently dip toward freezing and local forecasts predict overnight lows at or below 32°F (0°C), homeowners should plan to winterize their sprinkler systems.
The exact timing varies by region, with colder northern areas scheduling this task in early to mid‑autumn while milder climates can wait until late autumn or the first hard freeze.
Regional microclimates, elevation, and historical freeze dates guide precise scheduling.
Tools and materials needed for winterizing
A concise kit of tools and materials makes winterizing a sprinkler system faster and reduces the chance of damage: essential items include an air compressor with appropriate fittings for the system’s blow‑out port, a pressure regulator or inline gauge to limit PSI to safe levels (typically 40–50 PSI for PVC lines), a quick‑connect hose or adapter, insulated covers for above‑ground backflow preventers and valves, non‑toxic antifreeze only if local code permits (usually not recommended for irrigation mains), basic hand tools (wrenches, screwdriver), replacement seals or valve caps, and personal protective equipment such as eye and hearing protection and gloves.
Safety precautions and turning off water supply
Shut off the irrigation supply at the main valve and relieve pressure before working on the system to prevent pipe bursts and injury.
Wear gloves and eye protection, verify electrical components are deactivated, and post warning signs if others access the area.
Confirm the supply is isolated by checking downstream faucets, close backflow assemblies per manufacturer instructions, and tag valves to avoid accidental reactivation.
Step-by-Step Drain and Blow-Out Methods
The section outlines clear procedures for draining irrigation lines, covering both aboveground and belowground manual methods along with checks for automatic drains and anti-siphon valves.
It then explains the compressed-air blow-out technique, including step-by-step operation and safety precautions.
Recommended air compressor types, fittings, and pressure limits are specified to prevent pipe and sprinkler damage.
Manual drain procedure for aboveground and belowground systems
Begin by identifying whether the system is aboveground or belowground, since each requires distinct manual draining and blow-out steps; aboveground systems often allow gravity drainage of exposed pipes and backflow assemblies, while belowground systems require accessing valve boxes and using risers or compressed-air blow-outs to clear buried lines.
For aboveground: open drain valves, slope lines, and purge remaining water.
For belowground: excavate if needed, open manual drains, then blow out each zone sequentially until dry.
Automatic drain and anti-siphon valve checks
Having completed manual drains or blow-outs on exposed and buried lines, attention turns to automatic drain devices and anti-siphon valves to guarantee they operate properly before winter.
Inspect for corrosion, debris, and proper seating; activate valves to confirm full drainage.
Replace faulty components, tighten fittings, and test under normal pressure.
Document findings and schedule repairs to prevent freeze damage and contamination.
Compressed air blow-out method
Use a pressure-regulated air source to force water out of the sprinkler lines, following a controlled sequence of zones to prevent pipe or component damage.
The technician isolates the main, connects the blow-out hose, and cycles each zone until clear.
Steps:
- Shut off water supply.
- Attach air hose securely.
- Purge zones sequentially.
- Verify no residual moisture remains.
Recommended air compressor specifications and pressure limits
After purging each zone with regulated air, attention turns to selecting an appropriate compressor and observing strict pressure limits to protect piping and valves.
A portable compressor delivering dry, oil-free air at 20–80 psi is recommended; most residential systems require 40–60 psi.
Use a regulator, inline moisture trap, and pressure gauge.
Never exceed 80 psi or system damage may occur.
Winterizing Sprinkler Zones and Components
The following section explains how to winterize critical zones and components to prevent freeze damage.
It covers procedures for valves, manifolds, and backflow preventers, plus protection for sprinkler heads, risers, and drip lines.
Guidance on insulating exposed pipes and backflow devices is also provided.
How to winterize valves, manifold, and backflow preventers
Before temperatures drop below freezing, valves, manifolds, and backflow preventers require careful isolation and drainage to prevent cracking and costly repairs.
Shut main valves, relieve downstream pressure, and close zone solenoids. Drain or blow out lines feeding these assemblies, following manufacturer steps.
Insulate aboveground components with foam and tape. Remove or winterize electronic controllers and label parts for spring reassembly.
Protecting sprinkler heads, risers, and drip irrigation
Flush sprinkler zones and drain risers to prevent ice damage to heads, piping, and drip lines as temperatures fall.
Then remove and store aboveground heads, cap exposed risers, and clear debris.
Blow out each zone using low-pressure air per manufacturer guidelines, inspect seals and nozzles, and flush drip tubing.
Replace cracked components and document completed zones for spring reactivation.
Insulating exposed pipes and backflow devices
Insulate exposed pipes and backflow devices to prevent freezing, bursting, and costly winter damage.
Practitioners should follow clear, efficient steps to secure vulnerable components before cold sets in:
- Wrap pipes with foam sleeves or heat tape.
- Encase backflow assemblies in insulated covers or plywood boxes.
- Seal gaps to block drafts.
- Inspect and replace damaged insulation annually to guarantee effectiveness.
Dealing with Different System Types
Different sprinkler systems require tailored winter care to prevent freeze damage and guarantee reliable operation come spring.
Guidance should cover in-ground systems, above-ground and portable setups, drip irrigation and micro-sprinklers, plus protection for smart controllers and exposed wiring.
Clear, system-specific steps help owners prioritize actions and avoid common mistakes.
In-ground sprinkler systems
Many homeowners rely on in-ground sprinkler systems for efficient lawn irrigation, but winterizing approaches vary by system type—manual drain, automatic drain, and blow-out (compressed air) systems each require specific steps.
Manual systems need zone-by-zone draining and valve isolation.
Automatic-drain units require activation and inspection of drain ports.
For blow-out methods, trained operators should use regulated pressure and clear each lateral to prevent freeze damage.
Above-ground and portable systems
Above-ground and portable sprinkler setups require a different winter approach than in-ground systems because their components remain exposed and are more easily moved or removed.
Components should be drained, disconnected, and stored indoors; hoses and timers need insulation or winter storage.
Elevate or cover vulnerable sections to prevent snow and ice damage.
Inspect fittings before reassembly in spring.
Drip irrigation and micro-sprinklers
When temperatures approach freezing, drip irrigation and micro‑sprinkler systems require targeted winterization because their low‑flow emitters and narrow tubing are especially prone to clogging and freeze damage.
Flush lines, remove and store emitters where feasible, insulate exposed risers and aboveground fittings, and blow out remaining water with low‑pressure air.
Check filters and repair leaks to prevent trapped moisture and ice formation.
Smart/automatic controllers and wiring protection
Review smart and automatic controllers and their wiring early in the cold‑season checklist, since electronics and exposed conductors require different winter strategies than hydraulic components.
Inspect enclosures for seals, move controllers indoors when possible, and back up schedules.
Remove batteries, label and disconnect field wiring at terminals or use dielectric grease on exposed connectors.
Protect conduit runs and splice boxes against moisture and freezing.
Common Problems During Winterization and How to Fix Them
Common winterization problems include a zone that won’t drain or a valve that won’t close, which often require checking solenoids, diaphragms, and air pressure.
Freeze–thaw cycles can mask or create leaks that are found by visual inspection, pressure testing, and targeted repairs or pipe replacement.
Controller and power issues are common in cold weather and are resolved by verifying power sources, replacing batteries or damaged wiring, and protecting the controller from exposure.
Trouble draining a zone or valve won’t close
Encountering a zone that won’t drain or a valve that refuses to close is a frequent obstacle during winterization and usually signals a mechanical fault or blockage.
Inspect solenoid and diaphragm for debris or wear, flush supply lines, and manually actuate the valve to isolate the issue.
Replace damaged diaphragms, clean solenoids, or swap faulty valves; consult a professional if electronic controls or pipe damage are suspected.
Detecting and repairing leaks after freeze-thaw
After a freeze-thaw cycle, small cracks and joint separations often reveal themselves as visible wet spots, pooling, or unusually damp soil near spray heads and along lateral lines.
Inspect lines, fittings, and risers; mark leak locations.
Repair buried breaks by excavating, cutting back damaged piping, and installing couplings or replacement segments.
Test system at low pressure, recheck for dampness, and backfill once dry.
Restoring power or controller issues in cold weather
Restore power and diagnostic control first when winter weather causes a controller to fail: cold, moisture, and voltage fluctuations are frequent culprits that leave timers unresponsive or erratic.
Inspect the controller enclosure, fuses, and breakers; dry connections and replace corroded terminals.
Test with a known-good power source, update or reset firmware, and consult a qualified technician for persistent faults or for replacing weather-damaged units.
How to Recommission Your Sprinkler System in Spring
A concise spring recommissioning routine begins with a step-by-step start-up checklist to restore water, power, and controller settings.
Each zone should be tested while heads are adjusted and system pressure checked to guarantee even coverage and proper operation.
Finally, a careful inspection for winter damage identifies broken components and guides any essential repairs before regular irrigation resumes.
Step-by-step start-up checklist
Begin by inspecting the controller, valves, and visible pipework for damage or signs of rodent chewing.
Next, restore power and set the controller clock and schedule.
Reopen the main shutoff and slowly pressurize the system, watching for leaks.
Manually operate each valve to confirm activation.
Note any repairs, replace damaged components, and document the start-up status for the season.
Testing zones, adjusting heads, and pressure checks
Inspect each irrigation zone methodically, activating valves one at a time to confirm coverage, identify clogged or misaligned heads, and observe spray patterns for uniformity.
Adjust nozzle angles and heights to eliminate overspray and guarantee target watering.
Measure system pressure at the backflow or manifold; verify it matches specifications.
Note fluctuating pressure, leaks, or weak zones for targeted correction before routine operation.
Inspecting for winter damage and essential repairs
With zones tested and pressure verified, attention shifts to signs of winter damage that can compromise spring operation.
Inspect pipes, valves, and backflow assemblies for cracks, leaks, or corrosion.
Check sprinkler heads for broken nozzles, misalignment, or clogged filters.
Replace damaged components, tighten fittings, and repair insulation.
Document repairs and retest affected zones to confirm restored function before regular use.
Cost, Professional Help, and When to Hire a Pro
Deciding between DIY winterization and hiring a professional requires weighing time, skill, and risk: homeowners can save money doing basic blowouts but may miss hidden issues that a pro would catch.
Typical professional fees and package details vary by region and system size, so clear estimates should specify blowout, valve checks, repairs, and post-service guarantees.
When choosing an irrigation technician, prioritize licensed, insured providers with local references, written quotes, and demonstrated experience with the specific system type.
DIY vs. professional winterization: pros and cons
How should a homeowner choose between DIY winterizing and hiring a pro? A homeowner weighs skill, time, and risk: DIY saves money but risks missed steps; pros guarantee thorough blowout and liability coverage. Hire a pro for complex systems or limited time.
| Option | Benefit | Drawback |
|---|---|---|
| DIY | Lower immediate cost | Risk of error |
| Pro | Expertise, warranty | Higher price |
Typical costs and what services include
Estimated winterization costs vary by system size and service level, typically ranging from $50–$150 for a basic blowout to $200–$400 for thorough winter servicing.
Services commonly include blowout, valve/drain checks, backflow protection, controller shutdown, and minor repairs.
Professionals may diagnose hidden issues; hire a pro for complex systems, recurring leaks, elevated risk of freeze damage, or limited DIY confidence.
How to choose a qualified irrigation technician
When should a homeowner hire a qualified irrigation technician rather than attempting winterization alone? A professional is recommended for complex systems, inconsistent water pressure, or visible leaks.
Choose licensed, insured technicians with local references, written estimates, and clear warranties. Compare costs—hourly vs. flat rates—and verify winterization experience.
Hire a pro when risk of freeze damage, warranty requirements, or lack of tools/skills exist.
Preventive Tips and Long-Term Maintenance
A clear seasonal maintenance schedule helps prevent freeze damage by timing shutdowns, blowouts, and inspections before the first hard freeze.
Strategic upgrades—such as insulated valves, heat-traced lines, and freeze sensors—can reduce long-term risk and alert owners to developing problems.
Consistent best practices for year-round water shutoff and thorough drainage preserve system integrity and simplify winter preparations.
Seasonal maintenance schedule to prevent freeze damage
Several targeted actions spaced through the fall prepare a sprinkler system to withstand freezing temperatures.
A concise seasonal schedule assigns tasks and timing, ensuring consistent protection.
- Early fall: inspect valves, test zones, repair leaks.
- Mid-fall: drain low spots, adjust timers, verify backflow.
- Late fall: blow out mains, close isolation valves.
- Winterize: confirm shutdown, document actions, plan spring startup.
Upgrades that reduce freeze risk (insulated components, freeze sensors)
Consider upgrading key sprinkler components to materially reduce freeze risk and simplify winter management.
Insulated backflow covers, heat-traced valves, and frost-resistant vacuum breakers limit exposure.
Install programmable freeze sensors that automatically alert or shut systems down when temperatures drop.
Durable, insulated risers and buried service lines further reduce vulnerability.
Prioritize certified components and professional installation to guarantee reliability and warranty compliance.
Best practices for water shutoff and drainage year-round
Shut off the main supply and drain the system before temperatures consistently approach freezing to prevent pipe bursts and component damage.
Periodically test shutoff valves, repair leaks, and guarantee backflow preventers are drained. Use low points and automatic drains to remove residual water.
Maintain a written schedule for seasonal shutdowns and spring commissioning, keeping records of inspections, repairs, and drainage procedures for reliable year-round protection.
Troubleshooting Guide: Quick Fixes for Common Winter Damage
The troubleshooting guide outlines rapid responses for common winter damage, including temporary patches and permanent repair options for burst pipes.
It explains basic diagnostics for valve and controller failures and steps to isolate electrical versus mechanical issues.
Guidance is given on criteria for repairing frozen components versus replacing them outright.
Pipe bursts: temporary and permanent repair options
When a sprinkler pipe bursts due to freezing, prompt assessment separates a quick temporary stopgap from a long-term solution. Temporary measures (such as shutting isolation valves, applying hose clamps, or wrapping with self-fusing tape) can limit water loss and property damage.
However, a permanent repair—replacement of the damaged section with properly fitted, insulated piping and correct jointing—restores system integrity and prevents recurrence.
After isolation, document location, drain remaining water, cut out damaged portion, dry fittings, install replacement pipe with proper adhesive or solvent welds, insulate joints, pressure-test repaired run, and monitor for slow leaks before returning system to service.
Valve and controller failure diagnostics
Diagnose valve and controller failures by systematically isolating electrical and hydraulic causes: check for blown fuses, tripped breakers, loose or corroded wiring at the controller and solenoids, and verify battery backup status before inspecting physical valve assemblies for frozen, cracked, or clogged components.
Simple fixes—replacing a fuse, tightening or cleaning terminals, swapping a known-good solenoid, or clearing debris and reseating diaphragms—often restore function, while persistent issues signal the need for component replacement or a professional inspection.
Record test results, label faults, and retest after each repair to confirm resolution.
When to replace vs. repair frozen components
Assess whether frozen components are salvageable by comparing visible damage, function, and repair cost against replacement.
Inspect cracked pipes, split fittings, seized valves, and warped sprinkler heads.
Prioritize replacement for structural failure, persistent leaks, or compromised freeze resistance.
Repair when parts are cosmetic, movement can be restored, and costs are substantially lower.
Document age and warranty before deciding.
Local Considerations and Climate-Specific Advice
Regional climate and local conditions dictate different winter strategies for sprinkler systems.
In mild-winter areas, occasional freezes may require simple blowouts or insulated valves, while severe-freeze regions often need full winterization and buried or heat-traced components.
Soil type and landscaping—poorly draining clay, shallow topsoil, or heavy mulch—can increase freezing risk and should guide placement and protective measures.
Advice for mild-winter regions
In many mild-winter areas, sprinkler winterization focuses less on complete blowouts and more on preventing freeze damage from occasional cold snaps while avoiding unnecessary shutdowns. Homeowners should tailor preparations to local freeze frequency, typical lows, and soil drainage.
Practical steps include insulating aboveground backflow devices, draining exposed valves, adjusting irrigation schedules, and monitoring forecasts to manually shut systems briefly during rare freezes.
Advice for severe-freeze regions
For areas prone to prolonged subfreezing temperatures, winterizing a sprinkler system requires thorough, climate-specific measures that assume repeated freezes rather than occasional cold snaps.
Professionals recommend full blowout using appropriate-pressure compressors, draining and isolating aboveground components, insulating exposed valves and backflow preventers, installing freeze-rated equipment, and scheduling inspections before sustained cold.
Consider redundant safeguards and documented maintenance plans for reliability.
Soil type and landscaping factors that influence freezing risk
Soil composition and landscape layout greatly affect how and where freeze damage occurs around a sprinkler system.
Permeable soils drain and freeze less; clay holds water and freezes deeper. Grading, mulch, and plant beds alter insulation and exposure.
Consider these local factors:
- Soil texture and drainage
- Frost depth variability
- Surface vegetation and mulch
- Slope and water pooling locations
Conclusion
As frost exhales across lawns, the prudent caretaker tucks the sprinkler system into winter’s hush, sealing valves like lips against cold’s whisper. Pipes breathe out residual water; zones stand armored beneath insulation’s soft guard. By acting now—draining, blowing, and shielding—one buys springtime’s easy return: green unfurling without the brittle scars of neglect. Care, timed and steady, converts winter’s threat into a season of patient preservation and renewed growth.