How to Measure PVC Pipe Accurately: A Step-by-Step Guide for DIYers and Pros
To measure PVC pipe accurately, follow these essential steps: Use a tape measure for centerline lengths and a caliper for measuring outside diameter (OD) and inside diameter (ID). Mark your cut lines with a fine-tip marker, and don’t forget to measure socket depths and factor in insertion allowances along with wall thickness for accurate ID calculations. Always verify nominal sizes against actual measurements and perform a dry fit before solvent welding. Remember to account for material expansion due to temperature changes, and wear personal protective equipment (PPE) during cutting. For detailed steps, charts, and troubleshooting tips, continue reading.
Why Accurate PVC Pipe Measurement Matters for DIY Projects
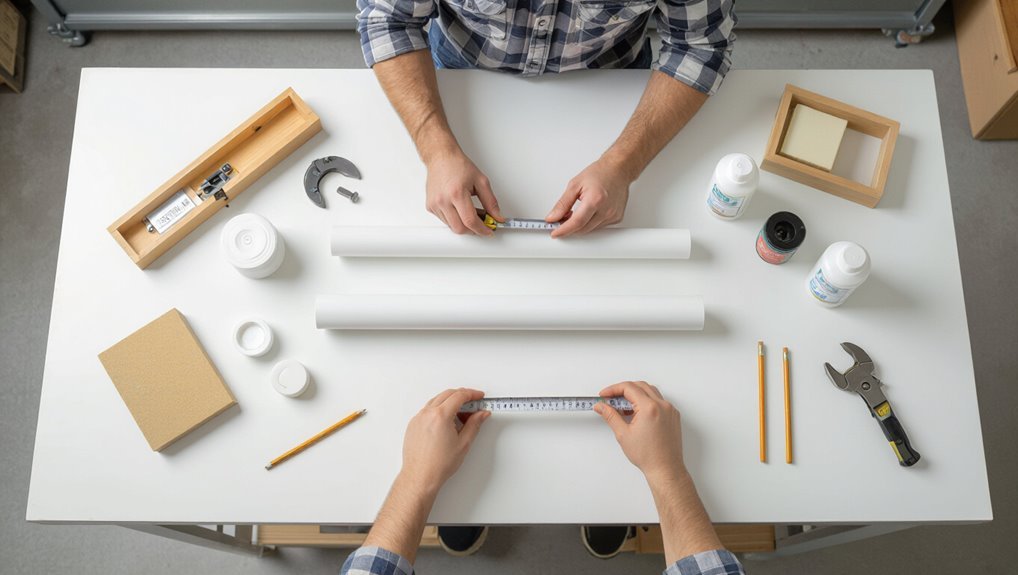
Many common DIY tasks—such as irrigation lines, furniture frames, and drainage systems—depend on precise PVC measurements to guarantee parts align and function.
Incorrect measurements can cause poor fits, resulting in leaks, structural weakness, or the need to remake components. Those errors also waste materials and time, increasing project cost and frustration.
Common projects that require precise PVC measurements
Although often underestimated, precise PVC measurements are essential for a range of common DIY projects—from irrigation systems and greenhouse frames to furniture, shelving, and custom drainage—because even small errors can cause misfits, leaks, structural weakness, or wasted materials.
Typical projects include drip irrigation layouts, greenhouse skeletons, PVC furniture builds, shelving units, conduit runs, and custom plumbing adapters; clear guidance on how to measure PVC aids planning.
Consequences of incorrect measurements (fit issues, leaks, wasted materials)
Even small deviations in PVC measurements can cascade into tangible problems: misaligned joints that prevent snug fittings, stress points that lead to cracks or leaks, and cut pieces rendered unusable so materials and time are wasted.
Improperly sized pipes force rework, increase costs, compromise system integrity, and risk water damage or system failure.
Precision prevents frustration, conserves resources, and guarantees reliable, long-lasting assemblies.
Quick Answer: How to Measure PVC Pipe Correctly in Seconds
A quick length check is done by laying the pipe flat and measuring from end to end with a tape measure.
To get the diameter, measure across the outside of the pipe and, if needed, subtract twice the wall thickness for the internal diameter.
These two simple steps provide fast, reliable measurements for most DIY needs.
One-sentence method for measuring length
Measure the required length by aligning the pipe with a tape measure from one end to the other, reading the measurement at the nearest mark, and subtracting any necessary fitting allowances (such as socket depth or planned overlap) to get the final cut length.
Then mark the cut line with a pencil or masking tape, recheck the distance, clamp or secure the pipe, and cut squarely with an appropriate saw.
One-sentence method for measuring diameter
After confirming the correct cut length, the diameter can be checked in seconds by placing calipers or a tape measure across the pipe’s outside edges to read the outside diameter (OD) or measuring the inside opening for the inside diameter (ID).
Then, compare that number to nominal PVC sizing charts to determine the pipe’s nominal size. Use consistent units and measure at multiple points to verify roundness.
PVC Pipe Basics You Need to Know Before Measuring
Before measuring, the distinction between nominal size and actual outer diameter must be understood because fittings use nominal dimensions while physical measurements reflect real diameters.
Different PVC types—schedule 40, schedule 80, DWV, and conduit—have varying wall thicknesses and pressure ratings that affect where and how to measure.
Wall thickness changes the inner diameter and can alter fit and flow, so measurements should account for it.
Nominal size vs. actual size explained
Pipe sizing can be confusing because the nominal size printed on PVC fittings does not equal the pipe’s outside or inside diameter; it is a label tied to the system’s flow capacity and historical standards.
Nominal refers to a naming convention, not a measurement. Actual dimensions—outside diameter (OD) and inside diameter (ID)—vary by schedule and wall thickness, so measure OD and ID when precision matters.
Types of PVC pipe (schedule 40, schedule 80, DWV, conduit)
PVC comes in several common types—Schedule 40, Schedule 80, DWV, and conduit—each designed for different pressure, strength, and application requirements.
Schedule 40 is standard for water and irrigation.
Schedule 80 offers thicker walls for higher pressure or industrial use.
DWV is for drainage, waste, and vent with lower pressure ratings.
Conduit protects electrical wiring and follows different sizing standards.
How wall thickness affects measurements
Measure wall thickness precisely because it determines a pipe’s internal diameter, pressure rating, and fitting compatibility.
Wall thickness varies by schedule and manufacturer; thicker walls reduce bore size and increase strength.
Accurate measurement—using calipers or micrometer at multiple points—ensures correct ID calculation and proper selection of fittings, adhesives, and supports.
Ignoring thickness leads to leaks, failures, or incompatible components.
Tools Required for Accurate PVC Measurement
Selecting the right tools guarantees measurements are precise and cuts fit correctly. The guide compares measuring tape, ruler, and caliper for different accuracy needs and highlights simple shop tools that speed layout and finishing.
Readers will learn when to choose each instrument and which auxiliary items help produce professional results.
- Measuring tape for general runs, ruler for short straight edges, caliper for inside/outside diameters
- Marker for clear reference lines and a pipe cutter for straight, consistent cuts
- Reamer and file to remove burrs and guarantee smooth, accurate fits
Measuring tape vs. ruler vs. caliper when to use each
When accuracy, convenience, and the scale of the task vary, choosing between a measuring tape, a ruler, or a caliper depends on the dimension being checked and the level of precision required.
A tape suits long runs and rough cuts. A ruler handles straight edges and short, visible lengths. A caliper measures outer, inner diameters and wall thickness precisely for fittings and tight tolerances.
Additional helpful tools (marker, pipe cutter, reamer, file)
Beyond choosing between tape, ruler, or caliper, a few simple hand tools make accurate PVC measurement and cutting far more reliable: a fine-tip permanent marker for clear cut lines, a quality PVC pipe cutter for clean, square cuts, a reamer or deburring tool to remove inner burrs, and a small file or sandpaper to smooth outer edges and refine fit.
These tools speed work and improve joint integrity.
Step-by-Step Guide to Measuring PVC Pipe Length
The guide outlines how to measure straight runs, clarifying inside-to-inside versus end-to-end methods to guarantee correct fit.
It explains adding allowances for fittings, such as socket depth and slip connections, and describes measuring curved or bent runs with a flexible tape or cloth.
Finally, it covers recording measurements clearly and marking precise cut lines before making cuts.
Measuring straight lengths (inside-to-inside vs. end-to-end)
Measuring a straight run of PVC requires choosing whether to record inside-to-inside or end-to-end dimensions, because fittings and pipe wall thickness change the overall length.
Inside-to-inside is useful when internal clearances matter; measure between inner faces.
End-to-end suits cutting and material list purposes; measure from outer ends.
Consistently use one method and note which to avoid assembly errors.
Measuring for fittings and allowances (socket depth, slip fittings)
Account for socket depths and slip-fit allowances before cutting so each joint seats fully without shorting the run.
Measure from finished face to face, then subtract socket depth on each hub when using slip fittings. Consult manufacturer specs for depth.
Mark cut lines clearly, allow glue gap (about 1/8 inch) if using solvent welds, and confirm dry-fit alignment prior to final assembly.
Measuring curved or bent runs (using flexible tape or cloth)
For curved or bent PVC runs, use a flexible tape or cloth to capture the actual centerline length rather than relying on straight-line measurements.
Lay the tape along the pipe’s centerline, following bends and offsets, keeping it taut but not stretched. Note end points where fittings will join.
Repeat for complex S‑shapes, summing segments for total run length before accounting for fittings or allowances.
Recording measurements and marking cut lines
Begin by confirming each measurement on a flat surface and converting any fractional inches to a single unit (decimal or fraction) that will be used for cuts.
Record lengths in a notebook or digital app, labeling each piece and orientation.
Transfer measurements to the pipe, marking cut lines with a fine-tip marker or pencil.
Double-check marks against the plan before cutting.
Step-by-Step Guide to Measuring PVC Pipe Diameter
The procedure begins by measuring the pipe’s outside diameter (OD) with a caliper or a tape measure for a quick, accurate reading.
Next, the inside diameter (ID) is measured or inferred to calculate wall thickness by subtracting ID from OD and dividing by two.
Finally, the measured OD and ID are compared to a nominal pipe size chart to determine the standardized pipe designation.
Measuring outside diameter (OD) with caliper or tape
When measuring a PVC pipe’s outside diameter (OD) with a caliper or tape, the technician aligns the tool perpendicular to the pipe’s axis, guarantees contact at the widest point, and reads the measurement to the nearest practical unit.
For calipers, lock and record; for tape, wrap snugly without compressing the pipe and read across the widest exterior.
Repeat for consistency.
Measuring inside diameter (ID) and calculating wall thickness
Measuring the inside diameter (ID) and deriving wall thickness requires simple tools and careful placement: a caliper, inside micrometer, or tape for larger bores is positioned perpendicular to the pipe axis at the pipe’s inner lip, ensuring contact at the widest interior points.
Record the ID measurement, then subtract twice the wall thickness from the outside diameter (OD) or compute wall thickness as (OD − ID) / 2 to confirm consistency across multiple measurements.
Verify at several locations along the pipe to detect ovality or variations; average consistent readings and note discrepancies for replacement or fitting decisions.
Converting OD/ID to nominal pipe size (reference chart)
Converting a measured outside or inside diameter to a nominal pipe size requires consulting a standardized reference chart, since nominal sizes for PVC do not always match actual OD or ID values.
The chart lists nominal size, actual OD, and typical ID by schedule. Match the measured OD or ID to the closest chart entry, confirm wall thickness, and select the corresponding nominal size for fittings and ordering.
How to Measure PVC Pipe for Common Fittings and Connections
When preparing PVC for common fittings and connections, the practitioner measures differently for slip (solvent-weld) and threaded joints to guarantee proper fit and sealing.
Attention is given to length allowances for couplings, elbows, tees, and adapters, since socket depths and thread engagement affect final dimensions.
Accurate measurement prevents gaps, misalignment, and the need for rework during assembly.
Measuring for slip and solvent-weld fittings
Cut pipe ends are checked for snug fit before marking length for slip and solvent-weld fittings; accuracy here prevents gaps and excessive trimming during assembly.
Measure depth of socket insertion (use a depth gauge or mark pipe), add solvent-weld allowance, and mark cutting line squarely.
Deburr and test-fit dry, ensuring alignment.
Final cleaning and priming follow manufacturer directions prior to adhesive application.
Measuring for threaded fittings
Measure the threaded connection depth and thread engagement before marking or cutting the pipe to confirm the joint will seal and reach full engagement without bottoming out.
Verify male and female thread types (NPT vs. BSP) and measure thread length with calipers or a depth gauge.
Account for pipe end loss from thread cutters or compound tape, then mark cut location accordingly.
Guarantee straight, square cuts.
Allowances for couplings, elbows, tees, and adapters
Several common fittings—couplings, elbows, tees, and adapters—require specific length allowances to guarantee proper alignment and full engagement. Each fitting’s socket depth, hub length, and wall thickness must be added to the cut length rather than assumed as zero.
Measure manufacturer socket depths and account for insertion depth on both ends for couplings, subtracting for bends and tees to maintain run length.
Measurement Conversions and Reference Charts
A concise reference of common nominal PVC sizes with corresponding outside diameter (OD), inside diameter (ID), and Schedule 40 wall thickness helps guarantee accurate measurements for fittings and repairs. Included below is a quick conversion and size chart for common nominal sizes and metric/imperial lengths to aid measurement and ordering. The table presents typical values for rapid cross-reference.
| Nominal Size | OD / ID (in) | Wall Thickness (Sch 40) |
|---|---|---|
| 1/2″ | OD 0.840 / ID 0.622 | 0.109 |
| 3/4″ | OD 1.050 / ID 0.824 | 0.113 |
| 1″ | OD 1.315 / ID 1.029 | 0.133 |
| 1-1/2″ | OD 1.900 / ID 1.590 | 0.145 |
Common nominal sizes with OD, ID, and wall thickness (schedule 40)
Pipe sizing tables list the most common nominal PVC diameters alongside their outside diameter (OD), inside diameter (ID), and wall thickness for Schedule 40.
Typical entries include 1/2″ through 8″ nominal sizes with specified ODs (e.g., 0.840″ for 1″), corresponding IDs, and wall thicknesses (e.g., 0.109″ for 1″).
Use these tables to match fittings and calculate flow or pressure limits.
Quick conversion table for metric and imperial lengths
When converting between metric and imperial measurements for PVC lengths, a simple reference table eliminates guesswork by listing common values in both systems side by side (for example, 1 ft = 0.3048 m and 1 in = 25.4 mm).
Include rows for millimeters, centimeters, meters, inches, feet, and common pipe lengths (e.g., 300 mm ≈ 11.81 in, 1.2 m ≈ 3.94 ft).
Tips for Measuring in Tight or Hard-to-Reach Areas
When measuring PVC in trenches, behind walls, or above ceilings, practitioners often rely on long-reach tools and feeler probes to obtain accurate lengths where direct access is limited.
Temporary templates, such as cut cardboard or scrap pipe, and taut string lines provide repeatable reference points for bends and offsets.
Careful marking of contact points and verification with a second measurement reduce errors in confined or obstructed spaces.
Techniques for trenches, behind walls, and ceilings
Measure carefully in confined spaces by planning access points and using the right tools: a telescoping tape, a flexible measuring blade, or a laser distance meter small enough to fit into trenches, behind walls, or ceiling cavities.
Record reference points, note fittings and offsets, and measure twice to confirm clearances. Protect tools from soil and debris, and account for pipe bends, wall thicknesses, and insulation.
Using temporary templates and string lines
Lay out a temporary template or string line to establish exact pipe runs and critical offsets before cutting or fitting.
A rigid template or taut string maps bends, drop points, and slope over obstacles. Mark attachment locations and union positions, then transfer measurements to pipe.
Recheck alignment with level or gauge. Templates prevent costly re-cuts and guarantee precise joints in confined spaces.
Common Measurement Mistakes and How to Avoid Them
Mistakes in measuring PVC pipe often stem from confusing nominal sizes with actual dimensions, overlooking how far fittings insert, or failing to allow for joint shrinkage or expansion. Each error can lead to poor fit, leaks, or wasted materials if not caught early.
The following points highlight common slip-ups and how to prevent them.
- Misreading nominal vs. actual sizes: always check manufacturer specs and measure outside diameter for pipe, inside diameter for fittings.
- Ignoring fitting insertion depth: mark and verify socket depth before cutting to guarantee proper engagement.
- Not accounting for solvent-weld shrinkage or expansion: plan for dimensional change during curing and thermal cycles.
Misreading nominal vs. actual sizes
Confusion often arises because PVC pipe is labeled by nominal size rather than its actual outside or inside diameter, so a 1-inch pipe will not measure exactly one inch across.
Readers should verify whether listings reference nominal, OD, or ID, consult manufacturer charts, and measure OD and wall thickness to calculate ID.
Accurate labeling prevents mismatched fittings and assembly errors.
Ignoring fitting insertion depth
How deep should a fitting actually seat? Failure to measure insertion depth leads to joints that are too short or bottom out, changing overall length and alignment.
Measure from pipe end to shoulder inside the fitting, mark the pipe, and cut to allow full insertion.
Account for manufacturer-specified depth for each fitting type to guarantee accurate final dimensions and proper sealing.
Not accounting for solvent-weld shrinkage or expansion
Allow for dimensional change when using solvent-weld joints: PVC pipe and fittings temporarily soften as the solvent cement dissolves the surface, permitting insertion and fusion, and then the joint cures, shrinking slightly as the solvent evaporates.
Designers and installers must factor this shrinkage (and potential thermal expansion) into measured lengths and offsets, trimming pipe to achieve final assembled dimensions after full cure.
How to Verify Measurements Before Cutting or Gluing
Before cutting or gluing, the builder should dry-fit components to confirm alignment and fit without committing to adhesive.
Test assemblies and final checks verify lengths, angles, and clearances match plans and accommodate socket or slip allowances.
Clear marking conventions—such as indicating cut lines, insertion depth, and orientation—help prevent costly errors during installation.
Dry-fitting components
Dry-fit each section of the assembly to confirm alignment and fit before committing to cuts or solvent cement.
Components should be assembled dry, noting socket depth, insertion marks, and orientation.
Verify lengths with spacers or temporary clamps, check for interference, and guarantee fittings sit squarely.
Adjust cuts or use shims as needed.
Record final positions before disassembly for accurate gluing later.
Test assemblies and final checks
Having confirmed alignment and marked socket depths during the dry-fitting stage, proceed to full test assemblies to verify every measurement and fit before any cutting or solvent cementing.
Check overall run length, joint gaps, and component orientation. Confirm parts seat fully without stress, verify clearance at fixtures and walls, and remeasure critical dimensions.
Correct any discrepancy, then disassemble for final prepping and cleaning.
Marking conventions to prevent mistakes
Mark clear, consistent marks on pipe and fittings to eliminate guesswork during cutting and assembly. Use contrasting markers, single-line cut indicators, and reference lines for socket depth.
Label orientation and mating pieces with matching symbols or numbers. Record measurement units and tolerances nearby.
Verify each mark against a layout or dry-fit before cutting or solvent application to prevent misalignment and wasted material.
Material-Specific Considerations (PVC vs. CPVC vs. ABS)
Different thermoplastics expand and contract at different rates, so temperature should be considered when measuring and allowing joint clearance for PVC, CPVC, and ABS.
Each material also follows specific fitting standards and nominal sizing that can affect measured lengths and connection compatibility.
Measure with the installed material and fittings in mind to guarantee proper fit and function.
Temperature and expansion differences affecting measurement
Because PVC, CPVC, and ABS each respond differently to temperature changes, accurate measurements require accounting for thermal expansion and contraction.
Measure at the installation temperature when possible, note ambient and expected service temperatures, and apply material-specific expansion coefficients to adjust lengths.
Allow for movement with proper spacing or slip joints; record adjusted dimensions for cutting and fitting to guarantee proper assembly.
Different fitting standards and sizes
Fittings for PVC, CPVC, and ABS follow distinct standards and sizing conventions that affect compatibility and measurement.
PVC typically uses Schedule and nominal sizing; CPVC shares nominal sizes but different pressure and temperature ratings.
ABS employs its own dimensions and joining methods.
Measured outside diameter, socket depth, and wall thickness vary by material and standard, so verify manufacturer specs before cutting or joining.
Quick Checklist Before Cutting or Buying PVC Pipe
Before making any cuts or purchases, a concise checklist helps prevent measurement errors and shortage of materials. The checklist covers exact length and diameter needs, counts of runs and fittings, and allowances for waste or future repairs.
Following this brief review saves time and money on the project.
- Measure twice: confirm finished lengths and actual pipe outside diameter for fittings
- Count items: total runs, fittings, and connector types needed
- Allow extras: add spare pipe and a few extra fittings for mistakes or future fixes
Measurement checklist for lengths and diameters
When preparing to cut or purchase PVC pipe, a concise measurement checklist guarantees the correct lengths and diameters are selected the first time.
Verify inside and outside diameters, note nominal size, measure finished length including fittings, account for wall thickness, mark cut lines, confirm straightness and run, re-measure after marking, and record all dimensions clearly before cutting or ordering to prevent errors.
Shopping checklist: quantities, extra pipe, and fittings
A simple checklist helps guarantee the correct quantities of pipe and the right mix of fittings are on hand, reducing trips to the store and wasted material.
Include measured run lengths, number and types of fittings (elbows, tees, couplings, adapters), expected waste per cut (5–10%), spare straight lengths, primer/solvent and caps, and a small contingency allowance for errors or future adjustments.
Troubleshooting Common Measurement Problems
When a pipe ends up slightly too long or short, practical remedies such as trimming a small excess or adding a short coupler or spacer can restore proper fit.
For mismatched diameters, the use of appropriate reducers or adapters corrects size differences without compromising flow.
If fittings are stuck, careful application of penetrating lubricant, gentle heat where safe, or controlled cutting and replacement will resolve most issues.
What to do when a pipe is slightly too long or short
Measure twice, cut once remains good advice, but small discrepancies still occur; if a PVC pipe ends up slightly too long or short, there are straightforward corrective options.
Trim excess with a fine-toothed saw or deburring tool for a tight fit. If slightly short, use a short coupling, spacer, or solvent-weld sleeve to bridge the gap, ensuring proper alignment and secure adhesive application.
Fixes for mismatched diameters or stuck fittings
Address mismatched diameters and stuck fittings promptly to prevent leaks and wasted materials.
Use appropriate reducers or couplers for differing sizes; chamfer and clean pipe ends for better fit.
For stuck fittings, apply penetrating lubricant, heat gently with a heat gun, and twist with proper grip tools; avoid excessive force to prevent cracking.
Re-measure and test joints before final solvent welding.
Safety and Best Practices When Measuring and Cutting PVC
The section on safety and best practices emphasizes wearing appropriate personal protective equipment and using controlled cutting techniques to reduce injury and guarantee clean cuts.
It also covers proper handling, support, and storage methods to prevent pipe deformation or warping.
Clear, repeatable procedures help maintain accuracy and protect both installer and materials.
Personal protective equipment and safe cutting techniques
Prioritizing safety reduces injury risk when preparing and cutting PVC: workers should wear eye protection, gloves, and a dust mask while securing the pipe and using sharp, appropriate cutting tools on a stable surface.
Maintain firm clamping, cut steadily to avoid binding, and deburr edges with a file or deburring tool.
Inspect tools before use and clear debris promptly to maintain visibility and control.
Proper handling and storage to prevent warping
Store PVC pipe flat, supported, and out of direct sunlight to prevent heat-induced warping and sagging; long runs should rest on evenly spaced racks or rollers every 3–4 feet to maintain straightness.
Store indoors or under cover, avoid stacking heavy loads, and keep pipes off damp ground.
Handle gently, avoid kinking when moving, and inspect before cutting to confirm straightness and integrity.
Useful Resources and Printable Measurement Aids
A concise set of external resources and printable aids can improve measurement speed and reduce errors when working with PVC.
The article points readers to downloadable measurement charts and templates as well as a short list of recommended tools and brands for reliable accuracy. These resources are designed to be practical, easy to print, and ready for on-site use.
- Printable PVC measurement charts and cutting templates (PDF)
- Quick-reference diameter and schedule conversion tables
- Recommended measuring tools and brands for precision (calipers, tape measures, marking gauges)
Links to downloadable measurement charts and templates
When precise cuts and fittings are required, downloadable measurement charts and printable templates provide clear, ready-to-use guides that save time and reduce errors.
Include links to PDF size charts, pipe circumference-to-diameter converters, cutting templates for common fittings, and angle guides.
Offer printer-ready scales and a checklist for verifying printed scale accuracy.
Host files on reliable sites and update versions as standards change.
Recommended tools and brands for accuracy
Choose quality measuring and cutting tools to guarantee repeatable accuracy when working with PVC.
Recommended items include stainless steel tape measures (Stanley FatMax), calipers (Mitutoyo or iGaging digital), combination squares, and reliable PVC cutters or ratchet saws (Milwaukee, Irwin).
Include a Sharpie fine-point marker and deburring tool.
Printable charts and templates from manufacturer websites support consistent layout and verification.
Conclusion
They insisted that measuring PVC pipe was a ritual capable of bending reality: a fraction of an inch allegedly summoned destiny, a misread marking supposedly launched plumbing chaos. In truth, meticulous measurement simply prevents leaks, wasted material, and quiet domestic warfare. Professionals and DIYers alike treat tape, caliper, and eye with almost reverent precision, knowing that a straight-cut, accurately measured pipe can transform a messy project into a small triumph of order over entropy.