How to Add a Sprinkler Head: Step-by-Step Guide for Quick DIY Installation
To add a sprinkler head easily, follow these steps: turn off the zone, dig to expose the pipe, cut and deburr the line, then install a compatible riser or street elbow along with the head using thread sealant or PVC cement. After installation, test for leaks, adjust the arc and radius, and address any low pressure or clogs. Regular maintenance is essential to avoid issues, and be sure to winterize your system as necessary. For detailed instructions, a list of tools, and troubleshooting advice, keep reading.
How to Add a Sprinkler Head Quickly: What This Guide Covers
The guide is meant for homeowners and DIYers with basic tools and a few hours to spare, though a novice can follow the steps with care.
It outlines simple tasks: locating the line, turning off water, removing the old head or digging a new riser, installing the fitting and head, and testing for leaks.
Clear, sequential instructions and safety notes are provided to keep the job quick and reliable.
Who can use this guide and expected time/skill level
Although basic DIY experience helps, this guide is written for homeowners and renters with limited plumbing or landscaping skills who want a quick, reliable way to add a sprinkler head.
It suits beginners comfortable with basic tools and following clear steps. Typical installs take 30–90 minutes, depending on access and soil.
No specialized certification is required; caution and common sense are advised.
Quick overview of the basic steps
Begin by locating the main line and deciding the best spot, then shut off water, expose the pipe, cut and attach a tee or saddle.
Install the riser and sprinkler head, test for leaks and adjust spray, and finally backfill and tidy the area.
The guide summarizes tool needs, safety, assembly steps, common checks, troubleshooting tips, and finishing touches for a quick DIY installation.
Tools and Materials Needed Before You Start
Before beginning, the installer assembles the specific tools and materials required to guarantee a smooth installation. The list below separates essentials, required plumbing parts, and useful extras so nothing is overlooked.
Gathering these items in advance minimizes delays and prevents mistakes.
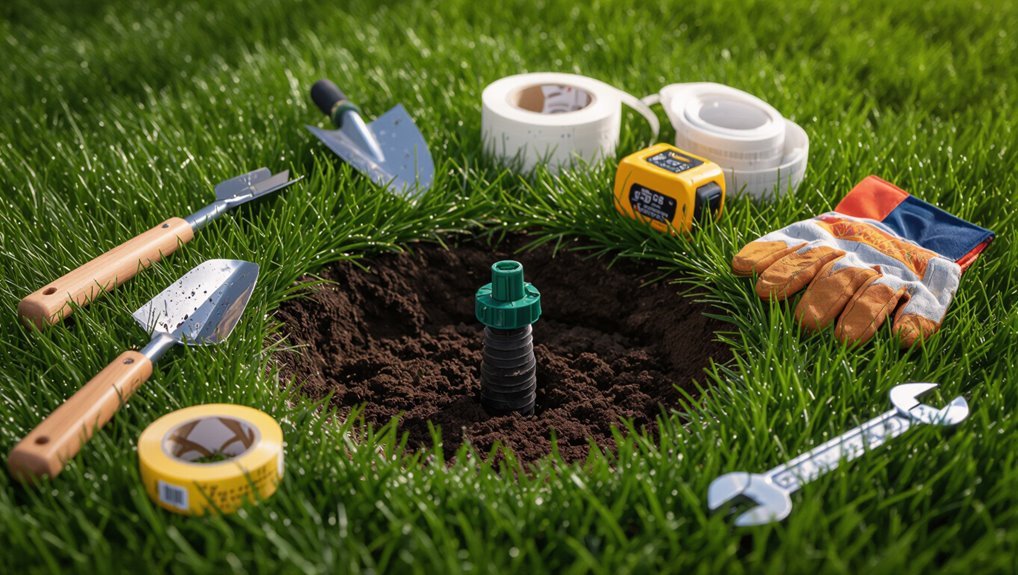
- Essential tools: shovel, PVC cutter, tape measure, adjustable wrench.
- Necessary materials: chosen sprinkler head type, riser, fittings, Teflon (plumber’s) tape, street elbow, pipe.
- Optional helpful items: soil probe, PVC primer/pipe glue, trench plate.
Essential tools (shovel, PVC cutter, tape, wrench, etc.)
A small set of reliable tools makes installing a sprinkler head efficient and durable: a flat spade or trenching shovel for digging, a PVC cutter or fine-tooth saw for clean pipe cuts, adjustable wrench and pliers for fittings, Teflon tape for sealed threads, a utility knife, tape measure, and a marker.
A small bucket or tray keeps removed soil and parts organized.
Necessary materials (sprinkler head types, risers, fittings, Teflon tape, street elbow, pipe)
Several essential materials are required to install a sprinkler head: the correct sprinkler head type for the coverage needed (fixed spray, rotary, or pop-up rotor), appropriate risers and fittings to connect to the lateral line, lengths of PVC or polyethylene pipe sized to the system pressure, a threaded street elbow or tee for the valve-to-head connection, and Teflon tape or pipe thread sealant for all threaded joints.
Select matching barb, compression, or solvent-weld fittings, and verify pipe diameter and pressure ratings match system requirements.
Optional helpful items (soil probe, pipe glue, plumber’s tape, trench plate)
After listing the main parts and fittings, attention turns to optional items that make installation faster, cleaner, and safer.
A soil probe locates lines and clears planting points.
PVC or ABS pipe glue secures solvent-weld joints; plumber’s (Teflon) tape seals threaded fittings.
A trench plate protects wiring and pipes when backfilling or working over shallow trenches, reducing damage risk.
Choosing the Right Sprinkler Head for Your Lawn
Selecting the appropriate sprinkler head begins with recognizing the main types—fixed spray, rotor, and drip—and the situations each suits best.
The installer must then match spray radius, flow rate and arc to the specific zone layout to guarantee even coverage.
Finally, understanding PSI and GPM requirements from the system and the sprinkler’s specifications prevents poor performance and uneven watering.
Types of sprinkler heads and when to use each
Sprinkler heads come in several distinct styles—fixed spray, rotary, impact, and drip emitters—each suited to different lawn sizes, shapes, and water-pressure conditions.
- Fixed spray: best for small, uniform areas; short radius, precise coverage.
- Rotary: ideal for medium to large lawns; moves slowly for even distribution.
- Drip/impact: use drip for beds and water conservation; impact for older systems needing robust reach.
Matching spray radius, flow rate, and arc to your zone
Choosing the right head involves more than style; radius, flow rate, and arc must match the specific demands of each irrigation zone.
Select heads whose spray radius covers targeted turf without overspray. Match arc settings to shape beds and avoid gaps.
Guarantee flow distribution suits existing emitters so zones run evenly. Adjust or swap nozzles to balance coverage and conserve water.
How to read PSI and GPM requirements
How much water pressure and flow does a zone actually need? The guide explains reading PSI (pressure) and GPM (flow): check controller or pump specs, measure with a pressure gauge and flow meter, then compare to sprinkler head requirements.
Match head PSI range and required GPM per nozzle to zone capacity. Allow margin for pressure loss from elevation, valves, and piping.
Locating the Installation Point Safely
Before cutting any soil, the installer maps the irrigation zone and traces existing water lines to understand layout and flow.
They confirm underground utilities and applicable local codes to prevent damage and guarantee compliance.
Finally, they mark the chosen spot to provide ideal coverage while respecting required setbacks.
How to map your irrigation zone and water lines
A clear map of the irrigation zone and existing water lines is essential to locate a safe installation point for a new sprinkler head.
The installer should sketch zone boundaries, valve locations, main and lateral line paths, and sprinkler spacing.
Mark pipe depths and fittings observed during past repairs.
Label pressure zones and note nearby landscape features to guarantee proper coverage and avoid conflicts with existing components.
Checking for underground utilities and local codes
Locate all underground utilities and verify local permitting requirements before digging: call the national one-call number to have gas, electric, water, sewer, and telecom lines marked;
review municipal codes for setback, depth, and backflow-prevention rules;
consult utility maps and previous repair records to reconcile markings with the irrigation map;
and document any conflicts that require route changes, hand excavation, or professional coordination.
Follow notification timelines and retain clearance confirmation.
Marking the spot for optimal coverage and setbacks
When the planned irrigation layout is confirmed, the installer marks each sprinkler head location so spacing, arc coverage, and municipal setback requirements align precisely. Using a measuring tape, spray paint, and a stake, they verify distance from structures, property lines, and sidewalks.
Marks reflect nozzle radius and overlap for uniform coverage, avoiding obstructions and complying with utility clearances and local setback regulations.
Step-by-Step Installation Process
The installation process proceeds through five clear steps to guarantee a secure, watertight sprinkler connection.
First, the system is shut off and pressure relieved before excavating to expose the pipe and cutting it to fit the chosen fittings.
Next, the riser or elbow is installed and the sprinkler head attached.
Then the hole is backfilled with the head positioned flush with the soil.
Step 1 Shutting off water and relieving system pressure
Begin by shutting off the main irrigation valve to stop flow into the sprinkler zone being worked on.
Then open a nearby manual drain or zone valve to relieve residual pressure; failing to do so can cause pressurized water to spray when fittings are loosened.
Verify pressure is zero at the test fitting or by briefly opening a spigot.
Then secure valves and tag the control panel to prevent accidental reactivation.
Step 2 Excavating the area and exposing the pipe
After confirming the system is depressurized and valves are secured, excavation can start to reach the sprinkler line.
The worker digs carefully along the marked route, removing sod and soil to expose the pipe without striking it. Hand tools are preferred near utilities; a trench wide enough for access is created.
Debris is set aside, and the exposed pipe is cleaned for inspection.
Step 3 Cutting the pipe and preparing fittings
Carefully cut the exposed sprinkler pipe at the marked location using an appropriate cutter or saw, ensuring a square, burr-free end for a secure connection.
Deburr and chamfer the cut edge, remove debris, and dry the pipe.
Select compatible fittings and primer/adhesive if required.
Test-fit components, align threads or sockets, and mark orientation before final joining to guarantee leak-free assembly.
Step 4 Installing riser or elbow and attaching the sprinkler head
Install the riser or elbow by applying thread sealant or PVC cement as appropriate, threading or solvent-welding the fitting onto the prepared pipe until it seats squarely.
Allow cure time per product instructions.
Attach the sprinkler head to the riser, tightening by hand then a quarter turn with a wrench if needed.
Confirm proper orientation and check for secure connection before pressurizing the line.
Step 5 Backfilling and positioning the head flush with soil
Begin backfilling by placing excavated soil back around the riser in layers, tamping each layer lightly to eliminate large voids while keeping the sprinkler head centered.
Continue until soil reaches surrounding grade, keeping the nozzle tip flush with or slightly below finished soil level.
Firm the top layer gently, remove debris, and guarantee surrounding turf or mulch sits evenly for unobstructed spray and stability.
Step 6 Turning water on and initial inspection
Turn the main supply valve on slowly and observe the system as pressure builds, checking for any immediate leaks, unusual noises, or misaligned heads.
Note spray patterns and adjust the nozzle or riser to guarantee even coverage.
Inspect joints and the new head for seepage.
If problems appear, shut off water, depressurize, and tighten or reseat fittings before retesting.
Adjusting and Testing the New Sprinkler Head
After installation, the new sprinkler head should be tested for spray pattern, distance, and uniformity to confirm proper coverage.
The technician can adjust arc, radius, and swap nozzles as needed to correct gaps or overspray.
If issues persist, basic troubleshooting—checking water pressure, debris in the nozzle, or alignment—usually identifies the problem.
How to test spray pattern, distance, and uniformity
Once installed, the new sprinkler head should be tested for spray pattern, distance, and uniformity before returning the system to regular use.
Activate the zone, observe coverage, and place markers or cups at measured intervals to record sprinkle depth.
Rotate or walk the arc to confirm consistent reach.
Note any dry spots or overspray and document results for later adjustment.
Adjusting arc, radius, and nozzle if needed
Begin by inspecting the head’s arc and spray while the zone runs, noting any gaps, overlaps, or excessive distance. Adjustments should be made only after confirming the problem locations.
Use the adjustment key or screwdriver to set arc limits, change the nozzle to alter flow and radius, and fine-tune rotation speed if applicable.
Re-test and repeat until coverage is uniform and non-overspraying.
Troubleshooting common spray issues
Diagnose spray problems by running the zone and observing the new head from several angles and distances, noting spray pattern, droplet size, and any misting, clogging, or uneven coverage.
Clean or replace clogged nozzles, check pressure (use a gauge) and install a pressure regulator if needed, adjust arc and radius, reposition for obstructions, and retest until distribution is uniform and droplet size matches nozzle specifications.
Common Problems and How to Fix Them
Common issues after installing a sprinkler head often involve pressure, leaks, sticking pop-ups, and spray alignment.
The following concise list highlights typical faults and quick fixes to check first:
- Low pressure or poor coverage — check for closed valves, clogged nozzles, or zone overloading.
- Leakage at fittings or riser — tighten or replace seals and use plumber’s tape; replace damaged risers.
- Pop-up not retracting or misaligned spray — clean or replace the head, adjust nozzle direction, and trim nearby obstructions.
Low pressure or insufficient coverage
Low water pressure or uneven coverage in a new sprinkler installation often stems from restricted flow, incorrect head selection, or improper layout; identifying whether the issue is system-wide or isolated to specific heads narrows the troubleshooting steps.
Check valve settings, mainline supply, and zone flow rate.
Replace low-radius heads with appropriate spray or rotor types, adjust nozzle sizes, and reconfigure spacing to restore uniform coverage.
Leakage at fittings or riser
After addressing pressure and coverage issues, attention turns to leakage at fittings or risers, which can waste water and undermine system performance.
Inspect joints for cracks, loose connections, or damaged thread tape.
Shut off water, tighten fittings or replace O-rings, apply fresh Teflon tape, and swap compromised risers or couplings.
Test system under pressure to confirm repair and prevent recurrence.
Pop-up head not retracting or stuck
When a pop-up sprinkler head fails to retract, it can leave the lawn vulnerable to damage and create tripping hazards. The issue typically stems from debris, damaged seals, misaligned stems, or inadequate water pressure.
To fix it, flush and clean the head, inspect and replace torn seals or springs, realign the stem, and verify system pressure.
Replace the unit if mechanical failure persists.
Misaligned spray and overspray onto hardscapes
A misaligned spray or overspray onto driveways, sidewalks, and patios often follows the same wear-and-tear issues that can affect pop-up heads—stems shifted by impact, bent nozzles, or seals that no longer hold the spray pattern—resulting in wasted water and wet hardscapes.
Inspect alignment, straighten or replace damaged risers, swap worn nozzles for correct arc and radius, and use adjustable nozzles or shields to prevent runoff.
Maintenance Tips to Keep the Sprinkler Working
Regular seasonal checks, including basic winterization, help prevent freeze damage and prolong system life.
Periodic cleaning of nozzles and timely replacement of worn seals or heads maintain proper coverage and flow.
Clear criteria for repair versus replacement—cost, extent of damage, and part availability—guide long-term decisions.
Seasonal checks and winterization basics
Although the sprinkler system performs reliably through spring and summer, seasonal checks and winterization are essential to prevent freeze damage and guarantee long-term operation.
Inspect valves, timers, and visible piping for leaks or wear before first frost.
Drain or blow out lines, shut off and insulate backflow preventers, and store removable components indoors.
Schedule a final system test after thawing.
Cleaning nozzles and replacing worn parts
After seasonal checks and winterization confirm the system survived cold months, attention turns to nozzle care and replacing worn parts to restore full performance.
Inspect for clogs, mineral buildup, and cracked seals. Remove nozzles, flush lines, soak tips in vinegar if needed, and clear debris with a soft brush.
Replace deteriorated O-rings, filters, and nozzles to maintain spray pattern and prevent leaks.
When to replace versus repair
Decide between repair and replacement by evaluating the sprinkler’s age, frequency of problems, cost of parts versus a new head, and whether performance issues stem from wear or a fixable obstruction.
If leaks, broken risers, or repeated clogging persist despite cleaning, replacement is more economical.
Repair when damage is minor, seals or nozzles are inexpensive, and the unit otherwise functions reliably.
Cost and Time Estimates for DIY Installation
A brief cost and time overview helps a homeowner plan a DIY sprinkler head installation without surprises. Typical material costs and an average time per task are summarized below to aid quick budgeting and scheduling. The following table lists common items and estimated hours for each task.
| Item / Task | Typical Material Cost (USD) | Average Time Required |
|---|---|---|
| Sprinkler head | $5–$20 | 15–30 min |
| Pipe/connector fittings | $3–$15 | 10–30 min |
| Trenching/repair materials | $0–$40 | 15–60 min |
| Miscellaneous (sealant, clamps) | $2–$10 | 5–15 min |
Typical material costs breakdown
Several common components make up the bulk of material costs for a DIY sprinkler-head installation: the sprinkler head itself, PVC or polyethylene pipe, fittings (elbows, tees, couplings), valves or valve box components, Teflon tape or primer/cement, and any necessary tools like a trenching shovel or pipe cutter.
Typical price ranges:
- sprinkler head $5–20
- pipe $0.50–2/ft
- fittings $1–8 each
- valve assembly $15–60.
Average time required by task
Typical DIY sprinkler-head installations require a series of discrete tasks—site measurement, trenching, pipe layout and cutting, fitting assembly, head installation, and system testing—each with its own average time range that depends on soil conditions, experience, and tools available.
Estimated times: measurement 10–20 minutes, trenching 30–90 minutes, layout/cutting 20–40 minutes, fittings 15–30 minutes, head install 10–20 minutes, testing 10–25 minutes.
When to Call a Pro
When problems go beyond simple head replacement—such as complex repairs, high-pressure system issues, or rearranging large zones—it is advisable to seek a professional.
Signs that warrant service include persistent leaks despite basic fixes, fluctuating or excessively high pressure, and multiple heads failing across a zone.
Calling a pro can prevent further damage and guarantee system settings and pressure are correctly restored.
Complex repairs, high-pressure systems, and large zone changes
If a sprinkler system requires extensive pipe replacement, operates at unusually high pressure, or needs zone layout changes that affect large areas, a trained irrigation professional should be consulted.
Professionals assess system hydraulics, recommend pressure-regulating equipment, and reconfigure zone valves and wiring to maintain coverage and prevent water waste.
Complex permits, trenching, and specialized tools also justify hiring licensed contractors for safety and code compliance.
Signs the problem requires professional service
Recognize clear indicators that a sprinkler issue exceeds DIY scope: persistent low or no water flow across multiple heads, loud banging or hissing that suggests dangerous pressure problems, visible leaks or soggy areas despite valve closures, recurring electrical faults or burned control components, and any work requiring deep trenching, mains replacement, or municipal permits.
Hire licensed professionals for diagnosis, high-pressure repairs, major pipe replacement, or permit-required modifications.
Quick Safety Checklist Before You Finish
Before wrapping up, a brief safety checklist verifies the new sprinkler head functions correctly and is documented for future maintenance.
The technician or homeowner should verify there are no leaks, confirm correct alignment and sufficient clearance, and update the irrigation map and service notes. Completing these steps reduces rework and helps track system changes over time.
- Inspect for leaks, correct alignment, and proper clearance.
- Run a short test cycle to confirm spray coverage and no obstructions.
- Record the new head on the irrigation map and add maintenance notes.
Final checks for leaks, alignment, and clearance
Conduct a systematic walk‑through to confirm the sprinkler head operates correctly, sits true in its mount, and has adequate clearance from plants, hardscapes, and walkways.
Inspect for drips at fittings, verify spray pattern and radius, and check pop‑up travel without obstruction.
Tighten loose connections, adjust nozzle aim, level the riser, and remove debris.
Perform a brief pressure test and recheck after a full cycle.
Documentation: update irrigation map and notes
Document the change immediately: update the irrigation map and maintenance notes to reflect the new sprinkler head’s location, nozzle type, and any adjustments made.
Include installation date, pressure setting, spray radius, and controller zone. Note nearby obstacles, recommended inspection intervals, and parts used.
Store a digital copy and a printed version near the controller for quick reference during repairs and seasonal maintenance.
Conclusion
In minutes, even the most irrigation-averse homeowner can transform a thirsty lawn into a verdant oasis, wielding a mere handful of tools like a small army of turf-saving engineers. This guide condenses expertise into doable steps, promising near-miraculous results without summoning a contractor. With modest effort and attention to placement, parts, and upkeep, a single added sprinkler head can rescue parched grass and restore suburban harmony—almost instantly and undeniably satisfying.