How to Fix Toilet Flange Bolts: A Step-by-Step Repair Guide for a Secure Toilet
To fix toilet flange bolts effectively, start by shutting off the water supply and emptying the bowl. Inspect the flange for any damage, such as cracked or corroded bolt posts. If the bolts are stripped, replace them with stainless or brass ones, or use a repair kit for missing posts. If the flange is severely damaged, consider replacing it entirely. After securing the new bolts, tighten the nuts evenly and check for any wobbling. This guide will outline the necessary tools, costs, and troubleshooting steps for a successful repair.
What a Toilet Flange Bolt Is and Why It Matters
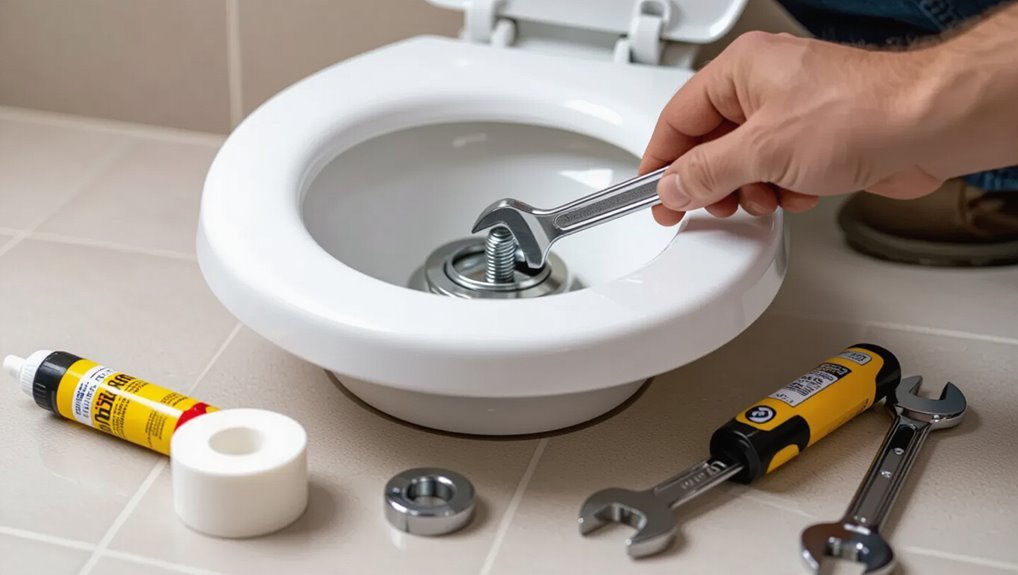
A toilet flange bolt secures the toilet to the flange—a ringed fitting that anchors the fixture to the drain and maintains a wax seal—so its function is to keep the toilet stable and watertight.
When flange bolts are loose, corroded, or the flange itself is cracked, leaks, wobbling, and damaged flooring can result.
Minor bolt issues can often be repaired, but extensive corrosion or a broken flange typically warrants replacement to guarantee a reliable seal and secure mounting.
Definition and function of the flange and bolts
Toilet flange bolts secure the closet flange—a circular fitting that connects the toilet to the drainpipe and anchors it to the floor—and consequently play a critical role in preventing leaks, wobble, and sewer gas escape.
The flange provides a sealed interface; bolts fasten the toilet base, align the wax ring, and transmit load to the subfloor.
Guidance on how to fix toilet flange bolts covers replacement and torque.
Common consequences of damaged or loose flange bolts
With the flange and bolts responsible for sealing and securing the fixture, damage or looseness quickly leads to problems beyond a wobbly bowl.
Consequences include leaks that soak subflooring and encourage rot, unstable attachment risking cracks or falls, sewer gas odors, and accelerated wax ring failure.
Left unaddressed, water damage and structural deterioration increase repair scope and costs.
When to repair versus when to replace the flange
When is repair sufficient and when does the flange demand replacement?
Assessment hinges on damage extent: minor cracks, loose bolts, or surface corrosion often merit repair—shimming, epoxy, or bolt replacement.
Severe cracks, warped or corroded metal, missing sections, or sewer line misalignment require full flange replacement.
Structural compromise, persistent leaks, or recurring instability also justify replacement to prevent further damage.
Quick Answer: How to Fix Toilet Flange Bolts Safely
A simple repair typically involves replacing or tightening the flange bolts and securing the toilet to the flange.
This task usually takes 30–90 minutes, requires basic DIY skills, and uses tools such as a wrench, screwdriver, replacement bolts or a repair kit, and possibly a hacksaw.
Safety precautions include shutting off water, draining the bowl, and wearing gloves and eye protection.
One-sentence repair summary
Tighten or replace corroded flange bolts, confirm the flange is level and securely fastened to the floor, and seat the toilet on a fresh wax ring to restore a leak-free, stable connection.
Ensure bolt alignment and proper washer/nut torque, replace damaged flange sections or use a repair ring when necessary, and verify the toilet sits squarely with no rocking before reconnecting water and testing for leaks.
Time, skill level, and tools required
Although the job is straightforward for anyone with basic DIY experience, estimating about 1–2 hours from toilet removal to reseating provides a realistic timeframe.
Required skill is beginner to intermediate; attention to seal alignment matters. Basic tools suffice; specialty parts may be needed.
- Gloves and safety glasses
- Adjustable wrench and socket set
- Screwdriver and putty knife
- Replacement flange bolts and wax ring
Tools and Materials You’ll Need
Before starting the repair, the reader is advised to gather essential tools and safety gear such as adjustable wrenches, a screwdriver, gloves, and eye protection.
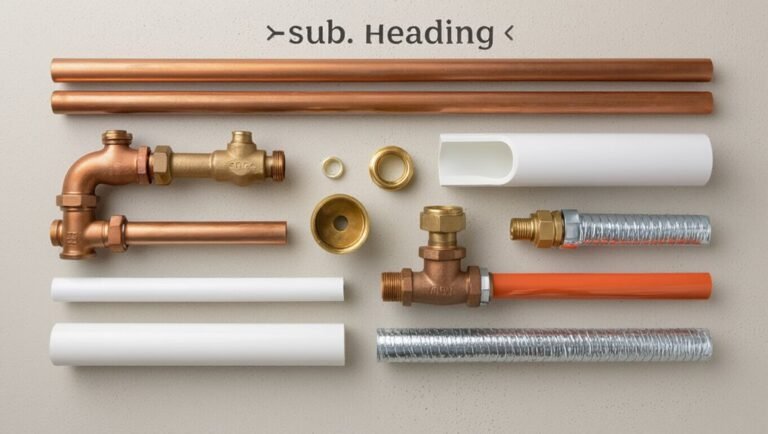
Replacement parts like new flange bolts, washers, and a replacement flange or repair ring should be on hand.
Optional materials—sealant, plumber’s putty, and silicone—can simplify installation and improve longevity.
Essential tools and safety gear
Gather the right tools and safety gear to guarantee the flange bolt repair proceeds efficiently and without avoidable risk.
Recommended items focus on control, access, and protection. Use tools that fit bolts, provide leverage, and resist corrosion.
Follow basic safety: cut power if needed, ventilate, and avoid chemical exposure.
- Adjustable wrench
- Screwdriver set
- Work gloves
- Safety goggles
Replacement parts and optional materials
With basic tools and safety gear in place, attention shifts to the replacement parts and optional materials needed to complete a flange bolt repair. Necessary components guarantee a durable, watertight connection; optional items improve longevity and ease installation.
- Wax ring or rubber gasket
- Stainless steel flange bolts and nuts
- Flange repair ring or spacer
- Silicone sealant and thread lubricant
Preparing the Toilet and Work Area
The plumber first shuts off the water supply and drains the tank to prevent spills.
Next, the toilet is removed following a clear step-by-step checklist—disconnecting supply lines, unbolting, and lifting the bowl.
Finally, the flange and surrounding flooring are inspected for damage or rot before any repairs proceed.
Shutting off water and draining the tank
Begin by locating and closing the toilet shutoff valve—usually a small knob or lever on the wall or floor behind the toilet—to stop water flow into the tank.
Flush once to empty most water. Hold the handle until the tank drains, then sponge or towel remaining water from the tank and bowl.
Place a bucket and rags nearby to catch drips and protect the floor.
Removing the toilet (step checklist)
After the tank and bowl are drained and the shutoff valve secured, attention turns to preparing the toilet and work area for removal.
Protective gloves and eyewear are donned. Water supply disconnected.
Old wax ring exposed by removing tank-to-bowl bolts if needed. Supply line detached.
Floor around base cleared, towels placed to catch residual water, and helper positioned for safe lifting and straight vertical removal.
Inspecting the flange and surrounding flooring
Inspecting the flange and surrounding flooring starts with a careful visual and tactile survey to identify corrosion, cracks, or rot that could compromise a secure seal.
The inspector checks bolt condition, flange alignment, and wax ring remnants, probes for soft spots in subflooring, and measures flange height relative to finished floor.
Any deterioration is documented for repair or replacement before reinstalling the toilet.
Four Common Flange Bolt Problems and How to Diagnose Them
Four common issues affect toilet flange bolts: stripped or corroded bolts, broken or missing bolt posts, warped or cracked flanges, and flanges set below the finished floor.
Each problem produces distinct signs—loose or wobbly toilets, visible damage at the bolt area, cracks around the flange, or an uneven seal.
Identifying the specific symptom guides the correct repair approach.
Stripped or corroded bolts
Stripped or corroded flange bolts compromise the toilet’s secure attachment to the floor and can cause wobbling, leaks, or difficult removal during maintenance.
Inspect bolt heads and threads for rounding, rust, or missing material. Test fit a wrench; failure to grip indicates stripping.
Corrosion visible as pitting or flaking suggests replacement. Use stainless or brass replacements and anti-seize to prevent recurrence.
Broken or missing bolt posts
When bolt posts are broken or missing the toilet loses its primary anchor, causing gaps, instability, or an inability to bolt the fixture down at all.
Inspection reveals fractured plastic or corroded metal posts, uneven toilet rocking, and visible flange damage.
Diagnosis requires removing the toilet, evaluating flange integrity, and determining if post replacement, flange repair ring, or full flange replacement best restores secure, level mounting.
Warped or cracked flange
If bolt posts are damaged beyond repair, the problem often extends to the flange itself: a warped or cracked flange can’t hold bolts straight or keep the toilet seated evenly.
Inspect for visible cracks, distortion, or separation from the hub. Test bolt alignment and wobble by hand.
Replace a deformed flange or install a flange repair ring; guarantee solid substrate and secure attachment before reinstalling the toilet.
Flange sitting below finished floor level
A common issue is a toilet flange that sits too far below the finished floor, preventing the wax ring from sealing properly and causing wobble or leaks.
This condition often results from floor refinishing or improper installation.
Diagnosis includes measuring flange height relative to floor.
Repair options: use flange extenders, a thicker wax ring, or reset the flange to proper level; guarantee secure bolt alignment and sealing.
Step-by-Step Repairs for Each Problem Type
The following section gives concise, step-by-step repairs tailored to each common flange bolt issue.
It covers replacing stripped or corroded bolts, repairing broken or missing bolt posts, fixing a cracked or warped flange, and raising a flange that sits below the floor.
Each procedure lists required tools, safety notes, and clear sequencing to restore a secure toilet connection.
Replacing stripped or corroded bolts
The procedure begins by removing the damaged bolts and thoroughly cleaning the flange to guarantee a secure seating surface.
Corroded remnants and old sealant are cleared so the mounting holes and flange face are visible and free of debris.
New brass or stainless steel bolts are then installed to resist future corrosion and restore reliable toilet anchoring.
Removing old bolts and cleaning the flange
Begin by shutting off the water and flushing the toilet to empty the bowl.
Remove caps, nuts, and washers; cut corroded bolts if necessary and extract remaining stubs with pliers or an oscillating tool.
Scrape old wax and debris from the flange, inspect for cracks or lifting, and clean with a stiff brush and solvent.
Dry the flange area thoroughly before proceeding.
Installing new brass or stainless bolts
Install new brass or stainless flange bolts by selecting corrosion-resistant replacements sized to match the flange and toilet base; these will restore a secure, leak-free connection after stripped or corroded bolts were removed.
Position nylon washers and rubber bushings to protect the porcelain, insert bolts into flange slots, align toilet over bolts, tighten nuts evenly to compress the wax ring, and avoid overtightening to prevent cracking.
Repairing broken or missing bolt posts
When bolt posts are broken or missing, the usual solutions are to rebuild the flange area or install new anchors.
A flange repair kit can replace damaged material with options like polymer, stainless steel, or composite patches to restore mounting points.
Alternatively, threaded inserts or bolt anchors can be installed into the flange or subfloor to provide secure, replaceable posts.
Using a flange repair kit (material options)
If the flange’s bolt posts are cracked, sheared off, or missing altogether, a flange repair kit provides a straightforward way to restore secure anchor points for the toilet’s closet bolts.
Kits come in plastic, nylon, stainless steel and brass options; plastic is economical, nylon resists chemicals, stainless steel offers strength and corrosion resistance, and brass combines durability with easy threading.
Choose by flange material and load requirements.
Installing threaded inserts or bolt anchors
Begin by evaluating the damage to the flange area and the substrate to determine whether threaded inserts or bolt anchors are appropriate. Inserts suit sound plastic or metal flanges with intact bolt holes, while anchors are better for crumbled or missing posts and for repair over tile or concrete.
Install inserts by drilling, tapping, and seating the insert. Anchors require proper hole sizing, adhesive or epoxy setting, and curing before bolting.
Fixing a cracked or warped flange
When a flange is cracked or warped, the choice is usually between a temporary epoxy repair and a full replacement.
The article will compare durability, cost, and suitability of epoxy fixes versus replacing the flange.
It will also outline step-by-step removal and installation procedures for both PVC and cast-iron flanges.
Epoxy repair vs. replacing the flange
Assess whether the flange damage is limited to small cracks or whether it is warped, broken, or missing significant material before choosing between epoxy repair and full replacement.
Epoxy suits minor hairline cracks and stabilizes mounting surfaces when the flange remains structurally sound.
Full replacement is advised for warped, extensively cracked, or fragmented flanges that compromise seal integrity, bolt alignment, or toilet stability.
How to remove and replace a PVC or cast-iron flange
If inspection shows the flange is warped, cracked beyond hairline fissures, or missing chunks that prevent a snug seal and proper bolt alignment, replacement is the safest course.
Drain and remove the toilet, unfasten flange screws, cut or detach old PVC or cast-iron flange, clean pipe, install appropriate replacement flange (PVC adapter or cast-iron sleeve), secure to floor, align bolts, and reinstall toilet.
Raising a flange that sits below the floor
When the flange sits below the finished floor, the preferred solutions are flange extenders or ring adapters to bring the sealing surface up to level.
Installers should select extenders sized to match the flange diameter and stack no more than what the manufacturer permits, using a nonhardening sealant between layers.
For minor height differences, thin shims may be used with a compatible sealant and proper bolt alignment to guarantee a watertight, stable connection.
Using flange extenders or ring adapters
To raise a toilet flange that sits below the finished floor, a flange extender or ring adapter provides a quick, reliable way to rebuild the flange height without removing the existing flange or redoing the subfloor.
The installer selects a compatible extender, aligns bolt locations, applies approved sealant or gasket to the mating surface, then secures the extender with screws or bolts per manufacturer instructions for a stable flange.
Best practices for shimming and sealing
Although a flange extender often solves a low-flange issue, proper shimming and sealing guarantee a stable, leak-free connection between the toilet and the waste line.
Use corrosion-resistant shims to level the bowl, trimming for even contact.
Compress a new wax or wax-free gasket correctly, then seal flange edges with waterproof silicone.
Tighten bolts evenly and recheck for movement and leaks before finalizing.
Reinstalling the Toilet and Testing for a Secure Seal
The toilet is lowered onto the flange with the wax ring or alternative seal properly centered to guarantee an even compression under the bowl.
Bolts are aligned and tightened evenly in small increments to secure the base without cracking the porcelain.
After reconnecting the water supply, the fill and flush are tested while checking all connections and the flange area for leaks, with final adjustments made as needed.
Setting the wax ring or alternative seal
Once the flange bolts are aligned and the seal chosen, the toilet can be lowered onto the wax ring or alternative seal with steady, even pressure to compress the seal and create a leak-proof connection.
Careful vertical lowering guarantees an even seal; rocking or shifting should be avoided.
Excess sealant should be removed, and a visual inspection confirms proper compression before proceeding to bolt installation.
Aligning and tightening the bolts without cracking the base
Carefully lower the toilet until the base settles squarely over the flange bolts.
Then align the bolt slots with the toilet’s mounting holes to guarantee even contact with the seal.
Place washers and nuts loosely, alternating tightening each side in small increments with a wrench, checking level frequently.
Stop when snug; avoid over-torquing.
Confirm no rocking before proceeding.
Reconnecting water, checking for leaks, and final adjustments
With the bowl secured and bolts snug, attention shifts to restoring the water supply and verifying a watertight installation.
The shutoff valve opens slowly while the tank fills; connections are inspected for drips.
Flush cycles check seal integrity and bolt stability. Minor wobble prompts tightening or shim placement.
Final visual and tactile checks confirm no leaks and solid, level seating before cleanup and regular use.
When to Call a Professional
If the flange problem reveals signs of major sewer-pipe damage or shifting floor structure, a professional assessment is warranted to prevent further deterioration.
Homeowners should weigh the estimated scope of work and repair costs against DIY risks and capabilities.
A licensed plumber or structural contractor can provide diagnostics, accurate estimates, and safe repair options.
Signs of major sewer-pipe or structural issues
Recognize that persistent wobbling, recurring leaks despite flange repairs, foul sewer gas odors, sewage backups, or visible cracks and sagging in the bathroom floor indicate problems beyond simple flange maintenance; these signs suggest compromised sewer pipes, deteriorating subflooring, or shifting structural supports and warrant professional inspection and repair.
Immediate evaluation is advised when odors, backups, structural movement, or spreading moisture stains appear to prevent escalation and health risks.
Cost and scope considerations for professional repair
Evaluating when to call a professional hinges on both the visible damage and the likely underlying work required: simple bolt replacement and wax-ring swaps are low-cost, DIY-friendly tasks, while corroded flanges, broken closet bolts embedded in cast-iron or PVC, rotted subflooring, or compromised waste lines demand licensed plumbers or carpenters and substantially higher labor and material costs.
Professionals assess scope, provide permits, warranty work, and prevent recurrence.
Preventive Maintenance and Longevity Tips
Preventive measures can extend the life of flange bolts by using corrosion-resistant materials like stainless steel or brass and applying anti-seize or protective coatings.
Regular inspections—especially seasonal checks for moisture, loose fasteners, and wax-ring integrity—help catch issues early.
During flooring projects, bolts and flange areas should be temporarily protected or raised to prevent crushing, corrosion, or misalignment.
Recommended materials to prevent future corrosion
When exposed to moisture and chemicals common in bathrooms, standard steel fasteners corrode quickly.
Choosing corrosion-resistant materials like stainless steel, brass, or nylon-coated bolts greatly extends flange longevity. Stainless steel (especially 304 or 316 grades) offers the best balance of strength and rust resistance, while brass resists corrosion and galvanic reactions. Nylon-coated or plastic anchors provide a nonmetallic alternative where metal contact is problematic.
Use compatible washers, silicone sealant, and dielectric tape to prevent dissimilar metal corrosion.
Consider stainless nuts and marine-grade hardware in coastal homes.
Routine checks and seasonal maintenance
Inspect flange bolts and surrounding hardware on a regular schedule—at least twice a year and after any plumbing work—to catch corrosion, looseness, or seal degradation early.
Routine checks extend service life and prevent leaks. Record findings, tighten bolts to spec, and replace damaged parts promptly.
- Document condition and actions
- Check torque and tightness
- Inspect seals and wax ring
- Replace corroded bolts
How to protect flange bolts during flooring projects
Protect flange bolts with simple, deliberate steps before and during flooring work to prevent damage, corrosion, and misalignment.
Cover bolts with caps or tape, remove and store spare bolts in labeled containers, and shield the flange with a plywood or cardboard template while cutting or sanding.
Re-check bolt alignment and torque after flooring installation, and apply anti-seize or light grease to protect threads before reassembly.
Comparison of Repair Options and Estimated Costs
A concise comparison of repair approaches helps the reader weigh short-term fixes against long-term replacements. DIY repair kits typically cost less in materials but may be limited by flange condition, while full flange replacement incurs higher material and labor expenses but restores structural integrity. The following table summarizes typical cost ranges and expected labor involvement.
| Option | Material Cost Range (USD) | Labor Estimate (hours / cost) |
|---|---|---|
| DIY repair kit | $10–$50 | 0.5–1 hr (DIY) |
| Partial flange repair | $20–$100 | 1–2 hrs ($80–$250) |
| Full flange replacement | $50–$250 | 1.5–3 hrs ($150–$500) |
DIY repair kits vs. full flange replacement
When a toilet flange shows minor damage, homeowners must decide between inexpensive DIY repair kits and replacing the entire flange; each option balances cost, durability, and required skill.
DIY kits suit hairline cracks or loose bolt strips, offering quick fixes with basic tools but limited longevity.
Full flange replacement demands more work and skill yet restores structural integrity and long-term reliability for recurring or severe damage.
Material cost ranges and labor estimates
After weighing DIY kits against full flange replacement, cost becomes the deciding factor for many homeowners.
Materials for a DIY kit typically range $10–$50; replacement flanges, $20–$100.
If hiring a plumber, labor adds $75–$200 per visit for minor repairs, $200–$500 for full replacement.
Emergency or complex jobs can exceed these estimates. Budget accordingly.
Troubleshooting Checklist for Persistent Problems
When problems persist after initial repairs, a concise troubleshooting checklist helps isolate root causes and guide next steps. The checklist focuses on leak sources, flange seating, bolt integrity, and environmental factors that cause recurring failure.
Technicians should follow each step methodically before escalating to more invasive repairs.
- Verify wax ring seal and flange alignment for sources of continued leaks.
- Inspect flange flatness and toilet base contact points when rocking occurs after bolts are tightened.
- Check bolt material, nearby electrochemical exposure, and mounting hardware fit when corrosion recurs.
- Confirm flange-securement to subfloor and presence of hidden cracks or movement that undermine repairs.
Leak persists after reseating toilet
If a leak persists after reseating the toilet, the source is likely not the flange alignment alone and requires a systematic check of seal, hardware, and surrounding fixtures.
Inspect the wax or waxless gasket for damage or improper compression, verify flange integrity and correct height, confirm bolts and caps are sealed, examine supply line and shutoff valve connections, and check nearby pipes and floor for hidden cracks or moisture paths.
Toilet rocks after tightening bolts
One clear step is to confirm that the toilet still rocks despite bolts being tightened; this indicates that the issue lies not with loose hardware but with uneven contact points or compromised flange/closet flange height.
Inspect the bowl-to-floor interface, check for warped base, floor gaps, or broken flange.
Use shims under the base or replace/raise the flange to restore full, even contact before final tightening.
Recurrent bolt corrosion despite replacement
Repeated corrosion of replacement toilet flange bolts signals an underlying environmental or material mismatch rather than simple wear.
Investigate persistent moisture, chemical exposure, or stray electrolytes from dissimilar metals.
Recommend stainless steel or brass fasteners, nonmetallic alternatives, and dielectric washers.
Verify flange and floor drainage, seal integrity, and ventilation.
Consider protective coatings and routine inspection to prevent accelerated galvanic or chemical corrosion.
Step-by-Step Safety Checklist Before You Start
Before beginning work on the toilet flange, the technician confirms that water and power sources are secured, the workspace is cleared, and appropriate protective gear is on hand.
A concise safety checklist guarantees efficient, hazard-free repairs and protects plumbing integrity.
- Shut off water and unplug nearby electrical devices.
- Wear gloves and eye protection.
- Ventilate and clear area.
- Keep tools and replacement parts organized.
Conclusion
Like a ship’s anchor finally lashed to a steady pier, the repaired flange bolts restore the toilet’s quiet dignity and prevent future leaks. The reader now knows how to identify corroded, stripped, misaligned, or missing bolts, choose the right tools and parts, and perform secure repairs or replacements. With routine checks and proper installation, what once wobbled will remain firmly fastened—steady as a well-set course on calm waters.