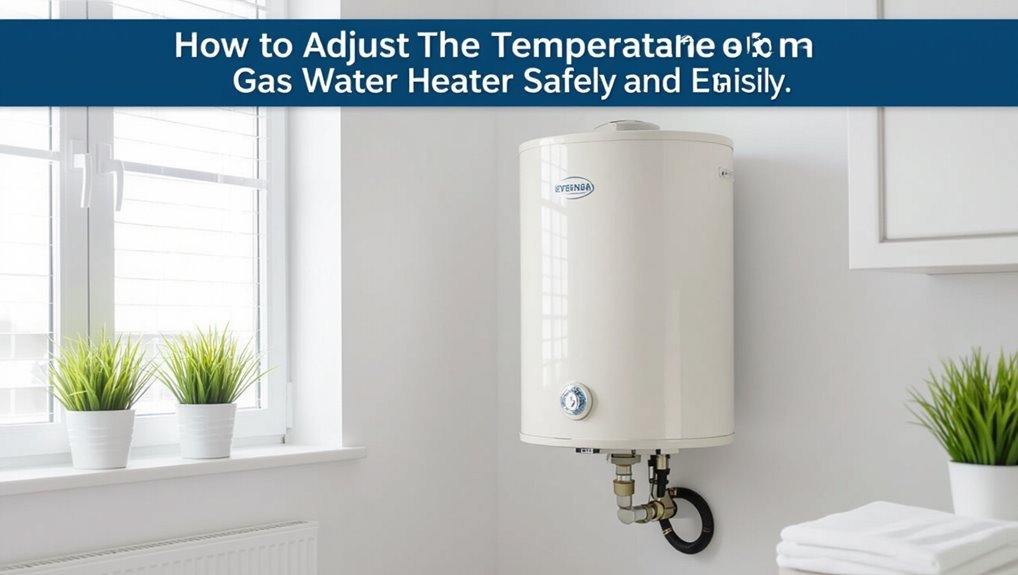
How to Adjust the Temperature on a Gas Water Heater Safely and Easily
To safely and easily adjust the temperature on a gas water heater, start by locating the thermostat or control panel. Turn off the power or set the gas to pilot if necessary. Make small adjustments toward your target temperature, ideally around 120°F, while wearing gloves and ensuring good ventilation. After adjusting, check the outlet temperature with a thermometer and monitor for any leaks, burner issues, or risks of scalding. If you smell gas or feel uncertain, contact a licensed technician for assistance. More detailed safety tips and steps follow to ensure an efficient process.
How to Adjust the Temperature on a Gas Water Heater Safely and Easily
A safe and comfortable setting for most households is 120°F (49°C), which balances scald prevention with adequate hot water.
The thermostat should be adjusted when water is noticeably too hot or too cool, when there are frequent burns or bacterial concerns, or after plumbing work that changes flow or temperature.
Simple steps and basic precautions make the change straightforward for a homeowner.
Quick answer where the thermostat should be set for safety and comfort
While individual needs vary, most authorities recommend setting a gas water heater thermostat to 120°F (49°C) for a balance of safety, energy savings, and adequate hot-water supply.
Households with infants, elderly, or immunocompromised members may prefer 110–115°F to reduce scald risk, while settings above 125°F increase burn danger and energy use.
For guidance on how to adjust the temperature on a gas water heater, follow manufacturer instructions and use a thermometer to verify output.
When you should change the temperature (signs and reasons)
Safety and efficiency often dictate when a gas water heater’s temperature should be changed. Indicators include scalding or insufficient hot water, frequent pilot or burner cycling, high energy bills, sediment-related noise or reduced capacity, and household vulnerability (children, elderly).
Adjustments respond to comfort, safety, system performance, or efficiency.
Professional inspection is advised if problems persist or overheating and corrosion signs appear.
Basic parts and how a gas water heater controls temperature
A gas water heater regulates temperature through a few key components: the insulated tank, thermostat or control module, gas control valve, and pilot or electronic ignition.
Thermostats range from simple mechanical dials to digital, programmable controls that interface with the gas valve to maintain set temperatures.
Temperature is sensed by a probe or thermostat bulb and shown either on a dial or digital display for user adjustment.
Main components you need to know (tank, thermostat, gas control valve, pilot/light)
Understanding how a gas water heater controls temperature begins with its main components: the tank, thermostat, gas control valve, and pilot or ignition system.
The tank stores heated water. The thermostat senses temperature and signals the gas control valve. The valve regulates gas flow to the burner.
The pilot or electronic ignition lights the burner when heat is needed, completing the control loop.
Types of gas water heater thermostats and controls
With the tank, thermostat, gas control valve, and ignition identified, attention shifts to the different thermostat designs and control configurations that actually set and maintain water temperature.
Mechanical dial thermostats, thermocouple-linked gas control modules, and electronic thermostats with safety cutoffs are common.
Some systems use manual pilot valves; others use automatic ignition with integrated temperature limiters and pressure-temperature safety interlocks.
How temperature is measured and displayed
Temperature in a gas water heater is sensed by a temperature element—typically a thermistor, thermocouple, or bimetallic sensor—mounted in the tank or the control assembly and relays that reading to the control module or mechanical dial.
The control compares the reading to the setpoint, cycling the gas valve and pilot or electronic ignition.
Displays can be analog dials, digital readouts, or simple high/low indicators.
Safety precautions before you start
Before adjusting the temperature, the reader should gather basic tools and personal protective gear and confirm they know how to safely shut off the gas and power.
The area must be well ventilated and inspected for leaks using approved methods prior to any work.
If there is any uncertainty about gas lines, combustion odors, or venting, a qualified professional should be contacted.
Tools and protective gear to have on hand
Gather essential tools and protective gear to minimize risk and allow precise adjustments: a flathead and Phillips screwdriver, adjustable wrench, and a multimeter (or non-contact voltage tester) for electrical checks;
insulated gloves and safety goggles to protect against scalding and debris;
a flashlight or work light for visibility;
and a bucket and towels to catch any drained water.
- Basic hand tools
- Personal protective equipment
- Lighting and spill control
How to shut off gas and turn off power safely
Shut off the gas supply and cut electrical power before making any adjustments to a gas water heater to eliminate fire, explosion, and shock hazards.
Locate the gas shutoff valve on the supply line and turn perpendicular.
Switch off the breaker labeled for the heater or remove power at the panel.
Verify gas is off by confirming pilot extinguishes and use a non-sparking tool if needed.
Ventilation, leak checks, and when to call a professional
Guarantee adequate ventilation and check for leaks before proceeding: confirm combustion air pathways are clear, exhaust vents and chimneys are unobstructed, and that there is fresh air available to prevent buildup of carbon monoxide.
Inspect fittings, valve seals, and the gas line for odors or hissing.
If corrosion, persistent leaks, pilot instability, or suspected CO presence occur, stop and contact a licensed technician immediately.
Step-by-step: Adjusting the temperature on common gas water heater models
The next section outlines how to access the thermostat panel and control knobs before making adjustments.
It then explains steps for single-knob mechanical models, procedures for dual-element or modern digital controls, and how to verify the outlet temperature with a thermometer.
Finally, it covers fine-tuning to reach a safe, consistent setting.
Accessing the thermostat panel and control knobs
Begin by locating the thermostat access panel on the gas water heater—typically a rectangular metal cover situated near the base of the tank—then remove any screws or clips to expose the burner area and control knobs.
Turn off the gas or power per manufacturer instructions, clear dust with a soft brush, and guarantee adequate lighting.
Identify labeled knobs and any protective shields before proceeding.
Adjusting a single control knob model
After exposing the burner area and controls, focus attention on models with a single thermostat knob—common on many residential gas water heaters.
Identify the current setting, note safety markings, then turn the knob slowly toward a desired temperature increment (typically 120°F standard).
Wait 30–60 minutes, recheck water temperature at a nearby tap, and fine-tune in small increments until satisfactory.
Adjusting dual-element or modern digital control models
For models with separate upper and lower thermostats or with digital interfaces, approach adjustments methodically to keep temperature balanced and safe.
Adjust the upper thermostat first on dual-element units, then the lower after system recovery.
For digital controls, use the menu to set desired temperature, confirm both zones match, and consult the manufacturer’s guidance for lockout, minimum settings, and safety features before leaving settings unchanged.
Verifying temperature with a thermometer and fine-tuning
With the thermostats set, confirm actual water temperature at the tap using a reliable food-grade or digital instant-read thermometer to verify settings and spot any discrepancies between controller readout and delivered hot water.
Record readings after running hot water for several minutes. If temperature differs, make small adjustments, wait for stabilization, recheck, and repeat until target is reached.
Note safety and label final setting.
Recommended temperature settings and health considerations
Recommended temperature settings balance energy savings and comfort, with many manufacturers advising around 120°F (49°C) as a practical compromise.
To reduce the risk of Legionella and other bacterial growth, water heaters should maintain a minimum safe temperature—typically at least 120°F at the tank, though some situations call for higher settings.
Homes with young children, elderly, or immunocompromised residents may require higher tank temperatures combined with anti-scald devices or thermostatic mixing valves to protect against burns while ensuring pathogen control.
Optimal setting for energy savings and comfort
Many households find that setting a gas water heater to 120°F (49°C) balances energy savings, scald risk, and sufficient hot water for most uses.
This temperature reduces standby heat loss and lowers utility bills while remaining comfortable for showers and dishwashing.
Small increases may improve recovery time but raise costs and scald potential.
Users should adjust only as needed and monitor household preferences.
Minimum safe temperature to prevent bacterial growth (Legionella)
How warm should a gas water heater be to limit Legionella growth?
Experts recommend maintaining stored water at least 60°C (140°F) to kill Legionella bacteria reliably, with distribution temperatures not falling below 50°C (122°F) to inhibit regrowth.
Regular flushing, tank maintenance, and monitoring thermostats guarantee consistent temperatures.
Balance these measures with scald risk controls and local safety guidelines.
Settings for homes with children, elderly, or immunocompromised residents
Safety considerations guide thermostat choices in homes with children, elderly, or immunocompromised residents: maintaining water hot enough to control pathogens must be balanced against scald risk.
Recommended setting is often 120–130°F (49–54°C) with point-of-use anti-scald devices and thermostatic mixing valves.
Routine monitoring, clear labeling, and caregiver education reduce injury and infection risks while preserving necessary thermal control.
Energy-saving tips and temperature management strategies
Practical energy-saving measures can reduce water heating costs without sacrificing comfort by modestly lowering the set temperature and relying on insulation and efficient fixtures.
Thermostatic mixing valves and point-of-use devices allow safe delivery of warm water at taps while the tank remains at a lower, more efficient setting.
Seasonal adjustments and simple vacation shutdown procedures further minimize wasted energy when hot water demand drops.
Lowering temperature without losing comfort
Many households can lower a gas water heater’s setpoint a few degrees without noticeable loss of comfort by combining modest temperature reduction with simple behavioral and system adjustments.
Stagger showers, shorten durations, run full loads for dishwashers and laundry, install low‑flow showerheads and aerators, and insulate hot pipes and the tank.
Together these steps preserve perceived warmth while reducing energy use and standby losses.
Using thermostatic mixing valves and point-of-use devices
When set between a hot supply and cold return, thermostatic mixing valves maintain a consistent outlet temperature by blending water automatically, reducing the need to keep the main tank set excessively high.
Point-of-use thermostatic mixers at showers and sinks add localized control, prevent scalding, and allow lower storage temperatures.
Proper installation and periodic testing guarantee safety, efficiency, and compliance with plumbing codes.
Seasonal adjustments and vacation shutdown tips
As outdoor temperatures and household occupancy patterns change seasonally, adjusting a gas water heater’s setpoint and operation can yield meaningful energy savings and prevent issues like freezing or sediment buildup.
Lowering the thermostat by 5–10°F during milder months reduces standby losses, while raising it slightly in winter maintains recovery and prevents pipe freezing in unheated spaces.
For vacations, drain or set to pilot/low, shut off water supply, and run a brief drain and flush before returning.
Common problems after adjusting temperature and how to fix them
After changing the thermostat, a quick diagnostic checklist helps identify whether water is too hot or too cold and rules out simple causes like incorrect setpoint or a tripped high-limit switch.
If hot water is uneven or fluctuates rapidly, common causes include cross-connections, a failing dip tube, or a thermostatic mixing valve that needs adjustment.
Changes to thermostat settings can also expose pilot light or burner issues, so inspecting the pilot, thermocouple, and burner flame is recommended.
Water too hot or too cold diagnostic checklist
What should be checked first when water remains too hot or too cold after adjusting the gas heater?
Inspect thermostat setting, pilot flame stability, and burner condition.
Verify cold-water inlet and hot outlet valves are fully open and check dip tube integrity.
Examine pressure relief valve and temperature-pressure settings.
Confirm no recent cross-connections, and guarantee adequate recovery time after adjustments before retesting performance.
Uneven hot water or rapid fluctuations causes and remedies
Diagnose uneven hot water or rapid temperature swings by isolating common causes that can persist after thermostat adjustments.
Check for cross-connections (mixed hot/cold valves), failing thermostatic mixing valves, or defective thermostats.
Flush sediment that causes localized overheating.
Inspect dip tube integrity and pressure-balancing valves in showers.
If electrical or control components malfunction, consult a qualified technician for safe replacement or calibration.
Pilot light or burner issues related to thermostat changes
Issues with the pilot light or burner frequently surface once thermostat settings are changed, especially if higher temperatures increase demand or reveal marginal components.
Pilot outages, weak flames, soot, or delayed ignition often follow.
Recommend inspecting pilot assembly, cleaning burner ports, checking thermocouple and gas valve operation, and verifying proper air/gas mixture.
If uncertainty or persistent faults exist, contact a licensed technician promptly.
When to call a professional and replacement considerations
If temperature issues persist, produce strange noises, cause yellow or sooty burner flames, or trigger frequent pilot failures, a technician or burner/thermostat replacement is likely needed.
Service visits typically vary by labor, parts, and diagnostics, so homeowners should expect an initial inspection, a written estimate, and clear communication about costs and timelines.
When safety or efficiency is a concern, professionals can recommend and install upgraded control systems such as electronic thermostats or anti-scald devices.
Signs you need a technician or burner/thermostat replacement
Recognize persistent or hazardous symptoms that indicate a professional is needed: repeated failure to maintain set temperature, visible corrosion or gas smell, pilot light problems that recur after simple resets, loud or unusual combustion noises, or water consistently too hot or cold despite thermostat adjustments.
Technician evaluation is warranted when diagnostic steps fail, burners show uneven flame, thermocouples degrade, or safety controls trip unpredictably; replacement follows confirmed component failure.
Cost factors and what to expect during a service visit
Several factors influence the cost and scope of a service visit for a gas water heater, including the technician’s labor rate, travel time, parts required, unit age, and whether diagnostic testing or safety inspections are needed.
A technician will assess leaks, burner performance, thermostat function, and safety controls. Then, they will provide estimates for repair versus replacement based on age and parts availability.
- Diagnostic fee
- Parts/labor
- Replacement cost
Upgrading to a safer or more efficient control system
After evaluating repair versus replacement costs and identifying faulty components, homeowners may consider upgrading the water heater’s control system to improve safety and efficiency.
Professional assessment is advised when thermostats, gas valves, or pilot assemblies are malfunctioning or when adding electronic temperature controls, anti-scald devices, or thermostatic mixing valves.
Licensed technicians guarantee correct compatibility, gas line work, code compliance, and safe disposal of old components.
Quick reference charts and checklists
A concise temperature setting quick-reference chart helps readers match comfort and safety goals to specific thermostat settings.
A pre-adjustment safety checklist outlines steps such as shutting off pilots, ventilating the area, and confirming gas and electrical isolation.
A post-adjustment verification checklist reminds users to check water temperature at fixtures, inspect for leaks, and monitor system performance over the following days.
Temperature setting quick-reference chart
This quick-reference chart distills recommended water heater temperature settings into an easy-to-scan format, showing common thermostat temperatures, associated safety and energy notes, and suggested adjustments for households with young children, elderly residents, or dishwashers without a boost heater. The chart helps decide a baseline setting and any conservative increases or decreases.
| Temperature | Use case | Note |
|---|---|---|
| 120°F | Typical safe balance | Saves energy |
| 140°F | High-demand | Burn risk if unprotected |
| 110°F | Child/elder care | Lower scald risk |
Pre-adjustment safety checklist
Before changing the thermostat, a concise safety checklist should be reviewed to minimize scald, gas, and carbon monoxide hazards.
Confirm the area is ventilated and free of flammable materials. Shut off the gas and pilot if required. Verify tools and protective gloves are on hand.
- Check ventilation
- Shut off gas/pilot
- Gather tools and PPE
Post-adjustment verification checklist
Once the thermostat setting has been changed and the system allowed time to stabilize, perform a concise post-adjustment verification checklist to confirm safe, correct operation.
Verify water temperature at a tap, inspect for leaks or unusual odors, and confirm pilot/flame stability.
Use a simple chart to record readings and actions.
- Measure temperature
- Inspect for leaks/odor
- Record and confirm status
Troubleshooting scenarios and stepwise solutions
The article presents three concise troubleshooting scenarios with clear stepwise responses: loss of hot water after an adjustment, an immediate scalding risk following a change, and a suspected gas leak after servicing.
For each scenario it lists prioritized checks, safe interim actions, and when to call a professional.
The goal is to enable rapid identification of the problem and safe, decisive steps to resolve or escalate it.
Scenario: No hot water after adjusting stepwise checks
Check the control and safety systems methodically when no hot water follows a temperature adjustment.
Inspect pilot light or electronic ignition, confirm gas supply valve is open, and verify thermostat setting.
Reset any tripped high-limit or safety switches per manufacturer instructions.
Examine venting and combustion air for blockages.
If pilot won’t ignite or components fail, advise contacting a qualified technician for diagnosis and repair.
Scenario: Scalding risk after adjustment immediate actions
If water becomes dangerously hot after a temperature adjustment, immediate steps are essential to prevent burns and limit further risk.
Turn the thermostat down to a safe setting, shut off the cold-water supply if overheating persists, and drain a small amount to reduce tank temperature.
Advise occupants to avoid hot taps, label controls, and contact a qualified technician for inspection and recalibration.
Scenario: Suspected gas leak after working on the heater emergency steps
Any person who suspects a gas leak after working on a heater must act immediately and deliberately: evacuate everyone, avoid sparks, and call emergency services.
Steps to follow:
- Leave the building immediately; do not use phones or switches inside.
- Shut off the gas at the meter if safe to do so from outside.
- Call emergency services and your gas provider; await clearance before returning.
Conclusion
Adjusting a gas water heater’s temperature is a simple safety measure with real impact. One interesting statistic: scalding causes over 100,000 emergency room visits annually in the U.S., highlighting why recommended settings matter. By following precautions, understanding controls, and verifying outcomes, homeowners can reduce burn risk and energy waste. If issues persist—strange noises, leaks, or thermostat failure—calling a licensed technician guarantees safe, code-compliant repairs or replacement.