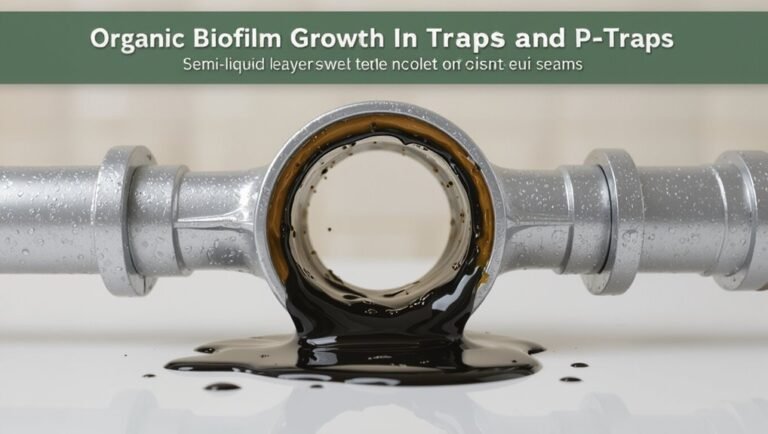
How to Unclog Grease in Pipes: 7 Safe DIY Methods That Work Fast
If you’re dealing with grease clogs in your pipes, there are several effective DIY methods to clear them quickly. Grease buildup occurs when fats and oils cool and adhere to the pipe walls, leading to slow drains and unpleasant odors. Here are seven safe and efficient techniques:
- Boiling Water Flush: Pour boiling water down the drain to help dissolve the grease.
- Baking Soda and Vinegar: Combine these two ingredients for a powerful reaction that can break down clogs.
- Enzyme-Based Cleaners: Use cleaners specifically designed to target fats, oils, and grease.
- Mechanical Snaking: A plumbing snake can reach and dislodge stubborn clogs.
- Plunging: A plunger can create pressure to push the blockage through.
- Biodegradable Chemical Degreasers: Use products labeled for FOG to safely break down grease.
- Manual Trap Cleaning: If accessible, clean out the trap directly to remove buildup.
Always wear gloves and eye protection, and avoid mixing different chemicals. If you’re facing multiple backed-up fixtures or persistent odors, it’s best to call a professional. Follow these methods and safety tips to effectively tackle grease clogs in your plumbing.
What to know before you start unclogging grease in pipes
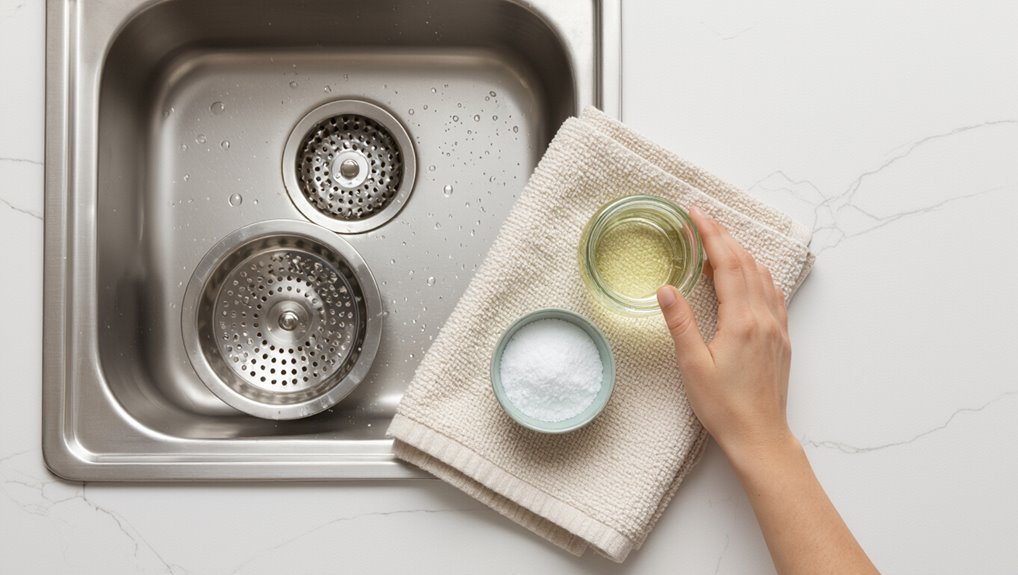
Grease clogs form when fats and oils cool and adhere to pipe walls, creating firm, persistent buildups that resist simple flushing.
Distinguishing grease from other causes relies on symptoms like slow drainage, greasy residues, and multiple fixtures affected rather than isolated blockages.
Before attempting remedies, the reader should note required safety gear and tools and recognize situations—extensive backups, recurring clogs, or damaged pipes—warranting a professional plumber.
How grease clogs form and why they’re stubborn
Warm cooking oil and food particles traveling down kitchen drains cool and combine into sticky masses that cling to pipe walls, narrowing flow and trapping more debris.
Over time biochemical films and mineral deposits bond with fat, creating dense, adherent plugs resistant to water pressure and basic plunging.
Understanding how to unclog grease in pipes requires heat, enzymatic breakdown, or mechanical removal to overcome adhesion and buildup.
Signs your pipes are clogged by grease vs other causes
How can a homeowner tell whether slow drains and odors come from fat buildup or another problem?
Grease clogs typically cause slow draining across kitchen fixtures, recurring foul odors, and greasy residue on drain covers.
Plumbing issues from hair, mineral buildup, or collapsed pipes often show localized backups (bathroom only), gurgling elsewhere, or sudden complete stoppage.
Visual inspection and fixture pattern help differentiate.
Safety precautions and tools to have on hand
Preparation is essential before attempting to clear fat from household drains: wearing gloves and eye protection, ensuring good ventilation, and turning off nearby electrical outlets reduce injury and chemical risks.
Gather tools: plunger, plumber’s snake, bucket, adjustable wrench, scrub brush, and sturdy rags. Keep baking soda, vinegar, enzymatic cleaner, and a flashlight nearby.
Know first-aid steps for chemical exposure.
When to call a professional plumber
After gathering safety gear and tools, homeowners should recognize situations that exceed DIY scope and warrant a professional plumber.
Call a pro if multiple fixtures are backed up, recurring clogs happen, sewer odors persist, or water backs up into sinks or appliances.
Also seek help for damaged pipes, failed plunging or snaking, or when cameras or hydrojetting are likely needed to diagnose or clear stubborn grease.
Fast overview 7 safe DIY methods to remove grease clogs
A concise set of safe DIY options can address most household grease clogs without calling a professional.
Common approaches include boiling-water flushes, baking soda with vinegar, enzyme or bacterial cleaners, manual snaking, and effective plunging techniques.
Choose a method based on clog severity, pipe material, and safety considerations; quick reminders:
- Boiling water flush
- Baking soda and vinegar reaction
- Enzyme or bacterial drain cleaners
- Manual removal with a drain snake or auger
Method 1 Boiling water flush
Pouring boiling water down a grease-clogged drain can soften and wash away light buildup when used promptly and repeatedly.
The method requires slowly pouring several kettles in stages, allowing hot water to penetrate and carry softened grease. It suits recent, minor clogs; persistent or solidified grease may need mechanical clearing or professional service.
Exercise caution to avoid burns and cracked pipes.
Method 2 Baking soda and vinegar reaction
Combine baking soda and vinegar to create a fizzy reaction that helps loosen and lift light to moderate grease deposits from pipe walls.
Measure about half a cup baking soda, pour down the drain, follow with one cup vinegar, cover and wait 15–30 minutes.
Flush with hot water. Repeat once if needed.
Safe for most household pipes when used sparingly.
Method 3 Enzyme or bacterial drain cleaners
Consider enzyme or bacterial drain cleaners when grease clogs are persistent but chemical cleaners are undesirable.
These products contain microbes or enzymes that digest fats and organic buildup over hours to days.
Follow label directions, maintain warm water flow to keep microbes active, and avoid mixing with bleach or harsh chemicals.
They’re safe for pipes and septic systems but require patience and repeated applications for heavy blockages.
Method 4 Manual removal with a drain snake or auger
Use a drain snake or auger to physically break up and extract grease clogs when chemical or enzymatic methods are ineffective or too slow.
Insert the coil, rotate steadily, and feed until resistance eases. Withdraw the tool, wiping away removed grease. Repeat as needed, flushing with hot water afterward.
Wear gloves and eye protection; avoid forcing past fragile pipes to prevent damage.
Method 5 Plunging technique for grease clogs
Plunge the drain to dislodge grease clogs by creating pressure and suction that loosens congealed fat and moves it downstream.
Use a cup-style plunger, seal around the drain, and pump vigorously for 15–20 seconds.
Repeat as needed, clearing standing water between attempts.
Avoid excessive force that could damage seals; if resistance persists, proceed to more targeted mechanical or enzymatic methods.
Method 6 Dish soap degreasing flush
Apply a dish soap degreasing flush to break down fatty deposits by pouring a generous squirt of a grease-cutting liquid soap into the drain, letting it sit for 15–30 minutes, then flushing with hot (but not boiling) water to carry dissolved grease downstream.
Repeat once if needed. This method is safe, inexpensive and effective for minor buildup; follow with regular hot-water maintenance to prevent recurrence.
Method 7 Wet/dry vacuum extraction
Employing a wet/dry vacuum can rapidly extract softened grease and standing water from a clogged drain by creating strong suction to pull debris into the collection canister.
The operator seals the hose at the drain, uses a foam filter for liquids, and alternates short bursts to avoid overheating.
This method removes softened deposits efficiently but requires prior softening (hot water or degreaser) and careful cleanup.
Step-by-step instructions for each DIY method
The following section presents concise, step-by-step procedures for each DIY approach to clearing grease clogs.
It covers boiling-water flushes with required materials and exact steps, baking soda and vinegar proportions and timing, enzyme cleaner selection and recommended wait times, safe drain-snake insertion and retrieval techniques, and proper plunging methods for kitchen sinks.
Each procedure is written for clarity and to minimize risk of pipe damage.
Boiling water flush materials and precise steps
Several simple materials are needed for a boiling water flush: a kettle or pot, a heat source, a long-handled pouring vessel (if the kettle is small), potholders or heat-resistant gloves, and a clear sink or drain access.
Boil water, remove impediments, wear protection, and pour in controlled bursts directly into the drain.
Repeat three to five times, allowing brief intervals to assess flow.
Baking soda and vinegar exact proportions and timing
After attempting a boiling-water flush, homeowners can try a baking soda and vinegar treatment to break up remaining grease. This method relies on a fizzy chemical reaction and controlled timing rather than brute heat.
Measure 1 cup baking soda into the drain, follow with 1 cup white vinegar, cover for 10–15 minutes, then flush with 2–3 liters of hot (not boiling) water to clear loosened residue.
Enzyme cleaners selection, application, and wait times
For homeowners seeking a biological alternative, enzyme drain cleaners target organic grease and food buildup by using live enzymes and bacteria to break down residues over time.
Choose products labeled for fats, oils, and grease and safe for pipes.
Follow manufacturer dosage, pour into slow-draining pipes after removing standing water, then wait 6–12 hours (overnight for stubborn blockages) before flushing with hot water.
Using a drain snake how to insert, retrieve grease, and avoid damage
When facing grease-clogged drains, a drain snake (also called a plumber’s auger) provides a direct mechanical way to break up and extract buildup without chemicals; proper technique minimizes pipe damage and mess.
Feed the snake slowly, crank clockwise to bore through grease, hook and pull debris gently. Retract regularly to clear buildup, use a bucket and gloves, and avoid forcing sharp bends.
Proper plunging technique for kitchen sinks
Begin by seating a flange-style plunger over the sink drain to create a solid seal and guarantee the overflow (if present) is closed or plugged; this concentrates the plunging force on the clog.
Fill the basin with enough water to cover the plunger cup.
Push and pull vigorously with controlled strokes for 15–20 seconds, then test drainage.
Repeat up to three cycles.
Dish soap degreasing flush best soaps and procedure
Use a concentrated dish soap and hot water to dissolve and flush grease buildup without harsh chemicals.
Recommend high-degreasing brands or formulations with grease-cutting enzymes.
Pour a generous squirt into the drain, let sit 10–15 minutes, then rinse with a kettle of very hot (not boiling) water.
Repeat once if needed.
Follow with weekly maintenance doses to prevent recurrence.
Wet/dry vacuum method setup, seals, and extraction tips
After applying a dish-soap and hot-water flush to soften and mobilize grease, a wet/dry vacuum can physically extract the loosened residue. Proper setup and sealing determine how much is removed.
Attach a narrow hose, create a rubber-to-pipe seal with cloth or plumber’s putty, set vacuum to liquid mode, and suction in short bursts.
Empty and clean filter frequently to prevent recontamination.
Combining methods safely for tougher clogs
When a clog resists single treatments, combining methods in a controlled sequence can improve results. For example, applying a degreaser and hot water before using a plumbing snake to break up softened buildup can be effective.
Care must be taken to never mix incompatible chemicals or follow one caustic product immediately with another, as reactions can produce toxic gases or heat.
Clear safety steps and waiting periods should be observed so that effectiveness is maximized without creating new hazards.
Effective method sequences (e.g., degreaser then snake)
Start by evaluating the clog’s severity and the pipe material to determine a safe, effective sequence of treatments.
Begin with mechanical measures: remove visible buildup, plunge, then use a manual snake to break compacted grease.
If residue remains, apply a biodegradable degreaser and allow recommended dwell time before flushing with hot water.
Repeat as needed, inspecting after each step.
What never to combine (chemical conflicts and hazards)
Because certain cleaning agents and techniques can react violently or produce toxic gases, the practitioner must never mix caustic drain cleaners (lye or sodium hydroxide) with acidic products (vinegar, toilet bowl cleaners) or with bleach.
Chemical mixes can emit chlorine or heat, causing burns or explosions.
Also avoid combining enzymatic cleaners with strong chemicals and never run hot water into active chemical treatments; flush and wait per instructions.
Tools, products, and materials comparison
A concise comparison of common tools, products, and materials helps determine the best option based on effectiveness, cost, safety, and pipe compatibility. The table below summarizes key trade-offs to guide selection for different pipe types and clog severities. The following overview supports practical decision-making without assuming specialist training.
| Item | Strengths | Limitations |
|---|---|---|
| Mechanical auger (snake) | High effectiveness on blockages; reusable | Can damage fragile pipes; requires some skill |
| Enzymatic/bacterial drain cleaners | Safe for pipes and environment; good for maintenance | Slower action; higher cost over time |
| Caustic chemical cleaners | Fast and inexpensive for grease | Hazardous to skin/pipes; poor with older materials |
Effectiveness, cost, safety, and suitability for pipe types
How well a method clears grease, how much it costs, how safe it is, and which pipe materials it suits are the key metrics for choosing between mechanical tools, enzymatic or chemical cleaners, and hot-water or enzymatic maintenance—each option balances efficacy, expense, and risk differently. Mechanical: high, moderate, low risk; Enzymatic: moderate, low, very safe; Chemical: high, low, hazardous.
| Method | Effectiveness | Safety/Cost |
|---|---|---|
| Mechanical | High | Moderate |
| Enzymatic | Moderate | Low |
| Chemical | High | Hazardous |
Troubleshooting common problems during DIY unclogging
If a drain remains slow after initial treatment, the article outlines clear next steps including mechanical clearing and when to call a professional.
It also covers neutralizing persistent foul odors and preventive habits to reduce recurrence.
Additionally, readers are guided on temporary fixes for leaks or damage discovered during work and given a concise checklist to diagnose recurring grease buildup.
Drain remains slow after treatment next steps
When a treated drain still runs slowly, further assessment is necessary to determine whether residual grease, partial blockage, venting issues, or pipe damage is the cause.
The next steps should prioritize noninvasive diagnostics—visually checking accessible traps, running a plunger, and using a drain snake—before escalating to enzymatic repeat treatments, hydro-jetting, or professional inspection.
Document findings, avoid harsh chemicals, and schedule a plumber if flow fails to improve.
Foul odors after cleaning how to neutralize and prevent
Residual smells often linger even after visible grease and slow flow have been addressed, signaling trapped organic matter, bacterial buildup, or dry traps.
To neutralize, flush with hot water and a baking soda–vinegar rinse, then run enzyme drain cleaners to digest residues.
Prevent recurrence by regular hot-water flushes, periodic enzyme treatments, keeping strainers clean, and ensuring traps hold water to block sewer gases.
Leaks or damage discovered during work temporary fixes
Pause work and assess the situation immediately upon noticing leaks or visible damage to pipes, as temporary fixes can prevent further water loss and property harm until proper repairs are made.
Turn off water supply, drain affected lines, and apply a rubber patch and hose clamp or pipe repair tape for small hairline leaks.
Note extent, document damage, and arrange professional repair promptly.
Recurring grease buildup diagnosis checklist
A short, systematic checklist helps identify why grease clogs recur despite DIY efforts.
Inspect fixture use: excessive fats or frequent food disposal.
Verify hot-water and detergent practices.
Check traps and accessible drains for partial blockages.
Confirm venting and slope for slow flow.
Assess pipe material and age for buildup.
Note intermittent leaks, root intrusion, or improper grease disposal habits.
Preventing future grease clogs
Preventing future grease clogs begins with simple daily habits that keep fats and oils out of the drain, such as wiping pans and disposing of grease in sealed containers.
Longer-term measures—installing traps and strainers, and establishing a grease recycling practice—reduce the burden on plumbing.
A clear maintenance schedule with seasonal reminders guarantees these practices remain consistent and effective.
Daily habits to keep grease out of pipes
Several simple daily habits markedly reduce the risk of grease buildup in household pipes:
- Wipe pans and plates with paper towels into the trash.
- Pour cooled grease into sealed containers for disposal.
- Run hot water while washing oily dishes.
- Use minimal dish soap and scrubbers to remove residue.
- Periodically flush drains with boiling water to dissolve light deposits before they harden.
Long-term solutions: traps, strainers, and grease recycling
Many households benefit from installing physical barriers and systems that intercept grease before it enters plumbing: grease traps under sinks, mesh or basket strainers over drains, and dedicated containers for collecting used cooking oil all reduce long-term buildup and maintenance needs.
Properly sized traps capture solids and separate fats; strainers stop debris. Collected oil can be recycled or disposed responsibly, minimizing sewer blockages and costly repairs.
Maintenance schedule and seasonal reminders
Although grease buildup develops gradually, a simple, consistent maintenance schedule keeps drains and traps functioning and reduces emergency repairs.
Monthly flushing with hot water and biodegradable degreasers, weekly strainer cleaning, and quarterly trap inspections prevent accumulation.
Seasonal reminders—pre-winter deep cleans and post-holiday checks—address heavy use periods.
Records of tasks and prompt repairs guarantee longevity and minimize costly blockages.
Environmental and safety considerations
Proper disposal of removed grease and related waste is essential to prevent sewer blockages and environmental contamination.
The article also outlines eco-friendly product options and practices that reduce impact.
Safe handling and clear instructions for chemical cleaners are provided to minimize health risks and accidental damage.
Proper disposal of removed grease and waste
Once removed, grease and related waste require careful handling to prevent environmental harm and safety risks; they should never be poured down drains or discarded with regular trash.
Collected grease should be cooled, solidified if possible, and sealed in leak‑proof containers for municipal hazardous waste or recycling programs.
Absorbents and contaminated rags must be disposed of according to local hazardous‑waste guidelines to avoid fires and pollution.
Eco-friendly product recommendations
When selecting products to prevent or remove grease clogs, priority should be given to formulations that balance effectiveness with low toxicity and biodegradability.
Enzymes and bacteria-based cleaners, plant-derived surfactants, and solvent-free degreasers typically pose fewer risks to wastewater systems and aquatic life than caustic chemicals.
Choose certified eco-labels, read ingredient lists, favor concentrated dosing to reduce packaging, and prefer manufacturers transparent about biodegradation and aquatic toxicity data.
Handling chemical cleaners safely
After preferring low-toxicity, biodegradable options, attention should turn to safe handling of stronger chemical cleaners that may still be used for severe grease buildup.
Read labels, follow dilution and contact-time instructions, wear gloves and eye protection, guarantee ventilation, and never mix products (especially bleach and acids).
Store chemicals locked and upright, dispose per local regulations, and keep pets and children away until pipes are fully rinsed.
Quick decision guide
A quick decision guide helps determine which unclogging method to try first based on clog severity and pipe material.
Minor surface grease in metal or PVC pipes often responds to hot water and enzymatic cleaners, while stubborn blockages may require mechanical snaking or professional hydrojetting.
Pipe age and fittings influence risk, so gentler options are recommended for older or fragile systems.
Which method to try first based on clog severity and pipe type
Assess severity and pipe material before choosing a method: minor surface grease in a metal trap responds well to hot water and detergent.
Moderate buildup in PVC or metal requires enzymatic cleaners or a baking-soda/vinegar flush, and deep, solidified blockages—especially in older cast iron or long runs—call for mechanical rooter tools or professional service.
- Metal trap: hot water + detergent first
- PVC/metal moderate: enzymatic or baking soda/vinegar
- Cast iron deep: mechanical snaking or auger
- When in doubt: consult a plumber promptly
Conclusion
Like a river learning new channels, the household pipe system responds when small habits redirect its flow. Removing hardened grease is less battle than recalibration: gentle heat, patient enzymes, mindful scraping and regular rinses act as new currents that restore movement. With tools chosen for care rather than force, drains recover and kitchens breathe easier. Each simple step becomes a pebble that, when placed right, guides steady water onward and keeps future blockages at bay.