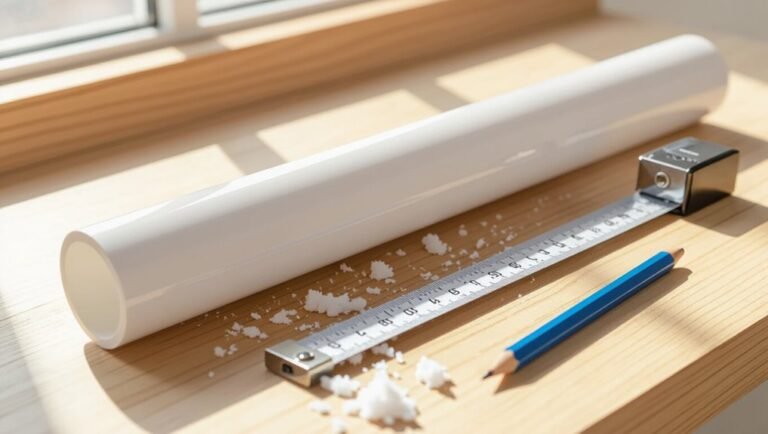
How to Repair an Enamel Bath: Step-by-Step Guide to Fix Chips, Cracks & Stains
If you’re looking to repair chips, cracks, or stains in your enamel bath, you can often do it yourself instead of replacing the entire fixture. Start by cleaning and degreasing the affected area, then sand it down and remove any rust. After that, apply enamel repair paste or epoxy according to the instructions, and allow it to cure. Finish by sanding and polishing for a smooth, seamless look. For larger issues like severe corrosion or structural cracks, consider professional reglazing or replacement. Continue reading for detailed step-by-step procedures, necessary tools, estimated costs, and maintenance tips.
What an enamel bath is and when repair is appropriate
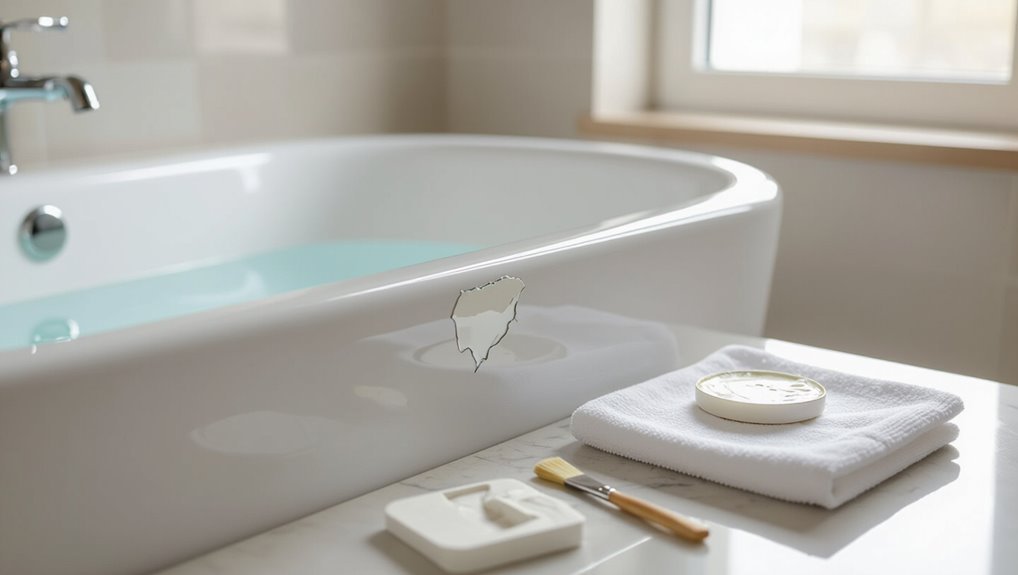
Enamel baths are typically steel or cast-iron tubs coated with fused glass-like enamel, and the term covers both the base material and the hard, glossy surface finish.
Common signs that an enamel bath needs attention include chips, cracks, rust spots, deep stains, and peeling of the coating.
Repair is appropriate for cosmetic damage or isolated chips that do not affect structural integrity, while extensive corrosion, large cracks, or costs approaching replacement justify installing a new tub.
What “enamel” means for bathtubs (materials and coatings)
A hard, glossy surface on bathtubs typically refers to a layer of fused glass-like coating applied over a metal or cast-iron base, or to the vitreous finish integrated into cast-iron or steel during manufacturing.
Enamel may be porcelain, ceramic, or enamelized steel.
Repair appropriateness depends on substrate integrity; minor surface damage can be fixed with enamel repair kits.
Readers follow how to repair enamel bath procedures accordingly.
Common signs that an enamel bath needs repair (chips, cracks, rust, stains, peeling)
After outlining what constitutes bathtub enamel and when repairs are feasible, attention turns to visible signs that repair is needed.
Chips expose underlying metal or cast iron, hairline or longer cracks traverse the surface, rust forms around damage or drains, stubborn discoloration resists cleaning, and enamel flakes or peels.
These signs indicate surface failure requiring targeted restoration to prevent worsening.
When to repair versus replace (cost, safety, structural damage)
When should a homeowner opt for repair rather than replacement of a damaged enamel bath?
Repair suits minor chips, surface stains, small rust spots or hairline cracks when cost is low and structure remains sound.
Replace if extensive rust, large cracks, persistent leaks, sagging or compromised support exists, or if repair costs approach replacement.
Safety and long-term durability dictate the choice.
Tools, materials, and safety precautions you need
Before beginning any enamel bath repair, the article lists the essential tools and materials and explains which repair kits are recommended and where to purchase them.
It also outlines required personal protective equipment and ventilation measures to guarantee a safe workspace.
The following checklist and buying guidance help readers prepare efficiently and reduce health risks.
Essential tools and materials checklist
A compact kit of the right tools, suitable repair materials, and simple safety gear guarantees an enamel bath repair proceeds efficiently and safely.
Recommended essentials include:
- Abrasives, sandpaper (various grits), rust remover.
- Epoxy or enamel filler, matching touch-up paint, primer.
- Cleaners, rags, masking tape, applicators, mixing sticks.
Protective gloves, goggles, and ventilation are mandatory; a respirator for solvent work is advised.
Recommended repair kits and where to buy them
With the checklist completed, attention turns to ready-made repair kits that bundle the abrasives, fillers, primers, touch-up paints, and basic safety items needed for most enamel bath fixes.
Recommended brands include Rust-Oleum, Homax, and Evercoat; specialty ceramic/enamel kits from Porc-a-Fix suit deeper chips.
Purchase from hardware stores, home centers, or online retailers (Amazon, manufacturer sites).
Verify color match and cure times before buying.
Personal protective equipment and ventilation requirements
Although enamel repair products are designed for small areas, proper personal protective equipment and adequate ventilation are essential to prevent inhalation of dust and fumes and to protect skin and eyes.
Use a respirator rated for organic vapors and particulate filters, chemical-resistant gloves, safety goggles, and long sleeves.
Work with windows open, fans exhausting outdoors, and avoid sparks; keep a first-aid kit nearby.
Preparing the bathtub for repair
Before any patching or refinishing begins, the tub surface must be thoroughly cleaned and de-greased with an appropriate cleaner and given time to dry.
Any loose enamel, rust, and old sealant should be removed, then the repaired areas lightly sanded using progressively finer grits to feather edges and create a good key for coatings.
Surrounding fixtures, drains, and tiles must be carefully masked to protect them from dust, chemicals, and overspray.
How to clean and de-grease the surface (products and timing)
Once all loose debris has been removed, the enamel surface must be thoroughly cleaned and degreased to secure proper adhesion of repair materials.
Use a mild abrasive cleaner or trisodium phosphate substitute, following manufacturer dilution. Rinse twice with clean water, then wipe with solvent-based degreaser (isopropyl alcohol or acetone) and allow 10–15 minutes to evaporate.
Confirm the surface is dry and residue-free before proceeding.
Removing loose enamel, rust, and old sealant
Begin by identifying and removing all loose enamel, rust, and deteriorated sealant to create a stable substrate for repair.
Scrape loose material with a plastic or metal scraper as appropriate, gently wire-brush rust to bare metal, and apply a rust converter if needed.
Remove old sealant with a sealant remover or cutter, then vacuum and wipe the area with solvent to guarantee cleanliness.
Sanding techniques and grit progression for enamel surfaces
After loose enamel, rust, and sealant have been removed and the area cleaned, attention turns to sanding to create a properly profiled surface for adhesion.
Begin with 120–180 grit to remove rough edges, then progress to 320–400 grit for smoothing. Use light, even pressure and circular motions.
Finish with 600–800 grit for a satin surface ready for primer or filler application.
Masking surrounding fixtures, drains, and tiles
Proper masking isolates the repair area to protect fixtures, drains, and tiles from dust, solvents, and overspray.
Apply painter’s tape precisely around faucets, overflow plates, and drain edges. Cover exposed tiles and grouting with plastic sheeting, securing edges with tape.
Remove or plug loose fittings when possible. Confirm seams are tight to prevent seepage and allow easy removal without adhesive residue.
Repairing small chips and surface scratches
The guide next addresses repair of small chips and surface scratches, beginning with assessment of chip depth and selection of a matching repair product.
It outlines Step 1 cleaning and light sanding, Step 2 applying filler or enamel repair paste, and Step 3 curing followed by sanding smooth and polishing.
Common minor-chip problems and simple troubleshooting tips are then covered to guarantee a durable, unobtrusive finish.
Assessing chip depth and matching repair product
A quick visual and tactile inspection determines whether a chip is superficial—affecting only the enamel surface—or deep enough to expose the underlying metal or cast iron substrate.
This assessment guides the choice between a simple touch-up enamel, a two-part epoxy filler, or professional refinishing products.
Color-match samples to the surrounding glaze, verify adhesion properties for wet environments, and select products rated for bath enamel durability.
Step 1 cleaning and sanding the chip
Once the chip depth and product are chosen, attention turns to preparing the damaged area.
The surface is cleaned with mild detergent, rinsed, and dried. Loose enamel and rust are removed gently with fine-grit sandpaper or a nylon abrasive pad until edges are smooth.
Dust is wiped away with a lint-free cloth or alcohol. Proper prep guarantees good adhesion and an even finish.
Step 2 applying filler or enamel repair paste
Mix a small amount of enamel repair paste or filler according to the manufacturer’s directions and apply it carefully to the cleaned chip or scratch using a flat applicator or toothpick.
Press paste into voids, building slightly above the surrounding surface. Remove excess with a damp cloth or scraper, being careful not to disturb the fill.
Allow initial set time per product instructions before proceeding.
Step 3 curing, sanding smooth, and polishing
Allow the filler to cure fully according to the manufacturer’s specified time and conditions before any further work begins.
Once hardened, lightly sand with fine-grit paper (400–800), progressing to finer grits for a seamless blend.
Remove dust with a tack cloth, then polish the repair area with a non-abrasive polish or polish pad until sheen matches surrounding enamel.
Inspect for uniform finish.
Troubleshooting common minor-chip issues
After polishing and inspecting the repaired area for uniform finish, attention turns to smaller, more common blemishes such as nicks, chips, and surface scratches that did not require full resurfacing.
These are assessed for depth and substrate exposure. Minor chips are cleaned, primed, and filled with enamel repair paste; cured, sanded flush, and color-matched touch-up paint applied for seamless blending.
Repairing hairline cracks and deeper cracks
First assess whether a hairline crack is cosmetic or indicates underlying structural damage.
Next, stabilize and clean the area before applying an appropriate epoxy or acrylic repair system, reinforcing larger fractures with mesh or backing as needed.
Finish by sanding and blending the cured repair to match the surrounding enamel.
Determining if crack is cosmetic or structural
How can one tell whether a crack in an enamel bath is merely cosmetic or a sign of structural failure?
Visual inspection notes length, width, depth and whether enamel flaking exposes metal.
Cosmetic cracks are hairline, shallow, non-leaking and don’t flex under weight.
Structural cracks penetrate to substrate, create leaks, rust or movement, and require professional assessment rather than simple cosmetic repair.
Step 1 stabilizing and cleaning the crack
With the nature of the crack determined, attention turns to stabilizing and cleaning the affected area before any repair material is applied.
For hairline cracks, gently sand edges and blow away dust; for deeper cracks, widen slightly to remove loose enamel, then vacuum debris.
Degrease thoroughly with a non-residue cleaner and allow full drying.
Confirm surrounding glaze is stable before proceeding.
Step 2 using epoxy or acrylic repair systems
Select an appropriate epoxy or acrylic repair system based on crack depth and manufacturer recommendations, since formulations differ in viscosity, curing time, and adhesion to enamel.
For hairline cracks, apply thin capillary-flow resin and cure per instructions.
For deeper cracks, build in layers, allowing each to cure, then sand flush.
Finish with matching enamel topcoat for protection and blend.
Step 3 reinforcing large cracks (mesh, backing)
Because large or structurally compromised cracks cannot rely solely on surface fillers, reinforcing them with a backing or embedded mesh restores strength and prevents future failure.
The technician cleans and dries the area, inserts a thin fiberglass or metal mesh behind or across the crack, and secures it with epoxy resin.
Multiple layers may be applied for depth, ensuring load distribution before curing.
Finishing, sanding, and blending the repair
Begin by evaluating the repaired area to determine whether it requires only a light smoothing for hairline cracks or deeper material removal and layering for larger flaws.
For hairlines, sand fine grits progressively, clean dust, and apply thin touch-up enamel.
For deeper repairs, feather edges, sand contours, apply successive filler/enamel layers, sand between coats, then blend finish to match surrounding gloss and texture.
Fixing rust spots and corroded areas
Before repairing visible rust, the extent of underlying metal damage must be assessed to determine whether patching or panel replacement is required.
Rust should be removed carefully—mechanically or with appropriate removers—without further harming surrounding enamel. Then the bare metal must be cleaned, treated with a corrosion inhibitor, and primed.
Finally, selections between touch-up enamel, epoxy coatings, or professional re-enameling depend on the size of the area and desired durability.
Identifying underlying metal damage
Inspect the damaged area to determine whether the problem is limited to surface rust in the enamel or has progressed to bare, corroded metal beneath.
Look for pitting, flaking, discoloration, or soft spots indicating substrate loss.
Probe edges with a blunt tool to detect separation.
Measure extent and depth to decide if patching, reinforcement, or replacement of the bath section is required.
Removing rust without damaging enamel
Having determined whether corrosion is limited to surface rust or has exposed substrate, the next step is to remove rusted areas while preserving surrounding enamel.
Use fine-grit sanding pads or a rotary tool with gentle abrasive bits, keeping pressure light and edges feathered.
Clean residues with a rust remover compatible with enamel, rinse thoroughly, and dry.
Inspect for remaining corrosion before proceeding.
Treating metal, applying primer, and re-enameling options
Treat the exposed metal immediately to halt corrosion and create a sound surface for coatings: neutralize any remaining rust with a suitable converter or mild acid wash, remove loose scale with a wire brush or fine abrasive, then degrease and dry the area thoroughly.
Apply a compatible metal primer (zinc or epoxy-based), feather edges, sand between coats, then choose enamel repair kits or professional re-enameling for durable finish.
Removing stubborn stains and discoloration
Stubborn bathtub blemishes can stem from different sources—mineral deposits, soap scum, dye transfer, or rust—each needing a tailored approach.
Safe removal options range from mild abrasives and baking soda or vinegar for organic and mineral stains to commercial rust removers formulated for enamel, taking care to follow product instructions and ventilate.
If discoloration is deep, widespread, or accompanied by surface pitting, resurfacing rather than spot treatment is often the only reliable remedy.
Types of stains (mineral, soap scum, dye, rust)
What distinguishes mineral deposits from soap scum, dye marks, and rust is their origin and how they chemically bond to enamel surfaces.
Mineral stains are chalky, from hard water salts; soap scum is greasy, combining soap and body oils; dye marks penetrate pores from cosmetics or hair products; rust forms reddish-brown pits from iron corrosion.
Identification guides appropriate remediation.
Safe chemical and natural stain-removal methods
Begin by evaluating the stain type and enamel condition to choose a safe, effective removal method. For light mineral or soap scum, gentler agents suffice; for rust or dye, targeted cleaners work. Test in an inconspicuous spot.
Recommended approaches:
- Mild abrasive paste: baking soda + water, gentle scouring.
- Acidic rinse: diluted white vinegar for mineral buildup.
- Commercial enamel-safe rust remover, following label.
When stains require resurfacing instead of spot treatment
When spot treatments fail to restore uniform color or the enamel surface shows deep pitting, widespread scratches, or large-scale discoloration, resurfacing becomes the appropriate course of action.
Resurfacing removes compromised enamel, seals porosity, and restores appearance uniformly. It is recommended when stains penetrate beyond the surface or when repeated repairs create uneven patches.
Professional recoating guarantees adhesion, durability, and color match.
Re-enameling and reglazing the entire tub
When chips, widespread wear, or multiple repairs affect appearance or function, a full reglaze is typically recommended over spot fixes.
A concise overview of the DIY reglazing process—surface prep, priming, application and curing—should include realistic timeframes and safety notes, while comparing costs, quality and warranty options with professional services.
Finally, expected lifespan and routine maintenance after reglazing (cleaning methods, avoiding abrasives) determine whether the investment meets long‑term needs.
When to choose full reglaze versus spot repair
How should one decide between a full reglaze and a targeted spot repair?
Consider extent of damage, surface uniformity, and long-term durability. Choose spot repair for isolated chips or minor stains when surrounding enamel is sound.
Opt for full reglaze when widespread crazing, multiple repairs, discoloration, or adhesion loss compromise appearance or function.
Cost, timeline, and desired finish consistency also influence the decision.
Overview of DIY reglazing process (steps and timeframes)
Begin by preparing the workspace, tools, and safety gear: reglazing a full tub requires thorough cleaning, abrasion of the old surface, priming, multiple thin coats of enamel, and a proper cure.
The DIY sequence: clean (2–4 hours), sand/etch (1–3 hours), prime (1 hour plus flash-off), apply 2–4 coats (each 30–60 minutes), then cure (24–72 hours) before light use.
Pros and cons of professional reglazing services
After outlining the DIY reglazing sequence and time commitments, homeowners often weigh that against hiring a professional service for re-enameling or full-tub reglazing.
Professionals offer consistent results, warranty coverage, and faster turnaround, plus proper ventilation and equipment.
Downsides include higher cost, scheduling constraints, and dependence on contractor quality; poor workmanship can necessitate costly rework or void manufacturer warranties.
Expected lifespan and maintenance after reglazing
Expect reglazing to extend a tub’s usable life by roughly 5 to 10 years for re-enameling and up to 10–15 years for high-quality professional reglazing, depending on surface prep, materials, and usage.
Longevity hinges on proper curing, gentle cleaners, and avoiding abrasive tools. Regular inspection for chips, prompt touch-ups, and controlling humidity will preserve finish and delay full replacement.
Color matching and finishing techniques
Color matching begins with sampling the existing enamel and testing small swatches under the bathroom’s lighting to guarantee an accurate hue and gloss level.
Application method affects finish quality: spraying typically yields a smoother, more uniform surface while brush or roller work may require careful technique to avoid brush marks.
After the repair, polishing and a suitable protective topcoat restore shine and durability, with attention to compatibility between layers.
How to match paint/enamel to existing tub color
Although exact matches can be difficult, careful assessment of the tub’s hue, gloss, and undertones makes a close repair possible.
Photograph the area in natural light, bring a clean chip sample to a paint store, and request custom-matched enamel.
Test small swatches, adjust tint gradually, and choose matching sheen.
Blend edges subtly and allow full cure before final inspection.
Spraying vs brush/roller application for smooth finish
Weighing spray against brush or roller application hinges on the desired smoothness, the size of the repair, and practical constraints: spraying typically yields the flattest, most uniform finish with minimal brush marks but requires masking, ventilation, and equipment, while brushing or rolling is simpler and more controlled for small patches though it may leave slight texture.
Choice depends on area, skill, and cleanup.
Polishing and protective topcoats
Match the repaired area to the surrounding enamel by blending precise color tinting with careful finishing: proper color matching minimizes visible shifts, while polishing and a compatible protective topcoat restore sheen and abrasion resistance.
After curing, wet-sand with fine grit, polish to match gloss level, then apply thin, even coats of a chemical-resistant topcoat.
Allow full cure before regular use.
Curing times, testing, and first use after repair
Typical curing times for fillers, epoxies, and topcoats vary by product and ambient conditions and must be observed to guarantee a durable repair.
After full cure, adhesion and water resistance should be checked with noninvasive tests—gentle tape pulls, low-pressure water sprays, and visual inspection—before returning the bath to service.
Finally, any removed or damaged caulk should be replaced and the perimeter resealed to prevent water ingress.
Typical curing times for fillers, epoxies, and topcoats
When repairing an enamel bath, curing times for fillers, epoxy primers, and topcoats vary by product chemistry and ambient conditions and must be observed precisely to guarantee durability and adhesion.
Typical patch fillers set in 30 minutes to 24 hours. Epoxies cure to handle light use in 24–72 hours and full cure in 7 days. Topcoats dry to touch in hours, fully hardening over several days.
How to test adhesion and water resistance safely
After allowing the specified curing intervals for fillers, epoxies, and topcoats, the next step is to verify that the repair bonds and repels water as planned.
Inspect visually, then perform a gentle adhesion test with fingertip pressure and a plastic scraper.
Apply a slow stream of water and check for seepage or soft spots.
Wait full cure before regular use; document results.
Replacing caulk and re-sealing edges
Replace the damaged caulk and reseal perimeter joints only once all repair materials have reached their specified full cure to guarantee proper adhesion and waterproofing.
Remove old caulk, clean and dry surfaces, apply manufacturer-recommended silicone or epoxy sealant, tool joints smoothly.
Observe manufacturer curing times, avoid stress or water exposure, perform a small water test, then resume normal use only after full cure confirmation.
Cost estimates and time required for common repairs
Typical costs and durations for enamel bath repairs vary by scope and finish quality, so a concise comparison helps set expectations. Below is a quick reference of common jobs, approximate cost ranges, and typical time to completion. Use these figures as a starting point for budgeting and scheduling before obtaining specific quotes.
| Repair type | Typical cost (USD) | Typical time |
|---|---|---|
| Small chip | $20–$80 | 1–3 hours |
| Crack repair | $75–$250 | 2–6 hours |
| Rust repair / Full reglaze | $150–$1,200+ | 1 day–3 days |
Small chip repair
Estimate costs and time realistically: small enamel chip repairs typically range from a simple DIY touch-up to a professional refinishing, with prices spanning roughly $10–$50 for store-bought repair kits and about $100–$300 for a service call that includes color matching and curing.
DIY kits usually take 30–90 minutes plus curing; professionals may schedule one visit, finishing within a few hours to a day.
Crack repair
Evaluating and repairing cracks in an enamel bath varies with crack size and depth: hairline surface cracks often accept DIY epoxy or resin repairs costing $20–$75 and taking 1–3 hours including prep and initial cure time, while deeper or structural cracks that penetrate the substrate typically require professional intervention.
Price ranges commonly fall between $150 and $600 to include inspection, substrate stabilization, color-matched enamel application, and final curing, with work completed in a few hours to a day but potential delays if parts or extended curing are needed.
Minor repairs generally finish same day; major jobs may need 24–48 hours for full return to service.
Rust repair
Addressing rust damage in an enamel bath hinges on the extent of corrosion and whether it has breached the enamel to reach the underlying metal.
Minor surface rust: cost low, single afternoon to sand, treat with rust converter, prime and touch up with enamel repair kits.
Deeper corrosion requiring filler and multiple coats raises costs and may take one to two days; severe structural rust can be costlier.
Full reglaze
Full reglazing restores an enamel bath by stripping the old finish, repairing surface defects, applying primer, and spraying several coats of new enamel—typically completed by a professional.
Costs vary: DIY kits cost £50–£150, professional jobs run £200–£700 depending on size and condition.
Time required: DIY 4–12 hours over two days; professional refinishing 4–8 hours plus curing, often completed within one day.
Common mistakes to avoid and troubleshooting
Common errors that compromise finish or adhesion include inadequate surface preparation, using incompatible products, and improper curing.
Guidance on correcting a botched repair should cover assessment, stripping or sanding back to sound substrate, and reapplying appropriate materials.
Clear indicators for when to call a professional are persistent structural damage, widespread coating failure, or health and safety concerns.
Mistakes that ruin finish or adhesion
Mistakes that compromise the finish or adhesion of an enamel bath repair typically stem from overlooked surface preparation, incorrect product choice, or premature exposure to moisture and use.
Other common errors include inadequate cleaning (oils, soap film, rust), insufficient sanding or etching, mixing or applying compounds incorrectly, using incompatible primers or topcoats, and disturbing cure times.
Each prevents proper bonding and leads to peeling or discoloration.
How to fix a botched repair
When a repair begins to peel, bubble, or show uneven color, the next step is to identify and reverse the underlying cause rather than repeatedly applying fresh coats.
Remove loose material, sand to sound enamel, clean with solvent, and let dry.
Reprime bare metal or fibreglass as required.
Match filler/type, apply thin even layers, cure fully.
Test adhesion before finishing.
When to call a professional
How can a homeowner tell if a repair has exceeded DIY limits? Signs include persistent leaks, spreading cracks, uneven finish, or trapped rust.
If previous fixes fail, odors persist, or water damage appears behind panels, contact a professional. Licensed refinishers assess structural integrity, recommend reglazing or replacement, and prevent warranty voids.
Avoid prolonged DIY attempts that worsen damage.
Maintenance tips to prevent future damage
Practical maintenance can greatly reduce the need for future repairs, starting with gentle daily cleaning using non-abrasive cleaners and soft cloths.
Preventive measures—such as cushioning heavy items, using bath mats, promptly drying wet areas, and applying rust-inhibiting products—help avoid chips, scratches, and corrosion.
Periodic seasonal inspections and simple long-term care routines will catch early wear and extend the enamel’s lifespan.
Daily cleaning habits and recommended products
Establishing simple daily cleaning habits is the most effective way to preserve an enamel bath’s finish and prevent stains or scratches from developing.
Wipe surfaces after use with a soft microfiber cloth to remove soap residue and water spots.
Use mild, non-abrasive cleaners (pH-neutral dish soap or dedicated enamel cleaner) and avoid bleach or scouring pads.
Rinse thoroughly and air-dry.
How to prevent chips, scratches, and rust
Prevent damage to an enamel bath by adopting simple protective habits and addressing small issues before they worsen.
Use nonabrasive cleaners, soft cloths, and rubber mats to cushion impacts. Promptly dry wet surfaces and remove metal cans or razors.
Repair minor chips immediately with touch-up enamel to prevent rust. Avoid dropping heavy objects and limit chemical exposure that can dull or weaken the finish.
Seasonal checks and long-term care recommendations
After adopting daily protective habits and addressing small chips, seasonal inspections and consistent long-term care help preserve an enamel bath’s finish and function.
Quarterly checks should include drainage, caulking, and surface cleaning with nonabrasive cleaners.
Reseal worn grout, touch up exposed metal, and address persistent stains promptly.
Maintain moderate water temperature and avoid harsh chemicals to prevent deterioration and extend service life.
Quick checklist: Repair decision flow and next steps
When should a repair proceed versus when is replacement the better option? A concise decision checklist guides action: assess damage extent, safety risk, and cost-effectiveness.
Small chips/stains → repair.
Deep cracks, widespread delamination, or recurring leaks → replace.
Next steps: contact a pro if unsure, obtain quotes, schedule work or perform DIY with proper kits and safety precautions.
- Assess
- Compare
- Act
Conclusion
When an enamel bath shows chips, cracks, or stains, repair restores both function and appearance, acting like a small patch of sunlight in a cloudy room. With proper tools, safety, and methodical preparation, most minor damage can be fixed by a careful homeowner; deeper issues may need a professional. Following step-by-step repair, avoiding common mistakes, and doing regular maintenance keeps the tub durable and attractive, saving time, money, and future headaches.