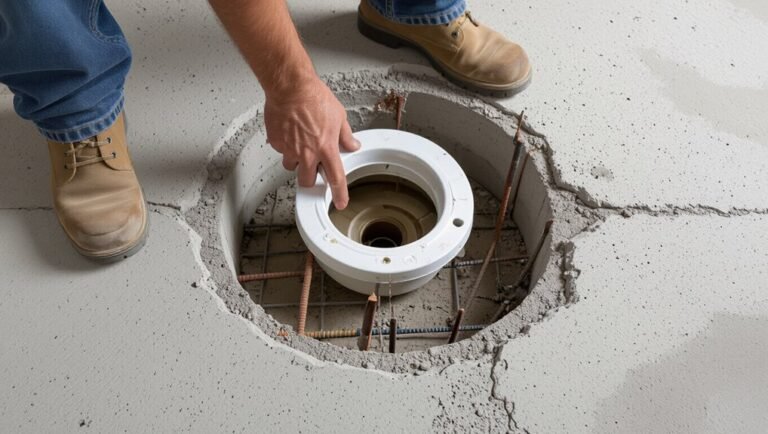
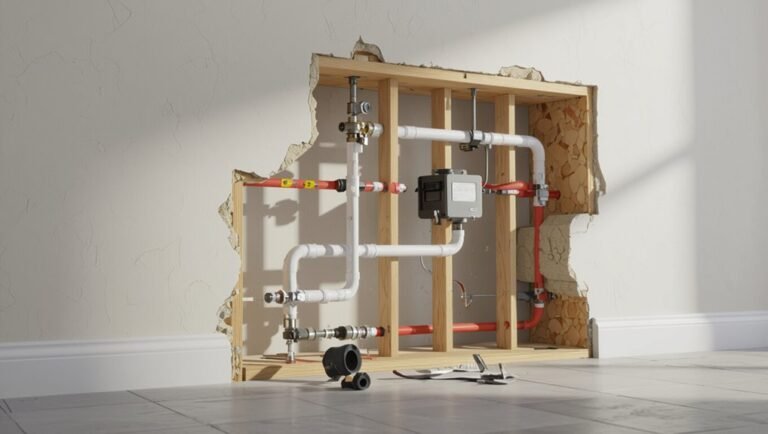
How to PEX Plumbing Installation: Step-by-Step Guide for DIYers and Pros
Introduction to PEX Plumbing Installation
PEX plumbing installation involves using flexible plastic tubing for water supply and heating systems. To successfully install PEX, you need to measure, cut, and join the tubing with various fittings. Follow local codes, secure the runs properly, and perform a pressure test to check for leaks. Proper tools and safety gear are essential for reducing mistakes, and a clear plan with necessary permits ensures compliance. This guide provides detailed steps and options for both DIYers and professionals.
What PEX Plumbing Is and Why DIYers Choose It
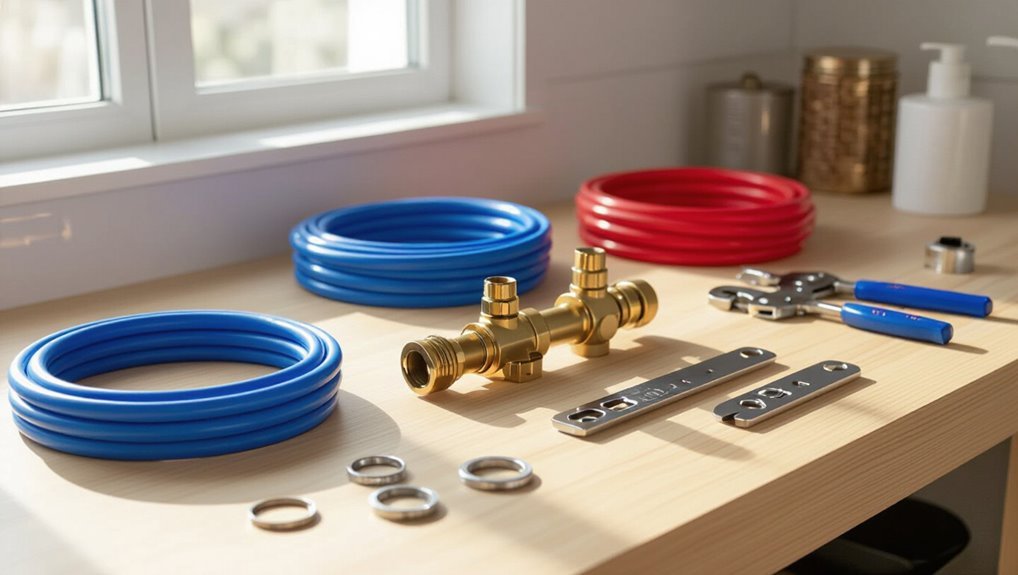
PEX (cross-linked polyethylene) is a flexible plastic pipe available in PEX-A, PEX-B, and PEX-C varieties that differ by manufacturing method and performance characteristics.
It is often chosen over copper or CPVC for residential work because it is generally less expensive, easier to bend around obstacles, and more resistant to freeze-related rupture.
Common uses include potable water distribution, radiant-floor heating, and repiping projects where quick, accessible installation is desired.
Definition and types of PEX (PEX-A, PEX-B, PEX-C)
Flexible plastic tubing offers a modern alternative to traditional copper and CPVC for residential water supply, known broadly as cross-linked polyethylene (PEX).
It explains how to PEX plumbing installation choices among three cross-linking methods: PEX-A (expansion, most flexible), PEX-B (peroxide, stiffer), and PEX-C (radiation, intermediate).
Each type affects fittings, repair methods, and long-term performance considerations.
Advantages vs. copper and CPVC (cost, flexibility, freeze resistance)
Although often chosen for modern installations because of its versatility, cross-linked polyethylene tubing offers distinct advantages over copper and CPVC that appeal to DIYers and professionals alike.
PEX typically costs less, requires fewer fittings, and installs faster due to flexibility and long continuous runs. It tolerates occasional freezing with less bursting risk, resists corrosion and scale, and reduces labor and material expenses compared to rigid alternatives.
Common residential uses for PEX piping
When homeowners and contractors need a reliable, easy-to-install supply line for potable water, radiant heating, or remodeling projects, cross-linked polyethylene tubing is often the material of choice.
It serves main water distribution, branch lines, in-wall and underfloor radiant systems, and retrofit runs where flexibility reduces fittings.
PEX also handles outdoor hose bibs, snow-melt loops, and temporary construction water lines with corrosion resistance and quick installation.
Tools, Materials, and Safety Gear Needed
Before beginning a PEX installation, the installer should assemble essential tools such as a pipe cutter, crimp or expander tool, deburring tool, and accurate measuring instruments.
A concise materials list—appropriate PEX tubing sizes, compatible fittings, manifolds, clamps or crimps, and mounting hardware—ensures the job proceeds without delays.
Proper safety equipment and a cleared, well-lit workspace reduce risk and support efficient, code-compliant work.
Essential tools (pipe cutter, crimp/expander, deburring tool, measuring tools)
A concise set of hand and specialty tools is essential for reliable PEX installation: a quality PEX-specific pipe cutter, either a crimp or expansion tool (matched to the chosen fitting system), a deburring tool to clean cut ends, and accurate measuring tools such as a tape measure and marker.
Additional useful items include a ratchet or clamp installer, deburr brush, level, and storage for organized, damage-free tubing handling.
Materials list (PEX tubing sizes, fittings, manifolds, clamps/crimps, mounting hardware)
Having gathered the necessary hand and specialty tools, attention turns to selecting the right materials for a durable PEX system.
Required items include 1/2″, 3/4″ (and 1″ for mains) PEX tubing; brass or polymer fittings; manifolds for zoned distribution; stainless clamps or copper crimp rings (with matching tool); mounting brackets, pipe clips, and insulation; compatible adapters and spare fittings for connections.
Safety equipment and workspace preparation
When preparing the work area and assembling safety gear, the installer should prioritize clear access, proper ventilation, and appropriate personal protective equipment (PPE) to reduce risk and support efficient work.
Essential items include safety glasses, gloves, hearing protection, knee pads, and respirator if soldering.
Confirm adequate lighting, stable ladders or scaffolding, fire extinguisher nearby, and organized tool layout to prevent trips and delays.
Local Codes, Permits, and When to Call a Pro
Before beginning any PEX work, the installer should verify local plumbing codes and contact the municipal building department to determine permit requirements.
Jobs involving mains connections, changes to drainage, or work beyond simple repairs typically require a licensed plumber.
All permitted work should be documented with plans, receipts, and inspection records to guarantee compliance.
How to check local plumbing codes and permit requirements
Curious how local rules affect a PEX installation? The installer should contact the municipal building or permitting office, review applicable plumbing codes online, and confirm accepted materials and fittings.
Verify permit types, inspection schedules, fee estimates, and required documentation. Document approvals before work begins.
When unclear, seek code interpretations from inspectors to avoid rework or fines.
Situations that require licensed plumber involvement
After verifying local codes and permits, the installer should identify situations that mandate a licensed plumber.
Complex alterations to mains, structural penetrations, water heater or gas appliance connections, backflow prevention and cross-connection corrections, multi-family or commercial system work, and projects requiring official sign-off typically need a licensed professional.
When in doubt, consult the authority having jurisdiction to avoid violations or safety risks.
Documenting work for inspections
A clear, organized record of PEX work streamlines inspections and protects both installer and property owner; it should list permits, scope of work, materials (including pipe type and fitting methods), dates, and any deviations from plans.
Include photos, pressure test results, and fixture locations. Note inspector communications, approval dates, and warranty info.
Retain copies for owner, contractor, and local authority as required.
Planning Your PEX Plumbing Project
Planning a PEX plumbing project begins with choosing a layout—trunk-and-branch or a home-run manifold—based on the home’s size, fixture locations, and desired flow control.
Accurate sizing of runs and tubing diameter, plus calculating required fittings, lengths, and spare materials, guarantees adequate pressure and avoids mid-job shortages.
The plan should also address hot water recirculation needs and insulation to maintain efficiency and reduce heat loss.
Mapping the layout: trunk-and-branch vs. home-run (manifold) systems
Several common piping layouts exist for PEX installations, but the two primary approaches—trunk-and-branch and home-run (manifold)—differ in routing, materials, and maintenance implications.
Trunk-and-branch uses main lines with lateral feeds, reducing tubing runs but introducing shared flow and potential pressure loss.
Home-run runs individual lines from a central manifold, improving control, isolation, and balancing at the cost of more tubing and manifold hardware.
Sizing PEX runs and selecting tubing diameter
Choosing between trunk-and-branch and home-run layouts influences how runs are sized and which tubing diameters are practical.
Designers prioritize flow rates, pressure loss, and fixture demand to select 1/2″, 3/4″, or 1″ PEX. Longer mains or multiple fixtures require larger diameters; short, dedicated home-run branches often use 1/2″.
Local code and pump capacity also guide diameter choices.
Calculating fittings, lengths, and spare materials
A careful materials tally begins by mapping each run and counting every fitting, length of tubing, and anticipated waste to produce an accurate parts list.
Calculate straight lengths, add allowances for bends and routing, and list fittings by type and size. Include clamps, manifolds, and connection kits.
Add spares for common failures and an extra 5–10% tubing for cutting errors and unforeseen adjustments.
Considerations for hot water recirculation and insulation
Plan for hot water recirculation and insulation early in the design phase to guarantee comfort, reduce water waste, and maintain system efficiency.
Specify recirculation loop layout, pump sizing, and control strategy (timer, thermostat, demand).
Insulate PEX runs, fittings, and manifolds to minimize heat loss.
Account for expansion, access for maintenance, and local codes.
Balance upfront cost against long-term energy and water savings.
Step-by-Step PEX Installation Process
Before beginning, the installer guarantees the water supply is shut off and existing plumbing is prepared to prevent leaks.
Measurements are taken and PEX tubing is cut to length, with tube ends deburred and prepped for reliable joints.
An overview of joining methods—crimp, clamp, push-fit, and expansion—is provided, followed by stepwise demonstration of crimp/clamp connection technique.
Preparing existing plumbing and shutting off water
Several key safety checks should be completed prior to any work on existing plumbing: confirm the main water shutoff is identified, notify occupants of the shutdown, and gather necessary tools for isolating specific branches.
The installer should depressurize lines, open lowest and highest fixtures to drain water, label isolated valves, and verify no flow with a pressure gauge.
Inspect for leaks and corrosion before cutting or removing fittings.
Measuring and cutting PEX tubing accurately
Measure each run twice and mark the PEX precisely before cutting to guarantee proper fit and avoid waste.
The installer measures from fitting center to center, allowing for bends and routing, then transfers marks to the tubing.
Use a square, sharp cutter and steady pressure for a clean, perpendicular cut.
Recheck lengths against layout before proceeding to the next step.
Deburring and prepping tube ends
After verifying cut lengths, attention turns to preparing the tube ends for fittings. The installer removes burrs and rough edges with a deburring tool or utility knife, then inspects for straight, square cuts.
Chamfering the inner edge prevents sleeve damage. Clean, dry tubing and a final measurement check guarantee proper seating and leak-free connections during assembly.
Joining methods overview: crimp, clamp, push-fit, expansion
A range of reliable joining methods—crimp, clamp, push‑fit, and expansion—covers most PEX installation needs, each with distinct tools, fittings, and suitability for specific applications.
Crimp and clamp use metal rings and simple tools; push‑fit offers tool‑free, reversible connections. Expansion creates secure, permanent joints for PEX‑a.
Selection depends on code, pipe type, accessibility, and expected service conditions.
Demonstration steps for crimp/clamp connections
Begin by preparing the work area and gathering the required tools and materials—PEX tubing, fittings, crimp or clamp rings, a ring crimper or clamp tool, a tubing cutter, and a go/no‑go gauge—so the installer can work efficiently and safely.
Cut squarely, deburr, slide ring onto tubing, fully seat tubing on fitting, position ring 1/8–1/4 inch from end, compress with tool, and verify fit with gauge.
Demonstration steps for expansion fittings (if using PEX-A)
Installers preparing PEX-A expansion fittings should guarantee the work area is clean and that the necessary tools—an expansion tool with the correct jaw size, expansion heads, PEX-A tubing, fittings, and a depth gauge—are at hand.
Cut tubing square, deburr, mark insertion depth, expand tubing evenly with the tool, insert fitting fully before tube contracts, confirm joint alignment, allow cooling, and inspect each connection for proper seating and no visible gaps.
Using push-fit fittings for repairs and tight spaces
Several common repair and tight-space scenarios call for push-fit fittings because they require no special tools and create reliable, watertight connections quickly.
They suit emergency fixes, adapter changes, and cramped under-sink splices. The installer must cut square, deburr, and fully insert tubing to the depth mark.
Test for leaks and secure tubing to prevent movement that can stress joints over time.
Installing manifolds and branch lines
Lay out the manifold and branch routing before fastening to guarantee logical flow, correct lengths, and unobstructed access for valves and future service.
Position the manifold centrally to minimize runs, label each port, and cut PEX squarely.
Deburr, insert fittings fully, and confirm alignment.
Test fit branches, maintain gentle bends, and leave access space for isolation valves and meters prior to final connections and pressure testing.
Securing and supporting PEX runs (staples, clamps, spacing)
After manifolds and branch lines are positioned and test-fitted, attention turns to securing the PEX runs to maintain alignment, prevent sagging, and protect against abrasion.
Use manufacturer-approved staples or cushioned clamps, spaced per code—typically every 32–48 inches horizontally and closer near bends, fittings, and supports.
Avoid overtightening; allow slight movement for expansion.
Anchor at manifolds and near fixtures for stability.
Routing through studs, joists, and around obstacles
One clear path through framing should be planned before cutting or drilling, mapping each run to minimize bends and avoid structural members, electrical wiring, and HVAC ducts.
Drill appropriately sized holes centered in studs and joists, using protective plates where necessary.
Maintain required clearances, use gentle sweeps around corners, and secure lines on both sides of penetrations to prevent abrasion while preserving structural integrity.
Connecting to fixtures, appliances, and water heater
With rough runs routed and secured through framing, attention shifts to tying PEX into fixtures, appliances, and the water heater.
Install manifolds or branch fittings, cut tubing squarely, deburr and insert fittings per system type (expansion, crimp, clamp).
Use correct adapters for appliances and water heater coils, maintain proper support, observe manufacturer torque/clearance, and label lines for hot and cold.
Pressure testing and leak checking procedures
Begin by isolating the completed PEX system and preparing for a controlled pressure test: close all fixture valves, attach a calibrated pressure gauge and a dedicated test pump or air/water source at the system’s highest practical point, and connect a documented means of slowly introducing test pressure while venting trapped air.
Pressurize to required PSI, hold for specified duration, inspect fittings, joints, and visible runs for drops or moisture, document results.
Finalizing connections and restoring water
Finish tightening and secure all remaining fittings, then prepare to reintroduce water to the PEX system in a controlled sequence.
Open main supply slowly, bleed air from high points and fixtures, and monitor joints for leaks.
Verify pressure stability and recheck support clips and insulation.
Restore branch valves one at a time, confirm fixture operation, and document final readings and adjustments before completing the job.
Common Problems and How to Fix Them
Common PEX installation issues include leaks at fittings, kinks or crimps from tubing memory, pressure loss or airlocks, and noise related to thermal expansion or water hammer.
Each problem requires specific inspection and corrective steps—re-tightening or replacing fittings, removing and re-routing damaged tubing, purging trapped air, or adding expansion loops and arrestors.
The following sections describe how to identify symptoms and apply practical fixes for these common faults.
Identifying and repairing leaks at fittings
Detecting and repairing leaks at PEX fittings requires careful inspection and systematic troubleshooting to determine whether the problem stems from improper installation, damaged components, or material degradation.
The technician isolates the circuit, dries the area, and reinspects fittings, fittings tools, and tubing ends.
Faulty crimps, loose clamp rings, damaged O-rings, or cut tubing get replaced; connections are retested under pressure for verification.
Dealing with kinks, crimps, and tubing memory
After addressing leaks at fittings, attention turns to physical deformities in PEX tubing—kinks, crimps, and residual coil memory—that can restrict flow or compromise fittings.
Small kinks can be eased with gentle bending or heated with warm water; severe kinks require cutting out and splicing.
Crimps near fittings necessitate replacement of the affected section.
To reduce memory, anneal coils before installation.
Troubleshooting pressure loss and airlocks
Identify pressure loss and airlocks early to prevent uneven flow, noisy pipes, and damage to fixtures.
Inspect fittings, valves, and manifolds for leaks or partial closures.
Purge lines by opening highest and lowest points, bleed fixtures sequentially, and run full flow to expel trapped air.
Check pressure at supply and branch lines; replace faulty valves or clogged aerators and clean debris from filters.
Addressing thermal expansion and noise (water hammer)
Once airlocks and pressure loss have been resolved, attention should turn to thermal expansion and water hammer, two sources of stress and noise in PEX systems.
Install expansion loops or slip fittings where long runs may buckle.
Add water hammer arrestors near quick-closing valves and secure piping with cushioned clamps to prevent movement.
Verify system pressure and add expansion tanks if needed.
Maintenance, Longevity, and Best Practices
Routine inspections of PEX systems identify wear, leaks, and signs of chemical attack before they escalate.
In cold climates, proper insulation and protection against freezing are recommended to prevent damage and extend service life.
Guidance on avoiding harmful chemicals, performing timely repairs, and knowing when to replace sections versus fittings helps maximize longevity and reliability.
Inspecting PEX systems periodically
Regular inspections of PEX plumbing help detect wear, damage, and installation issues before they escalate into leaks or failures.
Inspectors should check visible runs, fittings, and clamps for discoloration, kinks, abrasion, or corrosion at metal connections.
Verify support spacing, secure connections, and signs of moisture or staining.
Document findings, schedule repairs promptly, and maintain a routine inspection interval aligned with system usage and age.
Recommended insulation and protection in cold climates
When exposed to freezing conditions, PEX piping requires specific insulation and protective measures to prevent heat loss, freezing, and material stress.
Use closed-cell foam insulation, pipe sleeves, or heat tape rated for potable water applications and guarantee full coverage at bends, fittings, and exposed runs.
Additionally, seal wall penetrations, maintain attic and crawlspace insulation, slope outdoor runs for drainage, and protect against UV and rodents.
Tips to extend system life and avoid chemical damage
Several straightforward practices greatly extend PEX system life and reduce chemical exposure: use approved fittings and oxygen-barrier tubing where required, avoid direct contact with incompatible materials (certain plastics, solvents, and stored chemicals), and make certain water chemistry stays within recommended pH, hardness, and chlorine limits.
Periodic visual inspections, flushing after contamination, controlled disinfectant dosing, and avoiding prolonged UV exposure further minimize degradation and preserve performance.
When to replace sections vs. repair fittings
Maintaining appropriate materials and water chemistry reduces failure risk, but occasional leaks, fittings corrosion, or localized damage will still occur and require judgment on repair versus replacement.
Replace sections when multiple fittings fail, pipe integrity is compromised, or age and contamination suggest systemic issues.
Repair fittings for isolated failures, accessible connections, or when piping remains sound.
Prioritize safe, code-compliant methods and pressure-test after work.
Cost Breakdown and Time Estimates for DIY Projects
The section outlines typical material costs for projects ranging from a single fixture replacement to whole-house PEX installations, providing ballpark figures for tubing, fittings, and manifolds.
It compares tool purchase prices against rental options for specialty crimpers and cutters to help weigh upfront investment.
Estimated labor times for common jobs—such as a sink swap, bathroom retrofit, or full repipe—are presented to aid scheduling and cost calculations.
Typical material costs by project type (single fixture, whole-house)
A clear breakdown of typical material costs helps DIYers decide whether to tackle a single fixture or a whole-house PEX installation.
Single fixture jobs (sink, toilet, shower) commonly range $30–$150 for PEX tubing, fittings, valves, and connectors.
Whole-house installs typically run $400–$2,500 depending on home size, layout, and part quality.
Estimate conservatively and factor spare fittings.
Tool costs vs. rental options
After outlining typical material costs for single fixtures versus whole-house runs, attention turns to the tools required—buying outright versus renting can substantially change total project cost and scheduling.
Purchasing crimpers, expansion tools, and pipe cutters raises upfront expense but benefits frequent users. Renting or borrowing reduces short-term cost for one-off jobs; factor rental fees, deposit, availability, and potential damage charges into the budget.
Estimated labor time for common jobs
Estimating labor time for common PEX jobs helps set realistic expectations and budget for DIYers and contractors alike.
Typical estimates: single fixture rough-in 1–2 hours, full bathroom repipe 6–12 hours, kitchen branch add 2–4 hours, whole-house repipe 2–4 days.
Allow extra time for fittings, manifold work, inspections and unforeseen issues.
Adjust for experience, access, and system complexity.
Comparison of Fitting Methods and Brands
A concise comparison of common PEX fitting methods—crimp, clamp, expansion, and push-fit—helps clarify tool needs, installation skill, and leak resistance. Recommended brands and warranty notes are summarized to guide product selection and long-term reliability. The table below contrasts key attributes for quick reference.
| Fitting Method / Brand | Notes |
|---|---|
| Crimp | Requires crimp tool; economical; widely supported |
| Clamp (cinch) | Uses stainless steel clamp and tool; fast and forgiving |
| Expansion | No rings after expansion; higher skill, secure joints |
| Push-fit | Tool-free, fastest; higher material cost |
| Brands & Warranty | Major brands offer 25–25+ year warranties; check compatibility and certification (NSF/UPC) |
Crimp vs. clamp vs. expansion vs. push-fit
Choosing the right connection method for PEX tubing greatly affects installation speed, long-term reliability, and maintenance requirements. Each method balances cost, skill, and resilience: crimp is economical, clamp offers accessibility, expansion yields leak-resistant joints, and push-fit prioritizes convenience. Choose by access, expected pressure cycles, and repairability.
| Method | Feeling |
|---|---|
| Crimp | Practical |
| Clamp | Accessible |
| Expansion | Confident |
| Push-fit | Relieved |
Recommended brands and warranty notes
Several reputable manufacturers dominate the PEX fittings market, each pairing specific connection methods with distinct warranty terms and documented performance. Brands like Viega, Uponor, SharkBite and Zurn offer differing guarantees, material compatibilities, and installer requirements; choice depends on system type, local code acceptance, and desired longevity.
| Brand | Notable warranty |
|---|---|
| Viega | Lifetime |
| Uponor | 25+ years |
| SharkBite | Limited |
| Zurn | Varies |
Common Mistakes DIYers Make and How to Avoid Them
Common DIY errors in PEX installation often stem from basic lapses in measurement, support, and component selection, which can cause leaks or failures if not corrected.
Clear attention to cutting accuracy, proper securing and support, correct fitting choice and installation, and routine pressure testing prevents most issues.
The following highlights three frequent problem areas and practical steps to avoid them:
- Measuring/cutting inaccuracies and sloppy tubing preparation.
- Insufficient securing/support and improper fitting selection/installation.
- Skipping pressure tests and final inspections.
Mistakes with measuring and cutting
Many DIYers underestimate how small measurement and cutting errors compound across a PEX run, leading to leaks, poor fit, or unnecessary rework.
Misreading lengths, failing to allow for fittings, and cutting at improper angles cause joints to misalign or fittings to seat poorly.
Using proper tools, double-checking measurements, marking cuts, and deburring tubing prevents waste, weak connections, and time-consuming fixes.
Errors in securing and supporting tubing
Failing to secure and support PEX tubing properly often leads to sagging, stress at fittings, and noise from movement, which over time can cause leaks or joint failure.
Install supports at recommended intervals, maintain proper spacing near bends, avoid overtightening clamps that deform tubing, and use insulated clips to prevent abrasion.
Inspect runs for movement and correct loose or improperly spaced hangers promptly.
Improper fitting selection and installation
Select fittings carefully and install them correctly to prevent leaks, flow restrictions, or premature failures.
DIYers often choose wrong materials, sizes, or connection types, causing mismatches and stress points. Proper crimp, clamp, or push-fit technique, correct insert depth, and compatible materials prevent failures.
Verify manufacturer specifications and use recommended tools; replace damaged fittings and avoid improvisation.
Skipping pressure tests and inspections
Neglecting pressure tests and inspections leaves leaks and installation defects undiscovered until they cause water damage or system failure.
DIYers who skip testing risk costly repairs, mold, and voided warranties.
Proper pressure tests, timed leak checks, and required municipal or code inspections confirm joint integrity and correct routing.
Scheduling and documenting inspections guarantees compliance and provides proof for future maintenance or resale.
Quick Reference Checklists for Installation and Inspection
Quick reference checklists condense essential tasks into clear, actionable steps to reduce errors and save time during PEX plumbing projects.
They typically cover preparations before work begins, the sequential installation actions, and the required tests after completion to verify system integrity.
The following checklist categories provide a concise framework for consistent installation and inspection:
- Pre-installation checklist
- Step-by-step installation checklist
- Post-installation testing checklist
Pre-installation checklist
Before any fittings or tubing are cut, a concise pre-installation checklist guarantees all materials, tools, site conditions, and permits are verified to prevent delays and rework.
The checklist should confirm tubing type/lengths, fittings, clamps, manifolds, insulation, correct tools, pressure test equipment, pipe routing clearances, access panels, local code compliance, required permits, safety gear, and staging for efficient workflow.
Step-by-step installation checklist
With the materials and site verified, a step-by-step installation checklist guides technicians through a concise sequence of actions—layout and measurement, cutting and deburring, joining fittings or crimping, securing runs and supports, insulating and labeling, pressure testing, and final inspection—each item paired with pass/fail criteria, required tools, and typical tolerances to streamline work and simplify inspections.
The checklist prioritizes sequencing, verification stamps, remediation steps, and documentation fields.
Post-installation testing checklist
After system assembly and securing of all runs, the post-installation testing checklist directs a concise series of verifications to confirm integrity, functionality, and code compliance.
It includes pressure testing at specified PSI for prescribed duration, visual inspection of fittings, leak detection, flow and temperature checks, expansion allowance verification, labeling and documentation, and final shutoff and isolation testing with corrective actions recorded for code inspection and homeowner records.
Resources, Tutorials, and Further Reading
The guide points readers to manufacturer installation manuals and instructional videos for product-specific procedures and warranties.
It also highlights local building code resources and permit contacts to guarantee compliance.
Recommended online communities and troubleshooting forums are listed for peer support and practical tips.
Manufacturer installation guides and videos
Where can installers find the most reliable procedural details for PEX systems?
Manufacturer installation guides and videos provide authoritative instructions on fittings, crimping, expansion, pressure testing, and component compatibility.
They include torque specs, material lists, troubleshooting tips, and warranty conditions.
Installers should consult model-specific manuals and official training videos before starting work to verify proper technique and maintain warranty coverage.
Local code resources and permit contacts
Local building departments and code enforcement offices serve as the primary sources for jurisdiction-specific requirements and permit contacts related to PEX installations.
Inspectors, permit clerks, and online municipal portals provide code interpretations, application procedures, fee schedules, inspection checklists, and approved materials lists.
Contractors and DIYers should verify local amendments, obtain required permits before work, and document inspections to guarantee compliance and avoid rework or penalties.
Recommended online communities and troubleshooting forums
After consulting municipal sources for codes and permits, many installers turn to online communities and troubleshooting forums for practical guidance, peer experiences, and product-specific tips.
These resources offer installation techniques, tool recommendations, troubleshooting threads, and manufacturer clarifications. Trusted spaces include:
- Reddit’s r/Plumbing and r/DIY for user experiences and quick solutions
- Contractor Talk for professional discussions
- Manufacturer forums (Uponor, Viega) for product-specific support
Conclusion
Choosing PEX offers flexibility, cost savings, and faster installs, but success hinges on careful planning, correct tools, and adherence to codes. Whether using crimp, clamp, or expansion systems, follow manufacturer guidance, inspect connections, and know when to call a pro—don’t cut corners. With practice, many common pitfalls become second nature; keep checklists and resources handy so projects finish on time and under budget, proving that well-laid plans pay off.