How to Plumb a Tiny House: Step-by-Step Guide for DIYers and Pros
To plumb a tiny house effectively, start by deciding between a stationary or mobile setup. Then, ensure your water supply and waste systems comply with local codes. For mobile homes, include freshwater and gray/black tanks; for stationary ones, connect to municipal, well, or septic systems. Use PEX for water supply lines and PVC or ABS for drainage. Properly size vents and drains, and plan for cleanouts and access panels. Install suitable water heating, pumps, and filtration systems while adhering to manufacturer guidelines and local codes. The following sections will provide detailed steps and layouts to guide you through the process.
Overview of Tiny House Plumbing: What to Expect
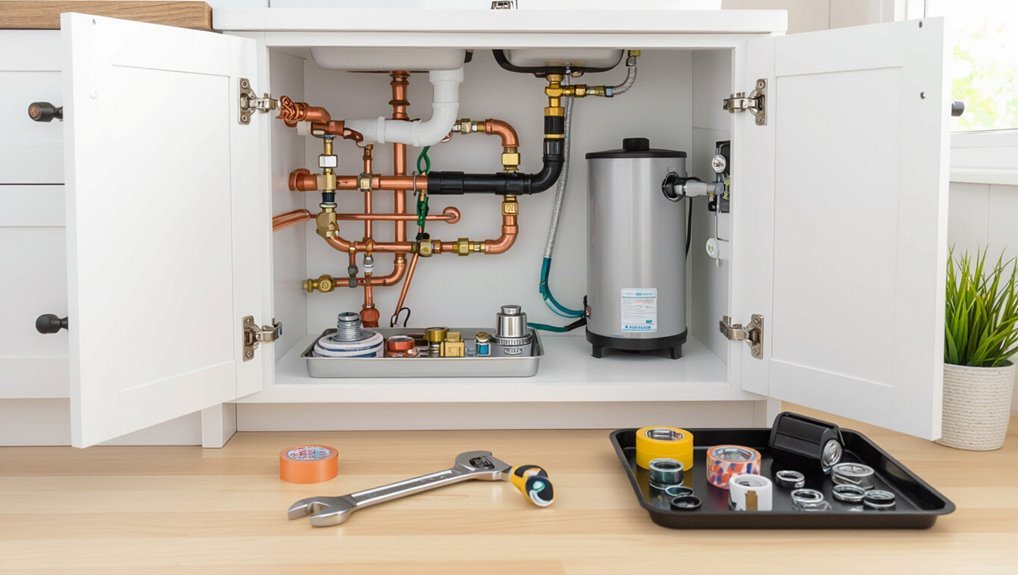
Tiny house plumbing differs from conventional systems in scale, water storage, and flexibility, requiring choices that prioritize compactness and efficiency.
Owners must decide between stationary hookups and mobile self-contained systems, each with distinct supply, waste, and venting arrangements.
Permitting and code classification—RV versus residential—will determine allowed fixtures, inspections, and installation standards.
Key differences between tiny house and conventional home plumbing
Several important distinctions separate plumbing in a tiny house from that in a conventional home, driven by size, mobility, and resource limits.
Systems must prioritize compact layouts, water conservation, simplified venting, and flexible connections for movement.
Materials and fixtures differ for weight and space.
Planning how to plumb a tiny house emphasizes efficient routing, smaller capacity tanks, and easier maintenance access.
Typical plumbing systems for tiny houses (stationary vs. mobile)
After outlining how size, mobility, and resource limits shape tiny-house plumbing choices, the next consideration is the basic system types owners will encounter: stationary (site-connected) and mobile (on-trailer).
Stationary setups tie into municipal water, sewer, or septic with conventional pipes and fixtures.
Mobile systems require compact, flexible supply lines, onboard fresh and gray/black water tanks, pumps, and freeze/vent strategies for travel and off-grid use.
Regulations, permits, and RV vs. residential code considerations
How do building codes and permits shape a tiny house’s plumbing? Authorities determine whether the unit follows RV, mobile home, or residential codes, affecting fixture types, drain sizes, venting, water heater installation, and sewer connection.
Permit requirements, inspections, and local zoning can restrict placement or hookup. Compliance prevents fines, guarantees safety, and influences system design, costs, and long-term legality.
Quick Plan: Decide Your Water and Waste Strategy
The author outlines the need to choose between on-grid, off-grid, or hybrid systems based on site access and lifestyle.
Freshwater sourcing—city hookup, well, or rainwater harvesting—should be matched to availability and treatment needs.
Waste management options such as septic, composting toilets, or blackwater tanks require evaluation for space, cost, and local regulations.
Choosing between on-grid, off-grid, and hybrid systems
When deciding between on-grid, off-grid, and hybrid plumbing systems for a tiny house, the primary considerations are water source reliability, waste disposal requirements, site constraints, and long-term maintenance needs; each option shifts responsibilities between the homeowner and municipal services and carries distinct costs, regulatory implications, and environmental trade-offs.
On-grid suits convenience and permitting; off-grid demands self-sufficiency and system redundancy; hybrid blends backup resilience with reduced regulatory burden.
Freshwater sourcing options (city hookup, well, rainwater harvesting)
Several viable freshwater sources exist for a tiny house—municipal hookup, private well, and rainwater harvesting—each with distinct trade-offs in reliability, cost, permitting, and water quality management.
Municipal connects easily but incurs fees and regulations.
Wells offer independence and ongoing maintenance and testing.
Rainwater harvesting reduces utility dependence yet demands filtration, storage, and seasonal planning; local codes may restrict use.
Waste management options (septic, composting toilet, blackwater tanks)
How best to handle wastewater and human waste depends on site constraints, local codes, and the occupant’s maintenance tolerance.
Options include septic systems for on-site engineered treatment, composting toilets that separate solids and reduce water use, and blackwater holding tanks requiring regular pump-outs.
Each option demands specific plumbing, ventilation, permitting, and waste disposal plans; weigh upfront costs, maintenance frequency, and environmental impact.
Tools, Materials, and Components You’ll Need
A concise toolkit and a clear inventory of parts are essential before beginning tiny house plumbing.
The discussion will cover important hand and power tools, the advantages and drawbacks of common pipe materials and fittings (PEX, copper, PVC, ABS), and a checklist of fixtures, valves, pumps, and tanks.
Knowing which components suit the chosen water and waste strategy prevents costly mistakes and simplifies installation.
Essential tools for DIY tiny house plumbing
Proper preparation hinges on assembling the right set of tools, materials, and fittings before any pipe is cut or joint tightened.
Essential tools include pipe cutters, adjustable wrenches, basin wrench, tubing bender, deburring tool, crimp or clamp tools, propane torch (for soldering, where applicable), thread tape, leak detection solution, plungers, and a quality inspection mirror.
Safety gear: gloves, goggles, respirator.
Pipe types and fittings: PEX, copper, PVC, ABS pros and cons
Which pipe material suits a tiny house depends on budget, climate, installation access, and desired lifespan. The guide compares PEX (flexible, freeze-resistant), copper (durable, costly), PVC (drain use, affordable), and ABS (sturdy for waste). Selection balances cost, thermal behavior, joint type, and code compliance.
| Material | Strength | Typical Use |
|---|---|---|
| PEX | Flexible | Supply |
| Copper | Durable | Supply |
| PVC/ABS | Rigid | Drain/Waste |
Fixtures, valves, pumps, and tanks checklist
Several essential fixtures, valves, pumps, and tanks are required to make a tiny house plumbing system functional, safe, and code-compliant.
The checklist includes compact sinks, low-flow faucets, shower fixtures, pressure-reducing and shutoff valves, bilge or demand pumps, freshwater and gray/blackwater tanks, vents, and mounting hardware.
Prioritize certified components sized for low-pressure, limited-space systems.
- Fixtures and valves
- Pumps
- Tanks
Designing the Plumbing Layout
Designing the plumbing layout requires balancing line sizes and routing to fit a compact footprint while maintaining adequate flow for supply and drains.
Fixture placement should minimize run lengths and heat loss, and the plan must include venting, strategic cleanouts, and accessible panels for maintenance.
Water heater type and location—tankless, tank, electric, or propane—should be chosen to match usage, space constraints, and venting requirements.
Sizing supply and drain lines for a compact footprint
When space is limited, sizing supply and drain lines requires balancing fixture demand, available routing, and local code to secure reliable flow without wasting room on oversize piping.
Calculate fixture units, apply pressure loss tables, and choose minimum diameters that meet peak demand. Use insulated, flexible supply where runs are tight.
For drains, guarantee slope, venting, and cleanouts while avoiding needless increases in pipe size.
Optimal fixture placement to minimize runs and heat loss
Having sized supply and drain lines to match fixture demand and routing constraints, the layout should cluster high-use fixtures to shorten runs and reduce heat loss.
Group kitchen, bathroom, and laundry near a common wall or central core. Place water heater centrally and insulate exposed runs.
Minimize elevation changes and avoid long, circuitous routing to reduce friction losses, heat loss, and installation complexity.
Planning venting, cleanouts, and access panels
Plan venting, cleanouts, and access panels so the system remains serviceable, code-compliant, and odor-free.
Map vent stacks and AAVs to prevent traps siphoning and guarantee proper flow; locate cleanouts at changes of direction and every 50–100 feet of drain.
Place access panels behind fixtures, under sinks, and near junctions for maintenance.
Coordinate with framing and insulation for accessibility.
Water heater options and placement (tankless, tank, electric, propane)
Water heating choices—tankless, tank, electric, or propane—drive layout, venting, fuel supply, and clearances in a tiny house and should be selected with capacity, efficiency, and available space in mind.
Tankless saves space and energy but requires higher gas or electrical feed and combi-venting; tanks need condensate, insulation, and wall or closet mounting.
Electric units simplify fuel but demand panel capacity and often larger batteries or shore power.
Step-by-Step Installation: Freshwater Supply
The section outlines the sequential tasks for establishing the freshwater system, beginning with installing the main inlet and shutoff and running and securing PEX supply lines.
It covers installation of a pressure regulator, backflow preventer, and filtration, followed by connections to fixtures such as sinks, showers, washing machines, and appliances.
Finally, it addresses water heating choices and insulation of hot lines to guarantee efficiency and prevent heat loss.
Installing the main inlet and shutoff
Begin by locating the primary freshwater inlet where the supply line will enter the tiny house—this is the point that dictates hose routing, protection from damage, and accessibility for connection.
Install a durable inlet fitting, seal penetrations, and mount a frost-resistant shutoff valve nearby.
Position the shutoff for easy access, label it, test for leaks, and guarantee compliance with local codes and backflow prevention requirements.
Laying and securing PEX supply lines
Route PEX runs from the inlet and shutoff to fixtures and appliances, planning straight paths with gentle bends to minimize fittings and pressure loss.
Measure, cut squarely, deburr, and leave slack for thermal expansion. Use compatible fittings and crimp or push-fit connections per manufacturer specs.
Secure lines with clips or straps every 32–48 inches, avoid kinks, keep hot and cold lines separated, and protect at penetrations.
Installing pressure regulator, backflow preventer, and filtration
Install the pressure regulator, backflow preventer, and filtration in a compact, accessible sequence at the incoming freshwater point so incoming mains pressure is reduced to a safe working level, cross-contamination is blocked, and particulate/taste contaminants are removed before distribution.
Mount components on a rigid board, use proper fittings and shutoffs, include test ports, follow manufacturer torque/specs, and purge air before pressurizing.
Connecting fixtures (sink, shower, washing machine, appliances)
Connect each fixture to the freshwater manifold using appropriately sized supply lines, shutoff valves, and pressure-rated fittings, ensuring clearly labeled hot and cold runs and minimal unnecessary bends to maintain flow and serviceability.
Fixtures are fitted with flexible connectors or PEX stub-outs, leak-tested at supply pressure, and secured to prevent movement.
Provide accessible isolation valves for maintenance; route lines to minimize crossovers and strain.
Setting up water heating and insulation of hot lines
Begin by selecting a water-heating system appropriate to the tiny house’s size, fuel source, and demand—tankless, mini-tank, or compact storage.
Then position the unit near the freshwater manifold and main drain to minimize run lengths.
Route insulated hot lines using foam or fiberglass sleeves, secure with clamps, maintain 1/4-inch slope toward fixtures for draining, add heat tape where freezing is a risk, and test for pressure and leaks.
Step-by-Step Installation: Drain-Waste-Vent (DWV) System
The DWV installation begins with careful layout of slopes and trap locations to guarantee reliable gravity drainage and prevent siphoning.
Each fixture receives an appropriately pitched drain and trap, with vent stacks or permitted air admittance valves sized and placed to maintain proper airflow.
Finally, the system is routed to the chosen disposal method—connection to a septic or blackwater tank and separation or diversion of graywater—following local code and best practices.
Designing slope and trap placement for reliable drainage
Several key principles govern slope and trap placement to guarantee reliable drainage in a tiny house DWV system: pipes must maintain consistent fall to promote gravity flow, traps must be positioned to prevent sewer gases without causing siphonage, and venting must be arranged to preserve trap seals.
Designers calculate minimum slopes (typically 1/8″–1/4″ per foot), minimize long unvented runs, and avoid trap arms exceeding code lengths.
Installing drain lines and traps for each fixture
Install drain lines and traps for each fixture sequentially, working from the highest (typically a shower or sink) down to the building drain so gravity and venting are preserved.
Cut pipe to measured slopes, assemble traps adjacent to fixtures, glue or solvent-weld joints per material, support runs with hangers at proper spacing, test for leaks and correct slope, and access cleanouts at strategic points.
Adding vent stacks and air admittance valves (AAVs) where allowed
Once drain lines and traps are positioned and tested, attention moves to venting to maintain proper flow and prevent siphoning.
The installer routes vent stacks through the roof or runs branch vents to a main stack, observing pitch and clearances.
Where codes permit, air admittance valves supplement vents for isolated fixtures.
All penetrations are flashed and sealed; vents must remain unobstructed and accessible.
Connecting to septic or blackwater tank / graywater diversion
Before final connections are made, the DWV system must be aligned with the chosen disposal method—septic, blackwater tank, or graywater diversion—so that pipe sizes, grades, and outlet locations match the receiving system’s requirements.
Verify local codes, obtain permits, and confirm inlet elevations.
Install proper inspection ports, backflow prevention, and filters.
Ascertain accessible cleanouts and slope continuity to prevent backups and odor issues.
Off-Grid Specifics: Pumps, Tanks, and Treatment
The off-grid plumbing section addresses choosing and sizing freshwater tanks and transfer pumps to meet daily demand and available space.
It also covers appropriate capacities for blackwater and graywater tanks plus options for filtration, purification, and safe graywater reuse.
Legal and regulatory considerations for on-site treatment and reuse are highlighted to guide compliant system design.
Selecting and sizing freshwater tanks and transfer pumps
Every tiny-house water system hinges on appropriately sized freshwater tanks and transfer pumps, which together determine storage capacity, delivery pressure, and refill logistics.
Assess daily water use, available refill frequency, and space constraints.
Choose tank material and shape for weight distribution.
Select a transfer pump with sufficient flow (GPM), head, and pressure switch or accumulator.
Include filtration and freeze protection.
Sizing and selecting blackwater/graywater tanks
Following freshwater sizing and pump selection, consideration turns to blackwater and graywater containment and management specific to off-grid living.
Tank sizing depends on occupancy, usage patterns, and local disposal regulations; calculate daily volumes and add safety buffer.
Choose durable, UV-resistant materials and compartmentalize when separating graywater for reuse.
Include accessible cleanouts, vents, and level indicators; plan pump or gravity drainage and secure mounting.
Filtration and purification methods for potable off-grid water
How should potable water be made reliably safe in an off-grid tiny house?
Install layered treatment: sediment pre-filter, activated carbon to remove taste/chemicals, and a certified microbiological barrier (UV sterilizer or reverse osmosis with post-UV).
Include a pressure tank and low-maintenance pump.
Regular filter replacement, system flushing, and periodic water testing guarantee ongoing safety.
Consider freeze protection and accessible maintenance.
Graywater reuse and legal considerations
Several components determine whether graywater can be safely and legally reused in an off-grid tiny house: collection points (sinks, showers, laundry), storage tank materials and sizing, pumps and treatment levels, and local regulations that govern permitted uses.
Owners should assess contaminant risks, choose appropriate filtration, disinfection, and retention, install backflow protection, label reuse systems, and obtain permits or follow codes to avoid fines and health hazards.
Winterizing and Freeze Protection for Tiny Houses
Winterizing a tiny house requires targeted measures such as insulating exposed pipes and applying heat tape where necessary to prevent freezing.
For seasonal use, clear drain-down procedures and safe storage of water systems minimize freeze damage and contamination.
Mobile, year-round tiny houses combine continuous heat, insulated enclosures for plumbing, and regularly monitored antifreeze or recirculation strategies to maintain reliability.
Insulating pipes and using heat tape
When temperatures drop below freezing, insulating pipes and applying heat tape become essential measures to prevent bursts and maintain water flow in a tiny house.
Foam pipe insulation, closed-cell spray foam in cavities, and insulated access panels reduce heat loss.
Self-regulating heat tape, installed per manufacturer instructions and tied to a GFCI circuit, keeps temperatures above freezing without overheating.
Regular inspections guarantee reliability.
Drain-down procedures for seasonal use
After insulating lines and fitting heat tape, attention shifts to seasonal drain-down procedures to protect a tiny house’s plumbing when it will sit unused.
Faucets and fixtures are opened, low points and hose bibs drained, and water heaters and pumps depressurized and emptied.
Antifreeze suitable for potable systems is added where needed.
Valves are tagged and systems inspected before closure.
Strategies for year-round mobile tiny houses
Why plan for year-round occupancy in a mobile tiny house?
Occupancy requires proactive freeze protection: insulate pipes and floors, route pipes through conditioned spaces, install heat tape with thermostat controls, use sealed and heated water tanks, and fit compact, efficient space heaters.
Incorporate accessible shutoffs, pressure relief, and glycol loops for remote sites.
Regular maintenance and monitoring prevent freeze damage and guarantee reliable winter plumbing.
Testing, Troubleshooting, and Safety Checks
A systematic testing phase confirms that supply lines hold pressure and remain leak-free while water quality is verified and any treatment systems are confirmed effective.
The troubleshooting checklist covers common issues—low pressure, clogs, and fixture leaks—and outlines straightforward repairs and when to call a professional.
Safety checks include inspection of gas connections, carbon monoxide monitoring, and proper integration of plumbing with the electrical system.
Pressure testing supply lines and leak detection
Begin by isolating the supply system and applying a controlled pressure to verify integrity before covering walls or connecting fixtures.
Monitor gauges for steady pressure loss over a specified hold period.
Inspect visible joints, valves, and fittings with soapy solution or electronic leak detector.
Repair any drops, retest until stable, then document results and release pressure slowly before proceeding to downstream connections.
Water quality testing and treatment verification
Several basic water quality checks should be performed after plumbing installation to confirm that source water and treatment devices produce safe, potable water for a tiny house.
Test for bacteria (total coliform/E. coli), chlorine, pH, hardness, and turbidity using certified kits or lab analysis.
Verify filtration, UV, or softener performance against manufacturer specs and document results and maintenance schedules for compliance and safety.
Common problems and how to fix them
Common issues in tiny house plumbing fall into a few predictable categories—low pressure, leaks, contamination, and intermittent heating—that can usually be diagnosed with simple tests and visual inspections.
Routine checks include pressure gauge readings, dye tests, and temperature verification. Prompt repairs prevent damage: replace worn fittings, clean aerators, flush lines, and sanitize tanks.
- Isolate
- Test
- Repair
Safety: gas connections, carbon monoxide, and electrical integration
While plumbing work focuses on water, safety checks for gas, carbon monoxide, and electrical systems are essential to prevent life‑threatening hazards. Each service—gas lines and fittings, venting and detectors for combustion gases, and electrical integration with pumps and heaters—must be tested, troubleshot, and verified to code before regular use.
Inspect fittings, pressure‑test lines, verify vents, install detectors, ground circuits, GFCI protection, label shutoffs.
Cost Breakdown and Time Estimates
A concise cost and time overview helps readers choose between basic, mid-range, or fully off-grid plumbing systems and their typical budget ranges.
Estimated labor hours for DIY installations are provided alongside professional time and cost, highlighting tasks that commonly extend schedules.
Guidance is offered on when complexity, code requirements, or limited experience make hiring a licensed plumber the safer and often more cost-effective option.
Typical budget ranges for different system choices
Budget ranges for tiny house plumbing vary widely depending on system choices—basic hook‑ups, RV‑style integrated systems, or fully off‑grid setups—and can span from a few hundred dollars to tens of thousands. Typical tiers: entry (parts only), mid (mixed new/used, simple off‑grid), premium (solar, composting, high‑end fixtures). Emotional table:
| Hope | Cost | Reality |
|---|---|---|
| Dream | $300–$1,500 | achievable |
| Practical | $1,500–$8,000 | manageable |
| Ambitious | $8,000+ | transformative |
Labor vs. DIY time estimates and when to hire a pro
Estimate hours and costs for tiny house plumbing by separating tasks into plumbing, electrical for pumps/heaters, and hookup/inspection time.
Provide realistic DIY time: rough-in plumbing 8–24 hours, fixture install 4–12 hours, pump/heater wiring 2–6 hours.
Compare with professional rates: pros complete full plumbing in 6–24 hours depending complexity.
Recommend hiring a licensed plumber for main connections, backflow, or code-restricted work.
Maintenance Schedule and Long-Term Care
A concise maintenance schedule helps preserve system performance and prevents costly failures.
It should include a routine inspection and preventive maintenance checklist covering leaks, fittings, valves, and filter changes.
Seasonal tasks and recommended component replacement intervals—such as winterizing lines and replacing hoses, cartridges, or sacrificial anodes at specified years—round out long-term care.
Routine inspections and preventive maintenance checklist
Routine inspections and a concise preventive maintenance checklist keep a tiny house plumbing system reliable and extend component life.
Inspections focus on leaks, fixture operation, water pressure, drain flow, venting, and tank/line accessibility. Documentation logs findings, dates, and corrective actions.
Prioritize safety, shutoff knowledge, and timely repairs to prevent escalation.
- Check for leaks and corrosion.
- Test valves and drains.
- Record and schedule repairs.
Seasonal tasks and component replacement intervals
Because seasonal shifts affect water temperature, pressure, and exposure risk, a clear maintenance schedule aligns specific tasks and component replacement intervals with seasonal triggers.
Inspect insulation, freeze-proof outdoor fixtures, flush water heater spring and fall, clean filters quarterly, and winterize supply lines.
Replace sacrificial anode every 3–5 years, hoses and filters biennially, and pressure regulators or backflow preventers per manufacturer or after visible wear.
Real-World Examples and Layout Templates
The article presents sample plumbing layouts scaled for 100, 200, 300, and 400 sq ft tiny houses to illustrate common fixture placements and pipe runs.
It then examines case studies covering on-grid, off-grid, and mobile builds to highlight how system choices and constraints affect design.
Readers are shown practical templates and real-world adaptations to inform their own layouts.
Sample plumbing layouts for 100 to 400 sq ft tiny houses
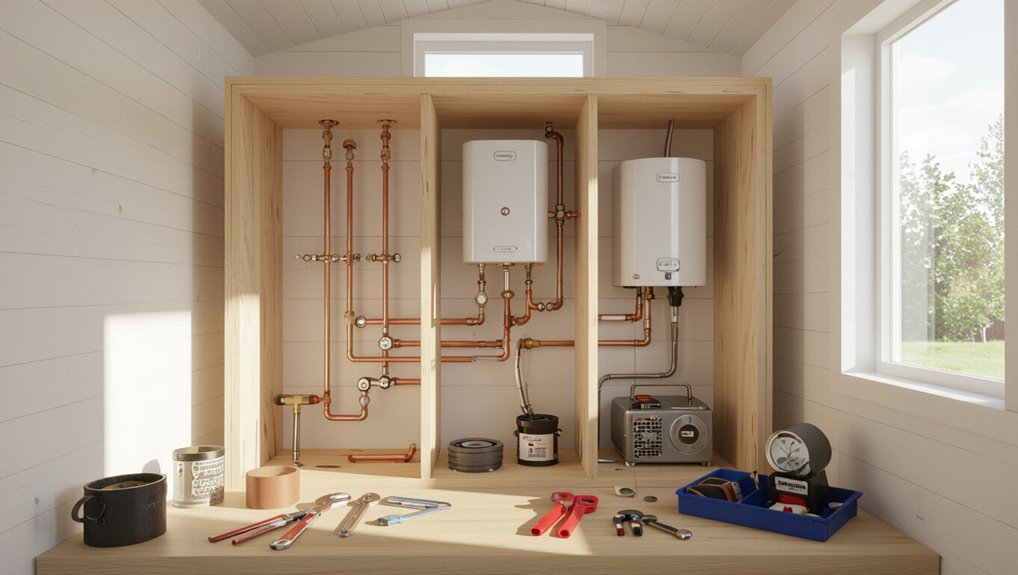
When planning plumbing for 100–400 sq ft tiny houses, designers start by mapping realistic fixture groups—kitchen, bathroom, and laundry—so drain and supply runs remain compact and efficient.
Typical layouts cluster wet walls, place water heater near fixtures, route main supply and drain along a central spine, and include accessible cleanouts.
Scaled templates (studio, one-bedroom, loft) show efficient fixture placements and pipe runs.
Case studies: on-grid, off-grid, and mobile builds
Three real-world tiny-house plumbing case studies—an on-grid backyard studio, an off-grid rural retreat, and a mobile trailer build—illustrate how site constraints, code requirements, and occupant needs shape layout choices, material selection, and system sizing.
The on-grid example uses centralized stack and municipal tie-ins; the off-grid relies on composting toilet, tanked water, and graywater reuse; the mobile prioritizes compact plumbing manifolds and vibration-resistant fittings.
Common Mistakes to Avoid and Pro Tips
The section highlights common design and installation pitfalls that lead to leaks, poor drainage, and code failures in tiny-house plumbing.
It then outlines space-saving hacks and efficiency tips that preserve function without sacrificing accessibility.
Practical examples emphasize fixes and choices that prevent costly rework.
Design and installation pitfalls that cause failures
A tiny house’s plumbing can fail not from lack of creativity but from common design and installation pitfalls that are easily overlooked. Recognizing these mistakes early—undersized waste lines, inadequate venting, improper slope, poor insulation, and unreliable fittings—prevents chronic clogs, leaks, and freeze damage.
Additional pitfalls include incorrect material choices, inaccessible shutoffs, weak supports, omitted cleanouts, and ignoring local code; address each during planning.
Space-saving hacks and efficiency tips for tiny layouts
Moving from common failure points to practical layout strategies, tiny-house plumbing benefits most from deliberate compacting without sacrificing function.
Prioritize stacked fixtures, combined wet rooms, and centralized risers to minimize piping runs and heat loss. Use compact electric or tankless heaters, remote-access shutoffs, and insulated, accessible chaseways.
Avoid overcomplicated routing; plan serviceable layouts and label valves for quick maintenance.
Resources, Codes, and Where to Get Parts
A concise list of useful guides, manufacturer manuals, and applicable code references provides the foundation for safe, code-compliant tiny house plumbing.
Reliable suppliers and specialty parts sources are identified to help match components to system requirements and space constraints.
Readers are directed to cross-check product specifications with local plumbing codes before purchase.
Useful guides, manufacturer manuals, and code references
When planning a tiny house plumbing system, reliable resources and accurate specifications form the foundation for safe, code-compliant work.
Consult installation manuals, local plumbing codes, and authoritative guides to confirm materials, clearances, and testing procedures.
- Manufacturer installation manuals for fixtures and pumps
- International/IPC or local plumbing codes and amendments
- Field guides and trade textbooks for best practices and troubleshooting
Recommended suppliers and specialty parts sources
After confirming specifications against manufacturer manuals and local codes, attention turns to sourcing reliable parts and suppliers that meet those requirements.
Recommended sources include specialty tiny-house retailers, plumbing wholesalers, and OEM manufacturers for tanks, composting toilets, and RV-grade fixtures.
Online marketplaces with verified seller ratings, local plumbing supply houses, and certified green-building suppliers help guarantee compliant, durable components and timely support.
Conclusion
The guide concludes by affirming that careful planning, code-aware design, and disciplined installation transform tiny-house plumbing from intimidating theory into reliable reality. Evidence shows that modest systems, when sized correctly and maintained, meet daily needs and endure. This truth—small spaces can sustain big comforts—resonates beyond technical steps, offering reassurance. Readers are left with calm confidence: practical knowledge and routine care make a self-sufficient, livable tiny home not just possible, but emotionally and functionally fulfilling.