How to Install Plumbing in a New House: Step-by-Step Guide for DIYers and Contractors
Installing plumbing in a new house involves careful planning and execution to ensure a functional and compliant system. Start by designing your layout, securing necessary permits, and coordinating with relevant utilities and trades. Begin with the main service line, meter, shutoff valves, and distribution piping, followed by DWV stacks, vents, and fixture rough-ins, ensuring proper slopes for drainage. Use approved materials like PEX, copper, or CPVC, adhere to local codes, and conduct pressure and leak tests prior to installing final fixtures. Keep all permits, test records, and warranties organized for future reference. For detailed steps, tools, testing methods, and compliance advice, continue reading.
Essential Overview of Installing Plumbing in a New House
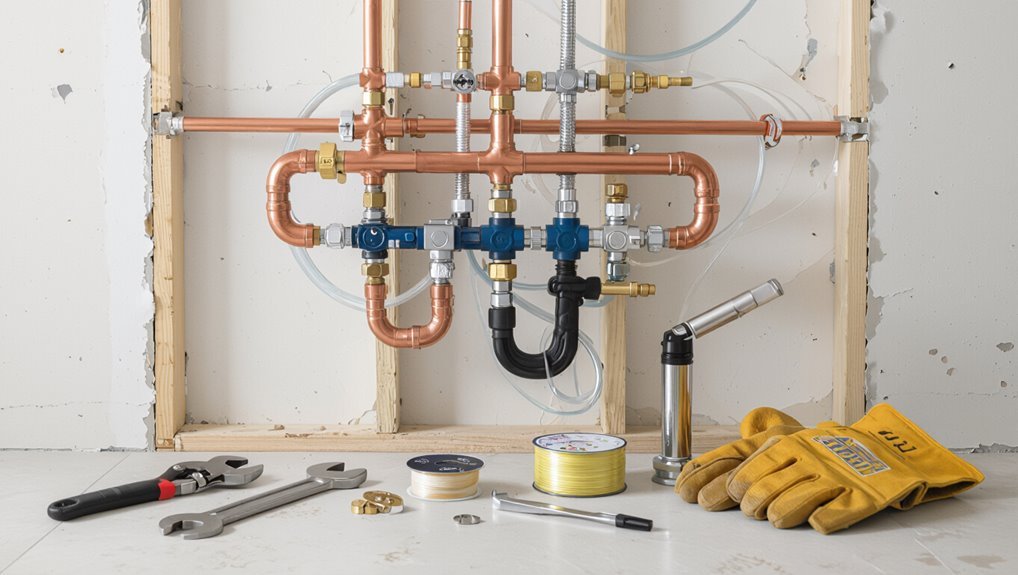
The overview outlines the full installation sequence from rough-in and supply/drain routing to fixture hookup and testing.
It contrasts situations suited to a knowledgeable DIYer with those that require a licensed contractor for code compliance and warranty protection.
It also summarizes a typical new-construction timeline and phases, from initial planning and permits through rough plumbing, inspections, and final connections.
Quick summary of the full installation process
Begin by laying out the main routes for supply and drain lines, then sequence work from rough-in to fixtures: install water service and meter, set up main shutoffs and distribution (hot and cold) with appropriate piping and insulation.
Run waste and vent stacks with correct slopes and connections, perform pressure and leak tests, apply necessary backflow and code-required devices, then finalize by mounting fixtures, connecting appliances, and commissioning the system.
A concise plan for how to install plumbing in a new house: rough-in framing and vents, install supply and waste, test, adjust, then finish connections and inspections.
Who should do it: DIY vs licensed contractor
Who should take responsibility for plumbing in a new house depends on skill level, risk tolerance, local code, and the project’s complexity.
Homeowners with plumbing experience and time can handle simple runs and fixture installs but should verify permits.
Complex systems, main connections, gas lines, or projects subject to strict inspections warrant licensed contractors who guarantee code compliance, liability coverage, and reliable warranty-backed work.
Typical timeline and phases for new-construction plumbing
When constructing plumbing for a new house, work proceeds in clear phases that align with the building schedule and inspection milestones: rough-in (underground and in-wall supply and drain lines), pressure-testing and inspections, fixture and appliance hookups after drywall and finishes, and final commissioning with system testing and adjustments.
Timelines vary by project size, typically spanning foundation stage through final occupancy, coordinated with other trades and permit schedules.
Building Codes, Permits, and Planning Requirements
Before any rough‑in work begins, the author recommends reviewing local plumbing codes and standards to determine applicable requirements.
A permit schedule should be obtained and followed, noting typical inspection milestones, what inspectors check at each stage, and the paperwork and fees involved.
The text also advises when it is necessary to consult an engineer or hire a licensed plumber for complex systems or code compliance.
How to find applicable local plumbing codes and standards
Where can one locate the specific plumbing codes and permit requirements that apply to a new house project?
Local municipal or county building departments publish applicable plumbing codes, often referencing national model codes (IBC, IPC, UPC).
Consult official websites, zoning maps, and code offices for amendments.
Review utility provider standards and homeowners’ association rules.
Keep records of adopted editions and local variances for compliance.
Permits required and how to apply
Although plumbing work often appears straightforward, most new-house installations require permits because they affect health, safety, and public infrastructure.
Applicants must identify local authority, submit plans showing layout, pipe sizes, materials, and fixture counts, pay fees, and obtain contractor licensing where required.
Permit approval timelines vary; keep copies on-site and notify the authority when work begins to guarantee compliance and legal occupancy.
Inspection milestones and what inspectors check
Inspection milestones mark key points when a building inspector reviews a plumbing installation to guarantee compliance with codes and the approved permit.
Typical inspections include underground sewer and water lines, rough-in framing with drain, waste and vent layouts, pressure and leak tests, and final hookup with fixtures and traps.
Inspectors verify materials, slope, venting, backflow prevention, accessibility, and proper permits before signing off.
When to involve an engineer or licensed plumber
Engage a licensed plumber or engineer early when project scope, local codes, or site conditions exceed basic DIY knowledge, since their expertise guarantees designs meet building codes, permitting requirements, and safety standards.
Consult them for complex drainage, pressurized systems, backflow prevention, structural penetrations, commercial or multi-family projects, unusual soil or slope issues, or when permits demand stamped plans.
Their involvement avoids costly rework and compliance failures.
Plumbing System Basics and Design Principles
The section summarizes key plumbing elements—supply, waste, venting, fixtures, and appliances—and compares common materials such as PEX, copper, CPVC, and PVC for different runs.
It then outlines hydraulic basics (water pressure, flow rate, fixture units) and how they inform sizing of the main service, meter, and pressure regulator.
Finally, it contrasts sewer and septic layout considerations to guide system layout and regulatory compliance.
Main components: supply, waste, venting, fixtures, and appliances
A functioning plumbing system rests on five interdependent elements—water supply, waste drainage, venting, fixtures, and appliances—each with distinct roles and design requirements.
Supply delivers adequate pressure and volume; waste removes sewage and graywater safely; venting prevents traps from siphoning and equalizes pressure; fixtures provide user interfaces; appliances integrate with supply and drain lines.
Proper layout, sizing, and access guarantee reliability and serviceability.
Choosing between PEX, copper, CPVC, and PVC for supply and drain lines
Selecting the right pipe material for supply and drain lines follows naturally from sizing, layout, and serviceability considerations, since material affects flow, durability, installation complexity, and cost. PEX offers flexibility and easy joins; copper resists heat and corrosion; CPVC handles hot water economically; PVC suits drains. Choose per code, budget, and access for repairs.
| Material | Best use |
|---|---|
| PEX | Supply runs, tight spaces |
| Copper | Long-term, high-temp |
| CPVC | Hot water, budget |
| PVC | Drain, vent lines |
Water pressure, flow rate, and fixture units explained
Several core metrics govern how a plumbing system performs: water pressure, flow rate, and fixture unit demand.
Pressure (psi) drives flow; flow rate (gpm) indicates delivery capacity.
Fixture units quantify simultaneous demand for sizing branch piping and ensuring adequate supply without excessive pressure loss.
Balancing these metrics prevents undersized lines, low flow, or noisy, high-pressure conditions and guides layout and fixture selection.
Sizing the main water service, meter, and pressure regulator
When sizing the main water service, meter, and pressure regulator, the designer evaluates peak demand, available supply pressure, and expected pressure losses to determine pipe diameter, meter capacity, and regulator setpoint.
The process uses fixture unit totals, hydraulic calculations, local code minimums, and foreseeable future expansion.
Pressure regulator selection balances adequate flow with protection against downstream overpressure and accommodates regulator turning range and maintenance access.
Sewer vs septic layout considerations
After sizing the water service and pressure control, attention shifts to wastewater disposition: choosing between connection to a municipal sewer or a private septic system determines site planning, pipe routing, and long-term maintenance strategy.
Municipal connections require gravity or pumped mains, easements, and compliance with utility standards.
Septic layouts need soil evaluation, drainfield sizing, setback compliance, tank access, and predictable maintenance intervals.
Materials, Tools, and Budgeting
The section lists required materials by area—kitchen, bathrooms, laundry, hot water systems—so each fixture and supply line is accounted for.
It also outlines essential tools for both DIY and contractor-level work and explains how to estimate costs for materials, labor, permits, and contingencies.
Finally, guidance is provided on where to purchase materials and how to assess quality to balance durability and budget.
Complete materials list by area: kitchen, bathrooms, laundry, hot water
One clear materials inventory per area—kitchen, each bathroom, laundry, and hot water system—helps guarantee accurate purchasing, proper tool selection, and realistic budgeting.
Lists should itemize fixtures, supply and drain lines, valves, connectors, mounting hardware, sealants, and insulation.
Include water heater components, venting, trap assemblies, and appliance hookups.
Quantify lengths, fittings, and spare parts to minimize delays and cost overruns.
Essential tools for DIY and contractor-level installs
A clear toolkit separates efficient installations from stalled projects: for DIYers this means a compact set of multi-use hand tools and a few specialty items, while contractors require a broader inventory including power tools, pipe-specific equipment, and site consumables.
Essential items include pipe cutters, wrenches, plungers, soldering or crimp kits, inspection tools, sealants, safety gear, and inspection gauges for reliable, code-compliant work.
Estimating costs: materials, labor, permits, and contingencies
Many projects start with a rough budget, but accurate plumbing estimates break costs into materials, labor, permits, and contingencies so homeowners and contractors can plan realistically. Itemize fixtures, pipe runs, and fittings; obtain local permit fees; get labor quotes per hour or project; and reserve 10–20% contingency for surprises.
| Category | Action |
|---|---|
| Materials | List and price |
| Labor/Permits | Quote and file |
Where to buy materials and how to evaluate quality
Having broken down costs into materials, labor, permits, and contingencies, attention now shifts to sourcing and judging the quality of plumbing components.
Purchases should come from reputable suppliers, licensed wholesalers, or manufacturer-authorized dealers. Inspect certifications (NSF, UPC), material type (PEX, copper, CPVC), pressure ratings, and warranty terms.
Compare prices, read reviews, and prioritize proven brands for critical fixtures and valves.
Pre-Construction Layout and Rough-In Planning
Before framing begins, a detailed riser diagram and rough-in plan are created to show mains, branches, stacks, and cleanouts.
Supply and waste lines are routed to minimize bends and heat loss while maintaining access for future service.
Coordination with framing, HVAC, and electrical teams guarantees clear pathways and prevents conflicts in wall and ceiling cavities.
Creating a plumbing riser diagram and plan
A plumbing riser diagram translates the building’s vertical and horizontal service needs into a clear, scaled plan that coordinates water supply, waste lines, vents, and fixture locations for the rough-in stage.
It shows piping routes, elevations, fixture heights, and connection points, enabling clash detection with structure and mechanical systems.
Symbols, legend, scale, and notes guarantee code compliance and contractor coordination.
Locating mains, branches, stacks, and cleanouts
Locate mains, branches, stacks, and cleanouts on the construction drawings with exactness to confirm proper flow, access, and code compliance during rough-in.
Mark service entry, main waste alignment, vent stacks, branch lines, and cleanout locations relative to framing, joists, and fixtures.
Coordinate with structural, HVAC, and electrical plans.
Verify clearances, trap arm lengths, slope requirements, and inspector access before excavation or framing.
Routing supply and waste to minimize bends and heat loss
Optimize routing of supply and waste lines to reduce bends, shorten runs, and limit thermal losses, because each elbow and extra foot increases pressure drop, leak risk, and heat loss in hot-water systems.
Plan straight, accessible runs; group fixtures to share trunks; select proper pipe sizes; use long-radius fittings; minimize vertical drops where possible; reserve insulation for hot lines and avoid unnecessary offsets.
Coordinating plumbing with framing, HVAC, and electrical
Coordinate plumbing with framing, HVAC, and electrical during pre-construction layout and rough-in planning to prevent conflicts, simplify access, and control costs.
Create coordinated drawings, mark chase locations, and set clear elevations for drains and vents.
Sequence work to allow insulation and fire-stopping.
Communicate changes with carpenters, HVAC techs, and electricians.
Verify clearances for fixtures, appliances, and service panels before closing walls.
Step-by-Step Rough-In Installation
The rough-in installation begins with setting the main water supply and shutoff, then laying and securing the water distribution network using PEX or copper.
Next comes assembly of the DWV system: stacking vertical stacks, running horizontal drains, and locating vents, roof flashings, and any needed air admittance valves.
Finally, fixture drains, trap arms, and cleanouts are placed and verified for proper slope and access before inspection.
Installing the main water supply and shutoff
Begin by locating the incoming municipal or well supply line, marking its entry point through the foundation or slab and planning a straight, accessible run to the house shutoff valve.
Trench or core-drill as needed, install a corrosive-resistant service tee, meter (if required), and pressure regulator.
Mount a readily accessible main shutoff with testable union and label for emergency isolation.
Laying out and securing water distribution lines (PEX/copper)
Lay out the PEX or copper paths on the framing, aligning runs to minimize bends and keep hot and cold lines parallel where practical.
Mark hole locations, maintain required clearances from electrical and vents, and fasten tubing with appropriate clamps or straps at code intervals.
Protect lines at studs with nail plates, install manifold or branching tees, and maintain slope for any low points to allow drainage.
Installing drain-waste-vent (DWV) stacks and horizontal drains
Installers assemble DWV stacks and horizontal drains during the rough-in to establish the waste and vent backbone before fixtures and finishes are installed.
They lay trap arms with proper slopes, cut and join PVC/ABS or cast-iron runs, install cleanouts, and support piping at code spacing.
Stack locations align with fixture drops; changes and offsets are planned to maintain flow, access, and future fixture connections.
Installing vents, roof flashing, and air admittance valves
The rough-in for vents, roof flashing, and air admittance valves (AAVs) establishes the system that prevents trap siphonage and allows proper venting before finishes are applied.
Install vertical vent runs from fixtures to the roof, maintain required slopes and diameters, flash roof penetrations with appropriate collars, and position AAVs where code permits.
Secure and test for leaks and unobstructed airflow.
Placing fixture drains, trap arms, and cleanouts
Begin by marking fixture locations and routing drain lines according to the plan, ensuring each fixture’s trap arm aligns with the venting layout and maintains the required slope.
Cut and assemble drain piping, install traps at correct distances from fixtures, and position cleanouts at changes of direction and intervals per code.
Test connections for leaks and confirm accessible cleanout placement before covering walls or floors.
Installing gas lines for appliances (if applicable) and safety checks
Prepare to run gas service and perform required safety checks by verifying appliance locations, meter and regulator placement, and local code requirements before any piping work commences.
Install approved piping (CSST, black iron, or copper where allowed), size per load, slope for drainage, and secure supports.
Pressure-test systems, purge air, check for leaks with soap or electronic detectors, and obtain required inspections and certifications.
Water Heater and Hot Water System Installation
The section covers selection among tank, tankless, heat pump, and hybrid water heaters and the criteria for proper sizing and placement within the home.
It addresses required components and safety measures including venting, TPR valve, expansion tank, and seismic straps.
Final steps explain connection of supply lines, drains, and necessary electrical or gas hookups.
Types of water heaters: tank, tankless, heat pump, hybrid
When choosing a water heater for a new house, homeowners must weigh four common types—storage tank, tankless, heat pump, and hybrid—each offering distinct trade-offs in cost, efficiency, and installation complexity.
Storage tanks are simple and lower upfront cost; tankless provides on-demand hot water and energy savings; heat pumps extract ambient heat for superior efficiency; hybrids combine heat pump efficiency with tanked reliability.
Sizing and locating the water heater
After selecting the appropriate water heater type, attention shifts to correct sizing and strategic placement to secure performance, safety, and ease of service.
Calculate peak demand using fixture units and first-hour rating; choose capacity and recovery to meet household needs.
Locate near primary hot-water load to reduce heat loss and pipe runs, facilitate access for maintenance, and comply with local codes and utility clearances.
Venting, TPR valve, expansion tank, and seismic straps
Proper venting, a correctly sized temperature-pressure-relief (TPR) valve, a thermal expansion tank, and secure seismic straps are essential components that together guarantee safe operation, pressure control, and physical stability of a water heater and its hot-water system.
Install venting per code for combustion or direct-vent units, size the TPR to manufacturer specifications, fit an expansion tank on the cold inlet, and anchor straps to structural framing.
Connecting supply lines, drains, and electrical/gas
Once plumbing rough-ins and safety components are in place, the installer connects cold and hot supply lines, ties in the TPR drain, and completes electrical or gas hookups with strict adherence to codes and manufacturer instructions.
Connections are pressure-tested, joints inspected for leaks, and dielectric unions used where dissimilar metals meet.
Electrical circuits are verified, gas lines leak-tested, and final system startup follows prescribed procedures and clearances.
Fixture Rough-In to Finish Connections
The final phase shifts rough-in plumbing to finished fixtures, including installing sinks, toilets, tubs, showers, and faucets and making their drain and water connections.
It also covers mounting and connecting shower and tub valves, plus adding laundry and dishwasher hookups.
The section concludes with finalizing gas appliance connections and systematic testing for leaks and proper operation.
Installing sinks, toilets, tubs, showers, and faucets
Begin by aligning fixture locations with the rough-in layout, confirming drain, vent, and supply positions before installing sinks, toilets, tubs, showers, and faucets; this assures that finish connections fit without rework and prevents leaks or code violations.
Install fixtures per manufacturer instructions, use proper seals and mounting hardware, connect supply lines with shutoffs, test for leaks, assure trap and vent integrity, and verify water flow and drainage.
Mounting and connecting showers and tub valves
Having confirmed fixture locations and supply/drain alignments for sinks and toilets, attention shifts to mounting and connecting shower and tub valves where finish plumbing meets the rough-in.
Install valve bodies at correct depth and secure to studs or support blocks.
Connect hot and cold supplies, pressure-test for leaks, set trim depth, sweat or crimp joints per manufacturer, then install escutcheons and trim.
Installing laundry and dishwasher hookups
Install washers and dishwashers by aligning finish connections to the rough-in locations and verifying supply, drain, and electrical clearances before fastening.
Secure water supply valves, use flexible stainless hoses, and slope the drain tailpiece toward the trap.
Install an air gap or high-loop per code.
Mount strain reliefs, test for leaks, and confirm appliance access for service while maintaining insulation and vibration isolation.
Finalizing gas appliance connections and testing
Finalize gas appliance connections by matching finished fittings to the rough-in supply, verifying correct pipe sizing, clean threads, and alignment before making the final joint.
Use approved connectors, apply pipe compound or tape where required, and torque fittings to specification.
Perform pressure and leak tests with gas detector and soapy solution, purge lines per code, and document results.
Only certified personnel should light and certify appliances.
Pressure Testing, Leak Detection, and Inspections
Before finishing the walls, the installer conducts standardized water pressure and air tests to verify system integrity and locate weak points.
When tests indicate a problem, common leak detection methods—such as pressure decay monitoring, acoustic listening devices, dye testing, and thermal imaging—are used to pinpoint failures.
Finally, the contractor compiles test results, repair records, and as-built documentation to satisfy municipal inspection requirements and secure approval.
Performing water pressure test and air test procedures
Begin by verifying system integrity through controlled pressure tests: these confirm that pipes, joints, and fixtures can withstand expected service pressures without leaking or failing.
Isolate sections, pressurize with water to specified psi, monitor for pressure drop over required duration, then drain.
For air tests, use regulated low-pressure air, apply soap for visible leaks, observe gauge stability, and document results for inspection records.
Common leak detection methods and tools
After completing water and air pressure checks, attention turns to the methods and tools used to locate leaks and verify repairs.
Common approaches include dye tests, electronic acoustic leak detectors, and pressure decay monitoring.
Infrared cameras reveal temperature anomalies, pipe locators map buried lines, and smoke or tracer gas pinpoints faults in drain or vent systems.
Proper tool selection guarantees accurate diagnosis.
Preparing for and passing municipal inspections
Schedule inspections and compile documentation to streamline municipal approval for plumbing pressure testing, leak detection, and final sign-off.
The installer coordinates required tests, notifies inspectors, and guarantees visible access to test points and valves.
Records of pressure readings, leak repairs, material approvals, and permits are presented.
Prompt corrective action on detected issues, retesting as needed, secures compliance and timely certification of the plumbing system.
Insulation, Freezing Protection, and Corrosion Prevention
The section explains practical pipe insulation methods and the typical R-values recommended for different locations in a new house.
It covers freeze-protection strategies for cold climates, including heat tracing, increased insulation, and proper routing of supply and waste lines.
It also addresses measures to prevent galvanic corrosion and maintain water quality, such as dielectric unions, compatible metals, and appropriate water treatment.
Pipe insulation methods and recommended R-values
Several effective pipe insulation methods—foam sleeve, fiberglass wrap, elastomeric rubber, and pipe heating cable—address heat retention, freeze protection, and condensation control with varying R-values and installation requirements.
Recommended R-values: indoor exposed pipes R-2 to R-4; unconditioned spaces R-4 to R-6; exterior or highly vulnerable lines R-8+.
Material choice depends on temperature range, moisture exposure, compressibility, and code compliance.
Freeze protection strategies for cold climates
When temperatures routinely drop below freezing, protecting plumbing requires a coordinated approach that combines proper insulation, active freeze-prevention measures, and corrosion control to maintain function and longevity.
Strategies include heat tape or trace wiring with thermostat control, maintaining heated enclosures and air barriers, slope and drainback designs for seldom-used lines, pressure relief/drain valves, and selecting corrosion-resistant materials and coatings to reduce freeze-related damage.
Preventing galvanic corrosion and water quality issues
Why prioritize galvanic corrosion control alongside freeze protection?
Corrosion between dissimilar metals degrades fittings, causes leaks, and contaminates water.
Use dielectric unions, insulating fittings, and compatible materials; apply protective coatings and proper grounding.
Maintain pH and chloride levels via water treatment.
Regular inspections and sacrificial anodes where applicable extend service life and preserve water quality in new plumbing installations.
Backflow Prevention and Water Treatment Considerations
The section outlines required backflow preventer types and typical installation locations to protect potable water from cross-connections.
It also reviews whole-house treatment options—filters, water softeners—and where to place them relative to the main shutoff and meter.
Finally, it explains how to integrate these devices into the plumbing layout for serviceability, code compliance, and ideal performance.
Types of backflow preventers and required locations
Backflow preventers are mechanical devices designed to stop contaminated water from reversing flow into the potable supply, and their selection depends on hazard level, pressure conditions, and local code requirements.
Common types include atmospheric vacuum breakers, pressure vacuum breakers, reduced pressure zone (RPZ) assemblies, and double-check valves.
Installation locations: irrigation systems, boilers, fire lines, chemical feed points, and any cross-connection risks.
Whole-house filtration, softeners, and filtration placement
After addressing specific backflow devices and their siting, attention shifts to whole-house water treatment and how its components interact with cross-connection control.
Whole-house filters, softeners, and UV systems require placement downstream of the main shutoff but upstream of branch valves to protect fixtures.
Install approved backflow preventers where chemical injection or bypasses occur, maintain service access, and follow local codes for drainage and venting.
Integrating water treatment with plumbing layout
Integrating water treatment into a house plumbing layout requires coordinating device placement, flow direction, and cross-connection controls so that treatment equipment protects potable water without creating contamination risks.
Plans should place pre- and post-treatment devices to control sediment, softening, and disinfection, include pressure relief and bypass valves, and specify approved backflow preventers and air gaps.
Compliance with codes and service access is mandatory.
Common Problems, Troubleshooting, and How to Fix Them
The section outlines common rough-in and finish-stage mistakes to avoid and the straightforward checks for low pressure, slow drains, and persistent leaks.
It explains systematic diagnostic steps and simple fixes for clogging, venting, and valve issues.
Guidance is provided on criteria for repairing versus replacing piping or fixtures based on condition, cost, and long-term performance.
Typical rough-in and finish-stage mistakes to avoid
Careful planning and attention to common pitfalls can prevent costly rework during both rough-in and finish stages of plumbing.
Common rough-in errors include incorrect pipe slopes, improper fixture locations, and unsecured piping.
Finish-stage mistakes involve over-tightening fittings, poor sealant application, and mismatched trim.
Inspect alignment, test systems before concealment, follow manufacturer torque/specs, and document changes to avoid rework.
Diagnosing low pressure, slow drains, and persistent leaks
After avoiding common rough-in and finish-stage errors, attention shifts to diagnosing everyday performance issues: low water pressure, slow-draining fixtures, and persistent leaks.
Technicians check shutoff valves, pressure regulators, and aerators for restriction; inspect venting and trap clogs with augers; test for hidden leaks using pressure tests and moisture detection.
Repairs focus on targeted cleaning, valve replacement, seal renewal, and localized pipe repair.
When to repair vs replace piping or fixtures
When corrosion, recurring leaks, or diminished capacity appear, determining whether to repair or replace piping and fixtures requires weighing the extent of damage, material age, and long-term performance goals.
Repair is suitable for localized faults, accessible joints, or newer materials with warranty.
Replace when widespread corrosion, degraded materials (galvanized, polybutylene), chronic failures, or during major remodels to guarantee reliability and code compliance.
Safety Practices and Regulatory Compliance
The section addresses essential job-site safety measures, including appropriate PPE, gas handling protocols, and confined-space precautions to prevent accidents.
It also covers regulatory requirements for lead-free materials and potable water systems to guarantee code compliance and public health protection.
Finally, it outlines necessary documentation, warranties, and record-keeping practices for inspections and future maintenance.
Job-site safety: PPE, gas safety, and confined spaces
Prioritizing job-site safety guarantees plumbing work proceeds without preventable injuries or regulatory violations; workers must use appropriate personal protective equipment (PPE), verify gas systems are de-energized and ventilated, and follow established confined-space entry protocols.
Supervisors should enforce training, lockout/tagout, continuous atmospheric monitoring, rescue readiness, clear communication, and documentation of permits and inspections to maintain compliance and reduce risks.
Lead-free materials and potable water regulations
Comply with lead-free material requirements and potable water standards to protect public health and meet regulatory obligations.
Install only certified lead-free pipes, fittings, solder and fixtures; verify NSF/ANSI and local approvals.
Prevent cross-connections and backflow with approved devices.
Flush and disinfect new systems per code before use.
Retain manufacturer labels and guarantee contractors follow municipal sampling and testing protocols.
Documentation, warranties, and record-keeping for inspections
When installing plumbing in a new house, clear documentation and organized record-keeping guarantee inspections proceed smoothly and warranties remain valid.
Collect permits, inspection reports, material receipts, and manufacturer warranty cards. Record installation dates, contractor names, model numbers, and serials.
Store digital copies backed up securely and maintain a chronological folder for inspectors. Review warranty terms and register products promptly to preserve coverage.
Time-Saving Tips, Best Practices, and Quality Checks
The section outlines practical layout shortcuts that preserve code compliance, highlighting when common simplifications are acceptable and when full specification is required.
It then presents efficient sequencing strategies to coordinate plumbing with framing, electrical, and HVAC work to reduce rework and idle time.
Finally, it provides concise final checklists—one to complete before drywall and one before system turn-on—to verify connections, supports, vents, and pressure integrity.
Layout shortcuts that maintain code compliance
Several straightforward layout shortcuts can shave hours from installation without sacrificing code compliance: grouping wet walls, aligning fixture centers, and standardizing riser locations reduce pipe runs and simplify venting.
Consolidating fixtures on common soil stacks, planning accessible cleanouts, using uniform trap arm lengths, and keeping minimum slope and vent distances consistent guarantees inspections pass while minimizing materials and labor for durable, code-compliant systems.
Efficient sequencing for trades coordination
Coordinate plumbing work around a clear, prioritized schedule that sequences rough-in, inspections, and finishes to minimize rework and downtime.
Allocate windows for electrical, framing, and HVAC to access critical paths.
Communicate daily with foremen, lock in inspection dates early, and stage materials to reduce wait times.
Implement quality checkpoints after rough-in and before fixture installation to catch leaks, grade issues, and code deviations.
Final checklist before drywall and before turn-on
Before drywall goes up and water is turned on, a concise final checklist guarantees plumbing is leak-free, accessible, and code-compliant to prevent costly rework.
Inspect all joints, supports, and slope; verify drain testing and pressure tests passed; confirm fixture locations, stub-outs, and valve access; document shutoff and isolation labeling; verify insulation and firestopping; obtain required inspections and signoffs before concealment and activation.
Sample Project Timeline and Labor Breakdown
A compact sample schedule for a typical 3–4 bedroom house outlines rough durations for rough‑in, fixture installation, pressure testing, and final inspections.
Estimated labor hours are presented separately for DIYers and contractors to clarify time commitments and skill requirements.
Key milestones and deliverables are listed by phase to track progress and coordinate inspections and subcontractors.
Example schedule for a typical 3 to 4 bedroom new house
Several key milestones define the plumbing schedule for a typical 3–4 bedroom new house: rough-in framing inspections and waste/vent layout, water supply routing and fixture setouts, pressure testing and inspections, and final connections with commissioning.
A concise six- to eight-week sequence typically allocates:
- week 1–2 rough-in,
- week 3 inspections,
- week 4 supply runs,
- week 5 pressure testing,
- week 6 finish trim and commissioning.
Labor hours estimates for DIYers vs contractors
Many homeowners can expect total labor for a full plumbing install in a 3–4 bedroom new house to range from roughly 80–200 hours depending on skill level, crew size, and project scope.
DIYers typically occupy the higher end—150–200+ hours—due to learning curves and slower pacing.
Licensed contractor crews often complete work in 80–120 hours with coordinated trades, experience, and multiple technicians.
Milestones and deliverables by phase
Project milestones and deliverables are organized into clear phases—preparation, rough-in, inspection, trim, and final testing—each with specific tasks, expected outcomes, and labor windows to track progress and coordinate trades.
Milestone-specific deliverables, sign-offs, and typical labor estimates are listed below for coordination and cost control:
- Preparation: site layout, materials, permits.
- Rough-in: piping, drain stacks, vents.
- Inspection: code checks, corrections.
- Trim & testing: fixtures, pressure tests, final sign-off.
Conclusion
Installing plumbing in a new house demands careful planning, skilled execution, and strict adherence to codes; like a conductor coordinating an orchestra, each pipe, valve, and fixture must enter at the right moment to produce a functioning whole. Attention to layout, proper materials, permits, and safety prevents costly mistakes, while thorough testing and thoughtful scheduling guarantee durability. With diligence and informed choices, a reliable, efficient plumbing system becomes both a technical achievement and a quiet everyday comfort.