How to Tell If You Have Cast Iron Pipes: 7 Easy Tests for Homeowners
Homeowners can easily identify cast iron pipes through several straightforward methods. Look for their thick, dark, rough surface and heavy weight, along with hub-and-spigot joints. Here are seven simple tests to confirm if you have cast iron pipes:
- Tap Test: Gently tap the pipe; a dull thud indicates cast iron.
- Magnet Test: Use a magnet; it will stick to cast iron.
- Scrape Test: Scrape the surface for flaky rust.
- Joint Inspection: Examine joints and fittings for typical characteristics.
- Color and Weight: Note the dark color and heavy feel.
- Drainage Issues: Observe for slow drains or recurring clogs.
- Rust Stains: Check for rust stains or pinholes.
Always wear gloves and avoid confined spaces during your inspection. For further information on causes, fixes, costs, and next steps, continue reading.
How to Know if Your Home Has Cast Iron Pipes
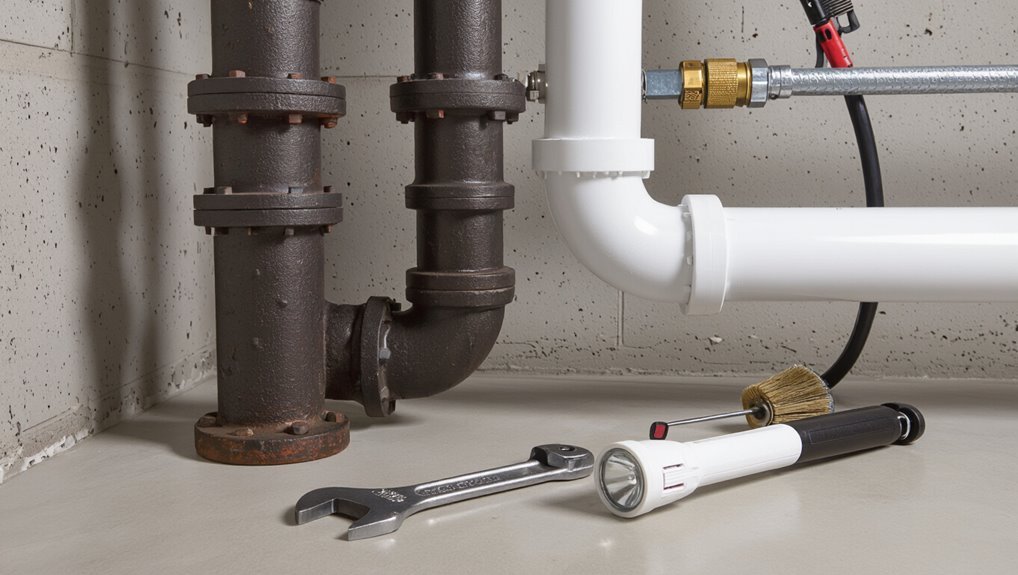
A simple checklist helps homeowners quickly determine whether their plumbing includes cast iron.
It suggests inspecting exposed pipes in basements or crawlspaces, noting dark, heavy metal with flaking rust and thick-walled construction.
It also recommends checking building age, listening for noisy drains, and consulting inspection records or a plumber for confirmation.
Quick identification checklist for homeowners
Several quick visual and tactile checks can help homeowners determine whether plumbing pipes are cast iron. A concise checklist guides inspection and answers how to tell if you have cast iron pipes.
- Exterior: look for thick, dark, rough surfaces and visible seams or flanges.
- Sound: tap—dull, solid tone indicates cast iron.
- Joint type: heavy hub-and-spigot or bolted flange connections suggest cast iron.
What Cast Iron Pipes Look and Feel Like
Cast iron pipes are typically dark gray to black with visible seams, bulky fittings, and flanges at jointed sections.
When exposed, their surfaces feel rough or pitted and the pipes are noticeably heavy compared with modern plastics or thin-gauge metals.
They were widely used from the late 19th century through the mid-20th century, so their presence often indicates older construction.
Common visual characteristics (color, seams, fittings)
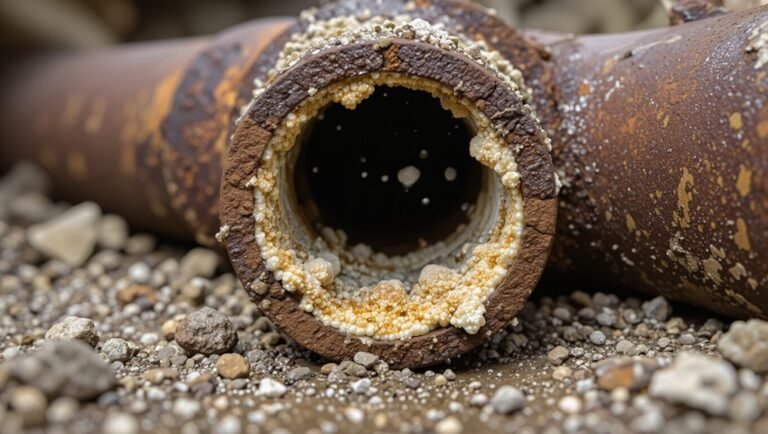
Distinctive visual cues help identify cast iron pipes: they typically exhibit a dark gray to black surface, often mottled with rust-brown patches where protective coatings have worn away.
Sections join with pronounced bell-and-spigot seams or flange bolts; seams may show lead or putty remnants.
Fittings are bulky, heavy-looking, and cast with integral hubs, often featuring visible machining marks and corrosion at joints.
Typical textures and weight when exposed
Beyond visual cues, the tactile and physical qualities of exposed cast iron are telling.
It feels dense and cold to the touch, with a coarse, sometimes pitted surface where rust has developed. Unlike thin modern pipes, it resists flexing and yields substantial heft when lifted.
Edges and joints often feel rough or slightly granular from casting and corrosion, signaling heavy, solid material.
Age range and construction eras when cast iron was commonly used
Historically, cast iron piping was widely installed from the mid-19th century through the mid-20th century, peaking in popularity for urban plumbing and drainage between about 1880 and 1950.
Homes built or remodeled before the 1960s often contain cast iron soil, waste, and vent lines.
Municipal mains and multi‑unit buildings also used it; replacements began accelerating in the 1950s–1970s with thinner steel and plastic alternatives.
7 Easy Tests You Can Do Yourself
Several simple hands-on checks can help identify cast iron pipes.
These include listening for differences in pitch when tapping, testing magnetism, scraping for rust and scale, inspecting joints and fittings visually, and examining exposed areas for wall thickness and surface appearance.
Each test provides distinct clues that, together, indicate whether the pipes are cast iron.
Test 1 Tap test: sound and pitch differences
Tap a short length of exposed pipe with a wrench or metal object to compare sounds; cast iron produces a dull, dead thud while steel or copper rings with a higher, clearer pitch.
Listen along several inches of pipe: cast iron’s muted tone remains consistent, often indicating thicker, older material.
Record differences mentally and note sections that sound distinctly resonant versus muffled for further inspection.
Test 2 Magnet test: does a magnet stick?
After using sound to narrow possibilities, a simple magnet test provides a quick, objective check for metal type.
A strong refrigerator magnet will adhere to ferrous metals like cast iron and steel but not to nonferrous pipes such as copper or PVC.
Test several exposed sections, note consistency, and avoid painted or heavily corroded areas that can reduce magnetic contact.
Test 3 Scrape test: surface rust and scale inspection
Use a small screwdriver or coin to gently scrape an exposed section of pipe and inspect the removed material for flaky, reddish-brown rust or layered, brittle scale.
Cast iron often shows coarse, friable rust and concentric flaky layers. Nonferrous pipes produce different residues.
Note color, texture, and adherence: cast iron detritus is crumbly and opaque, not shiny or ductile.
Test 4 Visual inspection of joints and fittings
How can joints and fittings reveal the pipe material?
The observer inspects connection styles: older cast iron often uses hub-and-spigot joints with visible bell-shaped hubs and lead or putty seals, or flanged connections with heavy bolts.
Look for thick, heavy fittings, irregular cast surfaces, and remnants of tar or lead dressing.
Modern smooth-sleeve couplings or thin threaded joints suggest non-cast materials.
Test 5 Check pipe thickness and wall appearance in exposed areas
Inspect exposed pipe sections for wall thickness and surface texture to distinguish cast iron from thinner modern materials.
Cast iron appears substantially thicker, with a rough, pitted or flaky surface when corroded; steel or PVC is smoother and thinner.
Measure thickness where safe, note heavy, solid feel and dull, metallic sound when tapped.
Document findings and photograph for reference.
Test 6 Sink/drain flow and clog patterns linked to cast iron issues
Curious about whether slow drains or recurring clogs point to cast iron pipes, homeowners can learn a lot from flow patterns and the nature of blockages.
Cast iron often corrodes internally, producing rusty sludge and rough interiors that trap hair and grease.
Widespread slow drainage across fixtures, brownish residue, and frequent pipe snaking suggest aging cast iron rather than isolated fixture issues.
Test 7 Compare visible piping to known cast iron examples (photos)
A visual comparison of exposed pipes with reference photos helps a homeowner quickly identify cast iron by matching key features—thick walls, flanged joints with bolts, and a dull, dark-gray surface that may show surface rust—against images of known examples.
Photographic guides emphasize join style, tapering, and casting marks; matching multiple traits increases confidence before pursuing further tests or professional inspection.
Tools and Safety Tips for Inspecting Pipes
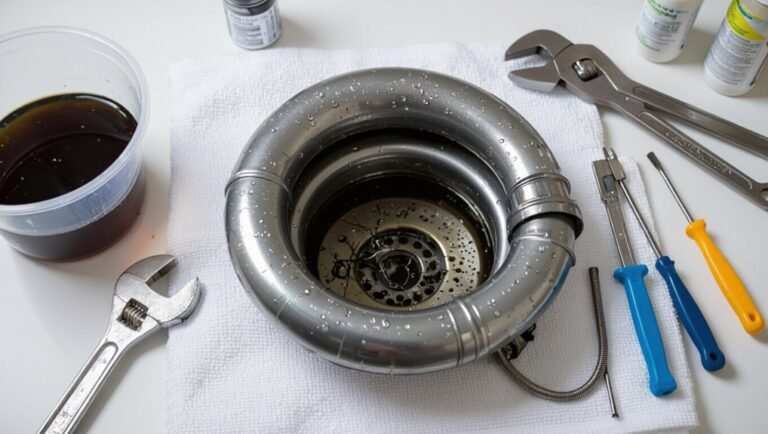
A simple kit—flashlight, magnet, screwdriver, tape measure, and camera—covers most in-home pipe checks.
Inspectors should follow basic safety: wear gloves and eye protection, guarantee stable footing in basements or crawlspaces, and avoid confined spaces without a partner or proper ventilation.
If corrosion is extensive, odors, leaks, or structural concerns are found, the inspector should stop and contact a licensed plumber or contractor.
Basic tools to carry for in-home tests
Several small, inexpensive items are all that’s needed to perform basic in-home pipe checks safely and effectively. A flashlight, screwdriver, wire brush, magnet, tape measure and notebook suffice.
Optional: camera or smartphone for photos, gloves and safety glasses. A small mirror helps view hidden runs.
Keep tools in a compact bag for quick access during visual, magnetic and measurement tests without specialized equipment.
Safety precautions when accessing basement, crawlspace, or walls
After gathering basic tools, the inspector must prioritize personal and structural safety before entering basements, crawlspaces, or opening walls.
Wear PPE—gloves, eye protection, respirator if mold or dust present—and sturdy footwear.
Confirm adequate lighting and ventilation.
Check for trip hazards, exposed wiring, gas smells, and unstable flooring.
Use a partner or notify someone, carry a phone, and avoid confined spaces without training.
When to stop and call a professional
When should inspection stop and a professional be called?
If corrosion, active leaks, heavy rust flakes, bulging joints, foul odors, or structural damage are found, stop immediately.
If tools, access, or confidence are insufficient, or if plumbing ties to main sewer or gas are involved, cease further probing.
Call a licensed plumber or structural contractor to assess, diagnose, and perform repairs safely and to code.
Differences Between Cast Iron and Common Alternatives
A brief comparison highlights how cast iron differs from common piping materials in appearance, longevity, and typical failure modes. The table below summarizes key contrasts with PVC, galvanized steel, and copper to help identify material-specific signs. Readers can use these differences to make more informed visual and physical inspections.
| Material Compared | Visual/Physical Clues | Typical Issues |
|---|---|---|
| Cast Iron vs PVC | Thick, heavy, dark gray; may have flange joints | Corrosion, rust, hairline cracks |
| Cast Iron vs Galvanized Steel | Cast iron is brittle and thicker; galvanized is lighter, metallic | Galvanized rusts under coating; cast iron corrodes through |
| Cast Iron vs Copper | Copper is reddish and smooth; cast iron is rough and dull | Copper leaks at joints; cast iron shows pitting |
| Inspection Tip | Tap tone: dull for cast iron, hollow for PVC/copper | Use weight and joint type to differentiate |
Cast iron vs PVC
Although both materials serve the same basic purpose of carrying wastewater, cast iron and PVC differ sharply in composition, durability, installation, and typical uses.
Cast iron is heavy, rigid, sound-dampening, and resists heat and UV but corrodes internally over decades.
PVC is lightweight, corrosion-resistant, cheaper, easier to join, and prone to thermal expansion and damage from high heat; lifespan and application depend on environment and code.
Cast iron vs Galvanized steel
Following the contrast with PVC, cast iron’s comparison with galvanized steel highlights different trade-offs in older plumbing and structural uses.
Cast iron offers superior noise dampening, longevity, and corrosion resistance in buried drains but is heavy and brittle.
Galvanized steel is lighter, easier to thread and join, yet prone to internal rust, reduced flow over time, and shorter service life in wet environments.
Cast iron vs Copper
When comparing cast iron and copper pipes, the two metals diverge sharply in strength, corrosion behavior, and typical applications:
Cast iron is thicker, heavier, and excels in drainage and noise dampening but is prone to rust and brittleness over decades.
Copper is lighter, corrosion-resistant for potable water, easier to solder, and more costly; it resists root intrusion and suits pressurized supply lines.
Signs of Cast Iron Pipe Problems to Watch For
Visible corrosion, pinhole leaks, and rust stains often signal aging cast iron, while slow drains and recurring clogs can indicate internal deterioration.
Foul odors or sewer gas smells are further warnings of compromised seals or breaks.
Left unchecked, structural weakening may lead to cracks or collapse requiring urgent replacement.
Corrosion, pinhole leaks, and rust stains
Inspectors note that cast iron pipes often betray deterioration through corrosion, small pinhole leaks, and rust stains that appear on fixtures, walls, or ceilings.
These signs indicate surface oxidation progressing to metal loss; moisture traces, orange-brown streaks, or flaking paint around joints warrant immediate attention.
Photographic documentation and prompt evaluation by a plumber can confirm pipe material and scope of repair before leaks worsen.
Slow drains and frequent clogs specific to cast iron deterioration
Slow drainage and frequent clogs can signal internal deterioration of cast iron pipes as scale, rust, and mineral buildup narrow the passage and roughen the inner surface.
Homeowners may notice recurring backups in sinks, tubs, or toilets despite snaking. Reduced flow rate, gurgling during flushing, and hair or grease catching sooner than expected point to progressive internal constriction rather than isolated blockages.
Odors and sewer gas indicators
How can persistent odors or fleeting whiffs of sewer gas reveal failing cast iron pipes? Corrosion and internal pitting create gaps, allowing gas to escape through joints, vents, or cracks.
Homeowners may notice rotten-egg or sewage smells near drains, basements, or utility rooms. Recurrent odors, especially alongside dampness or rust-colored residue, suggest inspection for deteriorating cast iron plumbing.
Structural issues and pipe collapse risks
Watch for signs that sections of cast iron plumbing are losing structural integrity, because corrosion and prolonged stress can lead to cracking, joint separation, or full collapse.
Observable indicators include sagging pipes, misaligned joints, persistent leaks at seams, hairline fractures, and localized bulging.
Interior corrosion may cause reduced flow and sediment buildup.
Immediate inspection and professional evaluation are recommended to prevent sudden failure.
Short-Term Fixes and Maintenance Options
The section outlines practical short-term measures for managing cast iron pipes, starting with safe cleaning and descaling techniques that remove buildup without damaging the metal.
It also summarizes temporary repairs—patches, sleeves, and internal linings—describing how each works and their limitations.
Guidance is provided on when such fixes are reasonable stopgaps and when they pose too much risk, indicating the need for professional assessment or replacement.
Cleaning and descaling methods safe for cast iron
Several practical cleaning and descaling approaches can remove rust and mineral buildup from cast iron pipes without causing damage.
Mechanical methods include wire-bristled brushes and drain snakes to dislodge scale.
Mild acidic solutions, such as diluted vinegar or citric acid, safely dissolve mineral deposits when applied briefly and flushed thoroughly.
Enzyme-based cleaners break organic matter without harming iron or joints; follow manufacturer instructions carefully.
Patch, sleeve, and lining repair options
Address common short-term fixes for leaking or deteriorating cast iron by outlining patch, sleeve, and lining options that stabilize pipes until permanent repairs or replacement can be performed.
Epoxy patches seal small holes; rubber sleeves with hose clamps bridge modest cracks.
Inflatable or cured-in-place resin liners restore flow and resist corrosion temporarily.
Professional assessment guarantees correct selection, proper installation, and safe interim service.
When temporary fixes are appropriate vs risky
After outlining patch, sleeve, and lining options, guidance is needed on when those short-term measures are appropriate versus risky.
Temporary fixes suit isolated, non-structural leaks, urgent stopgaps before scheduled replacement, or budget-limited homeowners who monitor regularly.
They are risky for widespread corrosion, collapsed sections, sewer odor, or frequent failures; such signs warrant professional assessment and prompt full replacement to avoid health and structural hazards.
Long-Term Solutions and Replacement Options
Long-term planning shifts focus from temporary repairs to full pipe replacement, weighing trench versus trenchless methods and their site impacts.
Material choices—PVC, ABS, SDR-35, or ductile iron—carry different installation requirements, costs, and expected lifespans.
A clear comparison of upfront expense, maintenance needs, and longevity helps determine the most cost-effective option for a given property.
Trench vs trenchless replacement explained
When cast iron sewer or water lines fail, homeowners must choose between traditional trenching and trenchless replacement methods—each offers distinct trade-offs in cost, disruption, and lifespan.
Trenching replaces pipes by excavation, allowing full access but causing greater landscaping and driveway damage and longer timelines.
Trenchless techniques (pipe bursting, relining) minimize surface disruption and restore flow faster, though they may have higher equipment costs and access limitations.
Material choices for replacement (PVC, ABS, SDR-35, ductile iron)
Although cost, durability, and local code requirements will shape the final decision, homeowners and contractors typically consider four primary replacement materials—PVC, ABS, SDR-35, and ductile iron—each offering distinct strengths and trade-offs in strength, corrosion resistance, flexibility, and installation method.
PVC resists corrosion and is lightweight; ABS offers impact resilience; SDR-35 balances pressure rating and wall thickness; ductile iron provides superior strength and longevity.
Cost factors and lifespan comparisons
Having outlined the main replacement materials and their performance characteristics, the focus shifts to how upfront costs, installation complexity, maintenance, and expected service life affect overall value. Owners weigh initial price against longevity; PVC/HDPE offer low cost and long life, ductile iron higher cost but durable; labor and access can dominate total expense.
| Material | Typical Cost | Expected Lifespan |
|---|---|---|
| PVC/HDPE | Low | 50+ years |
| Ductile iron | High | 75+ years |
| Cast iron (existing) | Variable | 50–100 years |
How to Document and Communicate Findings to a Plumber
The homeowner should gather clear photos of pipe junctions, corrosion, and any access points, and keep brief notes on locations and observable symptoms.
They should prepare focused questions for the plumber about inspection methods, expected timelines, and warranty or replacement options.
Including details such as pipe age, past repairs, and any access limitations can materially influence quotes and recommended repair plans.
How to take useful photos and notes
When documenting suspected cast iron pipes, prioritize clear, well-lit photos and concise notes that highlight location, pipe features, and any visible damage.
Capture wide shots for context, close-ups of seams, labels, rust, or flaking, and include a ruler or coin for scale.
Log date, exact location (room, access point), observed sounds or odors, and any temporary fixes applied for the plumber’s reference.
Key questions to ask a contractor
Why ask specific questions: to guarantee the contractor understands the scope, the homeowner’s priorities, and any constraints.
Provide clear descriptions, photos, pipe locations, and observable issues.
Ask about inspection methods, expected timeline, required permits, access needs, and cleanup.
Request written estimates, recommended next steps, and warranty details.
Confirm communication preferences and a point of contact for follow-up.
What information can affect quotes and repair plans
Several clear facts and documented observations shape quotes and repair plans for cast iron pipes: pipe age and diameter, visible corrosion or perforations, extent and location of blockages, length of affected runs, accessibility and required demolition, presence of pipe joints under slabs or in walls, and any related fixture or drainage issues.
Photographs, video scopes, measurements, material samples, repair preferences, permits, and timeline constraints further guide accurate estimates.
Preventive Measures to Extend Cast Iron Pipe Life
Practical preventive steps can greatly extend the service life of cast iron pipes. A regular maintenance schedule, targeted water treatment to limit corrosion, and careful landscaping or structural measures to shield buried lines each play distinct roles.
The following guidance outlines actionable routines and precautions homeowners and professionals can apply.
Routine maintenance schedule
Routine inspection preserves functionality and reduces the risk of costly failures; a defined maintenance schedule sets timely checks and actions for cast iron pipes.
Monthly visual inspections, semiannual cleanouts of accessible drains, and annual professional assessments create a predictable cycle.
Track findings, document repairs, and prioritize replacing compromised sections.
Prompt attention to leaks and structural issues prevents progression and prolongs service life.
Water treatment and corrosion control tips
Effective water treatment and corrosion control can greatly slow deterioration of cast iron pipes by managing chemistry, flow, and microbial activity.
Homeowners should monitor pH, hardness, and dissolved oxygen, use corrosion inhibitors when appropriate, control flow velocities to reduce erosion, and address biofilm with safe disinfectants.
Regular water testing and professional consultation help tailor treatments and extend service life without invasive work.
Landscaping and structural steps to protect buried lines
Beyond water chemistry and flow control, measures outside the pipe help prevent mechanical damage and soil-driven corrosion that shorten service life.
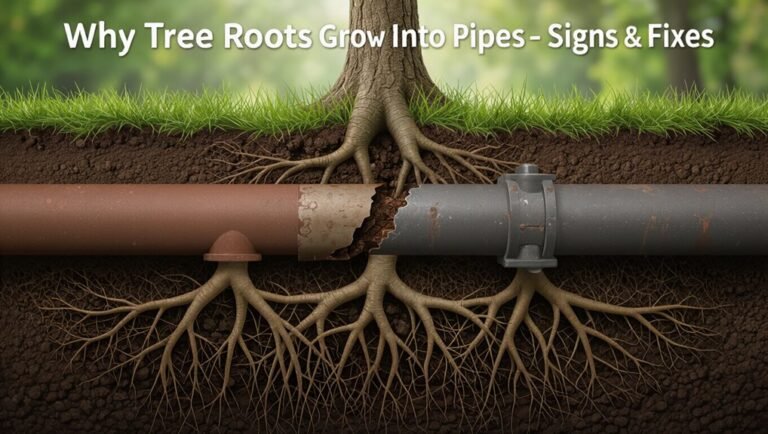
Proper grading directs surface runoff away from buried lines; non-invasive planting avoids root intrusion.
Use protective sleeves, sand backfill, and corrosion-resistant supports where pipes cross foundations.
Maintain access points, monitor soil moisture, and avoid heavy loads above lines to reduce stress and deterioration.
Resources and Next Steps for Homeowners
Homeowners should consult qualified plumbing professionals listed by local trade associations or licensed contractor directories to evaluate suspected cast iron systems.
Practical resources—such as inspection checklists, homeowner forms, and step-by-step guides—can help document issues and prepare for estimates.
A professional video inspection (sewer camera) is recommended when symptoms persist or when pipe condition and location cannot be confirmed by visual checks alone.
How to find qualified plumbing professionals
Where should a homeowner begin when cast iron pipe issues are suspected?
Start with licensed plumbers experienced in older plumbing; verify credentials, insurance, and local reviews.
Request references, ask about cast iron inspection methods, and obtain written estimates detailing scope, materials, and timelines.
Prefer plumbers offering camera inspection and remediation options.
Confirm warranties and permit handling before hiring.
Useful guides, inspection checklists, and homeowner forms
When cast iron pipe deterioration is suspected, a compact set of guides, checklists, and forms helps a homeowner move from uncertainty to action with clear steps and documented observations.
Recommended resources include concise identification guides, a room-by-room inspection checklist, and standardized damage/photo/log forms to record findings and dates.
- Identification guide
- Inspection checklist
- Damage/photo/log form
When to consider a professional video inspection (sewer camera)
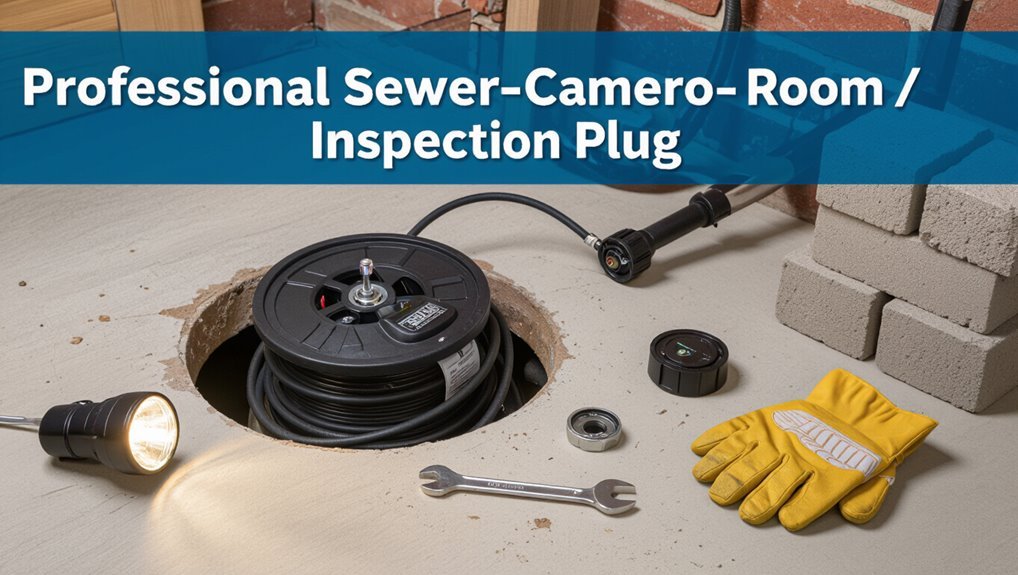
How can a professional video inspection clarify whether cast iron pipes are failing beyond what a visual check can reveal?
A sewer camera reveals internal corrosion, cracking, joint separation, and root intrusion that surface exams miss.
Consider inspection when recurring clogs, slow drains, foul odors, historic cast iron, or plans for renovation arise.
Report provides evidence for repair, lining, or replacement decisions and accurate cost estimates.
Conclusion
After dutifully rattling pipes, measuring thickness, and peering into basements like amateur archaeologists, the homeowner discovers what was obvious all along: cast iron proves its presence by resisting modern conveniences and rewarding patience. Iron pipes age with noisy dignity, leaking reminders that permanence is a homeowner’s illusion. Recognizing them is less a victory than a summons—to plan, budget, and accept that old strength often foreshadows necessary replacement.