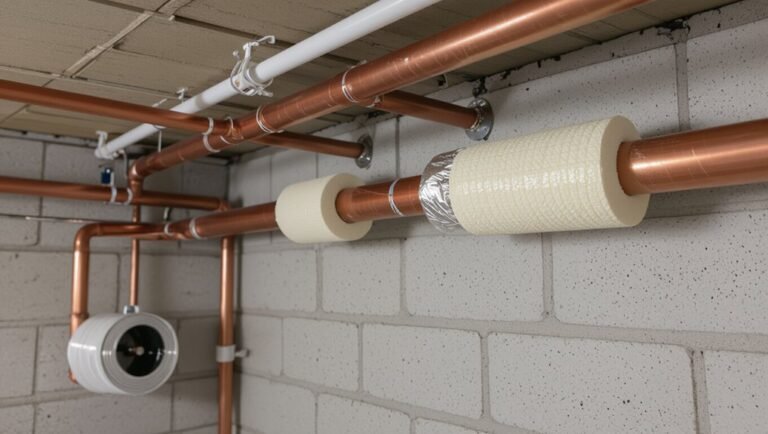
How to Clean a Furnace Blower: Step-by-Step Guide for Safe, Efficient DIY Maintenance
To clean a furnace blower safely and effectively, start by turning off the power and gas. Equip yourself with gloves, eye protection, and a dust mask. Carefully remove and support the blower assembly, labeling the wiring for easy reassembly. Use a soft brush, vacuum, and compressed air for light dust removal. For heavily soiled fan wheels, soak and gently scrub them, and clean the housings with a mild detergent if they’re oily. Inspect belts, bearings, and the motor, lubricating them according to the manufacturer’s recommendations. Finally, test the blower’s operation. Regular maintenance at seasonal intervals will help prevent damage. More detailed steps are provided below.
What a Furnace Blower Is and Why Regular Cleaning Matters
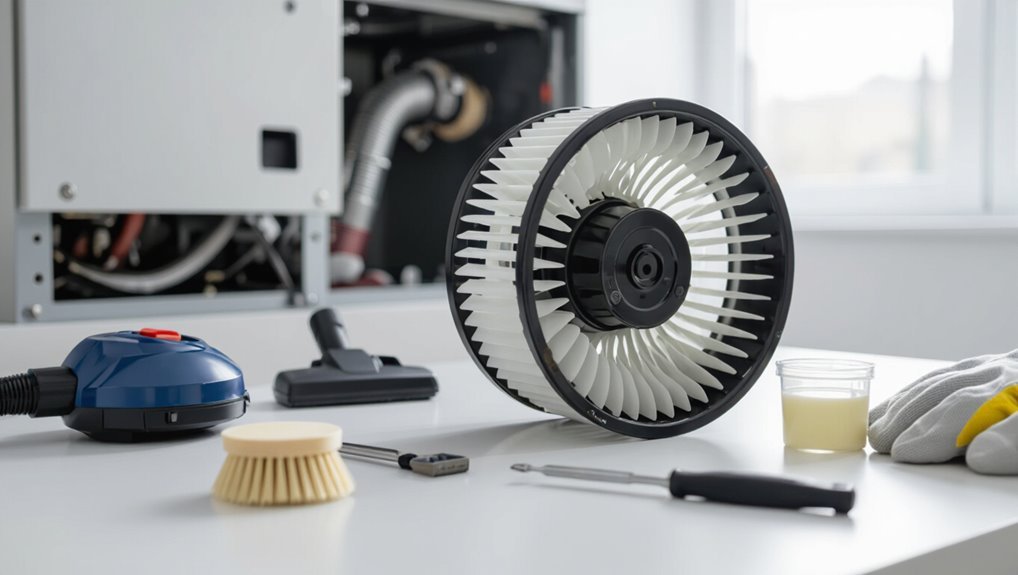
The furnace blower is the component that circulates conditioned air through the HVAC ductwork, linking the heat exchanger and the home’s vents.
When the blower becomes clogged with dust and debris it can cause reduced airflow, higher energy use, uneven heating, and premature motor wear.
Cleaning the blower can be a cost‑effective DIY task for owners comfortable with basic maintenance, though stubborn buildup or electrical issues may warrant a professional service.
How the furnace blower fits into your HVAC system
A furnace blower is the motor-driven fan that circulates heated or cooled air through the ductwork, serving as the central mover in an HVAC system.
It links heat exchanger or cooling coil output to rooms, maintaining pressure and flow.
Routine instructions like how to clean a furnace blower preserve airflow, protect components, and guarantee balanced distribution across vents, optimizing system performance and efficiency.
Common problems caused by a dirty blower
Neglected blower motors and dirty fan blades often lead to reduced airflow, higher energy use, and uneven heating or cooling throughout a home.
Accumulated dust and debris strain the motor, causing overheating, loud operation, and premature failure.
Restricted airflow increases system run-time and utility costs, worsens indoor air quality by circulating allergens, and can trigger frequent cycling or thermostat misreadings requiring corrective maintenance.
Benefits of DIY blower cleaning versus professional service
Beyond the performance problems caused by a dirty blower, homeowners must weigh whether to clean the blower themselves or hire a professional.
DIY cleaning saves money, builds familiarity with the system, and allows immediate action for light buildup.
Professional service guarantees thorough inspection, safer handling of motors and wiring, and access to specialized tools for heavy contamination or warranty-sensitive repairs.
Safety Precautions Before You Begin
Before beginning any work on the furnace blower, appropriate personal protective equipment such as gloves, eye protection, and a dust mask should be worn.
Power and gas to the unit must be shut off and locked out per local safety practices to prevent accidental startup.
The blower housing should be confirmed cool and free of residual heat or hazards before access is attempted.
Required personal protective equipment (PPE)
Several essential pieces of personal protective equipment (PPE) are recommended when servicing a furnace blower to protect against dust, sharp edges, and electrical hazards.
Required items include safety glasses, a dust mask or N95 respirator, work gloves with cut resistance, and ear protection for noisy units.
Long sleeves and sturdy closed-toe shoes reduce skin injury risk during disassembly and cleaning.
How to shut off power and gas safely
One essential safety step is to completely disconnect all power and gas to the furnace before any work begins.
The technician shuts off the furnace breaker at the electrical panel and tags it if possible.
Next, the gas supply is closed at the appliance shutoff valve; for homes with gas meters, the main valve may be used.
Confirm visually that switches read “off.”
Verifying blower housing is cool and safe to access
After power and gas have been secured, the technician verifies that the blower housing is cool and safe to access.
They wait sufficient time for components to reach ambient temperature, use a noncontact thermometer or gloved hand to confirm coolness, inspect for residual heat, odors, or signs of recent combustion, and guarantee surrounding areas are clear before removing panels and proceeding with cleaning.
Tools and Materials You’ll Need
Before starting work on the blower, the reader should gather everything needed to complete the job efficiently and safely.
Key items include:
- Essential tools
- Recommended cleaning supplies and replacement parts
- Optional tools for thorough maintenance
Having these on hand prevents interruptions and guarantees a smoother, more effective cleaning process.
Essential tools
A concise set of tools and materials simplifies the furnace blower cleaning process and reduces the chance of damage or missed steps.
Essential tools include a Phillips and flathead screwdriver, nut drivers, an adjustable wrench, and pliers. A soft-bristle brush, vacuum with crevice attachment, flashlight, and work gloves are recommended.
A magnetic tray keeps fasteners organized during disassembly.
Recommended cleaning supplies and replacement parts
With the basic tools laid out, attention turns to the specific cleaning supplies and common replacement parts that keep a furnace blower functioning reliably.
Recommended supplies include microfiber cloths, soft-bristle brushes, a vacuum with crevice tool, compressed air, isopropyl alcohol, and mild detergent.
Common replacement parts: air filter, belt, blower motor capacitor, and mounting screws; keep correct sizes and ratings on hand.
Optional tools for thorough maintenance
Consider adding a few optional tools to enable more thorough, efficient maintenance: a torque wrench for properly tightening fasteners, a multimeter for diagnosing electrical faults and testing capacitors, needle-nose pliers for reaching tight spots, a small inspection mirror and LED flashlight for viewing hidden components, and rubber gloves and safety goggles for protection.
A soft-bristled brush, spare belt, and contact cleaner complete a practical toolkit.
Prepare the Work Area and Access the Blower
A clear, protected workspace is established around the furnace to prevent damage to flooring and provide room for tools.
The blower assembly is located and access panels are removed following the manufacturer’s instructions.
Wiring and component positions are photographed or labeled before any disconnection to guarantee correct reassembly.
Clearing space and protecting flooring
Before beginning work, clear a generous area around the furnace and remove or cover nearby items to prevent dust and parts from being misplaced or damaged.
Lay tarps or drop cloths over flooring, secure edges with tape, and place a washable mat for tools and fasteners.
Guarantee adequate lighting and an unobstructed path for carrying parts to minimize spills and tripping hazards.
Locating the blower assembly and removing panels
Once the work area is prepared and power is disconnected, identify the furnace access panel and the blower housing by consulting the unit’s schematic or owner’s manual.
Manufacturers typically place the blower on the return-air side behind a removable panel held by screws or clips.
Remove screws or clips with appropriate tools, set panels aside, and note any foam gaskets or seals.
Keep fasteners organized and clear obstructing ductwork.
Documenting wiring and component placement before disassembly
Having removed the access panels and exposed the blower assembly, the technician should document all wiring and component locations prior to disassembly.
Photograph connections, label wires with durable tags or tape, and sketch component positions and mounting hardware.
Note connector orientations, wire colors, and terminal labels.
Secure documentation prevents errors during reassembly and guarantees safe, correct reconnection of controls, sensors, and grounding.
Step-by-Step Cleaning Procedure
The procedure proceeds in a clear sequence of safety checks, component removal, targeted cleaning, and final inspection.
Visualize the main phases as a compact checklist:
- Power off and confirm; remove blower wheel and motor.
- Clean wheel, housing, and air passages.
- Inspect and clean motor, belts, and bearings.
Each step is carried out with appropriate tools and attention to fasteners and buildup severity.
Step 1 Turn off power and confirm
Cut power to the furnace at the thermostat and then to the unit’s service switch or circuit breaker to guarantee no electricity reaches the blower.
Verify power is off by testing the thermostat display and confirming the fan does not run.
Use a noncontact voltage tester at the blower wiring or switch terminals.
Place a visible tag or tape over the switch to prevent accidental re-energization.
Step 2 Remove blower wheel and motor (with tips for common fasteners)
Begin by locating the blower assembly inside the furnace cabinet and visually noting how the motor, wheel, and any mounting brackets are arranged before loosening fasteners.
Disconnect power, label wires, then remove belt or set-screws.
Support the motor while loosening mounts; common fasteners include Phillips, hex head bolts, and captive nuts—use correct drivers and penetrating oil for seized hardware.
Store parts securely.
Step 3 Clean the blower wheel: methods for light vs heavy buildup
With the blower wheel and motor removed and parts set aside as described above, attention turns to cleaning the wheel itself.
For light dust, use a soft brush, compressed air on low, and a damp cloth with mild detergent.
For heavy grease or caked debris, soak in warm soapy water, gently scrub with a nylon brush, rinse, dry thoroughly, and inspect for damage before reassembly.
Step 4 Clean the blower housing and air passages
Proceed to clean the blower housing and air passages by removing accumulated dust, lint, and debris that restrict airflow and reduce system efficiency.
Use a soft brush and low‑pressure vacuum to reach corners and seams, avoiding contact with electrical components.
Wipe accessible surfaces with a damp cloth and mild detergent if oily residue exists.
Confirm all openings and ducts are clear before reassembly and testing.
Step 5 Inspect and clean the motor, belts, and bearings
Inspect the motor, belts, and bearings for wear, contamination, and proper tension before reassembly.
Disconnect power, then remove debris and dust with a soft brush and vacuum.
Check belt alignment and replace cracked or glazed belts.
Spin bearings by hand; lubricate sealed or oil ports per manufacturer instructions.
Verify motor mounts and electrical connections are secure and corrosion-free.
Step 6 Replace filter and check duct connections
After reassembling cleaned components and confirming the motor and belts operate correctly, attention turns to the air filter and duct connections to restore proper airflow and prevent recontamination.
Replace the furnace filter with the correct size and MERV rating. Seal or tighten loose duct joints, inspect for gaps or disconnected sections, and clean accessible return grilles to guarantee efficient, contaminant-free circulation.
Step 7 Reassemble blower and restore wiring exactly
Reassemble the blower with deliberate care, aligning the housing, wheel, and motor mounts exactly as they were removed to guarantee balance and clearance.
Tighten fasteners to specified torque where applicable.
Reconnect wiring using original labels or photos, matching color codes and terminal positions.
Secure strain reliefs and insulate exposed connections.
Verify blower spins freely by hand before fully closing access panels and restoring power.
Step 8 Test run and listen for abnormal noises
Power the furnace and initiate a short test run while observing the blower from a safe distance; listen closely for rattles, scraping, grinding, squeals, or irregular vibrations that indicate misalignment, loose fasteners, bearing wear, or foreign debris.
If abnormal sounds occur, stop power immediately, recheck mounting, wheel balance, and fasteners. Inspect bearings and motor shaft, remove obstructions, then retest.
How to Clean Specific Components Safely
The section explains safe techniques for cleaning the blower wheel without bending its fins. It distinguishes between lubricating serviceable bearings and leaving sealed motors alone.
Additionally, it evaluates whether drive belts and pulleys should be cleaned or replaced. It emphasizes using the right tools and gentle methods to avoid damage.
Readers are cautioned to follow manufacturer guidance and power-off procedures before beginning work.
Cleaning the blower wheel without bending fins
Carefully cleaning the blower wheel requires steady hands and the right tools to remove dust and debris without bending its delicate fins.
Use a soft-bristle brush and compressed air at low pressure, working from hub outward. Support the wheel to prevent flexing.
For stubborn grime, apply a mild degreaser on a cloth, avoiding saturation.
Reinspect blades before reassembly.
Lubricating motor bearings vs sealed motors
1 distinction to note when servicing a furnace blower is whether the motor uses oilable bearings or sealed bearings, because the approach, tools, and maintenance frequency differ considerably.
Oliable bearings require periodic light machine oil applied to accessible ports, using the manufacturer’s lubricant and schedule.
Sealed motors are maintenance-free; attempting lubrication can damage seals and void warranties, so they should be cleaned externally only.
Cleaning or replacing drive belts and pulleys
After determining whether the blower motor uses oilable or sealed bearings, attention shifts to the drive system: belts and pulleys often show wear that affects performance and noise.
Inspect belts for cracks, glazing, fraying or slack; check pulleys for rust, wobble or buildup.
Clean with a brush and solvent, replace belts showing damage, and guarantee proper tension and alignment before testing operation.
Troubleshooting Common Issues After Cleaning
After cleaning, common post-service problems are checked methodically to confirm the blower functions correctly.
Typical checks include:
- persistent noise or vibration diagnosis steps
- reduced airflow after reassembly checklist
- motor won’t start electrical checks to perform
A brief, ordered troubleshooting routine helps pinpoint whether the issue is mechanical, airflow-related, or electrical.
Persistent noise or vibration diagnosis steps
Begin by visually inspecting the blower assembly and housing while the furnace is operating to pinpoint the source of persistent noise or vibration.
Look for loose fasteners, bent or unbalanced blower wheels, deteriorated motor mounts, and contact between the wheel and housing.
Verify shaft play, bearing noise, and motor electrical humming.
Tighten or replace faulty parts, rebalance the wheel, and recheck vibrations before closing panels.
Reduced airflow after reassembly checklist
Confirming proper airflow after reassembly is essential to affirm cleaning resolved the issue rather than introduced new problems.
Verify filter orientation and cleanliness, ensure blower wheel and housing are securely fastened and free of debris, confirm duct registers are open, check that the blower wheel spins freely without rubbing, and inspect for misaligned or crushed ducts.
Measure airflow against pre-cleaning baseline if available.
Motor won’t start electrical checks to perform
If airflow checks show no mechanical obstruction but the blower motor fails to start, the problem likely lies in the electrical system.
Verify power at the furnace switch and breaker, inspect the fuse and wiring for burns or loose connections, and test the capacitor with a multimeter.
Confirm thermostat signals and control board output.
If uncertain, recommend calling a licensed HVAC electrician for safe diagnosis.
Maintenance Frequency and Seasonal Checklist
Guidance on maintenance frequency helps determine cleaning intervals based on household usage and local environmental factors such as dust, pets, or pollen.
A concise checklist outlines monthly filter and debris checks, quarterly deeper inspections and lubrication, and an annual thorough cleaning of the blower assembly.
It also clarifies when to arrange a professional inspection, typically before the heating season or if unusual noise, reduced airflow, or persistent dust are observed.
How often to clean based on usage and environment
Frequency for cleaning a furnace blower depends on runtime, household factors, and local air quality: systems in homes with pets, smokers, heavy pollen, or renovation dust typically require inspection and cleaning every 3 months, while low-use, well-filtered environments may only need semiannual attention.
Users in humid or wildfire-prone areas should clean more often. Track runtime hours and visible debris to adjust intervals.
Monthly, quarterly, and annual tasks
A clear seasonal checklist breaks tasks into monthly, quarterly, and annual actions so homeowners can match maintenance to runtime and environmental factors.
Monthly: inspect and change filters, clear debris near intake.
Quarterly: vacuum blower housing, tighten accessible fasteners, lubricate bearings if applicable.
Annual: deep clean blower assembly, replace worn belts, inspect motor wiring and ductwork.
Record dates and notes for each task.
When to schedule professional inspection
When should a homeowner call a professional for furnace blower inspection? A professional is recommended annually before heating season, after unusual noises, reduced airflow, burning smells, or visible damage.
Schedule sooner if pets increase dust, occupants have allergies, or prior repairs occurred.
Technicians verify motor function, belt tension, bearings, and safety controls, preventing failures and maintaining efficiency.
Mistakes to Avoid and Safety Red Flags
Readers should be warned about common DIY mistakes that can damage the blower, such as using incorrect tools, over-tightening components, or bypassing electrical safety.
They should also learn clear signs to stop work and call a professional, including burning smells, sparking, persistent vibration, or exposed wiring.
Finally, attention must be paid to warranty and local code implications before attempting repairs that could void coverage or violate regulations.
Common DIY errors that damage the blower
Attempting DIY blower cleaning without proper precautions often leads to avoidable damage or safety risks.
Common errors include bending or misaligning fan blades, using excessive force on the motor shaft, applying liquid cleaners to electrical components, skipping proper grounding, and reassembling parts incorrectly.
Ignoring manufacturer torque specs, failing to replace worn belts, or cleaning with abrasive tools accelerates wear and causes imbalance or motor failure.
Signs you should stop and call a professional
How can a routine blower clean quickly become a hazardous task? Sudden sparks, burning smells, excessive vibration, seized motor, frayed wiring, or oil leaks signal risk.
If access requires structural disassembly, unfamiliar electrical work, or specialized tools, stop.
Persistent noise or failure after basic cleaning also warrants professional diagnosis.
Prioritize safety; technicians prevent injury and further damage.
Warranty and code considerations
After recognizing safety red flags that require a professional, attention must turn to warranty and local code implications that can be jeopardized by improper blower servicing.
Unauthorized repairs may void manufacturer warranties and homeowner insurance claims.
Local electrical and fuel codes often mandate licensed technicians for certain tasks.
Document actions, consult manuals, and obtain permits or professional service when required to maintain compliance and protection.
Cost-Saving Tips and When Replacement Is Better
A brief cost assessment helps determine whether cleaning a furnace blower is worth the effort by listing likely parts and tools and their prices.
When estimated repair expenses approach or exceed the cost of a new blower or frequent failures continue, replacement becomes the more economical option.
If replacement is chosen, comparing blower models and the prices of professional installation versus DIY guarantees the best long-term value.
Estimating parts and tool costs for DIY cleaning
When estimating costs for DIY furnace blower cleaning, homeowners should list needed parts and tools, compare prices from local suppliers and online retailers, and factor in time and consumables like lubricants and replacement filters.
Include common items: screwdrivers, shop vacuum, soft brush, replacement belt, bearings, and cleaner.
Tally one-off tool purchases versus rental and prioritize quality for safety and longevity.
When cleaning is no longer economical
Recognize the point at which continued cleaning and repairs cost more than replacing the blower assembly or the entire furnace.
Calculate cumulative repair expenses, compare to replacement price and remaining unit lifespan.
Factor recurring breakdowns, diminished efficiency, and safety risks.
Prioritize replacement when repairs approach 50–70% of replacement cost or when performance and reliability decline despite repeated maintenance.
Choosing a replacement blower or professional service
If repair costs near the 50–70% threshold or performance remains poor, decision-making shifts toward replacement options and professional evaluation. A homeowner compares long-term efficiency, warranty coverage, and labor versus part costs. Professionals can diagnose hidden issues; installers guarantee fit and balance. Consider rebates, energy savings, and resale value when choosing replacement or hiring service.
| Option | Pros | Cons |
|---|---|---|
| DIY part | Lower cost | Risky |
| Pro service | Accurate | Higher price |
| New blower | Efficient | Upfront cost |
Quick Reference Checklist for Furnace Blower Cleaning
A concise checklist helps guarantee the furnace blower is cleaned safely and effectively.
- Pre-cleaning checklist: power off, tools ready, workspace clear.
- Step-by-step quick checklist during cleaning: remove panel, vacuum/blade wipe, inspect belt.
- Post-cleaning verification checklist: reassemble, test run, check for unusual noise.
Pre-cleaning checklist
Before any cleaning begins, the technician confirms a concise pre-cleaning checklist: power isolation, required tools and replacement parts on hand, appropriate personal protective equipment, documentation of current blower condition, and a clear working area with adequate lighting and ventilation.
They verify filter replacement availability, guarantee replacement fasteners and belts match specifications, confirm access to the blower assembly without obstruction, and note any preexisting damage for later comparison.
Step-by-step quick checklist during cleaning
Begin by confirming power remains isolated and lockout/tagout is applied, then proceed through the following succinct sequence:
remove blower access panel, note wiring positions, detach blower assembly, clean fan blades with brush and vacuum, inspect motor bearings and belt, lubricate per manufacturer, replace or tighten belt if needed, wipe housing and filter slot, reassemble components, secure fasteners, keep work area clear for restart.
Post-cleaning verification checklist
Post-cleaning verification guarantees the furnace blower is safe, properly reassembled, and ready for operation by confirming electrical isolation removal, mechanical integrity, cleanliness, and correct airflow.
Inspect fasteners and housing alignment, verify wiring and conduit are secure, confirm fan spins freely without noise or wobble, check filter and duct seals, test power-up and thermostat response, and verify airflow and temperature rise match manufacturer specifications before regular operation.
Conclusion
Regular cleaning keeps a furnace blower running efficiently and safely, reducing energy use and prolonging equipment life. Even homeowners who worry about complexity can perform basic maintenance by following safety steps and using common tools; professional help remains an option for complicated tasks. Prioritizing routine inspections and simple cleaning prevents costly failures, improves indoor air quality, and guarantees reliable heating—small, regular efforts deliver measurable savings and greater system longevity.