
How to Prevent Burst Pipes in an Empty Home: Essential Steps Before You Leave
To prevent burst pipes in a vacant home, turn off the main water supply and drain all faucets, toilets, and appliances to eliminate trapped water. Insulate exposed pipes, leave cabinet doors open to allow warm air circulation, and shut off and drain outdoor lines. Set the thermostat to at least 55–60°F and consider using heat tape or smart shutoff valves for extra protection. Additionally, take photographs of your systems and keep emergency contacts handy. Follow these steps for a thorough preparation checklist.
Why Pipes Burst in Empty Homes: Immediate Risks and Causes
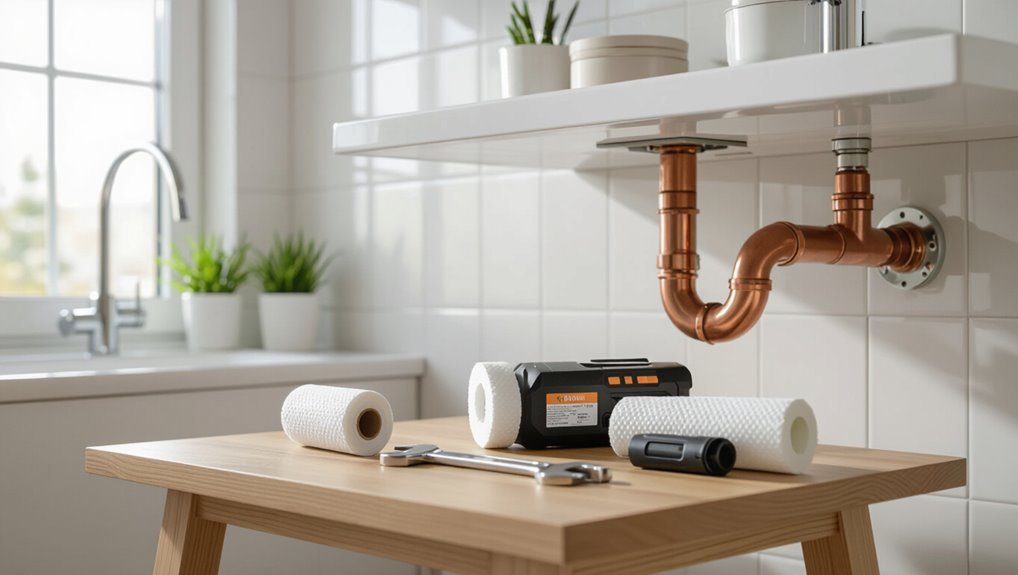
Freezing water expands inside pipes, pressure fluctuations during thermal cycles increase stress, and long-term corrosion weakens walls and joints, all of which can lead to sudden ruptures.
Risk varies by season and location, with cold climates and freeze–thaw zones posing the greatest immediate danger.
Older materials and certain fittings—such as corroded iron, brittle PVC, and poorly soldered joints—are especially vulnerable.
How freezing, pressure changes, and corrosion lead to bursts
When temperatures fall and water in pipes shifts to ice, the resulting expansion raises internal pressure and can crack fittings or burst weaker sections.
Similarly, rapid pressure changes from trapped water during thermal cycling or sudden valve closures can produce shock waves that stress joints, while long-term corrosion thins pipe walls and creates weak points that fail under normal pressure spikes.
Advice on how to prevent burst pipes in an empty home includes draining lines, relieving pressure, and inspecting for corrosion.
Seasonal and location-based risk factors
Beyond the mechanical causes already discussed, seasonal weather patterns and a property’s geographic setting greatly influence burst risk in unoccupied homes.
Cold snaps, prolonged freezing, rapid freeze–thaw cycles, and heavy rainfall increase stress on plumbing and foundations.
Altitude, proximity to coastlines, and local soil type affect drainage and pipe exposure.
Regional maintenance norms and utility reliability further modify vulnerability during vacancy.
Common vulnerable pipe materials and fittings
Pipes composed of older or lower-grade materials and their associated fittings are disproportionately prone to failure in vacant homes; common culprits include galvanized steel, polybutylene, and aging copper with corroded joints, as well as brittle PVC in cold conditions.
Faulty soldered or threaded fittings, deteriorated rubber seals, and degraded plastic connectors accelerate leaks during freeze–thaw cycles and pressure fluctuations, increasing burst risk.
Quick Checklist to Prevent Burst Pipes Before You Leave
Before leaving, a concise checklist helps guarantee the plumbing is secured: shut off the main water supply and confirm isolation, drain faucets, toilets, and appliances, and protect any exposed pipes with insulation or heat tape.
The homeowner should set the thermostat to maintain minimal heating and turn off and drain external hose bibs and irrigation lines.
Following these steps minimizes the risk of freeze-related bursts in an empty home.
Step 1 Shut off the main water supply and confirm isolation
Shut off the main water supply to eliminate the primary source of pressure that can cause leaks while the house is unoccupied.
Verify the valve is fully closed, then test by opening a single cold tap to confirm no flow.
Inspect the meter or visible pipes for residual trickle.
Label the shutoff and notify emergency contacts of its status before leaving.
Step 2 Drain the system: faucets, toilets, and appliances
With the main supply confirmed closed, the next step is to remove water from all fixtures and appliances to eliminate trapped volumes that can freeze and expand.
Open indoor and outdoor faucets, flush and tank-drain toilets, drain water heaters per manufacturer instructions, and empty washing machines, dishwashers and icemakers.
Check basement drains and low points; use buckets or hoses to guarantee complete drainage.
Step 3 Protect exposed pipes with insulation or heat tape
Seal and insulate exposed pipes to prevent freezing and ruptures: wrap vulnerable runs in foam insulation, apply self-regulating heat tape where temperatures routinely drop below freezing, and secure all materials per manufacturer instructions to guarantee continuous contact and proper electrical connections.
Inspect basements, crawlspaces, attics, and exterior lines; seal gaps and fasten insulation.
Test heat tape operation and label circuits for future occupants or caretakers.
Step 4 Set thermostat and maintain minimal heating
Any homeowner leaving a property for an extended period should maintain a minimal indoor temperature to keep pipes above freezing.
They set the thermostat to a steady, energy‑efficient setting—typically 55–60°F (13–16°C)—and avoid programmable setbacks that allow cold dips.
Remote monitoring or smart thermostats verify operation.
Interior doors stay open to promote warm air circulation; heating systems receive a brief maintenance check before departure.
Step 5 Turn off and drain external hose bibs and irrigation lines
After setting the thermostat to maintain warmth inside, attention shifts to outdoor water lines, where freezing can cause significant damage.
The homeowner shuts off exterior hose bib valves, opens faucets to relieve pressure, removes hoses, and installs insulated covers.
For irrigation, the system is turned off, drained via manual drains or blowout, and controllers powered down, preventing trapped water from freezing and expanding.
Step 6 Secure water-using appliances and shut off supply valves
Inspect and secure all fixtures and appliances that connect to the home’s water supply: shut off the main valves for washing machines, dishwashers, water heaters, and ice makers.
Disconnect hoses where practical, and open appliance drain valves to relieve trapped water.
Then label closed valves, drain remaining lines, empty appliance reservoirs, and verify no residual flow to minimize freeze damage and hidden leaks.
Step 7 Consider adding monitored leak detection or automatic shutoff
Install monitored leak detection or an automatic shutoff to add a layer of protection against unnoticed leaks or burst pipes while the property is vacant.
Sensors detect moisture or flow anomalies and notify owners or a monitoring service. Automatic valves can stop water on trigger.
Choose systems with remote alerts, battery backup, and professional monitoring for reliable, rapid response to minimize damage and insurance claims.
Detailed Step-by-Step Procedures for Each Major Task
The following section provides concise, step-by-step procedures for each major task required to prevent frozen or burst pipes in an unoccupied home.
It covers shutting off and testing the main water valve, draining water heaters, boilers, and lines, winterizing outdoor plumbing and irrigation, insulating exposed pipes in basements, crawlspaces, and attics, and proper use of heat tape with guidance on when to hire a licensed electrician.
Each procedure is presented in clear sequential actions to enable safe, reliable completion.
How to properly shut off and test the main water valve
Locate and close the home’s main water shutoff valve before winterizing or leaving the property vacant, then verify it is fully sealed and not leaking.
Confirm supply is off by opening a nearby faucet and observing flow cessation.
Inspect valve body and joints for dampness.
Tighten packing nut if minor seep occurs; replace valve or call a plumber for persistent leaks to guarantee reliability.
How to drain hot water heaters, boilers, and water lines safely
Begin by shutting off all water and power sources to each system. Then follow manufacturer and local-code procedures for draining to prevent pressure-related hazards and freeze damage.
For water heaters: attach a hose to the drain valve, open pressure relief and drain valves, and vent air.
For boilers: isolate, cool, open drain and vents. Flush lines, close valves, and cap or leave drained per instructions.
How to winterize outdoor plumbing and irrigation systems
Prepare outdoor plumbing and irrigation systems for winter by isolating water sources, draining lines, and protecting exposed components to prevent freezing and burst pipes.
Shut off outdoor valves, open spigots, and use blow-out air or drain plugs to clear irrigation lines.
Remove and store hoses, insulate aboveground backflow preventers and exposed fittings, and verify all drains remain unobstructed before leaving.
How to insulate pipes in basements, crawlspaces, and attics
After isolating and draining outdoor lines, attention should turn indoors to insulating pipes where cold air can enter the building envelope—basements, crawlspaces, and attics—which greatly reduces the risk of freezing in vacant homes.
Locate exposed runs, clean surfaces, measure lengths, fit foam or fiberglass insulation snugly, seal seams with tape or mastic, secure with zip ties, and insulate any valves or joints.
How to use heat tape and when to call an electrician for installation
Install heat tape carefully to provide targeted pipe warming where insulation alone may not suffice, and recognize situations that require a licensed electrician rather than a DIY approach.
Inspect pipe material and length, choose self-regulating tape for variable temperatures, follow manufacturer routing and attachment, seal connections, and test.
Call an electrician for hardwired systems, complex junctions, shared circuits, or unclear local codes to guarantee safety.
How to prep laundry appliances, dishwashers, and refrigerators
Begin by shutting off water and power to each appliance and documenting valve and breaker locations to guarantee a controlled, reversible shutdown; this reduces leak and electrical risks before any further steps.
Drain lines: run washer and dishwasher drain cycles, disconnect hoses, and clear traps.
Empty refrigerator, defrost, clean, prop door open, and shut water supply to ice maker.
Secure appliances for vacancy.
Tools, Materials, and Products You’ll Need
A concise inventory of tools, materials, and products helps guarantee proper preparation before winterizing an empty home.
This section covers essential hand tools and safety gear, insulation options (including pipe sleeves and heat tape), and electronic aids such as leak detectors, smart shutoff valves, and monitoring services.
It also outlines recommended antifreeze choices and key chemical precautions for safe use.
Essential hand tools and safety gear
When preparing to winterize an empty home, assembling a compact kit of reliable hand tools and basic safety gear guarantees tasks are completed efficiently and hazards are minimized.
Include adjustable wrench, pipe wrench, pliers, crescent wrench, tubing cutter, and plumber’s tape.
Add flashlight, pry bar, insulated gloves, safety glasses, dust mask, and a first-aid kit.
Store in a durable tool bag for accessibility.
Insulation types, pipe sleeves, and heat tape options
Insulation choices—foam pipe sleeves, fiberglass wrap, and closed-cell foam—determine how effectively exposed plumbing resists freezing, while niche products like self-regulating heat tape add active protection in vulnerable runs.
Homeowners should match material R-value, sleeve diameter, and heat-tape voltage to pipe location, surface, and local climate to prevent cold spots and guarantee safe, code-compliant installation.
- Sleeve sizing
- R-value
- Heat-tape type
- Weather rating
Leak detectors, smart shutoff valves, and monitoring services
Install leak detectors, smart shutoff valves, and monitoring services to detect and stop water leaks automatically before they cause damage in an empty home.
Devices should be placed at water heaters, under sinks, and near appliances. Choose battery-backed, Wi‑Fi models with automatic shutoff.
Consider professional monitoring for alerts and remote control.
- Placement
- Power
- Connectivity
- Monitoring
Recommended antifreeze and chemical precautions
Because antifreeze and chemical treatments can prevent freeze damage but also pose health and plumbing risks, selecting the right products and using them correctly is essential.
Choose non-toxic RV/portable water-safe antifreeze for drains and traps, avoid automotive glycol in potable systems, follow manufacturer dosages, label treated lines, ventilate when applying chemicals, and consult a plumber for systemic antifreeze or biocide use to protect pipes safely.
When to Hire a Professional and What to Ask
Visible leaks, frozen or bulging pipes, loss of water pressure, or lack of heat are signs that warrant a licensed plumber.
Homeowners should ask contractors about specific winterization steps, inspection scope and frequency, proof of license and insurance, and guarantees on work.
They should also request written estimates that list expected costs and timeframes for diagnosis, repairs, and seasonal services.
Signs that require a licensed plumber
When should a homeowner call a licensed plumber rather than attempt DIY fixes?
Significant leaks, frozen or bulging pipes, recurring low water pressure, discolored or foul-smelling water, suspected sewer backup, gas-line proximity issues, or visible structural water damage all warrant professional evaluation.
A licensed plumber assesses risk, performs safe repairs, and documents work for insurance, preventing misdiagnosed problems and costly secondary damage.
Questions to ask contractors about winterization and inspections
How should homeowners vet contractors for winterization and inspection services to guarantee thorough, reliable protection of an empty property?
Professionals should provide licensing, insurance, references, and written scopes detailing tasks (drainage, shutoffs, antifreeze use, insulation checks, leak detection).
Ask about inspection frequency, reporting format, emergency response times, subcontractors, warranty terms, and proof of recent continuing education or specialty certifications.
Estimated costs and timeframes for professional services
Because empty properties face higher risks from freezing and unnoticed leaks, homeowners should assess the cost-benefit of professional winterization and inspection services before problems occur; typical costs range from $100–$400 for winterization and $75–$200 per inspection, with one‑time services taking 1–3 hours and seasonal plans varying.
| Service | Typical Cost | Timeframe |
|---|---|---|
| Winterization | $100–$400 | 1–3 hrs |
| Inspection | $75–$200 | 30–90 mins |
| Seasonal plan | $150–$600 | Recurring |
Troubleshooting Common Problems After Returning Home
On returning to an unoccupied home, a systematic inspection should include checking for hidden leaks and early signs of water damage in ceilings, walls, basements, and around appliances.
If a pipe has burst, the first steps are to shut off the main water supply, isolate affected areas, and arrange immediate temporary repairs to stop further flooding.
Homeowners should document all damage with photos and notes, contact their insurer promptly, and preserve receipts for any emergency repairs.
How to inspect for hidden leaks and water damage
A systematic inspection for hidden leaks and water damage begins with a visual survey of the entire property, noting stains, warped materials, musty odors, and any signs of mold or efflorescence on walls, ceilings, and floors.
Next, check under sinks, around appliances, and at pipe joints for dampness, corrosion, or mineral deposits.
Use a moisture meter and inspect crawlspaces, basements, and attic penetrations.
What to do if a pipe has already burst
Discovering a burst pipe requires immediate, methodical action to minimize water damage and restore safety.
Turn off the main water supply, shut electrical power if water reaches outlets, and ventilate the area.
Contain leaks with buckets and towels, clear valuables, and document conditions for records.
Call a licensed plumber to stop the leak and assess structural or mold risks before restarting systems.
Insurance considerations and documenting damage
Several key steps help homeowners navigate insurance claims and properly document damage after returning to a property.
Photographs and time-stamped videos of affected areas, inventories of damaged items with receipts or estimates, and immediate contact with the insurer expedite claims.
Preserve evidence, avoid unnecessary repairs until approved, obtain written adjuster notes, and keep records of communications, expenses, and temporary mitigation measures for reimbursement.
Long-Term Strategies to Reduce Future Risk
Long-term risk reduction focuses on durable upgrades, such as replacing vulnerable pipe materials and installing frost-resistant fittings designed for cold climates.
Permanent freeze protection and smart monitoring systems can detect temperature drops and leaks early, minimizing damage.
A simple seasonal maintenance schedule guarantees insulation, valves, and sensors remain effective year after year.
Upgrading pipes and fittings for cold climates
Upgrade pipes and fittings to materials and layouts better suited for freezing conditions to reduce the risk of bursts in an empty home.
Replace vulnerable galvanized or older copper with PEX or thicker-walled copper, add insulation sleeves, reroute exposed runs away from exterior walls, install proper pipe supports to prevent stress, and upgrade valves and fittings to frost-resistant models.
Document changes for future maintenance.
Installing permanent freeze protection and smart monitoring
Implementing permanent freeze protection and smart monitoring transforms passive precautions into an active defense against pipe bursts in an unoccupied home.
Heated pipe cables, insulated pipe sleeves, and thermostatic controls maintain safe temperatures.
Remote sensors monitor temperature, flow, and pressure, sending alerts and enabling automatic shutoffs or heater activation.
Integrated systems reduce risk, lower repair costs, and provide documented protection for insurers and property managers.
Seasonal maintenance schedule to prevent recurrence
Consistency is the foundation of preventing repeat pipe failures: a simple, seasonal maintenance schedule aligns inspections, tests, and minor repairs with weather cycles to catch vulnerabilities before they escalate.
- Winter: insulate, drain exterior lines, test heating backup.
- Spring: check for freeze damage, clear vents, service insulation.
- Summer: pressure-test, repair leaks, update monitoring firmware.
- Fall: winterize, trim vegetation, verify thermostat and remote alerts.
Real-World Scenarios and Checklists to Follow Before Leaving
The article presents practical checklists tailored to common absence scenarios: short trips (48–72 hours), extended absences (more than a week), and properties left vacant for months.
Each checklist highlights essential, time‑sensitive actions for reducing freeze and burst risk.
Later sections provide step‑by‑step protocols for quick departures, thorough pre‑vacation shutdowns, and full winterization of long‑term vacancies.
Short trips (48 to 72 hours) condensed checklist
For short absences of 48 to 72 hours, a focused checklist helps minimize burst-pipe risk without major disruption:
- shut off and drain exterior hose bibs,
- set thermostat no lower than 55°F (13°C),
- insulate exposed pipes in unheated areas,
- close interior valves to nonessential appliances,
- leave cabinet doors open under sinks, and
- ask a neighbor to check the property once.
Extended absences (more than a week) thorough protocol
Anyone planning to be away for more than a week should follow a thorough protocol that goes beyond short-trip measures to greatly reduce the risk of frozen or burst pipes.
Shut off and drain main water; open faucets and appliance valves; insulate exposed pipes and maintain minimal heat (55–60°F) or set smart thermostat schedules; ask a neighbor to check weekly and leave emergency contact and water-main access instructions.
Vacant properties for months deep winterization plan
Prepare an extensive deep-winterization plan that treats a long-vacant property as a high-priority system:
identify vulnerable plumbing and HVAC components, establish who will perform regular inspections, decide on heat and water strategies, and assemble tools, supplies, and clear shutoff/access instructions.
Include checklist: drain and winterize systems, insulate pipes and openings, set monitored low heat or drain and antifreeze, secure permits, document procedures, and confirm periodic on-site checks.
Quick Reference: One-Page Pre-Departure Checklist
A concise, single-page checklist distills the essential steps homeowners should complete before leaving a property vacant to reduce the risk of burst pipes.
It summarizes inspections, settings, and emergency contacts for quick execution.
Use this four-point guide:
- Shut off and drain main water; open taps.
- Set thermostat to above-freezing temperature.
- Insulate exposed pipes and vents.
- Notify a local contact and post emergency instructions.
Conclusion
Before departing, the homeowner reviews measures taken to prevent frozen or burst pipes: draining lines, shutting off valves, insulating exposed plumbing, and maintaining minimal heat. Such precautions reduce costly damage and stress—so is the effort not worthwhile for peace of mind? Returning later, they inspect for leaks, restore systems methodically, and schedule any needed repairs. These routines transform a vulnerable empty house into a responsibly managed property, minimizing surprises and expense.
