
How to Clean Vent Covers Fast: Step-by-Step Guide for Dust-Free Air Vents
To clean vent covers quickly and effectively, gather a screwdriver, a vacuum with a brush attachment, a microfiber cloth, warm soapy water, and a soft brush. Begin by turning off your HVAC system. Carefully remove the vent covers, vacuum away loose dust, then soak and scrub them briefly in soapy water. Rinse and let them dry on a towel before securely reattaching them. For ongoing efficiency and improved indoor air quality, schedule regular maintenance to prevent dust buildup. This guide also covers timing, common pitfalls, and troubleshooting tips.
Why Clean Vent Covers Matters for Home Air Quality
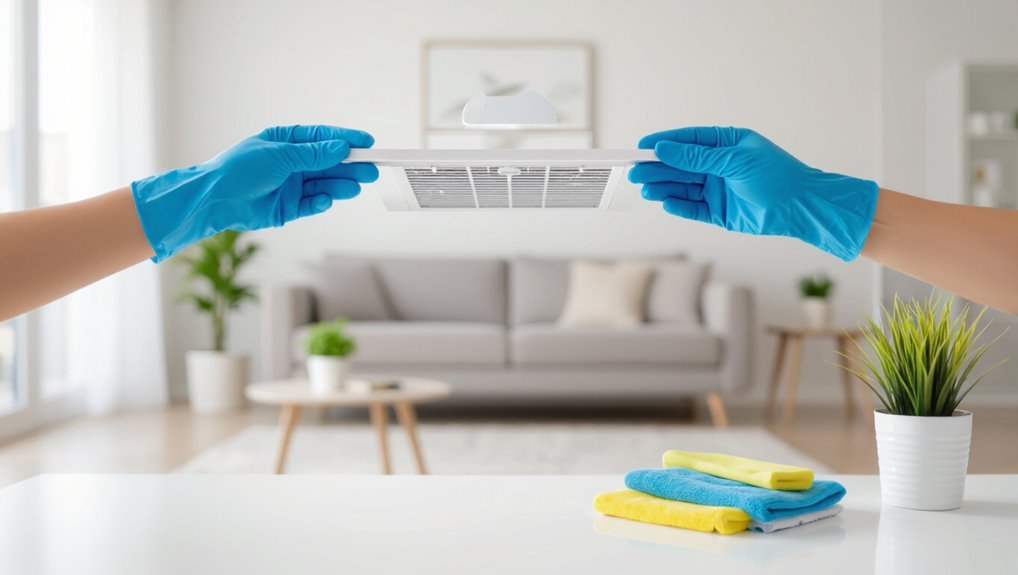
Dirty vent covers can restrict airflow, forcing HVAC systems to work harder and raising energy bills.
Accumulated dust and allergens trapped in vents can worsen respiratory symptoms and indoor air quality.
Visible dust buildup, reduced airflow, unusual odors, or increased allergy flare-ups are clear signs that vents need immediate cleaning.
How dirty vent covers affect HVAC efficiency and energy bills
Many homes with neglected vent covers experience reduced airflow and strain on HVAC systems, which increases energy consumption and shortens equipment lifespan.
Dirty grilles force fans to work harder, raising bills and maintenance needs.
Regularly learning how to clean vent covers and scheduling brief inspections restores airflow, lowers operational costs, and helps prevent premature system failures without costly repairs.
Health implications of dust and allergens in vents
Poorly maintained vent covers allow accumulated dust, pollen, pet dander, and mold spores to enter living spaces, directly increasing indoor allergen loads and respiratory irritants.
Elevated particulate concentrations worsen asthma, allergy symptoms, and sinus inflammation, and can aggravate COPD and other chronic respiratory conditions.
Vulnerable individuals—children, elderly, immunocompromised—face higher risk of infections and prolonged symptoms, making regular vent cleaning a preventative health measure.
Signs your vent covers need immediate cleaning
When dust buildup, visible mold, or dark streaks appear around vents, it indicates immediate cleaning is necessary to prevent degraded indoor air quality; other clear signs include reduced airflow from registers, unusual odors when the HVAC runs, and increased allergy symptoms among occupants.
Additional indicators include visible insect debris, excessive soot near vents, vibrating or rattling covers, and frequent filter clogging suggesting contaminant transfer.
Quick Answer: Fast Method to Clean Vent Covers in Under 30 Minutes
The fastest effective approach uses a quick removal, a warm soapy soak, and a brief scrub and dry to restore vent covers.
A clear time breakdown assigns 5 minutes for removal, 15 minutes for soaking and scrubbing, and 10 minutes for drying and reinstallation.
Expected results include visibly cleaner vents and reduced dust circulation within the half-hour window.
Overview of the fastest effective approach
Start by gathering basic supplies—screwdriver, vacuum with brush attachment, microfiber cloth, warm soapy water in a basin, and a soft brush—so the task proceeds without interruptions.
Remove covers, vacuum loose dust, soak and scrub grilles briefly, rinse and dry, and wipe surrounding duct openings.
Reinstall covers once fully dry. This sequence prioritizes speed while ensuring thorough surface and crevice cleaning.
Time breakdown and expected results
If keeping disruption minimal is a priority, the entire process—prepping supplies, removing grilles, vacuuming, a short soak and scrub, quick rinse and dry, and reinstallation—can be completed in under 30 minutes for a standard set of 4–6 vent covers.
Time allocation: 5 minutes prep/removal, 10 minutes vacuum/soak, 8 minutes scrub/rinse, 5–7 minutes dry/reinstall.
Expect visibly cleaner vents and improved airflow.
Essential Tools and Supplies for Speedy Vent Cover Cleaning
A concise inventory of tools and supplies helps streamline vent cover cleaning and prevents wasted time.
Key items, optional extras for tougher jobs, and safe product choices should be reviewed before starting. Below is a quick visual checklist to guide selection:
- Screwdriver or drill with appropriate bit
- Soft brush, microfiber cloths, and vacuum attachment
- Mild dish soap and warm water for routine cleaning
- Non-abrasive cleaner or degreaser for heavy buildup
- Rubber gloves and mask; avoid bleach or harsh ammonia-based products
Must-have tools for quick cleaning
Gathering the right tools streamlines vent cover cleaning and minimizes time spent on each step.
A microfiber cloth, soft-bristle brush, handheld vacuum with brush attachment, and a spray bottle with mild detergent solution suffice for most jobs.
Add a screwdriver for removable covers and disposable gloves for hygiene.
These essentials enable fast, effective dust removal without extra equipment.
Optional supplies for deeper cleaning
Several optional supplies can make a deeper vent cover cleaning more thorough and efficient: a soft toothbrush or detailing brush for crevices, a small bucket for soaking, mild degreaser for oily buildup, compressed air for unreachable corners, and replacement filters for inspection.
Additional helpful items include microfiber cloths, a gentle scrubbing pad, a spray bottle for rinse solution, nitrile gloves, and a lint-free drying rack.
Safe cleaning products and what to avoid
Building on those extra supplies, selecting the right cleaning products safeguards finishes and speeds the job.
Use mild dish soap, diluted white vinegar, or pH-neutral cleaners for painted metal and plastic.
Avoid bleach, abrasive powders, and harsh solvents that strip paint or corrode metal.
Test any cleaner on a hidden spot first.
Microfiber and soft brushes reduce surface damage.
Preparing Safely Before You Start
Before beginning, the homeowner should follow an HVAC and electrical safety checklist, including shutting off systems and power to affected zones.
Floors and nearby surfaces must be protected with drop cloths or plastic to catch debris and cleaning solution.
The homeowner should also identify each vent cover type and fastening method to guarantee the correct removal tools and technique are ready.
Turning off HVAC and electrical safety checklist
One clear step in preparing to clean vent covers is to shut down the HVAC system and isolate relevant electrical circuits to prevent fan startup and accidental contact with live components.
Confirm power off at thermostat and main panel, label tripped breakers, and use a noncontact voltage tester on nearby grilles or fan housings.
Keep a circuit map and a flashlight accessible.
Protecting floors and surrounding areas
With power confirmed off and breakers labeled, attention shifts to protecting floors and nearby surfaces from dust, drips, and cleaning products.
Lay down drop cloths or plastic sheeting, securing edges with painter’s tape.
Place a small tarp or tray beneath vents to catch debris and moisture.
Move rugs and delicate items away.
Keep a bin for removed screws and parts to prevent scratches.
How to identify different vent cover types and fastenings
How can different vent covers and their fastenings be recognized quickly and safely?
The guide notes common types: decorative grilles, basic register plates, drop-in ceiling vents, and bathroom exhaust covers.
Inspect fastenings: screws, spring clips, magnets, or press-fit frames.
Use a flashlight, magnifying view, and gentle probing with a flat tool.
Photograph before removal for correct reassembly.
Step-by-Step Fast Cleaning Process (30-Minute Routine)
The following concise routine outlines a 30-minute, efficient method for cleaning vent covers from removal to testing.
- Remove covers quickly and safely
- Initial dust removal techniques (vacuum, brush)
- Rapid wash method for metal and plastic covers
- Quick-dry and reinstallation tips
- Final wipe and airflow test
Each step is presented for fast, safe execution with minimal tools and downtime.
Step 1 Remove vent covers quickly and safely
Begin by shutting off the HVAC fan or system to prevent stirring dust and to avoid injury; then gather basic tools—screwdriver or drill, gloves, and a small brush—so the removal proceeds efficiently and safely.
Check vent type and fasteners, loosen screws or clips methodically, support cover to avoid drops, and place hardware in a labeled container.
Inspect gasket or paint for damage before proceeding.
Step 2 Initial dust removal techniques (vacuum, brush)
Start with a quick inspection to determine dust buildup and material type, then choose a vacuum with a soft brush attachment or a stiff hand brush accordingly.
Work outdoors or over a drop cloth, holding the cover steady. Vacuum loose dust first, then brush remaining debris into a pile or vacuum nozzle.
Tap edges gently to dislodge trapped particles before proceeding to deeper cleaning.
Step 3 Rapid wash method for metal and plastic covers
With loose dust removed, attention moves to a quick, effective wash that suits both metal and plastic vent covers in a 30-minute routine.
Prepare a basin of warm water and mild detergent, submerge covers briefly, and scrub with a soft brush or sponge.
Rinse under running water, inspect for remaining grime, and repeat spot-cleaning for stubborn residue before moving to drying.
Step 4 Quick-dry and reinstallation tips
Allow the covers to drain briefly, then pat them dry with a microfiber cloth and place them on a clean, absorbent towel in a warm, well-ventilated area to finish drying quickly.
Once bone-dry, inspect mounting hardware and replace any stripped screws or damaged clips.
Reinstall covers snugly, aligning louvers and securing fasteners without over-tightening to prevent warping or rattling during system operation.
Step 5 Final wipe and airflow test
Finish the job by giving each vent cover a final wipe and checking airflow to confirm effectiveness.
Using a microfiber cloth, remove remaining dust, fingerprints, and streaks.
Reinstall securely, then turn HVAC to high and place a hand or tissue near vents to verify steady airflow.
Note any weak spots for filter or duct inspection, and record cleaned vents for routine maintenance scheduling.
Deep-Clean Options When Fast Methods Aren’t Enough
When quick wiping and vacuuming fail to remove heavy grease and grime, soaking vent covers in a degreasing solution followed by targeted scrubbing can restore finish and airflow.
For stubborn buildup inside slats and housings, compressed air or a steam cleaner can dislodge residues without damage when used carefully.
If residue is extensive, persistent odors remain, or ducts appear heavily contaminated, a professional duct cleaning service should be consulted.
Soaking and scrubbing for heavy grease and grime
For vent covers caked with grease or embedded grime, soaking and scrubbing provide the most reliable deep-clean approach.
Remove covers, soak in a sink or tub with warm water and detergent or degreaser until softened.
Use a nylon brush and toothbrush for slats and corners, rinse thoroughly, then air-dry or towel-dry.
Repeat for stubborn areas; avoid abrasive pads that damage finishes.
Using compressed air and steam cleaners for stubborn buildup
If soaking and scrubbing still leave stubborn residue in vents, compressed air and steam cleaners offer powerful alternatives for deep cleaning without prolonged soaking.
Compressed air dislodges dust from louvers and tight crevices; use short bursts and shield surroundings.
Steam loosens grease and sanitizes surfaces—move slowly, avoid excess moisture, and guarantee vents are fully dry before reinstallation to prevent mold.
When to call a professional duct cleaning service
Although many vent issues can be resolved with household tools, persistent odors, visible mold, significant dust blowing from vents, or a marked decline in HVAC performance indicate the need for a professional duct cleaning service.
Technicians use HVAC-safe vacuums, rotary brushes, and containment to remove deep debris, inspect for mold or pests, and recommend repairs or filtration upgrades to restore air quality and system efficiency.
Maintaining Clean Vents with Minimal Effort
A simple maintenance plan keeps vents functioning and limits the need for intensive cleaning.
It outlines brief weekly and monthly tasks, recommends seasonal deep-clean windows, and suggests how to fold vent checks into existing home-cleaning routines.
Following a concise schedule reduces buildup and saves time over the year.
Weekly and monthly quick maintenance tasks
Regular, brief attention keeps vent covers functioning and looking their best with minimal effort.
Weekly and monthly checks prevent buildup and preserve airflow. Tasks include quick dusting, spot wiping, filter checks, and fan inspections.
Suggested routine:
- Light vacuum with brush attachment
- Microfiber wipe of grille
- Inspect for debris inside vent
- Replace or clean nearby filters
- Note loose screws or damage for repair
Seasonal cleaning schedule recommendations
After weekly and monthly upkeep, a simple seasonal schedule helps prevent heavy buildup and keeps vents efficient year-round.
Inspect and deep-clean supply and return covers each spring to remove pollen and dust.
In autumn, clear debris before heating season and replace filters.
Winter spot-checks catch wintertime pet hair.
Note heavy-soiling triggers more frequent deep cleans or professional service as needed.
How to include vent care in regular home cleaning routines
Many homeowners can fold vent care into routine cleaning with minimal extra time by pairing it with existing tasks—dusting, vacuuming, and filter checks become natural moments to glance at and quickly wipe or vacuum covers.
Establish a simple checklist: quick visual inspection, brush or microfiber wipe, and spot vacuum. Track monthly or seasonally in the main cleaning calendar to prevent buildup and maintain airflow.
Common Mistakes That Slow You Down or Damage Vent Covers
Common errors can turn a quick vent-cleaning task into a slow, costly chore. Harsh cleaners or abrasive tools can scratch finishes, while over-tightening or misplacing fasteners makes reinstallation take longer or fail.
Skipping basic safety steps often leads to setbacks that waste time and risk damage.
Using the wrong cleaners or abrasive tools
Choosing the wrong cleaner or an abrasive tool can quickly ruin a vent cover’s finish and shorten its lifespan.
Harsh solvents strip paint and coatings; steel wool or scouring pads scratch metal and plastic. Acidic cleaners corrode fasteners and leave residues that attract dust.
Use mild soap, warm water, soft brushes, or microfiber cloths to clean safely without damaging surfaces or impairing airflow.
Over-tightening or misplacing fasteners during reinstallation
After cleaning with gentle products, careful reinstallation prevents new damage.
Over-tightening screws can crack brittle plastic or warp metal frames; using proper torque and hand tools avoids stripping threads.
Misplacing fasteners wastes time and risks loose vents that rattle or fall.
Organize screws by type, match originals, and test fit before final tightening to guarantee secure, undamaged vent covers.
Skipping safety steps that cost time later
Skipping basic safety steps—like turning off HVAC power, wearing gloves, or protecting surrounding surfaces—often seems like a time-saver but routinely creates setbacks: electrical shorts, scratched finishes, chemical burns, or lost time dealing with spills and repairs.
Technicians who skip safety also risk contaminating ducts, misplacing tools during rushed work, and facing longer downtimes for corrective cleaning or part replacement.
Comparison of Cleaning Methods and Time Efficiency
A concise comparison of quick wipe/vacuum, wash-and-dry, and professional service highlights trade-offs in time, effectiveness, and cost. The table below summarizes typical time per vent, expected cleanliness, and resource needs to guide choice. Readers can use this snapshot to pick the fastest suitable method for their situation.
| Method | Typical Time per Vent | Key Consideration |
|---|---|---|
| Quick wipe/vacuum | 2–5 minutes | Fast but may miss deep grime |
| Wash-and-dry | 20–45 minutes | More thorough, requires drying time |
| Professional service | 30–60+ minutes | Best results, higher cost and scheduling needed |
Fast wipe/vacuum vs. wash-and-dry vs. professional service
Compare the three common approaches—quick wipe or vacuum, wash-and-dry, and professional service—by their cleaning effectiveness, required time, and typical costs to determine which suits different needs and schedules.
Quick wipe/vacuum: fastest (5–15 minutes), low cost, surface dust removal only.
Wash-and-dry: deeper cleaning (30–90 minutes), low-to-moderate effort.
Professional service: thorough, time-sparing for homeowner, higher expense and scheduling required.
Tips to Keep Air Vents Dust-Free Longer
Selecting the right air filter and keeping to a regular replacement schedule markedly reduces dust reaching vent covers.
Enhancing home airflow through balanced returns, sealed ducts, and proper ventilation further limits buildup.
Simple upgrades like magnetic filters and trap screens capture debris before it settles, cutting cleaning frequency.
Air filter selection and replacement frequency
Choose the right air filter and replace it on a regular schedule to reduce dust buildup on vent covers and improve indoor air quality.
Select filters with appropriate MERV ratings for the home’s needs—higher for allergy concerns, moderate for general use.
Check monthly, changing disposable filters every 1–3 months and washable filters per manufacturer guidance to maintain airflow and minimize particulate accumulation.
Improving home airflow to reduce dust buildup
Improving overall home airflow helps prevent dust from settling on vent covers by keeping particles suspended and moving toward filtration or exhaust. Simple adjustments—balancing supply and return vents, clearing obstructions, and ensuring fans and ducts operate efficiently—reduce stagnation that causes buildup.
Routine HVAC maintenance, unobstructed returns, timed fan use, and strategic furniture placement sustain steady circulation, minimizing dust accumulation on vents and nearby surfaces.
Small upgrades that reduce cleaning frequency (magnetic filters, trap screens)
Add simple hardware upgrades to cut how often vents need full cleanings: magnetic vent filters that snap onto metal grilles and fine trap screens placed behind returns capture dust before it settles, extending intervals between deep cleanings while preserving airflow.
These inexpensive, easy-to-install additions trap larger particles, protect HVAC components, and let occupants perform quick surface wipes or vacuuming rather than frequent full disassembly.
Troubleshooting: What to Do If Vent Covers Don’t Look Clean After Reinstallation
If vent covers still appear dirty after reinstallation, the first step is to identify ongoing dust sources such as nearby vents, attic leaks, or HVAC filter issues.
Persistent discoloration may signal material damage or staining that cleaning cannot remove, warranting replacement.
If airflow or odors remain problematic, recommend inspecting ductwork and consulting an HVAC professional for further diagnostics.
Diagnosing persistent dust sources
When vent covers still attract dust after cleaning and reinstallation, one of several persistent sources is likely at work—restricted airflow, duct buildup, nearby pollutants, or a failing filter can all redeposit particles quickly.
Inspect return vents, measure airflow, check and replace filters, and examine ducts for visible debris or pest signs.
Address nearby activities (cooking, smoking, renovations) and consider professional duct cleaning if problems persist.
When discoloration indicates material damage
Although cleaned surfaces can still appear stained, persistent discoloration often signals material degradation rather than surface dirt.
Inspect for cracks, warping, pitting, or thinning paint/coating. Plastic may yellow from UV or heat; metal can show corrosion or corrosion under paint.
Replace covers with evident structural compromise to restore appearance and safe airflow, and document condition for warranty or maintenance records.
Next steps for unresolved airflow or odor problems
Begin by evaluating persistent airflow restriction or lingering odors as distinct problems that often require steps beyond cleaning vent covers.
Inspect ductwork for blockages, damaged insulation, or disconnected sections.
Consider professional duct cleaning and HVAC diagnostic testing for pressure imbalances or mold.
Replace filters, seal leaks with mastic or foil tape, and test airflow and odor source after each corrective action to confirm resolution.
Conclusion
Consistent cleaning creates clearer, cooler circulation: a concise, quick-clean routine cultivates healthier home air. Swiftly stripping, scrubbing, and safely securing vent screens saves seconds and spares system strain. Regular, reasonable routines reduce recurring residues, resist recontamination, and reinforce respiratory relief. Avoid abrasive actions and allow ample air-drying; otherwise, costly complications can creep. Practical, persistent practices preserve performance, promote purity, and provide peace of mind through simple seasonal stewardship.
