How to Get Rid of Pipe Insulation Smell Fast: Proven Fixes and Prevention Tips
To quickly get rid of pipe insulation smells, address moisture, mold, or chemical off-gassing by increasing ventilation, isolating the affected area, and drying or removing wet insulation. Clean surrounding surfaces with mild detergent and use baking soda or activated charcoal to temporarily absorb odors. For severely contaminated insulation, replace it with vapor-resistant types and seal any gaps to prevent future issues. Promptly fix plumbing leaks and monitor humidity levels. Continue reading for detailed step-by-step fixes, treatment options, and prevention tips.
Why Your Pipe Insulation Smells and When to Act
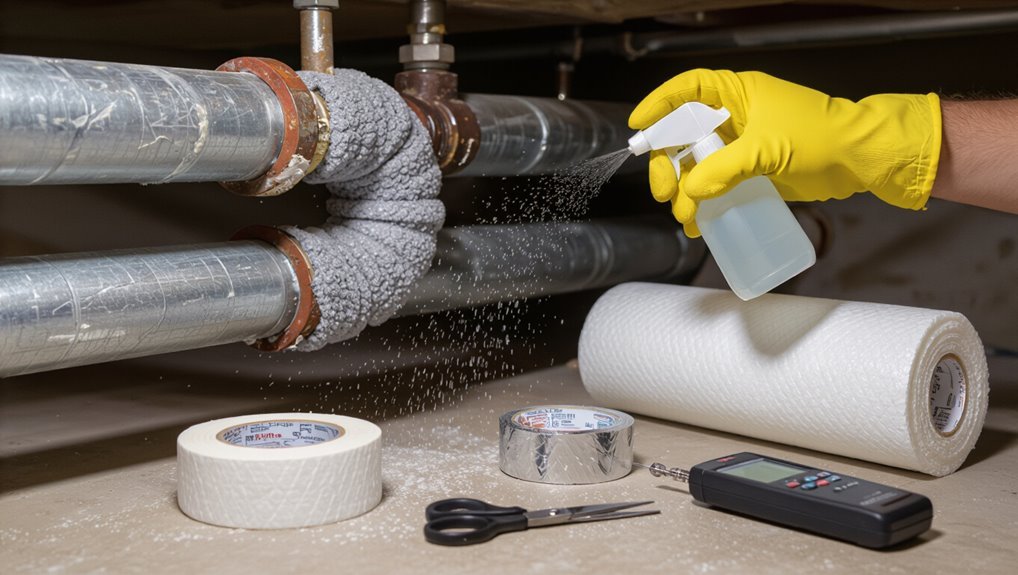
Pipe insulation odors can stem from trapped moisture and mold, chemical off‑gassing, sewer leaks, or decaying organic matter. Each source gives a different scent profile—musty, chemical, sewage, or rotten.
Identifying the smell and evaluating persistence helps determine health and safety risks, such as mold exposure or toxic fumes.
Minor, short‑lived odors may be handled with DIY drying and cleaning, but persistent, foul, or hazardous smells warrant a professional inspection.
Common odor sources in pipe insulation
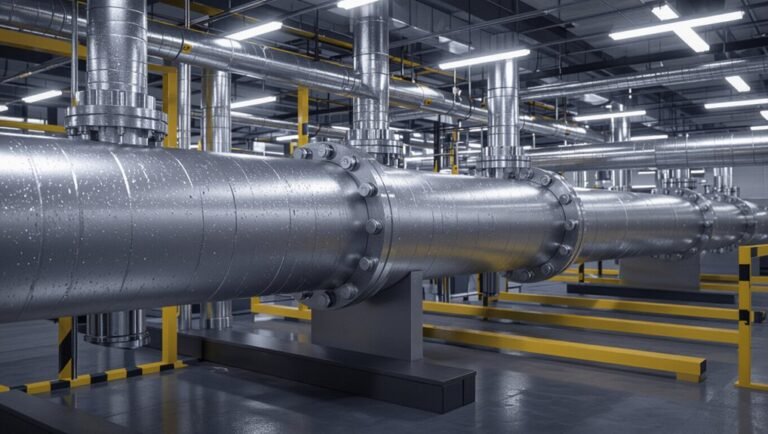
When insulation around water or HVAC lines develops an odor, it usually stems from a few identifiable causes: trapped moisture fostering mold and mildew, accumulated dust and debris heated by warm pipes, chemical off-gassing from foam or adhesives, or biological contamination such as rodent nests or insect remains.
Identifying sources guides how to get rid of pipe insulation smell quickly: dry, clean, replace, or seal affected sections.
How to identify the type of smell (musty, chemical, sewage, rotten)
How can the odor be classified? Inspectors note distinct profiles: musty equals damp, mold-like scent often near wet insulation;
chemical smells are sharp, solvent- or adhesive-like, suggesting off-gassing or spills;
sewage emits rotten-egg or fecal notes indicating sewer leaks or backup;
rotten denotes decaying organic matter, like trapped debris or rodent nesting.
Record location, intensity, and persistence for accurate diagnosis.
Health and safety risks of persistent insulation odors
Although often dismissed as a nuisance, persistent odors from pipe insulation can signal hazards that warrant timely attention: prolonged musty smells may indicate mold growth risking respiratory irritation and allergies; chemical or solvent scents can point to off-gassing of degrading materials causing headaches or dizziness; sewage-like odors suggest leaks and bacterial contamination.
Chronic exposure can aggravate vulnerable individuals and indicate structural moisture issues needing remediation.
When to call a professional vs. DIY response
Persistent insulation odors that signal mold, chemical off-gassing, sewage, or ongoing moisture problems require different responses depending on severity and source.
Minor surface mildew, localized dampness, or old adhesive smells can be handled with cleaning, drying, and replacing small sections of insulation.
Call a professional for visible mold spread, persistent sewer odors, structural water damage, or suspected hazardous materials to guarantee thorough remediation and safety.
Quick fixes to eliminate pipe insulation smell fast
The section outlines immediate actions to reduce pipe insulation odors, starting with ventilation and increased air circulation to disperse smells quickly.
It then describes temporary odor absorbers like baking soda and activated charcoal, simple cleaning steps for any exposed insulation, and short-term sealing methods to contain lingering fumes.
These quick fixes are meant to provide fast relief while longer-term solutions are arranged.
Immediate ventilation and air circulation tactics
Start by opening all nearby windows and interior doors to create a clear path for fresh air to move through the space.
Use box or ceiling fans to push contaminated air outside and draw fresh air in.
Increase airflow around affected pipes by removing obstructions and directing fans along the pipe run.
Run ventilation for several hours, monitoring odor reduction and repeating as needed.
Temporary odor absorbers to use right away (baking soda, activated charcoal)
Several common household absorbers can quickly reduce pipe insulation odors: sprinkling baking soda along accessible pipe runs or placing shallow bowls of it near vents, and using activated charcoal in breathable sachets or open containers to trap volatile compounds.
These options absorb and neutralize smells temporarily; refresh powders or replace charcoal every few days, and position absorbers where airflow carries odors for fastest effect.
Quick cleaning steps for accessible insulation surfaces
Wipe exposed insulation surfaces with a damp microfiber cloth and a mild detergent solution to remove surface residues that carry odors.
Then rinse with clean water and allow to dry thoroughly.
For stubborn spots, lightly scrub with a soft brush and a diluted vinegar solution (1 part white vinegar to 4 parts water) to neutralize odors without damaging common foam or fiberglass coverings.
Follow with ventilation and repeat as needed.
Short-term sealing methods to contain odors
Seal gaps temporarily to contain odors while longer fixes are arranged.
Apply painter’s tape, foil-backed tape, or removable caulk to joints and minor cracks; use plastic wrap and zip ties for larger sections.
Make certain materials are nonreactive and labeled for temporary use.
Monitor for moisture buildup and replace temporary seals with permanent insulation or professional repairs to prevent recurrence and mold.
Step-by-step DIY removal and replacement of smelly pipe insulation
This section outlines the practical steps for identifying, removing, and replacing smelly pipe insulation.
It lists required tools, materials, and protective gear, explains how to inspect insulation for mold, moisture, or contamination, and describes safe removal techniques for foam, fiberglass, and rubber types.
It also covers proper disposal of contaminated materials and selection and installation of replacement insulation designed to resist odors.
Tools, materials, and safety gear needed
A clear list of tools, materials, and safety gear is essential before attempting removal and replacement of smelly pipe insulation.
Required items: utility knife, wire cutters, pry bar, caulk gun, measuring tape, replacement insulation sleeves, vapor barrier tape, insulation adhesive, sealant.
Safety gear: N95 respirator, safety goggles, disposable gloves, long sleeves, knee pads, and a sturdy ladder.
How to inspect insulation for mold, moisture, or contamination
Begin by visually and physically evaluating the insulation along each pipe run, looking for discoloration, visible mold, damp spots, or sagging that indicate water intrusion or contamination.
Check joints, seams, and areas near valves or drips.
Smell for musty odors, press gently to test for softness or deterioration, and document affected sections for targeted removal and replacement.
Safe removal process for different insulation types (foam, fiberglass, rubber)
After documenting affected sections, the removal and replacement process proceeds differently depending on material:
Foam sleeves are typically slit lengthwise and peeled away.
Fiberglass wrap must be cut and bagged with its paper or foil facing intact where possible.
Rubber (elastomeric) insulation is usually cut and removed in segments.
Wear gloves, eye protection, and a respirator; clean pipe surfaces; measure and install matching replacement insulation, sealing joints.
Proper disposal of contaminated insulation
Dispose contaminated insulation promptly and according to local waste rules to prevent lingering odors and cross‑contamination:
Seal removed material in heavy-duty plastic bags, double-bag if damp or dusty.
Label bags if required.
Transport to designated hazardous or construction waste facility or arrange special pickup.
Do not mix with recyclables.
Clean tools and PPE before reuse and document disposal if regulations mandate records.
Installing replacement insulation that resists odors
With contaminated insulation removed and discarded according to local rules, attention turns to selecting and installing replacement materials that resist odors and moisture.
Choose closed-cell foam, foil-faced fiberglass, or elastomeric foam. Measure pipes, cut snugly, seal seams with compatible tape or mastic, and secure with corrosion-resistant bands.
Include a vapor barrier and guarantee ventilation to prevent future odor-causing moisture buildup.
Cleaning and treating insulation without full replacement
The section explains when cleaning can restore insulation and when complete replacement is necessary, focusing on visible damage, saturation, and persistent odors.
It outlines mold and mildew remediation options for insulation, including containment, dry brushing or HEPA vacuuming, and when professional removal is warranted.
It also reviews antimicrobial sprays, enzymatic cleaners, and odor-neutralizing treatments, noting their advantages, limitations, and appropriate use cases.
When cleaning is effective vs. when replacement is required
Assess whether odors stem from surface contaminants or material breakdown before deciding between cleaning and replacement.
Cleaning suffices when insulation shows superficial dirt, trapped debris, or light moisture without structural degradation; treat with vacuuming, mild detergent, and antimicrobial sprays.
Replacement is required if insulation is crumbling, saturated, emits persistent chemical odors, or cannot be sanitized safely, ensuring long-term performance and safety.
Mold and mildew remediation methods for insulation
When odors indicate biological growth rather than surface grime, targeted mold and mildew remediation can often restore insulation without full replacement.
Professionals assess extent, isolate affected areas, dry moisture sources, and remove loose contaminated material.
Remaining insulation is gently cleaned, vacuumed with HEPA equipment, and treated to inhibit regrowth.
Monitoring guarantees odors fade; replacement follows if structural integrity or persistent colonization remains.
Use of antimicrobial sprays and enzymatic cleaners
Several targeted antimicrobial sprays and enzymatic cleaners can neutralize odors and biological residues on insulation without requiring full replacement. They reduce microbial load, break down organic matter, and inhibit regrowth when applied per instructions.
Proper ventilation and protective gear remain necessary during application.
- Choose EPA-registered antimicrobial or enzyme formulations
- Test a small area first for material compatibility
- Follow dwell times and safety precautions
Odor-neutralizing treatments and their pros/cons
Consider odor-neutralizing treatments as a middle ground between surface cleaning and full insulation replacement: they target smells with chemical binders, absorbers, or encapsulants that mask, neutralize, or isolate odors without removing the material.
Advantages include lower cost, faster application, and minimal disruption.
Downsides: temporary results on deeply contaminated insulation, potential chemical sensitivities, and incompatibility with some insulation types or warranty terms.
Preventive measures to stop odors from returning
Preventing a recurrence of pipe insulation odors requires addressing the root causes: moisture entry, poor air circulation, and unsuitable materials.
Recommendations include controlling condensation, integrating ventilation with HVAC systems, selecting vapor-resistant or odor-resistant insulation, and keeping a simple inspection and maintenance schedule.
The following section outlines practical techniques and a checklist to implement these measures.
Moisture control and condensation prevention techniques
Control moisture and stop condensation at the source to prevent pipe insulation odors from returning: maintain proper ventilation, reduce indoor humidity, and guarantee insulation and pipes are dry and well-sealed.
Use vapor barriers, close gaps around penetrations, insulate cold surfaces with appropriate materials, slope piping to prevent water pooling, and repair leaks promptly.
Schedule periodic inspections and use dehumidifiers where needed.
Proper ventilation and HVAC integration tips
Good ventilation and proper HVAC integration are essential to keep pipe insulation odors from recurring by ensuring steady air exchange, balanced airflow, and consistent humidity control.
Implement targeted exhaust near pipes, adjust supply-return balances to prevent stagnation, and incorporate controllable ventilation rates.
Regular HVAC filter changes, duct cleaning, and sealed penetrations reduce contaminant recirculation and help maintain neutral, odor-free indoor air.
Choosing odor-resistant insulation materials and vapor barriers
Having addressed ventilation and HVAC measures to remove and limit odors, attention turns to the materials that surround pipes: choosing insulation and vapor barriers that resist absorbing and emitting smells will reduce recurrence.
Select closed-cell foam or foil-faced neoprene, specify impermeable vapor barriers, and prefer antimicrobial, low-VOC products to limit future odors.
- Closed-cell foam insulation
- Foil-faced vapor barriers
- Antimicrobial, low-VOC materials
Routine inspection checklist and maintenance schedule
A simple, regular inspection routine prevents small issues from becoming persistent pipe insulation odors.
Inspect insulation, vapor barriers, and joints monthly for dampness, mold, compression, or gaps.
Check surrounding ventilation and condensation sources quarterly.
Replace damaged sections and reseal seams promptly.
Log findings, actions, and dates.
Schedule professional assessment annually to verify system integrity and prevent odor recurrence.
Comparing insulation types for odor resistance and longevity
When evaluating fiberglass, foam, rubber, and closed-cell spray foam, the balance of cost, durability, moisture resistance, and odor risk determines the best choice for a given installation. A concise comparison helps prioritize options that minimize smell recurrence while lasting longer under damp conditions. The table below summarizes key trade-offs to guide selection.
| Property | Overview |
|---|---|
| Fiberglass | Low cost, moderate durability, poor moisture resistance, higher odor risk when wet |
| Foam (open-cell) | Low–moderate cost, moderate durability, poor moisture resistance, moderate odor risk |
| Rubber (closed-cell) | Moderate cost, high durability, good moisture resistance, low odor risk |
| Closed-cell spray foam | Higher cost, very high durability, excellent moisture resistance, very low odor risk |
Fiberglass vs. foam vs. rubber vs. closed-cell spray foam
Choosing the right pipe insulation involves balancing odor resistance, durability, and installation constraints.
Fiberglass resists many odors but can trap moisture if unjacketted.
Polyethylene foam is lightweight and odor-neutral but tears easily.
Rubber offers flexibility and good sealing against smells.
Closed‑cell spray foam provides excellent vapor barrier and long-term odor control when applied correctly, though requires professional application for best results.
Cost, durability, moisture resistance, and odor risk comparison
Although cost often guides initial selection, long-term value depends equally on durability, moisture resistance, and the likelihood that an insulation will emit or trap odors. Choices balance upfront price, lifespan, mold risk, and VOC or musty smells. Table summarizes typical trade-offs:
| Type | Durability | Moisture & Odor Risk |
|---|---|---|
| Fiberglass | Moderate | High mold/odor risk |
| Foam | Moderate–High | Low–Moderate |
| Rubber/Closed-cell | High | Low |
Common mistakes to avoid when dealing with pipe insulation smell
Many homeowners try quick fixes that rely on harsh chemicals or home remedies that do not neutralize the source of pipe insulation odor.
Others overlook underlying plumbing problems or leaks that allow mold and mildew to form.
Re-insulating without correcting moisture sources often leads to recurring smells and wasted effort.
Unsafe chemical use and ineffective home remedies
Avoid mixing household chemicals or relying on unproven DIY fixes when addressing pipe insulation odors, as both can create hazards or simply fail to remove the source.
Using bleach with ammonia, corrosive cleaners, or flammable solvents risks toxic fumes, damage, or fire.
Home remedies like perfumed sprays mask odors temporarily; proper identification, ventilation, and professional-grade cleaning or replacement are safer and more effective.
Ignoring underlying plumbing or leak issues
Masking smells or misusing household chemicals can leave the real problem intact: failing to check for leaks or damaged plumbing often allows moisture to persist inside and around insulation, feeding mold, mildew, and degradation that produce persistent odors.
Neglecting plumbing inspection delays repairs, lets bacteria and rot advance, and undermines any temporary deodorizing efforts; proper leak detection and repair are essential.
Re-insulating without addressing moisture sources
If moisture sources are not identified and stopped before replacing insulation, new material will quickly absorb dampness and trap odors, effectively resetting the problem rather than resolving it.
Professionals recommend diagnosing leaks, condensation points, or poor ventilation first.
Address plumbing repairs, improve airflow, and install proper vapor barriers.
Re-insulating without these steps wastes materials and prolongs odor, requiring repeated remediation.
Signs the smell indicates a bigger problem
A persistent or acrid odor from pipe insulation can signal more than aged material, potentially indicating sewage backup, a gas leak, or HVAC contamination.
Foul smells accompanied by staining, soft or warped surfaces, or visible mold suggest underlying moisture or structural damage.
If the scent resembles sewage or gas, immediate evacuation and contacting emergency services or a qualified technician are advised.
Odors linked to sewage, gas, or HVAC contamination
When pipe insulation emits odors reminiscent of sewage, gas, or musty HVAC contamination, it can signal issues beyond degraded foam—plumbing leaks, sewer line problems, gas leaks, or mold growth in ducts should be considered.
Immediate assessment is advised: detect sewer backflow, sniff for sulfur or rotten-egg gas, inspect ductwork for microbial growth, and engage licensed plumbers or HVAC professionals to diagnose and remediate hazards.
When smelly insulation signals structural moisture damage
Smells rising from pipe insulation can indicate that moisture has breached surrounding structures rather than merely degrading the foam; persistent musty or sour odors, especially after rain or in humid seasons, often point to trapped water, compromised vapor barriers, or hidden leaks that allow rot and mold to develop in framing, sheathing, or wall cavities.
Discolored drywall, warped trim, peeling paint, or recurring damp spots confirm deeper moisture intrusion requiring inspection and repair.
Emergency steps for hazardous smells (sewage, gas)
If sewage or natural gas odors are detected around pipe insulation, they should be treated as potential emergencies because these smells can signal active leaks that threaten health and safety.
Evacuate occupants, ventilate if safe, avoid ignition sources, and shut gas supply if trained.
Contact emergency services or utility provider immediately.
Arrange professional inspection and remediation before reoccupying the space.
Product and solution recommendations
This section outlines practical product and solution recommendations for addressing pipe insulation odors.
It covers effective odor absorbers and neutralizers for immediate use, plus recommended insulation materials and vapor barriers to prevent recurrence.
It also lists essential tools and protective equipment for safe removal and replacement.
Best odor absorbers and neutralizers for immediate use
Start with readily available odor absorbers and neutralizers that act quickly on pipe insulation smells: activated charcoal bags, baking soda placed in open containers near affected areas, and odor-neutralizing sprays formulated for smoke and musty odors (look for products containing zinc ricinoleate or hydroxypropyl methylcellulose).
Effective options include:
- Replaceable activated charcoal sachets
- Open bowls of baking soda
- Commercial odor-neutralizing spray
Recommended insulation materials and vapor barriers for prevention
Recommended insulation materials and vapor barriers should prioritize moisture resistance, low odor emissions, and compatibility with the plumbing system.
Recommended options reduce odor risk and improve longevity.
- Closed-cell foam insulation: water-resistant, low VOCs, durable.
- Foil-faced polyethylene: vapor barrier plus thermal reflection.
- Elastomeric foam with factory-applied jacket: flexible, anti-microbial, minimal off-gassing.
Tools and protective equipment to buy for safe removal
Gather essential tools and protective equipment before attempting pipe insulation removal to guarantee safety and minimize exposure to odors and contaminants.
Recommended purchases include respiratory protection, durable gloves, and proper disposal bags.
Use hand tools to avoid tearing old insulation. Proper PPE and tools reduce airborne fibers and chemical exposure, making removal cleaner and faster while protecting occupants and workers.
- NIOSH-rated respirator (P100)
- Cut-resistant gloves
- Heavy-duty disposal bags
Typical costs and timeframes for fixes
Typical costs vary from low-cost quick fixes—cleaning or sealing for under $50—to full insulation replacement that can run several hundred dollars or more.
DIY cleaning or partial replacement often takes a few hours to a day, while complete replacement typically requires a day or two.
Professional remediation raises costs due to labor and disposal but is warranted when mold, widespread deterioration, or complex piping are present.
Cost range: quick fixes vs. full replacement
Costs for addressing pipe insulation odor vary widely depending on whether a homeowner opts for quick fixes—cleaning, deodorizing, or spot repairs—or a complete insulation replacement; minor treatments often cost between $20 and $200 and can be completed in a few hours, while full replacement runs from several hundred to several thousand dollars and typically requires a day to several days depending on scope and access.
Prices reflect materials, labor, and disposal.
Estimated time to complete DIY cleaning or replacement
After weighing quick fixes against full replacement, homeowners can expect a wide range of time commitments for DIY work:
Simple cleaning and deodorizing of exposed insulation usually requires 1–3 hours.
Spot repairs or rewrapping short sections take 2–6 hours.
Removing and replacing insulation on accessible runs can occupy a weekend (6–16 hours) depending on pipe length and obstacles.
Materials, drying times, and unexpected corrosion can extend tasks.
When professional remediation increases cost but is necessary
When odors persist despite DIY efforts or insulation is water-damaged or moldy, homeowners often need professional remediation, which raises both costs and timelines.
Contractors may charge $500–$5,000 depending on scope, mold testing, containment, removal, and replacement.
Typical jobs take one day to a week.
Mandatory permits or structural repairs can further increase expenses and scheduling complexity, so obtain written estimates and timelines.
Checklist: Fast action plan to stop pipe insulation smell now
Start by locating the source and intensity of the odor, then follow a prioritized checklist to stop it quickly: ventilate the area, isolate affected pipes, remove or dry wet insulation, clean nearby surfaces, and apply temporary odor absorbers while arranging permanent repairs or replacement.
A focused checklist guides immediate steps and next actions.
- Ventilate and assess
- Remove or dry insulation
- Seal, repair, replace as needed
Conclusion
In short, homeowners should treat pipe insulation odor like a small spark—easy to smother if caught early but capable of reigniting into bigger issues if ignored. Promptly using quick fixes, targeted cleaning, or full replacement as outlined prevents recurring smells and potential moisture or mold damage. Regular inspections and preventive measures keep systems fresh, while professional help is prudent when odors persist, worsen, or accompany signs of leaks, pests, or structural problems.