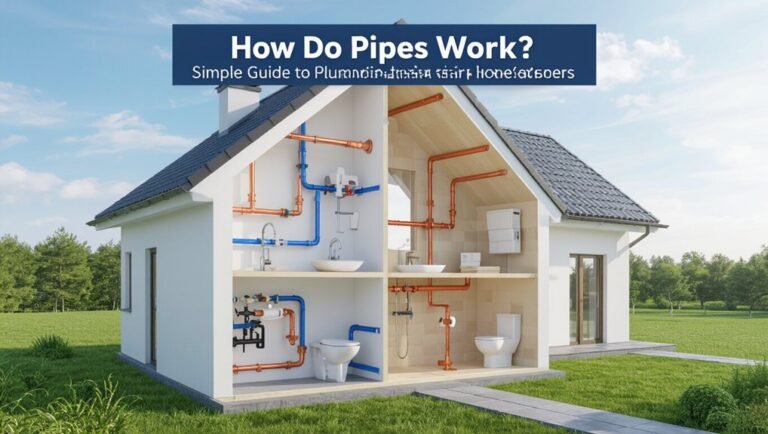
How to Reduce Water Pressure in Pipe: 7 Easy Fixes for Home Plumbing
To reduce high water pressure in your home, start by checking the pressure with a gauge at an outdoor spigot or main shutoff; aim for 40–60 PSI, and avoid exceeding 80 PSI. Common causes include municipal mains, well pumps, or a misadjusted pressure-reducing valve (PRV). Here are seven effective ways to lower water pressure:
- Adjust the PRV: If you have a pressure-reducing valve, tweaking its settings can effectively lower pressure.
- Install or Reset a Tank: A pressure tank can help regulate and maintain consistent pressure levels.
- Add Flow Restrictors/Aerators: These devices can reduce water flow without sacrificing performance in fixtures.
- Partially Close Supply Valves: Adjusting your supply valves can help manage pressure throughout your plumbing system.
- Fix Leaks: Addressing leaks can prevent pressure spikes and maintain stable water flow.
- Replace Faulty Pumps: If your well pump is malfunctioning, replacing it can resolve pressure issues.
- Hire a Plumber: For complex problems, consulting a professional for PRV replacement or adjustments may be necessary.
Following these steps will help you effectively manage and reduce water pressure in your home.
What causes high water pressure in home pipes
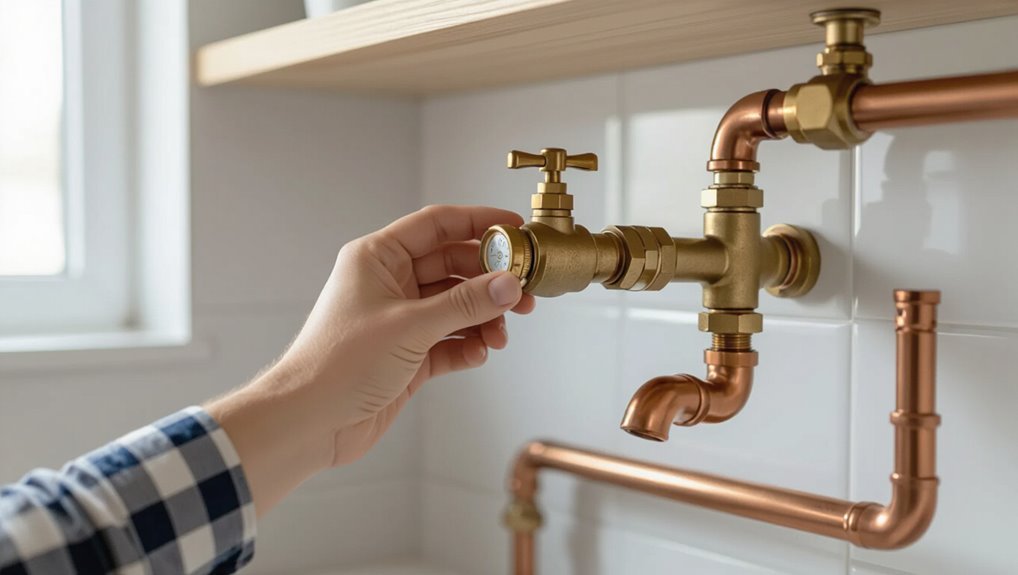
High household water pressure often originates from the municipal supply, private well systems, or misadjusted pump and pressure-tank settings.
Pressure is quantified in pounds per square inch (PSI), with typical residential systems ideally between about 40–60 PSI and higher readings indicating potential overpressure.
Excessive pressure can cause noisy pipes, frequent appliance failures, and increased risk of leaks or burst fittings.
Common sources of excessive pressure (municipal supply, private wells, pump settings)
Pressure in residential plumbing can originate from several distinct sources: the municipal system delivering water at excessive mains pressure, private well systems with pressure switches or tank issues that allow pumps to run beyond designated setpoints, and improperly adjusted or failing pressure-reducing valves and booster pumps installed within the home.
Identifying whether municipal supply, well pump settings, or faulty PRVs cause high flow guides how to reduce water pressure in pipe.
How pressure is measured and what readings mean (PSI explained)
Having identified whether excess force originates from the municipal mains, a private well system, or a failing pressure-reducing device, the discussion now turns to how that force is quantified and interpreted.
Water pressure is measured in pounds per square inch (PSI) using a gauge at fixtures or service lines.
Typical residential range is 40–60 PSI; sustained readings above 80 PSI indicate overpressure requiring adjustment.
Signs and risks of high water pressure in plumbing
Detecting unusually strong water flow, banging pipes, or frequent leaks can indicate excessive force within a home’s plumbing system.
High pressure strains fixtures, shortens appliance lifespan, and causes joints or seals to fail.
Causes include municipal supply spikes, pressure regulator failure, thermal expansion from closed systems, or incorrect pump settings.
Prompt diagnosis and regulator adjustment mitigate damage and reduce water waste.
Quick checklist to confirm your home’s water pressure
A simple checklist helps confirm whether household water pressure is within a safe range.
It recommends measuring pressure with a gauge and taking readings at an outdoor spigot, near the main shutoff, and at a laundry valve to spot differences.
Results are compared to the typical safe range (usually 40–60 psi) to determine if pressure-reducing measures are needed.
How to test water pressure with a gauge
One simple way to confirm household water pressure is to use a pressure gauge attached to an outdoor hose bib or the main shutoff.
This quick check yields a precise reading in pounds per square inch (psi) that indicates whether pressure is within a safe range.
Turn on a nearby faucet, note steady psi, repeat at different times, and compare results to recommended 40–60 psi.
Where to test (outdoor spigot, near main shutoff, laundry valve)
After confirming pressure with a gauge, testing at several strategic locations gives a clearer picture of the system’s behavior.
Check an outdoor spigot to assess exterior supply and hose bib backflow.
Test at the main shutoff or service line to gauge incoming pressure before house plumbing.
Measure at the laundry valve or appliance connections to detect pressure changes under typical indoor demand.
Interpreting results and safe pressure range
When test readings are collected from multiple fixtures and the service line, the next step is to interpret those numbers against safe operating ranges to decide whether adjustments or repairs are needed.
Compare static pressure (ideal 40–60 psi) and running pressure; significant variance between fixtures or spikes above 80 psi indicate issues.
Use the checklist: consistent readings, check PRV settings, inspect for leaks, and schedule repairs if outside safe range.
7 practical ways to reduce water pressure in pipes
A concise set of practical measures can lower excessive water pressure and protect plumbing fixtures.
Key options include both whole-house devices and fixture-level fixes:
- Install or adjust a pressure-reducing valve (PRV) or pressure regulator on well systems.
- Reduce pressure at the water heater and appliances.
- Fit flow restrictors/aerators or partially close the main shutoff as a temporary measure.
Each approach has different costs, permanence, and suitability depending on the home’s supply.
1. Install or adjust a pressure-reducing valve (PRV)
A pressure-reducing valve (PRV) lowers incoming mains pressure to a safer, consistent level and is appropriate when household readings exceed recommended limits or cause fixture strain.
Simple adjustments—typically turning an accessible screw while monitoring a pressure gauge—can correct mild overpressure, but shutoff, isolation, and caution against overtightening are essential safety steps.
For new installs, unclear piping, a stuck valve, or local code requirements, a licensed plumber should be contacted.
How a PRV works and when to choose it
Install a pressure-reducing valve (PRV) to limit incoming water pressure at the main line, allowing downstream fixtures to operate within a safe, consistent range.
A PRV uses a spring-loaded diaphragm to automatically lower and stabilize pressure.
Choose one when municipal or well supply exceeds recommended PSI, when banging occurs, or to protect appliances.
Match capacity and install at main shutoff for best results.
Basic DIY adjustment steps and safety precautions
Begin by shutting off the main water supply and relieving system pressure—this prevents sudden flows while adjusting the PRV.
Wear eye protection and gloves.
Locate the PRV near the meter, loosen the locknut, then turn the adjustment screw clockwise to lower pressure in small increments.
Open a faucet to test.
Re-tighten the locknut and restore supply slowly, checking for leaks.
When to call a professional for PRV installation
Call a professional when the job exceeds typical homeowner skills or when local codes, complex piping, or inaccessible locations are involved.
A licensed plumber should handle PRV selection, correct sizing, permit validation, and secure installation on mains or multi-unit systems.
Hire an expert if soldering, pipe modification, water shutoff management, or troubleshooting persistent pressure issues is required to guarantee safety, code compliance, and warranty protection.
2. Replace or install a pressure regulator on well systems
Well systems often require a different approach than municipal supplies because pressure comes from a pump and tank rather than a long distribution network.
Typical regulator settings for homes on wells range from 40 to 60 psi, and installers should check both pump cut-in/cut-out pressures and tank precharge when adjusting.
Routine maintenance—inspecting the regulator, testing pressure periodically, and replacing worn diaphragms—helps keep pressures within safe limits.
Differences between municipal and well system solutions
Because municipal and private well systems operate under different pressure-control arrangements, the approach to replacing or installing a pressure regulator differs in scope and components.
Municipal connections usually require a single regulator at the service entry to reduce high supply pressure.
Well systems often use regulators in conjunction with pressure tanks and switch settings, and may require compatible fittings, pump adjustments, or secondary regulators.
Typical settings and maintenance tips
Many homeowners set well-system pressure regulators to maintain a 30/50 psi range (cut-in/cut-out) or slightly lower when fixtures or appliances demand gentler flow; routine checks should confirm the regulator and pressure tank switch are coordinated, fittings are leak-free, and the gauge readings match expected values so adjustments can be made safely and accurately.
Periodic inspection, filter replacement, valve exercise, and prompt regulator replacement extend service life and guarantee consistent pressure.
3. Reduce pressure at the water heater and appliances
Adjusting inlet valves on the water heater and individual appliance shutoffs offers a targeted way to lower local water pressure without altering the whole-house regulator.
Doing so can protect fixtures, washing machines, and dishwashers from stress and premature failure caused by excessive pressure.
Simple valve adjustments or installing appliance-specific pressure-reducing devices are effective preventive measures.
Adjusting water heater inlet and appliance-specific valves
Lowering pressure at the water heater and at individual appliances offers a targeted way to protect fixtures and reduce strain on household plumbing.
A pressure-reducing valve can be installed on the heater inlet and set to a safe psi.
Appliance-specific shutoff or pressure-limiting valves (washing machines, dishwashers) allow independent adjustment.
After changes, test flow and check for leaks to confirm proper operation.
Preventing damage to appliances from high pressure
Protect appliances from high inlet pressure by installing adjustable pressure-reducing devices at the water heater and dedicated shutoff/limit valves at individual machines; these measures prevent overpressurization of hoses, internal seals, and valves that cause leaks or premature failure.
Additionally, use pressure-rated hoses, install vacuum breakers where required, test pressure periodically with a gauge, and service PRVs to maintain setpoints and avoid sudden spikes that shorten appliance lifespan.
4. Install flow restrictors and aerators on fixtures
Flow restrictors and aerators are most effective on kitchen and bathroom faucets, showerheads, and utility fixtures, where reducing outlet pressure directly lowers flow and splashing.
Installation typically involves unscrewing the spout or aerator housing and inserting a screened restrictor or replacement aerator, often without tools.
The trade-off is lower flow and water savings versus potential reduction in rinsing or showering force, so selection should balance pressure reduction with functional needs.
Which fixtures benefit most and how to install
Most household fixtures with unrestricted outlets—bathroom faucets, kitchen taps, showerheads, and utility-room spigots—benefit from fitted aerators or flow restrictors because they reduce water use without changing how the fixture feels.
Install by removing the existing tip, matching thread size, screwing in the device with plumber’s tape if needed, and testing flow.
Prioritize high‑use fixtures and retrofit easily.
Pros and cons for pressure vs. flow
Having covered which fixtures gain the most from aerators and how to fit them, it is useful to compare reducing water pressure at the source versus limiting flow at endpoints.
Source pressure reduction (pressure-reducing valve) gives whole-house control and protects plumbing but costs more and requires adjustment.
Endpoint flow restrictors are cheap, easy, and conserve water locally but don’t fix high system pressure.
5. Partially close the main shutoff or supply valve (temporary fix)
Partially closing the main shutoff or supply valve can temporarily reduce system pressure but requires a careful, step-by-step approach to avoid water hammer or interrupted service.
The procedure should include slowly turning the valve a quarter-turn at a time, checking pressure with a gauge, and being prepared to fully reopen the valve if leaks or problems appear.
This method is appropriate for short-term adjustments or troubleshooting but not for long-term pressure control, complex systems, or when multiple occupants rely on consistent water flow.
Step-by-step safe procedure and risks
One clear temporary method for lowering household water pressure is to partially close the main shutoff or supply valve; this paragraph outlines a safe, step-by-step procedure and the associated risks.
Turn valve slowly a quarter turn, check pressure at faucets, adjust incrementally, then secure position.
Risks: water hammer, trapped air, reduced flow to appliances, potential valve damage; monitor leaks and restore full opening promptly if problems occur.
When this is appropriate vs. when it’s not
When is it appropriate to partially close the main shutoff to reduce water pressure?
It suits short-term pressure spikes, testing fixtures, or preventing immediate pipe stress during repair.
It is inappropriate for long-term regulation, diagnosing systemic issues, or when pressure-reducing valves or municipal limits are required.
Incorrect use can mask leaks, cause inconsistent flow, or harm appliances needing steady pressure.
6. Repair or replace faulty pressure-increasing equipment (boosters)
The condition of pressure boosters and pumps should be assessed first by checking for abnormal noises, leaks, cycling patterns, and pressure gauge readings to identify malfunctions.
If a booster is confirmed faulty or supplying excessive pressure, recommended actions include isolating the unit, following manufacturer instructions to disable or adjust the control settings, or shutting power and draining the system before removal.
When in doubt, a qualified plumber or technician should perform repairs or replacement to guarantee safe and correct reconfiguration.
Diagnosing malfunctioning boosters or pumps
Inspecting pressure boosters and pumps begins the diagnostic process for high-pressure complaints, because these devices can fail or be set incorrectly and directly cause excessive downstream pressure.
Technicians check pump speed, pressure switch settings, tank precharge, leaks, and valve positions.
Listen for unusual noise and monitor pressure with a gauge.
Document findings and determine repair, calibration, or replacement needs.
Steps to disable or reconfigure boosting systems
If a booster or pump is identified as the source of high downstream pressure, technicians should follow a clear sequence to disable or reconfigure the system safely and effectively.
Isolate power and water supply, relieve system pressure, tag out controls, and consult manufacturer settings.
Adjust pressure switch or variable frequency drive, install or recalibrate pressure relief valves, test under load, and document changes for future service.
7. Address pipe blockages and plumbing layout issues
Clogs and undersized pipes can create localized high pressure and erratic flow, so identifying restrictive sections is essential.
A professional inspection followed by targeted cleaning or snaking can remove blockages, while pipe replacement or upsizing may be required where diameter limits performance.
Decisions should weigh severity, access, and cost to choose the most effective corrective action.
How clogs and undersized piping affect pressure
Blockages and undersized piping both increase resistance to flow, causing localized pressure buildup upstream and reduced delivery at fixtures downstream.
Clogs narrow effective diameter, raising friction losses and creating uneven pressure cycles. Similarly, pipes with too-small bore limit maximum flow rate, forcing higher system pressure to maintain supply.
Both conditions exacerbate wear, trigger noisy operation, and reduce fixture performance without corrective layout or sizing changes.
Inspection, cleaning, and pipe replacement considerations
A systematic inspection of the plumbing network reveals whether cleaning, partial repair, or full pipe replacement is the most effective remedy for high-pressure symptoms.
Technicians assess scale, sediment, corrosion, valve function, and layout bottlenecks. Mechanical or chemical descaling and targeted rerouting restore balanced flow; replacing severely pitted or undersized sections guarantees long-term pressure control.
Cost, disruption, and lifespan guide the final decision.
Comparison of common pressure-reduction solutions
A brief comparison of common pressure-reduction solutions highlights trade-offs among cost, effectiveness, DIY-friendliness, and long-term maintenance while noting which options suit apartments, single-family homes, or well systems. The table below summarizes typical outcomes to guide selection. Readers can use this snapshot to match a solution to their situation.
| Solution | Typical cost & maintenance | Recommended scenario |
|---|---|---|
| Pressure-reducing valve (PRV) | Moderate purchase/installation, low long-term maintenance | Single-family, apartment main line |
| Flow restrictors/aerators | Low cost, minimal maintenance, limited effectiveness | Apartments, fixtures |
| Pressure tank adjustments/well pump control | Moderate–high cost, regular maintenance for tanks/controllers | Well systems |
Factors: cost, effectiveness, DIY-friendliness, long-term maintenance
Several common pressure-reduction options—pressure-reducing valves (PRVs), adjustable regulators, thermal expansion tanks, and simple fixture-level restrictors—vary considerably in cost, effectiveness, DIY-friendliness, and long-term maintenance.
PRVs and adjustable regulators are effective but costlier and may need professional installation. Expansion tanks add system stability with moderate expense.
Fixture restrictors are cheap and DIY-friendly but less thorough. Maintenance requirements scale with complexity.
Recommended solution by scenario (apartment, single-family, well system)
When selecting a pressure-reduction approach, the most suitable option depends on occupancy type, plumbing layout, and source pressure:
Apartments benefit from building-wide PRVs or individual inline pressure-reducing valves for unit control;
single-family homes often use a whole-house PRV adjustable for household comfort;
well systems require pressure tank adjustments, pressure switch settings, or a PRV plus professional tuning to protect pump cycles and maintain steady delivery.
Safety, code, and maintenance considerations
The discussion now turns to regulatory and safety aspects, including applicable plumbing codes and recommended PSI limits for residential and commercial systems.
Guidance is provided on when conditions—such as persistent high pressure, complex installations, or code compliance issues—warrant hiring a licensed plumber.
It also outlines a concise routine for inspecting and maintaining pressure-reducing valves and other control devices to guarantee long-term performance.
Plumbing codes and recommended PSI limits
Although municipal supply pressures can vary, plumbing codes and manufacturers generally set maximum residential water-pressure limits—commonly 80 psi or lower—to protect fixtures, appliances, and piping from premature wear and failure.
Local codes may specify test and relief pressures, and manufacturers list operating ranges. Homeowners should verify local regulations, use pressure-reducing valves set within recommended PSI, and maintain devices per code intervals.
When to hire a licensed plumber
Call a licensed plumber for any pressure-related work that involves alterations to the supply line, installation or adjustment of a pressure-reducing valve (PRV), or evidence of repeated high-pressure damage. Such tasks can implicate safety, local code compliance, and warranty requirements and often require permits and certified testing.
A professional should also evaluate suspected hidden leaks, compromised fixtures, or systemic pressure irregularities to guarantee compliant, safe remedies.
Routine checks and maintenance schedule for pressure-control devices
Regular inspections of pressure-control devices—such as pressure-reducing valves (PRVs), expansion tanks, and relief valves—help guarantee system safety, code compliance, and long-term performance.
Establish quarterly visual checks, annual functional tests, and component replacement cycles per manufacturer or local code. Record pressure readings, leaks, and adjustments.
Promptly address corrosion, stuck valves, or failed diaphragms. Engage a licensed plumber for periodic certification and complex repairs.
Troubleshooting guide for persistent pressure issues
A clear, stepwise diagnostic approach helps identify whether high water pressure stems from simple causes or requires advanced fixes.
The guide explains how to isolate the source—testing at the water meter and main shutoff versus individual fixtures—to distinguish municipal supply issues from in-home plumbing faults.
It also notes situations where apparent high pressure is actually a symptom of other problems, such as blocked valves, malfunctioning pressure-reducing valves, or thermal expansion.
Stepwise diagnostics from simplest to advanced fixes
Several quick checks can often reveal whether high water pressure is a simple household issue or a symptom of a larger system problem.
Inspect faucets, aerators, and showerheads for blockages; confirm pressure at multiple fixtures; test the pressure regulator and relief valve; check for pipe damage or corroded fittings.
If unresolved, escalate to pressure gauge diagnostics and professional plumbing evaluation.
How to isolate problems to municipal supply vs. in-home plumbing
After completing basic fixture checks and regulator tests, determining whether pressure issues originate from the municipal supply or the home’s plumbing requires a systematic isolation process.
Inspect static pressure at the main shutoff with a gauge, compare readings to neighbors, test at different times of day, and shut off internal valves to see if pressure persists.
Document findings before contacting the utility.
When high pressure is actually a symptom of another problem
Consider high water pressure as a possible symptom rather than the root cause when pressure readings remain elevated despite regulator adjustments and valve isolates.
Investigate hidden causes: malfunctioning pressure-reducing valve, stuck check valve, thermal expansion from closed systems, blocked or corroded pipes, or water heater faults.
Diagnose systematically, use pressure gauges at multiple points, and consult a plumber if underlying defects are found.
Practical tips to prolong plumbing life and prevent damage
Routine monitoring with simple pressure gauges, leak sensors, and alert systems helps catch problems early.
Strategic small upgrades—such as pressure-reducing valves, water hammer arrestors, and higher-rated fittings—boost system resilience.
Following cost-saving maintenance and manufacturer-recommended practices preserves warranties and reduces long-term damage.
Monitoring, alerts, and simple tools to keep watch
Establishing simple monitoring and alert systems helps catch pressure issues before they cause leaks or burst pipes.
Homeowners are advised to install a pressure gauge at the main line, use affordable smart sensors for sudden changes, and set threshold alerts.
Regular visual checks, periodic readings, and prompt response to anomalies reduce wear and prevent catastrophic failures.
Keep logs for trend spotting.
Small upgrades that improve system resilience
Small, targeted upgrades can markedly increase a plumbing system’s resilience and reduce the risk of leaks or bursts.
Installing pressure regulators, water hammer arrestors, and quality shutoff valves limits stress on fittings.
Upgrading to flexible connectors and corrosion-resistant piping prevents joint failure.
Adding sediment filters protects appliances and valves.
Periodic valve replacement and secure pipe supports further reduce wear and sudden failures.
Cost-saving and warranty-preserving practices
Prioritize regular maintenance and informed upgrades to stretch plumbing life and protect warranties: scheduled inspections, timely replacement of worn components, and use of manufacturer-approved parts reduce failure risk and preserve coverage.
Documenting service and keeping receipts further supports warranty claims and helps spot trends that justify preventive fixes.
Encourage pressure-regulator installation, avoid harsh DIY alterations, flush sediment annually, and train occupants on soft-start valve use to minimize stress.
Conclusion
Like a garden hose eased to a gentle stream, a home’s plumbing responds when pressure is thoughtfully tamed. Reducing force restores balance, sparing fixtures and foundations from silent strain. Simple tools, routine checks, and timely repairs act as gardeners pruning overzealous growth—preventing bursts, leaks, and costly ruin. With steady attention and the right measures, pipes age gracefully, carrying life’s water calmly, reliably, and without the roar that foretells damage.