How to Increase Water Pressure for Your Water Filter: 9 Easy Fixes That Work
If you’re experiencing low water pressure at your home water filter, there are several effective fixes you can try. Start by checking the inlet pressure and ensuring that isolation valves are fully open. Inspect the tubing for kinks and clean or replace clogged prefilters. If issues persist, consider bypassing low-flow restrictors, running a flush to remove trapped air, shortening tubing runs, upgrading to lower-restriction filters, or adding a booster pump. Continue reading for detailed step-by-step solutions, costs, and diagnostic tips.
How to Quickly Improve Water Pressure for Your Water Filter
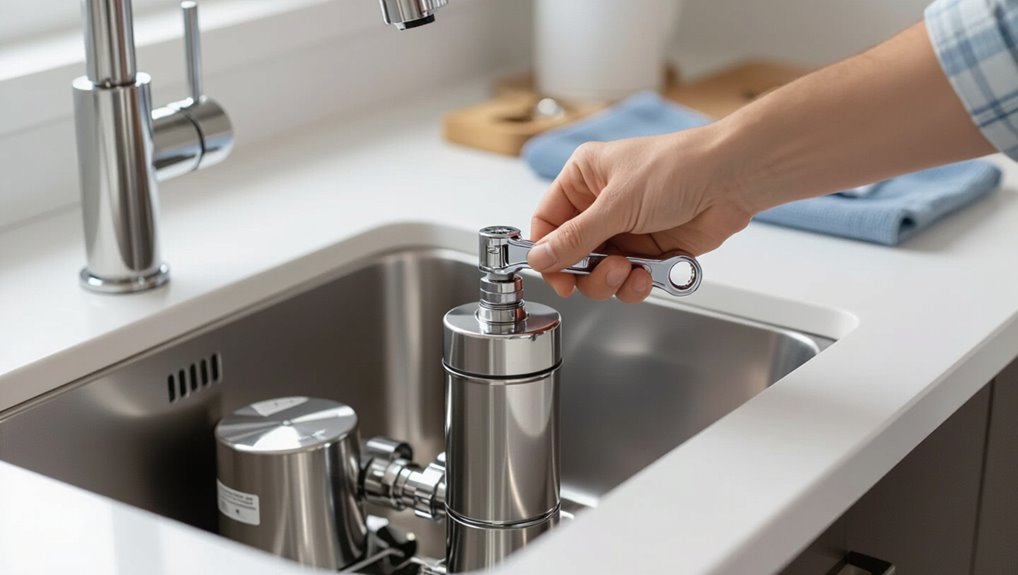
Before making adjustments, a quick inspection of visible fittings, the supply valve, and filter cartridge condition can identify simple causes of low pressure.
If no faults are found, temporary measures—such as partially opening the supply valve, flushing the filter housing, or bypassing a clogged prefilter—can restore usable flow immediately.
These steps serve as short-term solutions while a permanent fix is planned.
Immediate checks to perform before making changes
A few quick inspections can identify common causes of low flow without altering the filtration system.
Check incoming house pressure at a nearby tap, confirm shutoff and isolation valves are fully open, inspect visible tubing and fittings for kinks or leaks, and verify the prefilter or sediment screen isn’t obstructed.
These steps clarify next actions for how to increase water pressure for water filter.
Quick temporary fixes to boost output right away
Try simple, temporary fixes that restore usable flow within minutes without altering the filter itself.
Inspect and clear aerators and faucet screens, run cold water to flush trapped air, and tighten loose fittings.
Temporarily remove or bypass low‑flow restrictors if safe.
Raise upstream shutoff valves slightly to increase pressure, and confirm water heater bypass valves are correctly positioned before testing flow again.
Why Your Water Filter Might Have Low Pressure
Low pressure at a water filter can stem from clogged cartridges, faulty valves, or internal bypasses restricting flow.
Household plumbing problems—such as undersized pipes, closed shutoff valves, or mineral buildup in fixtures—can further reduce pressure reaching the unit.
External factors like low municipal supply pressure or scheduled maintenance and nearby main breaks also affect filter performance.
Common causes inside the filter unit
Although external plumbing often gets the blame, restrictions inside the filter unit are a frequent cause of reduced flow: clogged cartridges, compacted filter media, blocked inlet/outlet ports, or malfunctioning internal valves can all impede water movement and drop pressure at the tap.
Routine inspection, timely cartridge replacement, backwashing (if applicable), and clearing debris from ports restore internal flow.
Check seals and valve operation.
Household plumbing issues that affect filter pressure
Several common household plumbing problems outside the filter can reduce water pressure at the tap and make a properly functioning filter seem ineffective.
Leaky pipes, partially closed shutoff valves, corroded or mineral-clogged supply lines, old narrow piping, and restrictive faucet aerators all lower flow.
Blocked branch lines, faulty pressure-reducing valves, and improperly installed fittings similarly diminish pressure and warrant inspection.
External supply and municipal factors
Beyond household plumbing, external supply and municipal systems can exert a stronger influence on filter pressure.
Utility main breaks, scheduled maintenance, or hydrant flushing reduce pressure temporarily. High neighborhood demand, booster pump failures, or aging mains cause chronic low pressure.
Regulatory flow restrictions and pressure-reducing valves at the meter also limit supply.
Contacting the water provider for reports, repairs, or pressure adjustments is recommended.
9 Practical Fixes That Increase Water Pressure for Filters
A brief inspection and targeted maintenance can restore adequate flow to most water filter systems. Techniques range from replacing clogged cartridges and cleaning pre-filters to checking valves, removing tubing kinks, and adding a compatible booster pump when needed.
The following actions address the most common pressure-reducing causes.
- Replace clogged filter cartridges and clean sediment screens.
- Check and open shut-off valves and remove flow restrictors.
- Shorten tubing runs and eliminate kinks in inline setups.
- Install a filter-compatible booster pump for low-supply situations.
1. Inspect and replace clogged filter cartridges
Inspecting filter cartridges is the most direct way to diagnose pressure loss in a water filtration system.
Visual inspection and flow testing reveal clogging from mineral buildup, sediment, or biological growth. Replacing worn or saturated cartridges restores designed flow rates.
Use manufacturer-recommended replacements and follow installation orientation.
Regular scheduled cartridge changes prevent recurring pressure drops and maintain filtration efficiency.
2. Clean or replace the pre-filter and sediment screens
Check and clear the pre-filter and sediment screens regularly to prevent buildup that restricts flow and reduces downstream pressure.
Accumulated grit and debris compact over time, lowering throughput. Remove screens, rinse with clean water or use a soft brush; replace torn or heavily fouled screens.
Reinstall properly to guarantee seals. Routine inspection—monthly or per manufacturer—restores ideal flow and prolongs filter life.
3. Check and open shut-off valves and flow restrictors
Open and verify all shut-off valves and flow restrictors to guarantee unrestricted water delivery to the filter housing.
Inspect upstream and downstream valves for partial closure or corrosion, and fully open them if safe.
Locate any flow restrictors or pressure-limiting cartridges; clean or replace clogged or undersized parts.
After adjustments, run water and monitor pressure to confirm improvement.
4. Remove kinks and shorten tubing runs for inline filters
Straighten any bent or twisted tubing and shorten unnecessarily long runs to reduce resistance and restore flow to inline filters.
Inspect tubing for hidden kinks, crimps, or tight bends near connections.
Replace softened or collapsed sections and route lines along smooth, direct paths.
Use properly sized tubing and secure clamps to prevent future movement that would impede flow, improving pressure without extra equipment.
5. Install a filter-compatible booster pump
Consider installing a filter-compatible booster pump when low inlet pressure persists despite upstream fixes. These compact pumps raise flow and maintain consistent pressure through sediment and carbon filters that require a minimum PSI to perform effectively.
Select a model rated for the system’s flow and water type. Install with proper check valves and pressure switch, and verify electrical and plumbing codes to guarantee safe, reliable operation.
6. Upgrade to a lower-restriction filter or membrane
Switching to a lower-restriction filter or membrane reduces flow resistance and can immediately improve pressure downstream of the unit.
Select compatible cartridges rated for higher flow, confirm micron size meets treatment needs, and verify system housing and fittings tolerate increased throughput.
Replace restrictive elements like finer membranes or clogged ceramic inserts.
Monitor water quality and manufacturer guidelines to maintain filtration efficacy while restoring acceptable pressure.
7. Add a larger bypass or dedicated feed line
Installing a larger bypass or a dedicated feed line increases the volume of water available to the filter, reducing pressure drop caused by undersized plumbing or shared supply lines.
This involves replacing narrow tubing or adding a parallel line from the main, minimizing friction loss and demand conflicts.
It can restore consistent flow to high-demand filters; professional sizing and proper fittings guarantee reliable performance.
8. Maintain adequate tank pressure for systems with storage tanks
When a filtration system includes a storage tank, tank air charge and bladder pressure directly influence delivery pressure and flow consistency.
Keeping the tank precharge at the manufacturer’s recommended level (typically 2 psi below the pump cut-in pressure for pressure tanks) prevents rapid cycling, waterlogging, and reduced output.
Periodically check pressure with a gauge, deflate/adjust per instructions, and replace failing bladders to restore consistent filtered flow.
9. Address household pressure issues: pressure regulator and plumbing diagnostics
Check the household pressure regulator and plumbing layout to identify upstream constrictions or settings that limit flow to a filter.
Inspect and adjust the regulator to manufacturer specifications, verify main shutoff and isolation valves are fully open, and check for sediment-clogged strainers or undersized piping.
Use pressure gauges to compare inlet and outlet pressures, and consult a plumber for persistent drops or complex diagnostic needs.
How to Diagnose Which Fix You Need
The reader is guided through simple diagnostics using basic tools and measurements to identify whether the issue is filter-related, household plumbing, or supply-side.
A clear step-by-step troubleshooting flowchart outlines common scenarios, tests to run, and expected results for each path.
Guidance also specifies failure points and when the complexity or risk warrants calling a professional plumber.
Tools and measurements to determine pressure problems
Diagnosing low water pressure for a filter begins with a few targeted tools and measurements to pinpoint whether the issue is supply, plumbing, or the filter itself.
Essential tools: a pressure gauge at the tap and filter inlet, a flow meter or timed cup test, and a multimeter for pump systems.
Record static and running pressures, compare to expected values, and note pressure drops across components.
Step-by-step troubleshooting flowchart for common scenarios
A concise flowchart guides a step-by-step diagnosis by linking measured pressures and flow readings to likely causes and fixes.
It directs users to check inlet pressure, filter housing, and tubing sequentially; compares readings against thresholds; suggests cleaning, replacing cartridges, tightening fittings, or adjusting valves; and isolates RO-specific issues.
Each terminal node states the recommended corrective action and verification step.
When to call a professional plumber
When should a homeowner call a professional plumber for low water pressure at a water filter?
A plumber is warranted if inspections reveal hidden leaks, persistent low pressure after basic fixes, suspected clogged supply lines, pressure-reducing valves malfunctioning, or complex boiler/municipal supply issues.
Call also when electrical components, water heater problems, or warranty-sensitive filter systems require diagnostic tools or permits beyond DIY capability.
Choosing the Right Equipment and Parts
Selecting the right equipment starts with matching booster pumps and pressure tanks to the system’s flow and pressure requirements to guarantee compatibility and reliable performance.
Cartridge choice should align filter media and flow rating with household demand to avoid bottlenecks.
Properly sized tubing, low-restriction fittings, and full-port valves complete the setup by minimizing pressure loss.
How to select compatible booster pumps and pressure tanks
Because proper matching prevents damage and inefficiency, choosing a booster pump and pressure tank requires attention to flow rate, system pressure, and pump compatibility with the filter’s materials and capacity. Select pumps rated for required flow/pressure, match tank precharge to cut-in pressure, and confirm materials resist treated water. Consult manufacturer curves and warranty terms.
| Key check | Purpose |
|---|---|
| Flow/pressure rating | Verify performance |
| Material compatibility | Prevent corrosion |
Filter cartridge types and flow ratings to match household needs
A household’s water treatment needs determine the appropriate cartridge type and flow rating: sediment, carbon, and specialty cartridges each target different contaminants and have distinct nominal/absolute micron ratings and maximum flow capacities.
Match cartridge micron rating to particle size, choose carbon for chlorine/organics, specialty for metals or microbes, and guarantee flow capacity meets peak household demand without exceeding filter pressure-drop specifications.
Tubing, fittings, and valve choices that minimize flow restriction
Matching cartridge type and flow rating only partly determines in-line performance; the plumbing that connects filter housings to faucets and appliances often governs actual pressure and flow at points of use.
Use larger-diameter tubing, smooth-bore materials (PEX, copper), minimal sharp bends, high-flow fittings, and quarter-turn ball valves.
Avoid restrictive barb connectors, undersized adapters, and old corroded valves to preserve pressure and reduce turbulence.
Installation and Maintenance Best Practices
Proper installation and routine upkeep are essential to sustaining ideal water pressure and preventing leaks or equipment damage.
Clear step-by-step installation procedures, a regular maintenance schedule for filters and seals, and seasonal winterizing measures each play distinct roles in preserving performance.
The following guidance outlines safe installation steps, recommended maintenance intervals, and long-term care tips.
Safe installation steps to avoid leaks and damage
Begin by shutting off the main water supply and draining lines to relieve pressure and prevent accidental flooding during the filter installation.
Inspect fittings, tubing, and seals for defects. Use appropriate thread tape, properly sized compression fittings, and torque to manufacturer specs.
Support piping to prevent strain.
Test slowly for leaks before full pressurization and correct any drips immediately to avoid damage.
Routine maintenance schedule to preserve pressure
After confirming leak-free connections and correct torque, establish a routine maintenance schedule to preserve water pressure and extend filter life.
Inspect fittings monthly, check pressure gauges weekly, and replace pre-filters and cartridges per manufacturer intervals.
Flush housings during changes, clean inlet screens quarterly, and document service dates.
Promptly address pressure drops, sediment buildup, or unusual noises to prevent performance degradation.
Winterizing and long-term care tips
Prepare the system for cold months by draining, insulating, and isolating components that are vulnerable to freezing—including exposed housings, external valves, and bypass lines.
Store removable cartridges indoors, label connections, and purge lines where feasible.
Inspect seals, replace worn O-rings, and lubricate threads.
Schedule annual professional inspections, monitor pressure after seasonal changes, and document maintenance to prevent damage and preserve consistent flow.
Cost, Time, and Impact Comparison of Each Fix
A concise comparison of fixes helps readers weigh typical cost ranges, installation difficulty, and expected pressure gain against longevity. The following table highlights representative values for common solutions to clarify trade-offs. This enables a straightforward choice based on budget, time, and desired performance.
| Solution | Typical Cost | Pressure Gain & Longevity |
|---|---|---|
| Faucet aerator/cleaning | $0–$20 | Small gain; immediate, short-term |
| Cartridge replacement | $20–$100 | Moderate gain; medium longevity |
| Booster pump | $150–$800+ | Large gain; long-term with power needs |
| Plumbing upgrades | $200–$2,000+ | Significant gain; long-lasting depending on scope |
Typical cost ranges and installation difficulty
When evaluating methods to increase water pressure for a water filter, cost, installation difficulty, and time to completion vary widely and directly affect the choice of fix.
Simple actions (cleaning, tightening fittings) cost under $20 and take minutes.
Cartridge upgrades or booster pumps range $50–$600; DIY moderate to advanced.
Professional installs (pressure tanks, re-piping) cost $300–$2,000+ and require licensed plumbers and hours to days.
Expected pressure gain and longevity per solution
Having considered costs, installation effort, and time, attention shifts to how much pressure improvement each fix typically delivers and how long that improvement lasts.
Low-cost actions (cleaning, replacing cartridges) yield modest gains (5–15%) lasting weeks to months.
Aerator and valve adjustments give 10–25% for months to years.
Booster pumps provide 50–200% sustained improvement but require maintenance.
Pipe upgrades deliver durable, consistent gains.
Troubleshooting Checklist and Quick Reference
A concise troubleshooting checklist and quick reference help readers diagnose common low-pressure causes and choose the right next step.
The checklist condenses tests and fixes onto one page for fast action. A simple decision guide indicates when a DIY attempt is reasonable and when to call a professional.
- Check inlet valve, filter condition, and visible leaks first
- Measure pressure at the filter and compare to expected range
- Try basic fixes: clean pre-filter, adjust regulator, or replace cartridges
- Call a professional if pressure remains low after simple checks or if plumbing modifications are needed
One-page checklist for common pressure problems
This single-page checklist condenses the most common causes and fixes for low or fluctuating water pressure in filtration systems into a quick-reference format.
This allows users or technicians to diagnose and resolve issues efficiently. Sections list symptom, likely cause, immediate test, simple fix, required tools, and when to record measurements.
Include entries for inlet valve, clogged prefilter, pressure regulator, tubing/kinks, leaks, and pump performance.
Quick decision guide: DIY vs professional help
When should a homeowner tackle low or fluctuating water pressure and when is it wiser to call a professional?
Homeowners can perform simple checks: inspect aerators, replace filters, tighten fittings, and test pressure with a gauge.
Call a professional for persistent drops, suspected main-line issues, complex plumbing, pressure-reducing valve replacement, or when local codes or warranties apply.
Safety and tools determine choice.
Real-world Examples and Short Case Scenarios
The article presents three concise case scenarios to illustrate common pressure issues and fixes.
Scenario A examines low pressure after a cartridge change, identifying installation errors or trapped air and describing the corrective steps.
Scenarios B and C cover adding a booster pump for weak municipal supply and swapping undersized tubing for a simple retrofit respectively.
Scenario A: Low pressure after cartridge change root cause and fix
Inspecting pressure issues immediately after a cartridge change often reveals simple, fixable causes rather than complex system failures.
A technician finds common problems: trapped air, misaligned O-rings, improperly seated cartridges, or kinked tubing.
Resolving these—bleeding air, reseating or lubricating seals, correcting alignment, and straightening lines—restores flow.
Documenting the replacement process prevents recurrence and verifies warranty compliance.
Scenario B: Low municipal pressure pump installation case
After resolving cartridge-related airflow and seal issues, attention often shifts to broader supply-side problems such as inadequate municipal pressure that require a booster pump.
A homeowner consulted a plumber; tests confirmed substandard inlet pressure.
Installation of a pressure-boosting pump with a proper pressure tank and check valve restored consistent flow to the filter, eliminating intermittent low-pressure episodes and protecting membrane lifespan.
Scenario C: Undersized tubing simple retrofit solution
When household flow rates remain weak despite a healthy filter and adequate inlet pressure, attention often turns to tubing size; undersized supply or interconnect lines can create a bottleneck that cuts effective pressure at the filter head.
A homeowner swapped 1/4″ plastic tubing for 3/8″ lines, resecured fittings, and restored normal flow without altering the filter or source pressure.
Final Recommendations and Next Steps
The author recommends prioritizing repairs and adjustments based on observed symptoms and available budget, addressing low-cost fixes before pursuing larger investments.
If recurring problems persist or multiple components are aging, consideration should be given to upgrading the entire filtration system.
Next steps include a cost-benefit comparison and consulting a qualified plumber to confirm the most effective course of action.
Prioritizing fixes based on symptoms and budget
Although specific causes vary, prioritizing repairs should hinge on the most visible symptoms, estimated cost, and expected effectiveness.
Start with inexpensive, high-impact actions—cleaning aerators, replacing cartridges, or unclogging sediment traps. If symptoms persist, escalate to pressure-regulating valve adjustments or pump inspection.
Allocate budget to interventions with clear diagnostic evidence; defer costly replacements until simpler fixes are ruled out.
When to upgrade the entire filtration system
Why replace the entire filtration system now rather than continuing piecemeal repairs?
When persistent low pressure, frequent maintenance, outdated components, or incompatible upgrades cause cumulative costs, a full replacement often proves more reliable and cost-effective.
Upgrading guarantees capacity matches household demand, improves water quality, reduces recurring service calls, and provides warranty protection.
Consider long-term savings, performance, and health risks before deciding.
Conclusion
In sum, the guide equips readers with practical steps to restore filter pressure, reminding that “a stitch in time saves nine.” It stresses diagnosing causes before acting, weighing cost, time, and impact, and selecting appropriate parts. Small fixes often resolve common issues, while targeted upgrades suit persistent problems. By following the troubleshooting checklist and case examples, one can efficiently prioritize solutions, minimize disruption, and guarantee consistent filtered water flow for household needs.