
How to Read a Water Pressure Gauge: Step-by-Step Guide for Accurate Readings
To accurately read a water pressure gauge, follow these steps: First, wear appropriate personal protective equipment (PPE). Then, isolate and depressurize the water line. Attach a clean, compatible gauge to a test port or hose bib. Gradually open the valves and allow the pressure to stabilize. Observe the needle position against the scale—record both static and dynamic values to identify potential leaks or regulator issues. For most households, the ideal water pressure range is 40–60 PSI. For further assistance, refer to detailed steps on troubleshooting and calibration.
What a Water Pressure Gauge Measures
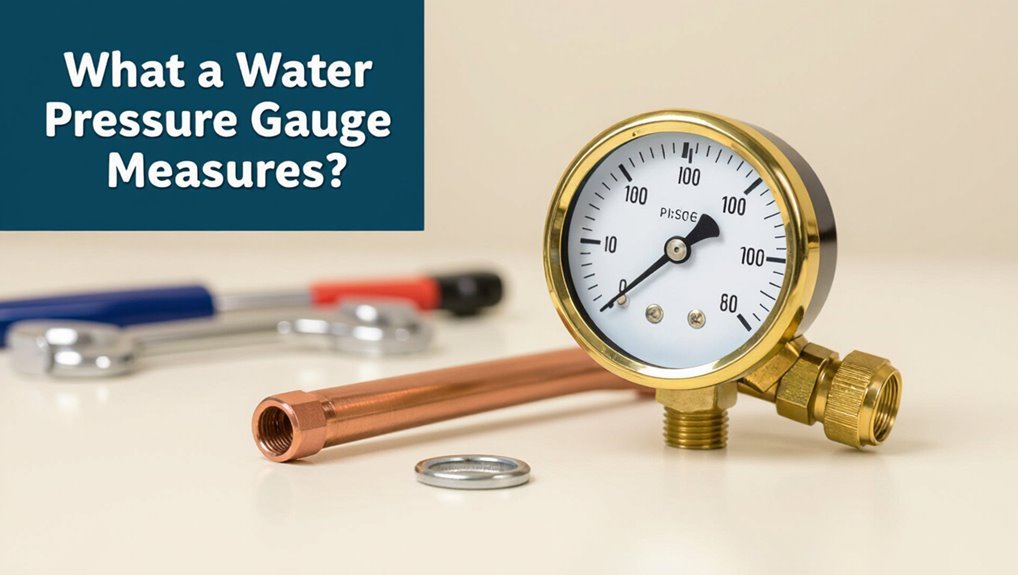
A water pressure gauge measures the force exerted by water within a system, typically expressed as pounds per square inch (PSI).
Gauges commonly display other units as well, such as bar and kilopascals (kPa), each with corresponding scale markings.
Typical readings vary by application, with residential systems often between 40–60 PSI and commercial or industrial systems running higher depending on demand.
Definition of water pressure and PSI
Water pressure describes the force exerted by moving water against the walls of pipes and fixtures, quantified as pounds per square inch (PSI).
A gauge measures that force at a point, reflecting supply strength and system demand. Understanding PSI helps diagnose low flow, leaks, or excessive pressure.
Readers learning how to read a water pressure gauge use PSI values to assess system performance and safety.
Common units and gauge scales (PSI, bar, kPa)
Pressure is expressed in several standard units—PSI, bar, and kilopascals (kPa)—each representing the same physical force per area but scaled differently for regional and industry use. Gauges display one or more scales; converting between them is straightforward. Users should note calibration and markings to interpret readings correctly.
| Unit | Typical notation |
|---|---|
| PSI | psi |
| bar | bar |
Typical pressure ranges for residential and commercial systems
Readings in psi, bar, or kPa gain practical meaning when compared to the typical ranges found in residential and commercial systems:
Residential potable systems commonly operate between 40–60 psi (2.8–4.1 bar), offering reliable flow without stressing fixtures.
Commercial buildings often target 50–80 psi (3.4–5.5 bar), varying with demand, elevation, and booster pumps.
Extremes suggest leaks, clogged pipes, or failing regulators.
Tools and Safety Before Taking a Reading
Before taking a reading, the writer outlines common types of pressure gauges, where to purchase reliable models, and which features matter for residential use.
Required personal protective equipment and basic safety precautions for working with plumbing are summarized to reduce risk.
Guidance is provided on scenarios suitable for DIY checks and those that warrant calling a professional.
Types of pressure gauges and where to buy them
A variety of pressure gauges—analog dial, digital, and compound models—are suitable for residential water systems, each differing in accuracy, range, and mounting style.
Common sources include hardware stores, plumbing suppliers, online retailers, and specialty instrument shops. Choose based on scale (psi/bar), accuracy class, and fitting type.
- Analog: robust, no batteries
- Digital: precise, easy readout
- Compound: vacuum to pressure
- Suppliers: compare warranties
Personal protective equipment and safety precautions
Personal protective equipment and basic safety checks are essential to prevent injury and equipment damage when taking water pressure measurements.
The operator should wear safety glasses, gloves, and non-slip footwear.
Verify system isolation, depressurize lines before attachment, and inspect hoses, fittings, and gauge threads for damage.
Avoid standing over connections; use proper tools and a leak-free setup to minimize risk.
When to call a professional vs. DIY
Deciding whether to call a professional or proceed with a DIY pressure check hinges on the complexity of the system, the tools available, and the operator’s experience.
For simple fixtures and basic gauges, a confident homeowner with proper PPE can test and adjust.
Call a licensed plumber if leaks, fluctuating pressure, inaccessible valves, water heater issues, or uncertainty about isolation procedures exist.
Locating the Right Gauge or Test Point
Locating the correct gauge or test point begins with scanning common locations such as the main water line, pressure regulator, and irrigation system connections.
The inspector then identifies nearby shutoff valves and test ports to determine where a reading can be taken safely.
Before measuring, the system should be isolated and depressurized if necessary to guarantee an accurate, controlled reading.
Common locations: main water line, pressure regulator, irrigation systems
A few key spots typically provide the most accurate read on household water pressure: the main water shutoff where the supply enters the building, the outlet near a pressure regulator or reducing valve, and accessible points within irrigation or sprinkler assemblies.
Technicians also check hose bibs, utility room manifolds, and irrigation test ports.
Choose a location with steady flow, minimal fittings, and easy gauge attachment for consistent readings.
How to identify shutoff valves and test ports
After identifying likely measurement points such as the main shutoff, pressure regulator outlet, or irrigation test port, the next step is to recognize the specific valves and access fittings that permit safe gauge attachment.
Look for threaded test ports, hose bibs, ball or gate valves with nearby tap points, and labeled isolation valves.
Note orientation, material, and any caps or bleeds before proceeding.
Preparing the system for an accurate reading (isolate, depressurize if needed)
Before attaching a gauge, the system should be isolated so the reading reflects the desired zone and not downstream fixtures or leaks.
Close upstream and downstream shutoffs, open a nearby faucet to relieve trapped pressure if necessary, then attach the gauge to the designated test port or spigot.
Verify valves remain sealed during measurement and record the stabilized pressure promptly.
Step-by-Step Guide to Taking an Accurate Water Pressure Reading
Before taking a reading, the technician assembles and inspects the gauge and fittings and secures any necessary adapters.
Downstream fixtures are shut off, the gauge is attached to the test port or hose bib, and valves are opened to allow pressure to stabilize.
The final step is to read the gauge, noting the needle position and units for proper interpretation.
Step 1 Assemble and inspect the gauge and fittings
Gather the gauge, adapter, hose (if required), and any sealing tape or washers. Then inspect each part for damage, debris, or worn threads.
Verify the gauge face is clear, the needle rests at zero, and connections match fitting sizes.
Replace compromised seals, clean threads, and confirm adapters provide a snug, leak-free engagement.
Prepare tools and a rag for final assembly.
Step 2 Shut off downstream fixtures and ensure system stability
With the gauge and fittings prepared, all downstream taps, appliances, and irrigation valves should be closed to isolate the section being measured.
The operator then confirms no fixtures run, including automatic systems.
Allow the system to stabilize for a minute to let pressure settle and thermal or pump cycles finish.
Record any residual flow or leaks before proceeding to attachment and reading.
Step 3 Attach the gauge correctly to the test port or hose bib
Attach the gauge to the test port or hose bib using the correct adapter and a snug, hand-tight connection to prevent leaks.
The technician guarantees threads match, applies plumber’s tape if needed, and avoids overtightening.
Flexible hoses sit straight without kinks.
Connections are inspected visually for gaps.
A secure fit preserves gauge accuracy and prevents water loss before pressure is read.
Step 4 Open valves and let pressure stabilize before reading
After confirming a secure connection at the test port or hose bib, the technician slowly opens the supply valve and any downstream fixtures needed to equalize flow.
Then, they wait for the gauge needle to stop moving. Pressure readings require a stable flow; transient spikes or drops must settle.
If fluctuations persist, check for leaks, partially closed valves, or pump cycles.
Then allow additional time before proceeding.
Step 5 Read the gauge: interpreting needle position and units
A clear glance at the gauge face gives the necessary information: read the needle where it rests against the numbered scale, noting the units shown (psi, bar, kPa) and any dual-scale markings.
Interpret the reading by matching the needle to the nearest division; estimate between ticks if needed.
Ignore transient needle bounce; verify the reading reflects the stabilized position and unit of measure.
Step 6 Record the reading and repeat for verification
With a stable needle position identified, the reader should note the exact value, unit, and time of measurement in a log or on the service tag.
Then repeat the measurement after a short interval (e.g., 1–5 minutes) and under the same conditions to confirm consistency.
Record any variance and average multiple consistent readings to establish a reliable pressure value for diagnostics.
Interpreting Readings and What They Mean
Typical household water pressure falls within a narrow range, with low pressure causing weak flow and high pressure risking leaks and appliance damage.
Sudden or repeated pressure fluctuations can signal issues such as a failing pressure regulator, water hammer, or supply problems.
Comparing static (system at rest) and dynamic (while running) readings helps pinpoint whether the problem is supply-wide or related to demand and fixtures.
Normal ranges for household water pressure and symptoms of low/high pressure
Household water pressure is generally measured in pounds per square inch (psi), and a normal range for most homes falls between about 40 and 60 psi.
Pressures consistently below or above that range produce recognizable performance issues.
Low pressure (under ~40 psi) causes weak flow, slow filling, and poor shower performance.
High pressure (over ~60 psi) risks noisy pipes, fixture wear, and leaks.
How pressure fluctuations indicate potential problems
Pressure readings that rise and fall rather than staying steady often signal underlying issues in the plumbing system.
Intermittent spikes or drops may indicate water hammer, a failing pressure regulator, leaking pipes, or cycling well pumps.
Persistent oscillation suggests mechanical failure or air in lines.
Document patterns, note appliance use during fluctuations, and consult a professional when irregularities repeat or coincide with performance problems.
Comparing static vs. dynamic (running) pressure readings
After noting fluctuating readings and their possible causes, the next step is to compare static and dynamic (running) pressure to pinpoint where problems occur.
Static pressure is measured with no water flow; it reflects supply baseline. Dynamic pressure is measured during flow and reveals losses from restrictions, leaks, or demand.
Significant drops between the two indicate supply issues, clogged pipes, or malfunctioning pressure regulators.
Common Problems Revealed by Gauge Readings and How to Fix Them
Gauge readings can indicate common issues such as low pressure from clogs or leaks, high pressure from a faulty regulator or thermal expansion, and intermittent fluctuations caused by supply or appliance faults.
Each problem has straightforward remedies: clear blockages and repair leaks for low pressure, adjust or replace pressure-reducing valves and install relief devices for high pressure, and follow systematic troubleshooting to isolate intermittent sources.
The following sections outline diagnostic steps and typical fixes for each scenario.
Low pressure causes and basic fixes
Identify common causes quickly by comparing low readings to the system’s normal range, since small deviations often point to simple fixes while larger drops signal more serious issues.
Inspect for closed or partially closed shutoff valves, clogged inlet screens, or leaking fixtures.
Check pressure at multiple points to isolate municipal supply issues versus internal plumbing faults.
Repair leaks, clean screens, and open valves before calling a plumber.
High pressure causes and pressure relief/regulator adjustment
High water pressure readings often indicate issues that can damage fixtures, stress joints, and shorten appliance life; common causes include a faulty pressure-reducing valve (PRV), a stuck or improperly set pressure relief valve, thermal expansion in closed systems, or an overactive municipal supply.
Diagnostic steps include confirming steady high gauge readings, inspecting and adjusting the PRV, testing the relief valve, and installing an expansion tank or professional regulator recalibration.
Intermittent or fluctuating pressure troubleshooting steps
Examine brief or erratic needle movements as indicators of intermittent pressure issues caused by factors such as water hammer, air in the line, a failing PRV that sticks, corroded or partially blocked pipes, or variable municipal supply; pinpointing the pattern—whether spikes, drops, or oscillations—helps determine whether the problem is localized (fixtures, valves, or appliances) or systemic (service line, mains, or pressure regulator).
Then isolate zones, check PRV and expansion tank, purge air, inspect for leaks, test with and without municipal connection, and replace corroded piping or install a pressure stabilizer if fluctuations persist.
Testing Specific Systems
The section shifts focus to interpreting gauge readings for distinct applications: irrigation and sprinkler networks, boilers and heating systems, and well pumps with pressure tanks.
Each system has its own normal ranges and diagnostic signals that the reader can use to assess performance and safety.
Practical testing steps and target pressures will be outlined for each type to facilitate accurate evaluation.
Reading pressure for irrigation and sprinklers
When testing irrigation and sprinkler systems, measuring static and dynamic pressure at key points—near the mainline, at control valves, and at sprinkler manifolds—reveals whether supply, distribution, and individual heads perform within design parameters.
Technicians record pressures with flow to identify drops indicating clogged pipes, leaking fittings, or failing valves.
Adjustments include pressure regulators, nozzle changes, zone balancing, and troubleshooting low or fluctuating readings for consistent coverage.
Reading pressure for boilers and heating systems
Measure boiler and heating-system pressure at the gauge near the boiler and at remote zones to verify operating and relief settings.
Technicians compare cold-fill (static) pressure to hot operating pressure and note rapid rises, drops, or fluctuations that indicate issues such as low water, failed expansion tanks, leaking valves, or circulator problems.
Record readings, compare to manufacturer specs, test differential between zones, and schedule repairs for persistent anomalies.
Reading pressure for well pumps and pressure tanks
Shifting focus from boiler systems to domestic well setups, technicians apply similar pressure-reading principles but with different targets and thresholds.
They inspect gauge placement at the pressure tank or pump, note cut-in and cut-out values (commonly 30/50 psi), verify tank precharge with gauge removed, observe pump cycling for short cycles indicating leaks or pressure loss, and record stable readings under typical demand.
Maintenance, Calibration, and Replacing Gauges
To keep readings trustworthy, a technician should routinely check gauge accuracy against a known standard and perform calibration when readings drift.
Visible damage, stuck needles, or repeated inaccurate readings indicate replacement, and selecting a new gauge requires matching pressure range, connection size, and quality.
Regular maintenance—cleaning ports, protecting from vibration and temperature extremes, and scheduling periodic checks—helps guarantee reliable performance.
How to check gauge accuracy and calibrate if needed
Begin by verifying a gauge’s accuracy periodically, since even well-maintained instruments can drift over time and give misleading readings.
Compare readings to a calibrated reference gauge or digital manometer at multiple pressures. If discrepancies exceed manufacturer tolerance, perform zero adjustment and span calibration per instructions or send for professional calibration.
Document results and retest after adjustment to confirm accuracy before returning the gauge to service.
Signs a gauge needs replacement and how to choose a new one
When should a gauge be replaced rather than repaired? A gauge should be replaced if the needle sticks, glass is cracked, accuracy drifts beyond calibration range, or corrosion damages the casing.
Selection criteria include pressure range, accuracy class, connection type, and material compatibility.
- Visible physical damage
- Persistent inaccuracy after calibration
- Incorrect pressure range
- Incompatible materials or connections
Routine maintenance tips to ensure reliable readings
Regular inspection and simple upkeep keep a water pressure gauge delivering reliable readings and extend its service life.
Inspect for leaks, dents, and clouding; clean connections and case; verify zeroing and range periodically.
Calibrate annually or after impact, using a reference gauge or professional service.
Replace damaged or drifting instruments promptly.
Document maintenance dates and results for consistent monitoring and compliance.
Quick Reference: Typical Pressure Targets and Actions
Although actual targets vary by system type and local codes, most residential and light-commercial water systems aim for a steady operating pressure between about 40 and 60 psi; pressures below this range can cause weak flow and appliance issues, while sustained pressures above 80 psi risk leaks and premature equipment failure.
| Pressure (psi) | Interpretation | Typical Action |
|---|---|---|
| <30 | Very low | Check supply/valve |
| 30–40 | Low | Inspect regulator |
| 40–60 | Normal | Monitor |
| 60–80 | High-normal | Consider reducer |
| >80 | Excessive | Repair/relieve |
Practical Tips to Ensure Consistent, Accurate Measurements
To obtain consistent, accurate water pressure readings, technicians should establish a repeatable procedure that covers gauge selection, connection method, and measurement timing.
Standardize equipment, warm systems to normal operating conditions, record ambient factors, and verify calibration before use.
- Use a calibrated gauge sized for expected range
- Secure connections to prevent leaks
- Measure at consistent times/flow states
- Log readings and note anomalies
Conclusion
To sum up, the guide empowers readers to measure water pressure confidently and accurately. If someone worries the steps are too technical, the clear, stepwise format and basic tools list make the process approachable for homeowners and professionals alike. By following the safety checks, locating the proper test point, and using straightforward interpretation charts, users can diagnose issues, maintain systems, or know when to call a pro—making routine pressure checks quick, useful, and reliable.
