How to Unfreeze Pipes in a Trailer Quickly and Safely (Pro Tips for RVs & Mobile Homes)
To quickly and safely unfreeze pipes in a trailer, first ensure that power and propane are turned off, then open the main shutoff and faucets to relieve pressure. Clear access to the pipes and gently warm exposed lines using a hair dryer or heat gun on low. Apply warm towels or hot-water bottles to joints, and position a space heater in enclosed areas, taking care to maintain safety. Keep an eye out for leaks, isolate any burst sections, and temporarily use clamps or repair tape as needed. For prevention, insulate pipes and consider using heat tape. Follow these detailed steps and safety checks for effective results.
How to Quickly and Safely Unfreeze Pipes in a Trailer
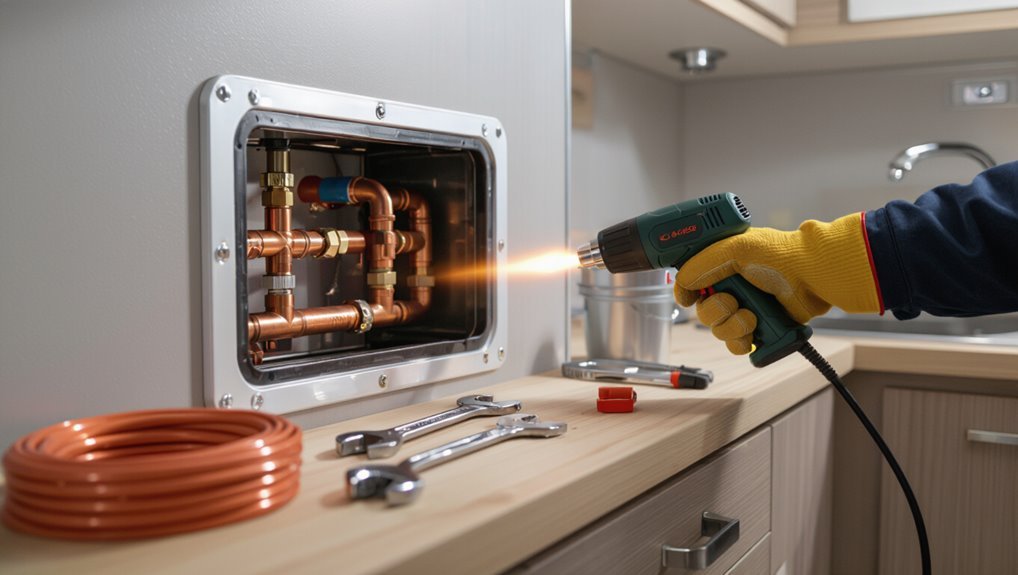
Before attempting to thaw plumbing, the writer recommends confirming power and gas are off, checking for electrical hazards, and shutting the main water supply.
Clear distinctions between a frozen and a burst pipe—such as audible cracking, wet spots, or loss of pressure—should be noted before proceeding.
A concise list of essential tools and materials for rapid thawing (heat source, towels, thermal gloves, and a bucket) is advised to have on hand.
Immediate safety checks before attempting thawing
Why check the basics first? Before thawing, confirm power and propane are off where necessary, locate the main water shutoff, and open faucets to relieve pressure.
Verify no electrical hazards, clear access to exposed pipes, and have a fire extinguisher nearby. These steps reduce risk and prepare for controlled thawing, following established how to unfreeze pipes in trailer procedures.
Signs a pipe is frozen vs. burst pipe indicators
After confirming power and propane are off and opening faucets to relieve pressure, the next step is to determine whether a pipe is frozen or has already burst.
Frozen pipes show no flow, cold spots along exposed piping, frost or bulging insulation.
Burst pipes reveal visible leaks, pooling water, damp walls or ceilings, dropping water pressure, and icy spray when thaw attempts begin—stop and repair.
Materials and tools to have on hand for rapid thawing
A compact toolkit of specific materials and tools lets a trailer owner thaw frozen pipes quickly and safely without improvisation.
The owner assembles reliable, portable items to apply controlled heat, protect surfaces, monitor temperatures, and stop water flow if needed. Preparation reduces damage and speeds recovery.
- Heat gun or hair dryer
- Electric space heater
- Thermal gloves and towels
- Inline shutoff valve and temperature gauge
Step-by-step fast-thaw methods for trailer pipes
The section outlines practical fast-thaw techniques for trailer pipes, including household heat sources such as hair dryers, heat guns, and space heaters.
It also covers localized methods like warm towels and hot water bottles.
It explains safe use of electric pipe-heating cables or heat tape, warns about the risks of portable propane torches, and specifies when they must not be used while offering safer alternatives.
Step-by-step guidance emphasizes thawing from the faucet toward the frozen section to relieve pressure and reduce burst risk.
Thawing with household heat sources (hair dryer, heat gun, space heater)
Begin by identifying accessible sections of frozen piping and clearing any nearby combustible materials to prepare for using household heat sources.
Use a hair dryer on low, moving continuously; keep a safe distance. A heat gun can be effective but use low settings and avoid prolonged focus.
Position a space heater to warm enclosed compartments, monitor constantly, and never leave heat sources unattended.
Using warm towels and hot water bottles for localized thawing
After using controlled household heat sources on accessible sections, attention can shift to targeted, low-risk methods for localized thawing.
Wrap warm towels around the frozen section, replacing them frequently as they cool.
Apply hot water bottles or sealed heat packs against fittings and joints.
Monitor pipe temperature and surrounding materials to prevent damage.
Test flow gently once thawed and inspect for leaks.
Applying electric pipe-heating cables or heat tape safely
Several practical steps guide the safe use of electric pipe-heating cables or heat tape on trailer plumbing: choose appropriately rated products, follow manufacturer instructions, and prioritize electrical safety.
Install cables along pipe length, secure with recommended tape or clips, avoid overlapping, insulate with approved pipe wrap, and connect to GFCI-protected circuits.
Monitor for damage, replace if frayed, and disconnect after thawing.
Using a portable propane torch’ risks, when never to use it, and safer alternatives
Many trailer owners consider a portable propane torch for rapid pipe thawing, but it poses significant fire, melting, and explosion hazards and should be treated as a last resort only by trained professionals.
Never use near insulation, gas lines, PVC, or confined spaces.
Safer alternatives include electric heat tape, space heaters placed safely, warm air blowers, heated blankets, or calling a licensed RV technician to prevent damage and injury.
Thawing from the faucet toward the frozen section to relieve pressure
Following the safety note about avoiding open flames, the recommended technique for fast thawing is to open the faucet nearest the frozen section and work heat back toward the ice blockage; this relieves built-up pressure, allows melting water to flow out, and reduces the chance of a burst pipe.
Apply gentle heat (hair dryer, heat lamp, warm towels) gradually toward the frozen area, monitoring for leaks and shutting water if cracking or leaking appears.
Accessing and protecting trailer-specific plumbing
The author outlines typical water-line layouts in RVs and mobile homes to help readers locate supply and waste pipes quickly.
Guidance is then given on safe methods to access enclosed or underbelly plumbing without causing damage to panels, insulation, or wiring.
Finally, the piece covers steps to protect fixtures, valves, and appliances from heat or thaw-related stress during the unfreezing process.
Locating water lines in RVs and mobile homes (common layouts)
A basic understanding of common RV and mobile-home plumbing layouts helps pinpoint water lines quickly:
Typical setups place fresh, grey, and black tanks centrally or underfloor; supply lines run along interior cabinetry, behind appliances, and in exterior access panels.
Hot water lines often cluster near the furnace or water heater.
Identifying fixtures, tracing visible hoses, and consulting manufacturer diagrams narrows likely pipe routes.
Gaining access to enclosed or underbelly pipes without causing damage
Once likely pipe routes are identified, attention turns to safe access and protection of enclosed or underbelly lines.
Technicians inspect access panels, removable trim, and crawl spaces, using hand tools to avoid cutting structural material. Insulation is gently pulled back and taped for reinstallation.
Temporary protective boards prevent tool damage. Any penetrations are resealed after thawing to maintain weatherproofing and rodent barriers.
Protecting fixtures, valves, and appliances during thaw
Begin by isolating downstream fixtures and appliances to limit water flow and reduce pressure on thawing sections: shut off branch valves, close appliance feed valves, and place drain pans under vulnerable connections.
Protect exposed fixtures with insulation wraps or towels, secure loose fittings, and support valves to prevent torque from thawing flows.
Keep appliance manuals and shutoff locations handy; test slowly once thawed.
Preventing further damage and handling leaks
The section outlines how to spot a burst pipe fast, including signs like rushing water, pooling, or sudden pressure loss.
It then explains emergency shutoff locations and steps specific to trailers and RVs to stop the flow immediately.
Finally, it summarizes quick temporary repair options and clear criteria for when a licensed plumber should be contacted.
How to identify and isolate a burst pipe quickly
Detecting a burst pipe quickly requires watching for sudden, unusual signs—gushing water, a sharp drop in water pressure, pooling or dripping in unexpected places, and damp or discolored walls and flooring.
Once found, trace noise or wetness to the source, isolate the affected section by closing local valves where available, remove valuables, contain spread with towels and buckets, and document damage for repairs.
Emergency shutoff procedures for trailers and RVs
Shut off water and power immediately to minimize damage: locate and close the trailer’s main water shutoff valve (usually near the freshwater tank, under sinks, or at the inlet) and turn off the RV’s water pump and shore-power breaker to stop flow and eliminate electrical hazards.
Then drain lines by opening faucets and low-point drains, isolate affected zones by closing individual shutoffs, and document leaks for repair.
Temporary leak repairs and when to call a professional
Assess damage quickly and apply temporary fixes to stop leaks and limit water loss until permanent repairs can be made.
Use pipe clamps, repair tape, or rubber patches for small cracks; tighten fittings and drain affected sections.
If corrosion, large ruptures, frozen pipe bursts, or uncertain connections exist, contact a licensed plumber or RV technician immediately to prevent structural damage and mold.
Long-term solutions to prevent frozen pipes in trailers
Long-term prevention focuses on combining physical protection, heat sources, and proactive winterization to keep trailer plumbing functioning in cold weather.
Practical measures include insulating exposed and underbelly pipes, adding heated enclosures or skirting with proper venting, and fitting heat tape with thermostatic controls alongside automatic drain systems.
Seasonal steps—using RV-safe antifreeze, thoroughly draining lines, and storing systems correctly—complete a reliable protection strategy.
Insulation options for exposed and underbelly pipes
When temperatures drop, protecting exposed and underbelly pipes with proper insulation is one of the most effective measures to prevent freezing in a trailer.
Options include closed-cell foam pipe wrap, rubber foam sleeves, fiberglass with vapor barrier, and spray foam for gaps.
Secure with UV-resistant tape or zip ties, maintain clearances, and inspect annually for compression, moisture, or damage to preserve thermal performance.
Using heated enclosures, skirting, and venting strategies
After insulating exposed and underbelly pipes, owners should consider heated enclosures, skirting, and strategic venting as more durable measures to keep plumbing above freezing.
Enclosures around critical valves and hookups concentrate warmth; insulated skirting reduces cold air infiltration beneath the trailer.
Adjustable vents and controlled airflow prevent moisture buildup while maintaining temperature balance.
Regular inspection guarantees seals and barriers remain effective.
Installing heat tape, thermostatic controls, and automatic water drain systems
Consider installing a combination of heat tape, thermostatic controls, and automatic drain systems to provide reliable, low-effort protection against frozen pipes in trailers.
Heat tape applied to exposed runs prevents ice formation; thermostats regulate activation by ambient or pipe temperature; automatic drain valves purge lines when power or temperatures drop.
Professional installation and correct sizing guarantee safety, code compliance, and consistent winter performance.
Winterization steps: antifreeze, draining, and storing tips
Many trailer owners rely on a systematic winterization routine—draining waterlines, adding RV-grade antifreeze, and properly storing plumbing components—to prevent freeze damage during long periods of inactivity.
They shut off water, open faucets, dump tanks, and use a low-pressure pump to circulate non-toxic antifreeze through fixtures and traps.
External hoses and filters are removed, lines insulated, and valves labeled for easy spring recommissioning.
Comparing thawing methods: speed, safety, and cost
Weighing thawing options requires evaluating three core factors: how quickly each method restores flow, the risks it introduces to people and plumbing, and the upfront and ongoing costs. Methods like heat tape, hair dryers, hot water, and professional services differ markedly.
| Method | Trade-offs |
|---|---|
| Heat tape | Fast, moderate risk, medium cost |
| Hair dryer | Slow, low risk, low cost |
| Hot water | Moderate, pipe stress, low cost |
| Pro service | Fastest, lowest risk, high cost |
Common mistakes and safety hazards to avoid
The section highlights key errors and hazards to avoid when thawing trailer plumbing.
Open flames and boiling water can damage pipes and start fires, while improper use of electric heaters or heat tape creates shock and fire risks.
Mistaking a clog for a freeze (or vice versa) often leads to ineffective or harmful interventions.
Why using open flame or boiling water can be dangerous
Using an open flame or pouring boiling water directly onto frozen trailer pipes can cause severe damage and serious safety risks.
Flames can ignite insulation, vapor, or siding; concentrated heat may warp, crack, or burst pipes.
Boiling water can shock cold materials, causing splitting and rapid leaks.
Both methods risk fire, scalding, structural harm, and costly repairs—avoid them.
Electrical hazards with heaters and heat tape
Plugged-in space heaters and improperly installed heat tape present significant electrical hazards around trailer plumbing.
Incorrect placement, damaged cords, overloaded outlets, and wet conditions increase fire and electrocution risk.
Heat tape must match pipe material and be installed per manufacturer instructions with a thermostat and GFCI protection.
Regular inspection, avoiding extension cords, and replacing worn components prevent accidents and system failures.
Misdiagnosing frozen vs. clogged pipes and resulting errors
How can one tell whether a trailer’s pipe is frozen or simply clogged, and why does that distinction matter?
Misdiagnosis leads to wrong fixes: applying chemicals or plungers to frozen lines risks pipe rupture, while heating a clogged line can spread contaminants.
Proper diagnosis uses temperature checks, inspection access, and gentle pressure testing.
Prioritize noninvasive checks, avoid excessive force, and document findings before repair.
Quick troubleshooting scenarios and solutions
The following quick troubleshooting scenarios identify common post-freeze issues and offer concise next steps to restore service or secure repairs.
Each item targets a specific symptom and the most likely cause, plus an immediate action to take. Use these checks before calling a professional to save time and limit damage.
- Faucet runs but fixtures dry — likely a frozen branch; trace and heat the branch line starting at the fixture.
- No water anywhere after thaw attempts — verify the main supply, interior shutoff valves, and any external utility connections.
- Continuous slow drip after thaw — suspect a small crack; isolate the section, shut off water, and prepare for temporary patch or replacement.
- Persistent low pressure in one area — check for partially closed valves, trapped air, or remaining ice obstruction and flush lines after reopening.
Faucet runs but no water from fixtures likely frozen branch
When a faucet runs but no water comes from downstream fixtures, a frozen branch line is a likely cause; the main valve and supply to the faucet are open, yet an isolated section has iced, restricting flow.
Inspect accessible branch runs, feel for cold spots, and open affected fixture taps.
Apply targeted heat (hair dryer, heat tape, warm towels) working from faucet toward the cold section until flow restores.
No water anywhere after thawing attempts check main supply and valves
If thawing branch lines restores flow to a faucet but no fixtures deliver water afterward, attention must shift to the main supply and shutoff valves.
Inspect external water source, pressure regulator, and inlet hose for ice or disconnection.
Verify interior main shutoff fully open and manifold valves aligned.
Reset RV water pump and check filter screens.
Call a pro if pressure remains absent after these checks.
Continuous slow drip after thaw possible small crack repair steps
Inspecting a persistent slow drip after thawing helps determine whether a temporary field repair will suffice or a replacement is required.
The technician locates the leak, shuts water, drains lines, and dries the area.
For small hairline cracks, apply epoxy putty or self-fusing silicone tape per instructions, clamp if possible, then pressure-test.
Schedule permanent pipe replacement when feasible.
Recommended tools, products, and pro services
A concise list of recommended tools and products—such as reliable heat tape models, effective pipe insulation options, and compact portable heaters suited for trailers—helps prevent and address frozen pipes.
Guidance on when to call an RV or mobile-home plumber and what to expect from their inspection and repair services prepares owners for professional intervention.
The following section compares top items and outlines typical service steps and costs.
Best heat tape, pipe insulation, and portable heaters for trailers
When temperatures drop, choosing the right combination of heat tape, pipe insulation, and a portable heater can prevent frozen pipes in a trailer and limit repair costs.
Recommended options balance safety, RV power limits, and ease of installation.
- Self-regulating heat tape (UL-listed)
- Closed-cell foam pipe wrap
- Reflective foil insulation sleeves
- Low-wattage ceramic or oil-filled portable heater
When to hire an RV/mobile-home plumber and what to expect from the service
If DIY measures—heat tape, insulation, and a small heater—fail to restore flow or if multiple fixtures are affected, calling an RV/mobile-home plumber is appropriate.
A technician will diagnose frozen or burst sections, perform thawing with controlled heat, pressure-test systems, and repair or replace damaged pipes, valves, or fittings.
Expect service truck tools, thermal cameras, antifreeze-safe heaters, and clear estimates before work begins.
Conclusion
A breath of warm air moves down the narrow corridor of pipes like sunlight along frost-tipped grass, easing ice into water and sending relief through the trailer’s veins. With steady hands, practiced methods and simple tools, the frozen hush retreats without rupture or panic. Vigilant care—insulation, heat tape, thoughtful winterizing—keeps that thawed flow steady, turning a once brittle winter risk into a quiet, reliable hum of home.