
How to Store a Pipe Flaring Tool Safely: Tips to Prevent Damage and Corrosion
To store a pipe flaring tool safely and prevent damage and corrosion, clean and dry the tool, then lubricate it before placing it in a protective case with foam cutouts to minimize movement. Store the case in a cool, low-humidity area away from corrosive chemicals and dissimilar metals. Use desiccants to absorb moisture and inspect the tool periodically for wear, rust, and loose parts. Remember to release clamp tension before storage, label components, and document maintenance. Following these steps will ensure longer life and reliable performance for your pipe flaring tool.
What a Pipe Flaring Tool Is and Why Proper Storage Matters
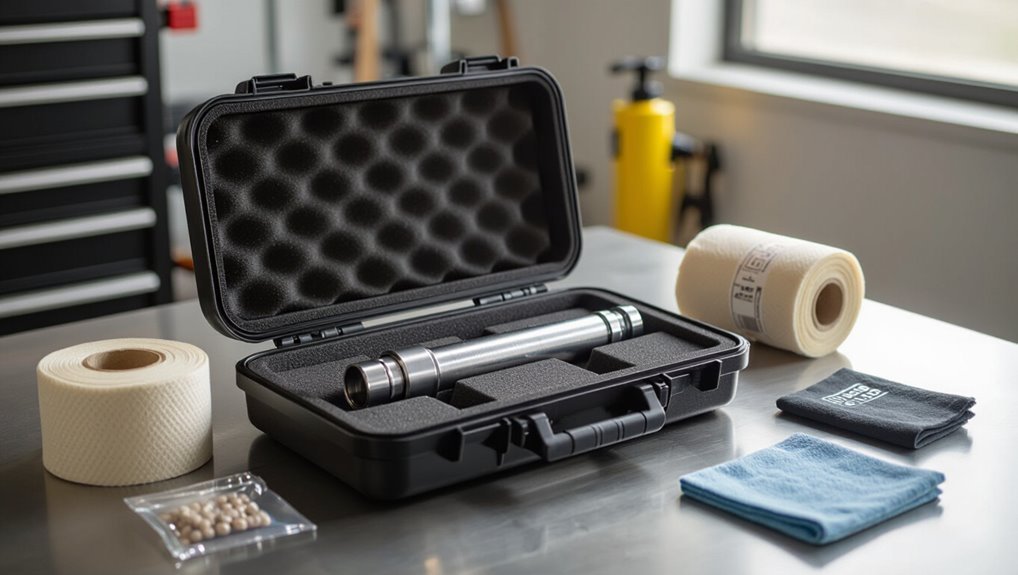
A pipe flaring tool is a hand or bench device used to form flared ends on tubing, with common types including single-flare, double-flare, and multi-jaw tubing flares.
Proper storage prevents damage, corrosion, and misalignment that can compromise flare quality and tool lifespan.
Left unsecured or exposed, these tools also present safety hazards such as sharp edges, pinching risks, and contaminated fittings.
Definition and common types of pipe flaring tools
Pipe flaring tools are hand-operated devices used to form a conical flare at the end of a metal tubing so it seals properly with fittings. Understanding their varieties helps guarantee they are stored and handled safely.
Common types include Y-block and clamp flares, multi-die flaring tools, and hydraulic or cone-type units.
Guidance on how to store pipe flaring tool varies by material and size.
Risks of improper storage: damage, corrosion, misalignment, safety hazards
Having reviewed common types and materials of flaring tools, attention shifts to the risks that arise when they are stored improperly.
Improper storage causes physical damage (dents, worn threads), accelerates corrosion from moisture and chemicals, induces misalignment of jaws and dies, and creates safety hazards from falling tools or accidental contact with sharp edges.
These issues compromise performance and increase repair costs.
Quick Best-Practice Summary for Storing a Pipe Flaring Tool
A concise storage recommendation is to clean, dry, and secure the pipe flaring tool in a protective case or designated toolbox to prevent corrosion and damage.
Immediately after use, wipe away debris and moisture, apply light lubricant to moving parts if needed, and return all components to their labeled positions.
The following checklist summarizes these quick actions for consistent, safe storage.
One-sentence storage recommendation
Store the pipe flaring tool clean, dry, and protected—ideally in its case or a labeled drawer—away from corrosive chemicals, extreme temperatures, and heavy items that could damage the jaws.
Periodically apply a light protective coating to metal surfaces, verify components are secured to prevent misalignment, and store with desiccant if humidity is high, keeping it accessible yet separated from reactive materials.
Checklist of immediate actions after use
Wipe the tool free of debris and moisture immediately after use to prevent corrosion and build-up.
Then follow a brief checklist to prepare for storage: dry all surfaces, apply light lubricant to moving parts, and return components to protective case. Visualize the steps for quick compliance.
- Clean surfaces and joints.
- Lubricate hinges and screws.
- Pack in a dry, labeled case.
Cleaning and Preparing the Tool Before Storage
Before storing a pipe flaring tool, the user should follow a clear cleaning routine for metal and composite parts, removing debris and residues.
Thorough drying and application of appropriate lubricants, rust inhibitors, or protective coatings will prevent corrosion.
Finally, movable components should be inspected, tightened, and secured to guarantee the tool remains functional and safe in storage.
Step-by-step cleaning process for metal and composite parts
A clear, methodical cleaning routine guarantees both metal and composite components of a pipe flaring tool remain functional and corrosion-free prior to storage.
The technician inspects surfaces, removes debris, and selects appropriate cleaners for each material. After gentle scrubbing and targeted spot treatment, finishes are reapplied as needed.
- Brush and wipe visible grime.
- Apply solvent for metal; mild soap for composites.
- Rinse and inspect.
How to dry and remove moisture to prevent rust
Eliminate all moisture from every surface and crevice of the pipe flaring tool to prevent rust formation during storage.
Wipe down with clean, lint-free cloths, using cotton swabs for tight joints.
Use compressed air to displace trapped water and allow components to air-dry fully in a warm, ventilated area.
Confirm dryness before packing; store with desiccant packs to maintain a dry environment.
Applying lubricants, rust inhibitors, or protective coatings
With surfaces confirmed dry, attention moves to protective treatments that inhibit corrosion and preserve moving parts during storage.
A light machine oil or silicone spray is applied to threads, hinges, and sliding surfaces; excess wiped away to prevent attract dust.
For longer-term protection, a thin film rust inhibitor or wax coating is used on exposed metal, avoiding painted or rubberized areas.
Inspecting and tightening movable parts before storage
Begin by visually scanning all movable components—joints, hinges, threads, and sliding surfaces—for wear, debris, or looseness.
Clean residue with a brush and cloth, then test motion.
Tighten loose fasteners to manufacturer torque where specified; avoid over-tightening.
Replace damaged pins or springs.
Confirm smooth operation after adjustments, apply minimal lubricant to contact points, and secure the tool for storage.
Choosing the Right Storage Location
Choosing the right storage location helps preserve the flaring tool’s accuracy and lifespan by controlling temperature, humidity, and ventilation.
It should be kept away from corrosive chemicals, direct outdoor exposure, and uninsulated garages that experience extremes.
Practical options include a climate-controlled workshop shelf, a padded toolbox, or a secure, covered jobsite case depending on use frequency.
Ideal environmental conditions: temperature, humidity, ventilation
Although not always obvious, selecting a storage spot with stable temperature, controlled humidity, and adequate ventilation is critical to prevent corrosion and maintain tool alignment.
Extremes or rapid fluctuations in any of these factors accelerate rust, degrade seals, and can warp precision flaring surfaces.
Ideal conditions: moderate, consistent temperature (around 15–25°C), relative humidity below 50%, gentle airflow to deter condensation.
Avoiding harmful locations: near chemicals, outdoors, uninsulated garages
With stable temperature, controlled humidity, and good ventilation established, attention turns to avoiding locations that actively harm a flaring tool.
Store away from chemical storage, solvents, acids, and fuels that emit corrosive vapors.
Avoid outdoor exposure and uninsulated garages where condensation, temperature swings, pests, and dust accelerate wear.
Choose interior, non-chemical zones to minimize corrosion and mechanical damage.
Recommendations for workshop, toolbox, and jobsite storage
Place the flaring tool where it balances accessibility and protection: a clean, dry shelf or dedicated drawer in the workshop for routine use; a padded, corrosion-resistant compartment within the toolbox for transport; and a lockable, weatherproof storage box on jobsites for overnight stays.
Inspect regularly for moisture, remove debris, apply light oil if idle, and label storage to prevent tool misuse or damage.
Protective Storage Solutions and Organizing Methods
Protective storage solutions and organizing methods focus on preventing damage, loss, and accidental injury through appropriate containment and mounting. Choices range from hard cases with molded foam for impact protection to tool chests, cabinets, pegboards, wall-mounted racks, and shadow boards for secure, visible placement.
For mobility and security, padded transport bags and lockable boxes provide padded support and theft deterrence.
Hard cases and molded foam inserts: benefits and selection tips
Several durable hard cases paired with custom-molded foam inserts offer the most secure, organized option for storing a pipe flaring tool. They protect against impact, moisture, and contaminants while keeping components separated.
Choose impact-resistant shells, closed-cell or polyurethane foam resistant to oils, and precise cutouts for tool, dies, and accessories.
Consider size, latches, pressure relief valves, and portability for jobsite use.
Tool chests, cabinets, and pegboards: mounting and securing options
A range of tool chests, cabinets, and pegboards can secure a pipe flaring tool for shop or jobsite use, provided they are mounted and organized to prevent movement, contamination, and corrosion.
Drawers should have non‑abrasive liners and foam cutouts; cabinets require vibration‑damping mounts and sealed doors.
Pegboards must use locked hooks and labelled spots.
Regular inspection and desiccant use minimize rust.
Wall-mounted racks and shadow boards to prevent drops
Wall-mounted racks and shadow boards offer secure, visible storage for pipe flaring tools by keeping them off work surfaces and preventing accidental drops. When designed with reinforced mounting points, lockable clips, and tool-specific outlines, they reduce handling errors and speed retrieval while protecting delicate flaring jaws from impact and contamination.
Regular inspection of mounts and labeled positions maintains order, minimizes tool loss, and supports corrosion prevention.
Portable storage for transport: padded bags and lockable boxes
Many technicians rely on padded bags and lockable boxes to transport pipe flaring tools safely, combining shock absorption with security to prevent damage, contamination, and theft.
Compact cases with foam cutouts immobilize dies and yokes. Lockable metal boxes deter theft and seal out moisture.
Weatherproof zippers and desiccant packets add corrosion protection.
- Foam compartments
- Locking clasps
- Moisture barriers
Preventing Corrosion and Mechanical Damage Over Time
Long-term corrosion prevention for a pipe flaring tool centers on controlled storage environments, protective coatings, and avoiding contact with corrosive substances.
Including desiccants or silica gel packets and humidity indicators in the storage case helps maintain low moisture levels and gives early warning of rising humidity.
A simple periodic maintenance schedule—inspecting for rust, checking lubrication, and replacing desiccants as needed—keeps the tool mechanically sound over time.
Long-term corrosion prevention strategies
Preservation of a pipe flaring tool hinges on minimizing corrosion and mechanical wear through controlled storage conditions and targeted protective measures.
Regular inspection, light oiling of metal surfaces, and application of removable protective coatings extend service life.
Use padded, vibration-free mounts, avoid contact with dissimilar metals, and rotate stock periodically.
Document maintenance intervals and store tools in labeled, clean enclosures to prevent unnoticed degradation.
Using desiccants, silica gel, and humidity indicators
Incorporating desiccants, silica gel, and humidity indicators into storage protocols greatly reduces the risk of corrosion and mechanical degradation by controlling ambient moisture.
Packs of silica gel placed inside cases absorb residual humidity; larger desiccant canisters suit cabinets.
Humidity indicator cards reveal when replacement or reconditioning is needed.
Components should be separated to allow circulation and prevent localized moisture pockets, extending tool lifespan.
Periodic maintenance schedule and what to check
A regular, documented maintenance schedule helps prevent corrosion and mechanical failure by ensuring inspections and care occur before minor issues escalate.
Inspections should be monthly to quarterly, focusing on lubrication, corrosion spots, and alignment. Records must note findings, actions, and dates to track trends and justify replacement.
- Check lubrication and moving parts.
- Inspect for rust and pitting.
- Verify jaw alignment and fasteners.
Handling and Transport Best Practices
When moving a pipe flaring tool between locations, the tool should be secured in padded cases or cradles to prevent impact and vibration damage.
Appropriate packing—using foam inserts, tie-downs, or dedicated transport boxes—reduces risk during shipping or site-to-site transfers.
Clear labeling and a simple inventory system guarantee tools are tracked, assigned, and inspected before and after transport.
Securing the tool during transit to prevent impact damage
Secure the tool inside a rigid, padded container to minimize movement and absorb shocks during transit.
The tool should be immobilized with foam inserts or non-abrasive straps, separating delicate components and flares.
Metal parts receive corrosion-resistant covers.
External cases bear clear handling labels and orientation arrows.
Inspect mounts before transport and avoid stacking heavy items atop the case to prevent impact and deformation.
Packing methods for shipping or carrying between sites
Packers should choose shipping methods that protect the pipe flaring tool from shock, moisture, and crushing while complying with carrier requirements.
Use rigid cases, internal foam cutouts, and desiccant packs. Cushion around the flare head, immobilize moving parts, and seal against water. Mark fragile handling instructions.
Follow box size limits and weight rules to prevent transit damage.
- Hard case with foam
- Wrapped tool core
- Sealed pallet
Labeling and inventory practices for fleets or multiple tools
Effective labeling and inventory practices secure fleets of pipe flaring tools are tracked, maintained, and deployed with minimal downtime.
Each tool receives durable ID tags, barcode or RFID labels, and documented maintenance histories tied to serial numbers.
Centralized inventory software schedules inspections, records repairs, and flags replacements.
Standardized procedures guarantee accountability during transport, reduce loss, and optimize tool availability across sites.
Common Storage Mistakes and How to Avoid Them
Common storage mistakes can accelerate corrosion, damage components, and create safety hazards if not corrected.
Examples include leaving tools dirty or wet, which promotes rust and is remedied by cleaning and drying before storage; storing clamps under tension, which deforms parts and should be relaxed before shelving; and mixing incompatible metals or chemicals, which can cause galvanic corrosion or reactions and requires segregated storage.
Addressing these issues with simple routines preserves tool function and extends service life.
Mistake: Storing dirty or wet tools why it’s harmful and fix
Many users underestimate the damage that storing a pipe flaring tool wet or dirty can cause: moisture and debris accelerate corrosion, foul moving parts, and transfer contaminants to new workpieces.
Failure to clean and dry tools shortens service life and causes poor flares.
Recommended fixes: wipe, air-dry, apply light oil to metal, replace damaged seals, and store in a dry, ventilated case or cabinet.
Mistake: Leaving clamps under tension consequences and correction
Leaving clamps tightened during storage places constant stress on the springs, threads, and pivot points, which can cause permanent deformation, loss of clamping force, and accelerated wear.
To correct this, release tension before storing, retract screws slightly, and lock mechanisms in neutral positions.
Periodically inspect and lubricate threads to restore smooth operation and prevent seizure from neglected stress.
Mistake: Mixing incompatible metals or chemicals in storage
After releasing clamps and neutralizing mechanisms, attention should turn to what is stored alongside the flaring tool.
Mixed metals accelerate galvanic corrosion; acids, solvents, and salts promote rust and pitting.
Store stainless, brass, and carbon steel separately, using protective coatings or desiccants.
Segregate chemicals by compatibility and label shelves.
Regularly inspect inventory to prevent cross-contamination and equipment degradation.
How to Recover and Restore a Neglected or Corroded Flaring Tool
When evaluating a neglected or corroded flaring tool, one should inspect for structural damage, seized parts, and wear to decide whether repair or replacement is more cost-effective.
Cleaning and de-rusting with appropriate solvents, brushes, and light abrasives can restore many metal surfaces, followed by lubrication and functional tests to recondition moving parts.
Severely pitted components, distorted dies, or compromised threads warrant replacing individual parts or the entire tool to guarantee safe, reliable operation.
Assessing damage and deciding repair vs. replacement
Begin by inspecting the flaring tool visually and functionally to identify corrosion, bent or broken components, stripped threads, and seizure points. This quick assessment establishes whether cleaning, lubrication, and minor part replacement will suffice or if full replacement is safer and more cost-effective.
Evaluate structural integrity, precision of mating surfaces, and availability/cost of spare parts.
Prioritize safety, consistent flare quality, and long-term reliability when deciding.
Cleaning, de-rusting, and reconditioning steps
Having determined whether a tool warrants repair or replacement, the next step is to restore a neglected flaring tool through thorough cleaning, de-rusting, and reconditioning to recover function and accuracy.
Use solvent, wire brush, and compressed air; neutralize rust chemically; lubricate moving parts and protect surfaces with light oil.
- Scrub and solvent-wash.
- Apply rust remover, rinse.
- Re-lubricate and protect.
When to replace components or the entire tool
Decide whether to replace parts or the entire flaring tool based on damage, wear, and the cost-to-benefit ratio of repair.
Inspect jaws, dies, and threads for pitting, distortion, or excessive wear. Replace components if integrity or alignment is compromised; replace the whole tool when repairs exceed half its replacement cost or safety and accuracy cannot be assured.
Document replacements and discard irreparable units.
Recommended Products and Materials for Safe Storage
A brief comparison of recommended cases, protective coatings, desiccants, and organizers helps clarify practical choices for preserving a pipe flaring tool. The following table contrasts key options to guide selection based on protection level, portability, and cost. Readers can use this overview to match products to their storage needs quickly.
| Item | Quick contrast |
|---|---|
| Hard case | Maximum impact protection, higher cost |
| Soft pouch | Lightweight, limited crush resistance |
| Rust-inhibiting coating | Long-term corrosion prevention, requires reapplication |
| Silica gel desiccant | Controls moisture effectively, needs periodic replacement |
| Foam organizers | Keep parts separated, customizable fit |
Comparison table of cases, coatings, desiccants, and organizers
Selection of the right case, coating, desiccant, and organizer greatly reduces corrosion risk and extends the service life of a pipe flaring tool. Below is a concise comparison to guide choices.
| Item | Benefit | Notes |
|---|---|---|
| Hard case | Impact protection | Foam inserts recommended |
| Plastic case | Lightweight | Less durable |
| VCI coating | Corrosion prevention | Long-lasting |
| Silica gel | Moisture control | Rechargeable |
| Foam organizer | Tool separation | Customizable |
Quick Reference: Daily, Monthly, and Annual Storage Maintenance Checklist
When used regularly, a brief checklist keeps the flaring tool and its storage area safe, functional, and ready for the next job. This quick reference groups essential tasks into daily, monthly, and annual actions so maintenance is consistent and easily audited.
- Inspect, clean, and return tool to case; wipe contacts and apply light lubricant.
- Check desiccant, seals, and mounting; replace or reseal as needed.
- Deep clean, full inspection, calibrate, and apply protective coating; document service.
Conclusion
Proper storage of a pipe flaring tool preserves function and prevents costly corrosion, ensuring readiness when needed. Like a meticulous Victorian archivist safeguarding a rare manuscript beneath a Bluetooth speaker, the user must clean, dry, lightly oil, and keep the tool in a stable, low-humidity spot away from acids. Periodic inspections, proper organizers, and prompt restoration of any rust restore reliability and extend the tool’s useful life for years to come.
