How to Connect a Pipe Clamp: Step-by-Step Guide for Secure Plumbing and Hoses
To effectively connect a pipe clamp for secure plumbing and hoses, follow these steps: First, select a clamp that matches the pipe’s diameter, material, and the environment it will be used in. Prepare a square cut on the pipe, then slide the clamp over the hose or position a U-bolt/saddle under the pipe. Center the clamp on the barb or support and tighten the fasteners evenly to the specified torque, ensuring not to overcompress. After installation, inspect for proper alignment, signs of corrosion, or any damage, and retorque if necessary. For further guidance, explore detailed instructions, helpful tips, and safety considerations.
What a Pipe Clamp Is and When to Use One
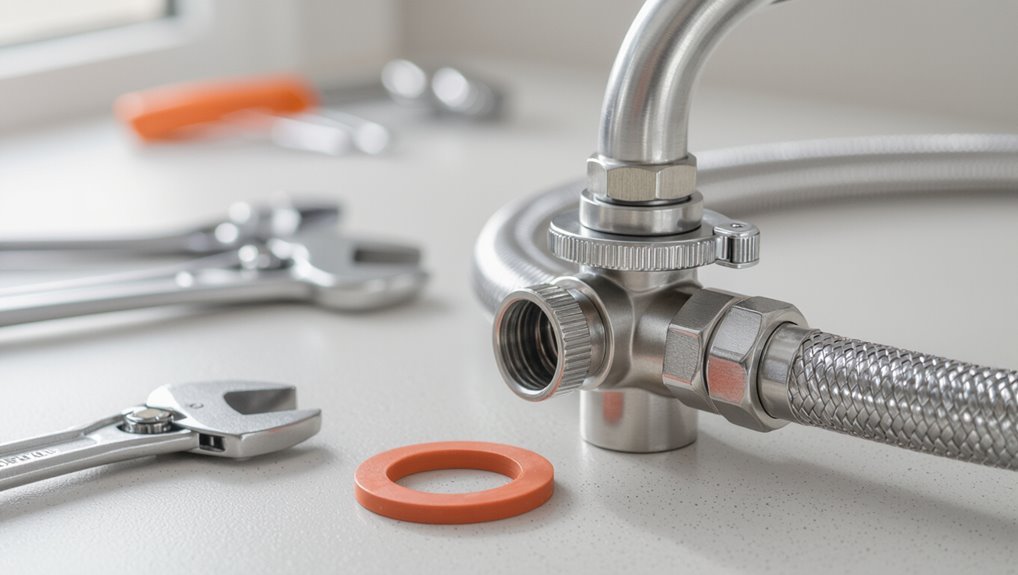
A pipe clamp is a fastening device used to secure pipes, hoses, or ducts, coming in common types such as screw/ear clamps, T-bolt clamps, and cushioned or saddle clamps.
It finds frequent use in plumbing, hose connections, HVAC ductwork, and automotive systems where a reliable seal or support is required.
Compared with alternatives like adhesives, tape, or zip ties, pipe clamps offer greater strength, reusability, and a controlled, uniform grip.
Definition and common types of pipe clamps
Pipe clamps are fastening devices designed to secure, support, or join cylindrical objects such as pipes, tubing, and conduit by wrapping around their circumference and applying pressure or mechanical restraint.
Common types include U-bolts, hose clamps, beam clamps, saddle clamps, and split-ring clamps.
Selection depends on diameter, load, material compatibility, and planned install method when learning how to connect a pipe clamp.
Typical applications: plumbing, hoses, HVAC, automotive
Clamps play a critical role across residential, commercial, and automotive systems by securing pipes, hoses, and ductwork to prevent leaks, vibration, and misalignment.
They fasten plumbing lines, hose connections, condensate and refrigerant lines in HVAC, and fuel, coolant, or vacuum hoses in vehicles.
Proper clamp selection and placement guarantee system integrity, reduce wear, and facilitate maintenance access.
Advantages of using pipe clamps over alternatives
Offer secure, adjustable support for tubing and ductwork, pipe clamps provide a reliable alternative to zip ties, soldering, or adhesive mounts in many installations.
They distribute load, resist vibration, and accommodate thermal expansion. Reusable and serviceable, clamps minimize damage to pipes, enable precise positioning, and suit diverse materials and environments.
Installation is typically quicker and more consistent than custom fittings or adhesive solutions.
Tools and Materials Needed
The section lists the essential tools—wrench, screwdriver, torque wrench, and cutting tools—needed to install and adjust pipe clamps.
It compares clamp types (worm-drive, Oetiker, spring, U-bolt, cushioned) and discusses material compatibility with pipes, hoses, and fittings.
It also covers required safety gear and basic workspace preparation.
Essential tools (wrench, screwdriver, torque wrench, cutting tools)
Gathering the right hand tools and cutting implements assures a secure, correctly fitted pipe clamp installation. A suitable adjustable wrench or socket set tightens hardware; flathead and Phillips screwdrivers adjust clamp screws.
A calibrated torque wrench prevents over- or under-tightening. Cutting tools — tubing cutters, hacksaws, deburring files — guarantee clean pipe ends.
Safety gloves and eye protection complete the essential kit.
Types of clamps and materials (worm-drive, Oetiker, spring, U-bolt, cushioned)
Clamps come in several distinct designs—worm-drive, Oetiker, spring, U-bolt, and cushioned—each suited to specific materials and applications.
Worm-drive offers adjustable stainless steel strength; Oetiker provides permanent, low-profile crimps for hoses; spring clamps deliver constant tension for thermal cycling; U-bolts secure pipes to structures; cushioned clamps protect fragile tubing and reduce vibration.
Selection balances strength, corrosion resistance, and permanence.
Pipe, hose, and fitting materials compatibility
After selecting a clamp type suited to the service and environment, compatibility between pipe, hose, and fitting materials must be confirmed before assembly.
Match materials to media, temperature, and pressure ratings; avoid galvanic corrosion by pairing compatible metals or using insulating sleeves.
Guarantee hose inner diameter and fitting barb/pull-back design align.
Verify chemical compatibility charts and manufacturer specifications to prevent leaks and premature failure.
Safety gear and workspace preparation
Begin by assembling personal protective equipment and arranging a clean, well-lit work area free of trip hazards.
The technician wears gloves, safety glasses, hearing protection if power tools are used, and a dust mask for debris.
Tools and clamps are organized on a stable bench with adequate lighting.
Flammable materials are removed, ventilation maintained, and a fire extinguisher is accessible.
How to Choose the Right Pipe Clamp
Selecting the appropriate pipe clamp begins with matching clamp size to pipe diameter and hose thickness to guarantee a secure fit.
Material choice—stainless steel, galvanized steel, or plastic—should reflect the environment, corrosion risk, and operating temperatures.
Finally, evaluate load and pressure requirements alongside upfront cost to balance safety and long-term durability.
Sizing clamps for pipe diameter and hose thickness
Choosing the correct clamp starts with matching its internal diameter to the pipe or hose outside diameter and accounting for material thickness; a snug fit prevents leaks and reduces stress on the connection.
Measure the hose OD and pipe OD precisely, include any fittings or layering, and select a clamp with an adjustable range that centers on the measured size.
Verify compression specifications to avoid deformation.
Material selection based on environment (corrosion resistance, temperature)
When exposed to chemicals, salt spray, extreme heat, or continuous moisture, the clamp material determines longevity and safety; consequently, assess the service environment first and match corrosion resistance, temperature rating, and mechanical strength to application demands.
Stainless steel grades (304, 316) suit corrosive or marine settings; plated steel is cost-effective for mild conditions; brass or polymers serve noncritical, low-temperature installations.
Load and pressure considerations
Any pipe clamp must be specified for the loads and internal pressures it will encounter, because inadequate capacity risks joint failure, pipe deformation, or support collapse.
Engineers assess axial, radial, and dynamic loads plus maximum working pressure and surge. Safety factors, burst and proof pressure ratings, and compatibility with pipe material determine clamp selection.
Verify manufacturer specifications and test certificates before installation.
Cost vs. longevity trade-offs
After confirming load and pressure requirements, attention shifts to balancing upfront cost against expected service life.
The evaluator compares material, environment, and maintenance needs to justify investment. Considerations include corrosion resistance, replacement frequency, and warranty implications.
- Material vs. price
- Corrosion risk and coatings
- Expected replacement interval
- Maintenance and warranty costs
Step-by-Step: Connecting a Hose with a Worm-Drive Clamp
The procedure begins with preparing the hose and fitting—cutting square, deburring, and measuring for correct insertion depth.
The clamp must be positioned so its band sits evenly over the fitting shoulder before following the tightening procedure and recommended torque values.
After tightening, the connection is checked for leaks and adjusted as needed while watching for common pitfalls such as overtightening, misalignment, or seating debris.
Preparing the hose and fitting (cutting, deburring, measuring)
Measure the hose and fitting carefully to guarantee a snug, leak-free connection: mark the hose length, allow for the fitting’s insertion depth, and account for clamp placement.
Cut squarely with a sharp blade or hose cutter. Deburr the inner and outer edges to prevent cuts and leaks.
Test-fit the fitting to confirm alignment and correct insertion depth before final assembly.
Positioning the clamp correctly
With the fitting test-fitted and insertion depth confirmed, attention turns to clamp placement for a secure seal.
The clamp should sit directly over the barb or raised bead, centered on the hose’s reinforced area, parallel to the hose end and not on frayed edges.
Allow a small gap from the hose lip to prevent extrusion, ensuring even contact around the circumference.
Tightening procedure and torque guidelines
Begin tightening the worm-drive screw slowly and evenly until the clamp snugly contacts the hose, watching for uniform compression around the fitting.
Apply steady, moderate torque—avoid overtightening which can cut the hose or deform the clamp. Use a torque driver if specified by manufacturer; typical small hose clamps require 1–3 Nm.
Recheck alignment and confirm the screw turns smoothly without resistance spikes.
Checking for leaks and final adjustments
Inspect the connection visually and by touch for any signs of seepage or uneven compression before placing the system back into service.
Activate the system at low pressure, observe for drips, and recheck clamp alignment. If leakage appears, tighten incrementally and retest.
Confirm hose seating and clamp band sits squarely.
Perform a final pressure check to verify a secure, leak‑free seal.
Common pitfalls in this method
Common mistakes when using a worm‑drive clamp stem from improper preparation and uneven tightening: hoses not cut squarely, clamps positioned over barbs or bends, or screws over‑ or under‑torqued can all compromise the seal.
Additional pitfalls include using wrong clamp size or material, failing to remove debris, reusing damaged clamps, and ignoring temperature or pressure limits, which shorten service life and increase leak risk.
Step-by-Step: Connecting a Pipe with U-Bolt and Saddle Clamps
The procedure begins with careful measurement and marking to locate clamp placement accurately on the pipe.
Next, the U-bolt and saddle assembly is positioned and fastened, following a proper torque sequence when multiple clamps are used to guarantee even load distribution.
Finally, vibration isolation and padding options are considered to protect the pipe and maintain clamp integrity over time.
Measuring and marking clamp placement
Measure twice before marking: determine exact clamp locations by accounting for pipe diameter, support spacing, and any fittings or valves that require clearance.
Using a tape measure and pencil, note distances from fixed reference points. Mark centerlines and edge bounds for each clamp, ensuring even spacing and alignment.
Verify marks against pipe run and structural supports before proceeding to installation.
Installing the U-bolt and saddle assembly
With clamp locations confirmed and marked, attention turns to assembling the U-bolt and saddle around the pipe.
The U-bolt is positioned so its legs straddle the pipe; the saddle fits over the U-bolt legs, matching curvature.
Insert washers and hand-start nuts, ensuring even alignment and no gap between saddle and pipe.
Check saddle orientation before final tightening.
Torque sequence and securing multiple clamps
Begin tightening in a systematic pattern to guarantee even clamping pressure across the pipe and prevent deformation.
Alternate torque between opposing nuts in small increments, using a calibrated torque wrench to reach manufacturer-specified values.
For multiple clamps along a run, tighten clamps sequentially from one end to the other, then recheck torque.
Document settings and inspect for alignment before returning system to service.
Vibration isolation and padding options
Although vibration can transfer along clamps and pipe runs, proper isolation and padding greatly reduce noise and wear.
The installer selects neoprene, EPDM, rubber-lined saddle inserts, or foam strips to dampen resonance.
Use anti-vibration mounts or resilient bushings with correct thickness and compression.
Guarantee secure clamp preload while avoiding over-compression that diminishes isolation and inspect periodically for degradation.
Step-by-Step: Using Spring Clamps and Ear Clamps
The text distinguishes when spring clamps are preferable for quick, low-pressure assemblies and when ear clamps suit permanent, high-seal applications.
It then outlines correct spring clamp installation, the proper crimping technique for ear clamps with recommended tools, and how those choices affect removal or reuse.
Practical tips on avoiding common mistakes and inspecting clamp integrity conclude the discussion.
When to prefer spring or ear clamps
When choosing between spring and ear clamps, consider the application’s pressure demands, accessibility, and desired reusability:
Spring clamps suit quick, low-to-moderate pressure fittings needing periodic removal; they compress and release easily.
Ear clamps provide uniform, permanent compression for higher-pressure or vibration-prone joints but require crimping for installation.
Select based on service life, maintenance frequency, and available installation tools.
Installation technique for spring clamps
Having chosen a spring clamp for its quick removal and moderate-pressure capability, proceed with a focused installation routine that emphasizes correct orientation, secure seating, and safe tool use.
Compress the clamp with pliers, slide evenly over the hose end and fitting, align jaws perpendicular to pressure direction, release slowly to seat uniformly.
Inspect for gaps, and test for leaks under low pressure before full service.
Crimping ear clamps properly and tools required
Start by selecting the correct ear clamp size and the appropriate crimping tool to guarantee a uniform, leak-free seal.
Position the clamp over hose and fitting, align the ear perpendicular to axis, then compress steadily with dedicated ear crimp pliers or a bench crimper.
Inspect the formed ear for complete deformation and consistent pressure around the circumference to prevent pinch points or gaps.
Removal and reuse considerations
After verifying a properly formed ear clamp, attention turns to removal and reuse decisions for both ear and spring clamps.
Ear clamps are typically single-use; cutting the ear prevents hose damage and guarantees secure replacement.
Spring clamps can be reused if undamaged and free of corrosion; inspect tension, hinge integrity, and surface wear.
Replace any clamp with compromised clamping force or visible deformation.
Verifying a Secure Connection
The installer should confirm the clamp’s seal using appropriate pressure and leak-testing methods to detect any immediate failures.
A concise visual and tactile inspection checklist—checking alignment, compression, and absence of seepage—helps identify installation defects.
Finally, a simple long-term monitoring and maintenance schedule should be established to catch gradual loosening or corrosion.
Pressure and leak testing methods
Confirming a tight, leak-free joint requires systematic pressure and leak testing to detect weaknesses that visual inspection can miss.
The procedure includes pressurizing the line to recommended working pressure, monitoring for pressure decay over a set interval, and applying soapy solution to suspect joints for bubble formation.
For critical systems, perform both static and dynamic tests, document results, and relieve pressure safely after completion.
Visual and tactile inspection checklist
Inspect connectors and surrounding pipework systematically, using sight and touch to verify clamp alignment, proper engagement of mating faces, uniform gasket compression, and absence of visible damage or foreign material.
- Check for even clamp gap and correct torque signs.
- Confirm gasket sits flush without overhang.
- Feel for movement or looseness under light force.
- Look for leaks, corrosion, cracks, or debris around the joint.
Long-term monitoring and maintenance schedule
Establish a scheduled program of periodic checks and preventative maintenance to guarantee clamps remain secure and joints leak-free over time.
Inspect clamps, fasteners, and seals monthly for corrosion, wear, or loosening; document findings.
Perform torque verification and retightening quarterly.
Replace compromised clamps or seals immediately.
Review system pressures and environmental factors annually, updating maintenance intervals and parts lists based on observed degradation.
Troubleshooting Common Problems
When connections fail, common causes include slipping clamps, overtightening that damages hoses, and corrosion from environmental exposure.
The section outlines how to diagnose loosened or slipping clamps, repair or replace hose sections harmed by excessive torque, and treat or replace corroded hardware.
It also covers techniques for swapping clamps with minimal disturbance to an active system.
Clamp slipping or loosening causes and fixes
Slippage or gradual loosening of a pipe clamp undermines joint integrity and can stem from several predictable causes: insufficient tightening torque, worn or damaged mating surfaces, incorrect clamp size, vibration-induced loosening, or contamination between the clamp and pipe.
Remedies include correct torque to manufacturer specs, replacing damaged clamps or pipe sections, selecting proper clamp diameter and style, adding anti-vibration lock washers, and cleaning contact surfaces.
Hose damage from overtightening and repair options
Overtightening a hose clamp can pinch or cut the hose material, causing cracks, flattened sections, or weakened reinforcement that lead to leaks or sudden failure under pressure.
Inspect damaged areas, trim away frayed ends if short, or replace the hose for compromised structural integrity.
Use correctly sized clamps, torque to manufacturer specs, and consider protective sleeves or rubber inserts to prevent recurrence.
Corrosion and environmental degradation solutions
Addressing corrosion and environmental degradation requires identifying the specific attack mechanisms—such as galvanic corrosion, pitting from salt exposure, UV degradation of polymers, or chemical etching—and selecting targeted remedies like material upgrades, protective coatings, or sacrificial anodes.
Regular inspections, compatible fastener selection, dielectric isolation, UV-stable hose materials, corrosion inhibitors, and localized coatings extend service life.
Documented maintenance schedules and environmental controls minimize recurrence.
Replacing clamps without disturbing the system
After reducing corrosion risks and stabilizing environmental factors, technicians often face the need to replace a pipe clamp while keeping the system pressurized and operational.
They isolate the immediate section with temporary seals or inflatable bladders, relieve minimal local pressure, cut and remove the old clamp, fit the replacement, and verify integrity using pressure checks and leak detection.
Restoring flow only after confirming a secure, leak-free connection.
Safety and Code Considerations
Before beginning work, the installer should verify applicable plumbing and building code requirements to guarantee clamp selection and placement meet local regulations.
Appropriate personal protective equipment and safe work practices are recommended to prevent injury during cutting, fitting, or tightening.
If the job involves structural supports, pressurized systems beyond basic repairs, or uncertain code interpretation, a licensed professional should be contacted.
Plumbing and building code requirements to check
When installing a pipe clamp, the installer must verify applicable plumbing and building codes to guarantee proper material selection, spacing, and methods for support and attachment.
These regulations dictate clamp types for different pipe materials, maximum unsupported spans, seismic or vibration requirements, and any firestopping or penetration treatments where clamps pass through walls or floors.
Additionally, confirm local amendments, required fastener ratings, manufacturer instructions, and inspection points.
Safe working practices and PPE
Having confirmed code requirements and material specifications, attention must shift to safe working practices and personal protective equipment to prevent injury and guarantee compliant installations.
Workers should wear gloves, eye protection, and hearing protection when cutting or tightening.
Use insulated tools for electrical proximity, secure ladders and supports, ventilate confined spaces, and follow lockout/tagout.
Inspect PPE and clamps before use; discard damaged items.
When to call a professional
Many situations warrant calling a licensed professional, especially if the installation affects structural integrity, fire protection systems, or electrical components governed by code.
A professional guarantees compliance, obtains permits, and performs pressure testing or welding when required.
Call for complex pipe routing, gas lines, large-diameter mains, concealed leaks, or repeated failures.
Prioritize inspections after modifications to avoid liability, safety hazards, or insurance denial.
Comparison of Popular Clamp Types
A concise comparison of common clamp types highlights their distinct mechanisms and typical uses: worm‑drive for adjustable sealing, Oetiker for permanent crimped joints, spring clamps for quick tensioning, and U‑bolts for pipe support.
The assessment then matches each clamp to suitable scenarios—household plumbing, automotive hoses, and industrial piping—based on strength, reusability, and corrosion resistance.
Practical selection criteria such as ease of installation, required service life, and operating conditions determine the best choice.
Worm-drive vs. Oetiker vs. spring vs. U-bolt
Selecting the right clamp depends on the application’s pressure, vibration, access, and material compatibility: worm-drive clamps offer adjustable, reusable fastening with moderate sealing; Oetiker ear clamps provide a tamper-resistant, uniform seal for permanent connections; spring clamps compensate for thermal cycling and are quick to install; U-bolts secure hoses or pipes to fittings and structural members where clamping force is applied around a fixed post.
| Type | Strength |
|---|---|
| Worm-drive | Adjustable, reusable |
| Oetiker | Permanent, uniform |
Best clamp for common scenarios (household plumbing, automotive, industrial)
Practical choices hinge on application-specific demands—household plumbing favors corrosion-resistant, adjustable clamps like stainless-steel worm-drive for ease of reuse and leak control; automotive systems often require spring or Oetiker ear clamps to maintain tension under thermal cycling and vibration.
Industrial environments may call for heavy-duty U-bolts, high-strength worm-drive, or bolted band clamps where pressure, safety factors, and material compatibility are critical.
- Household: stainless worm-drive
- Automotive: spring or Oetiker
- Industrial: U-bolt or bolted band
- Specialty: chemical-resistant or high-temperature alloys
Maintenance Tips to Extend Clamp Life
Routine inspections and a re-torquing schedule help guarantee clamps remain secure and perform to specification.
Regular cleaning, application of anti-seize, and corrosion protection prolong component life and prevent binding.
Clear signs such as thread wear, cracked bands, or persistent leakage indicate it is time to replace clamps.
Routine inspections and re-torquing schedule
Reliability depends on regular checks: scheduled inspections and a clear re-torquing plan prevent loosening, corrosion, and uneven load distribution in pipe clamps.
Inspect monthly initially, then quarterly if stable. Record torque values, compare to manufacturer specs, and re-torque after thermal cycles or vibration events.
Replace fasteners showing wear. Maintain inspection logs and set alerts to guarantee timely follow-up and consistent clamp performance.
Cleaning, anti-seize, and corrosion protection methods
Maintain clamps with regular cleaning, targeted anti-seize application, and appropriate corrosion protection to extend service life and preserve joint integrity.
Remove debris and oxide with mild detergent and soft brush; avoid harsh abrasives.
Apply anti-seize to threads and contact surfaces sparingly to prevent galling.
Use compatible coatings or sacrificial anodes for harsh environments and periodic touch-ups to maintain barrier integrity.
Signs it’s time to replace clamps
A visual and functional inspection can reveal when a clamp has reached the end of its useful life.
Look for visible corrosion, cracks, deformed bands, stripped or rounded screw heads, and loss of tension.
Leaks, slipping hoses, or frequent retightening indicate failure.
Replace clamps showing these signs promptly to prevent leaks, system damage, or safety hazards and maintain reliable connections.
Quick Reference: Choosing and Installing the Right Clamp
A concise cheat-sheet for selecting clamp size and type is provided to match pipe diameter and service conditions.
An accompanying quick chart lists recommended installation torque values and ideal placement points to guarantee secure, leak-free connections.
These references allow technicians to choose and fit clamps accurately and efficiently.
Size selection cheat-sheet
Confidence in clamp choice starts with matching clamp size to pipe diameter and application load. A concise cheat-sheet guides selection by fit, material, and pressure rating.
- Measure outer diameter; pick clamp range slightly above.
- Match clamp material to environment (stainless for corrosion).
- Verify working pressure and hose compatibility.
- Allow minimal gap for squeeze and thermal expansion.
Installation torque and placement quick chart
When determining clamp torque and placement, technicians should follow published torque values and position clamps where they compress the hose uniformly without pinching or leaving gaps. Reference chart lists common hose types, recommended torque, and preferred placement. Follow manufacturer specs, recheck after pressurization, and avoid overtightening.
| Hose Type | Torque (Nm) |
|---|---|
| Rubber | 5–7 |
| PVC | 4–6 |
| Braided | 6–9 |
| Silicone | 3–5 |
Conclusion
Pipe clamps provide reliable sealing and support across many plumbing and hose applications. Studies show that improper clamp installation causes up to 30% of hose leaks in industrial settings, underscoring the importance of correct clamp selection and tightening. By choosing the proper type, following step-by-step installation procedures, and observing safety and code requirements, users can minimize failures, extend clamp life, and guarantee consistent, leak-free connections in both residential and commercial systems.