How to Fix a Peeling Tub: Step-by-Step Repair Guide for Lasting Results
Fixing a Peeling Tub: Quick Guide
If your tub’s finish is peeling, you can often repair it effectively. Start by inspecting for any bubbles, chips, or rust. Remove any loose coating and thoroughly clean and dry the surface. Next, sand the area and feather the edges to create a smooth transition. Fill any chips with epoxy or marine filler, then apply a bonding primer. Finally, touch up the area with suitable paint and finish with a protective clear coat. Allow it to cure completely, then polish for a seamless blend. For detailed steps, material options, and troubleshooting tips, refer to our comprehensive guide.
What Causes Bathtub or Tub Finish to Peel
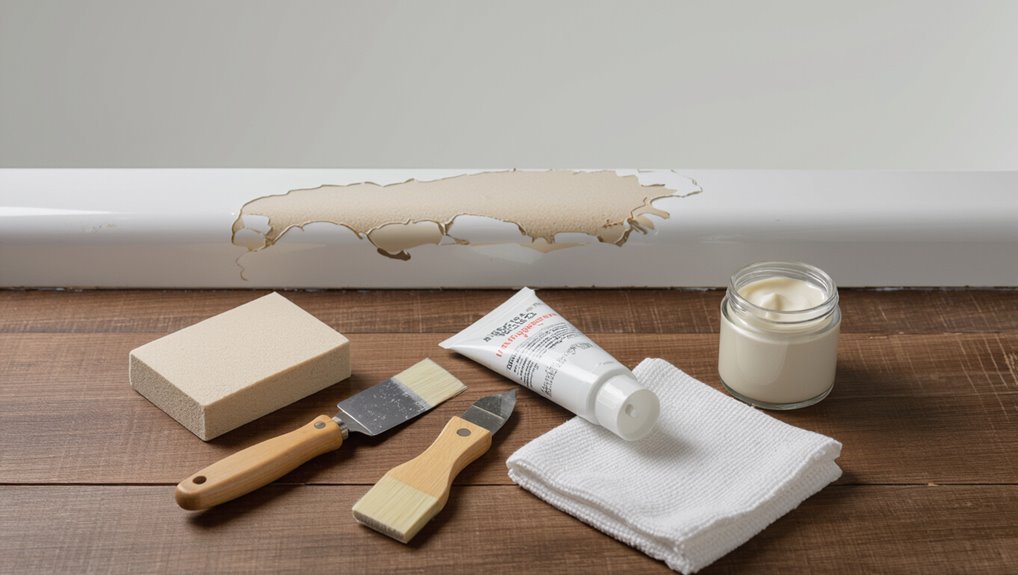
Bathtub finishes—porcelain, enamel, acrylic, and fiberglass—each have characteristic failure modes that lead to peeling.
Typical causes include age-related wear, improper refinishing, harsh chemicals, and prolonged moisture exposure.
Inspecting the finish for cracking, flaking patterns, discoloration, and substrate exposure helps determine the source and severity of the damage.
Common materials and finishes that peel (porcelain, enamel, acrylic, fiberglass)
A variety of tub surfaces—porcelain enamel, acrylic, fiberglass, and older cast-iron coatings—each have distinct vulnerabilities that lead to peeling: porcelain enamel chips and exposes metal, enamel coatings blister, acrylic scratches and may delaminate, and fiberglass gelcoat weathers and cracks.
Understanding material-specific issues helps determine how to fix peeling tub surfaces, select compatible repair products, and choose appropriate refinishing or patch methods.
Typical reasons for peeling (age, improper refinishing, chemical damage, moisture)
Having identified how different materials respond to wear and damage, it becomes clearer why finishes begin to peel.
Ageed coatings develop microcracks and lose adhesion. Poor or rushed refinishing leaves weak bonds and trapped contaminants.
Harsh cleaners or solvents chemically break down surfaces. Chronic moisture, leaking joints, or inadequate ventilation promotes substrate swelling and undermines coatings, accelerating delamination.
How to identify the source and extent of peeling
Frequently, peeling originates from a few identifiable sources that leave distinct clues: discoloration, bubbling, or flaking near seams suggests water infiltration; uniform dulling indicates age or UV/chemical wear; sharp-edged chips reveal impact or improper curing.
Inspect surrounding caulk, fixtures, and drain for leaks.
Probe edges gently to measure adhesion loss and map affected area before choosing repair or full refinishing.
Can a Peeling Tub Be Repaired vs. Replaced
A peeling tub can sometimes be repaired when the damage is limited to surface flaking and the underlying structure remains sound.
Full replacement or professional reglazing is recommended for extensive peeling, cracks, or when long-term durability and appearance are priorities.
The choice often comes down to a cost-and-time comparison: repairs are cheaper and quicker but shorter-lived, while replacement or reglazing requires more investment and time but yields a more durable finish.
When repair is a viable option
Several factors determine whether a peeling tub can be repaired rather than replaced.
Repair is viable when peeling is localized, substrate (porcelain, enamel, or acrylic) is intact, structural damage is absent, and adhesives or touch-up materials bond well.
Small chips, surface flaking, or worn finish confined to accessible areas suit repair.
Cost, expected longevity, and planned use also influence the decision.
When full replacement or reglazing is recommended
Decision-making hinges on the extent of damage and long-term goals: full replacement or professional reglazing is recommended when peeling is widespread, the substrate is compromised, or previous DIY fixes have failed.
Replacement suits structural cracks, persistent rust, or recurring delamination.
Reglazing fits otherwise-sound tubs with extensive surface failure that require a durable, factory-like finish.
Professional assessment guarantees appropriate selection and warranty considerations.
Cost and time comparison
While repair and replacement can both restore a peeling tub, the choice often comes down to relative cost, time, and the extent of surface versus structural damage. Repairs (spot fixes or reglazing) are cheaper and faster but shorter-lived; replacement is costlier, longer, and permanent. Consider budget, timeline, and underlying integrity when deciding.
| Option | Cost | Time |
|---|---|---|
| Repair | Low–Moderate | 1–3 days |
| Reglaze | Moderate | 1–2 days |
| Replace | High | 2–7 days |
Tools, Materials, and Safety Preparations
Before beginning repairs, the appropriate tools should be identified, including sanding blocks, scrapers, brushes, and mixing equipment.
Recommended materials and finishes—such as bonding primers, epoxy or acrylic repair compounds, and topcoats—must be selected to match the tub surface.
Proper safety gear (gloves, respirator, eye protection) and adequate ventilation are required to protect against dust and chemical fumes.
Essential tools checklist
A concise kit of tools, materials, and safety gear is necessary to repair a peeling tub effectively and safely.
The technician should prepare items that enable surface prep, bonding, and cleanup while protecting health.
- Sandpaper assortment, scrapers, and abrasive pads
- Cleaners, degreasers, and tack cloths
- Masking tape, disposable mixing cups, and applicators
- Respirator, gloves, and safety glasses
Recommended repair materials and finishes
With the tool kit assembled, attention turns to selecting repair materials and finishes that will bond well to the tub substrate and restore a durable, attractive surface.
Recommended selections emphasize adhesion, compatibility, and finish durability:
- Epoxy tub repair kit (two-part, sandable)
- Acrylic filler for small gouges
- Bonding primer formulated for fiberglass/porcelain
- High-build tub refinishing enamel
Safety gear and ventilation requirements
Two layers of protection — respiratory and skin — are essential when prepping and refinishing a tub: a properly fitted NIOSH-approved respirator with organic-vapor cartridges, chemical-resistant gloves (nitrile or neoprene), and eye protection must be worn to guard against solvent fumes, dust from sanding, and reactive resins.
Maintain continuous ventilation with exhaust fans or window vents, use drop cloths, and avoid ignition sources; monitor air quality.
How to Prepare a Peeling Tub for Repair
The tub should be inspected and photographed to document the extent of peeling, chips, rust, and cracks before work begins.
Thorough cleaning with appropriate cleaners removes soap scum, oils, and mildew that would interfere with adhesion.
Any loose or flaking finish must be gently removed and underlying substrate damage repaired or stabilized prior to refinishing.
Inspecting and documenting the damage
Before any repair begins, a thorough inspection must establish the extent and causes of the peeling by noting affected areas, surface texture (flaking, bubbling, or smooth lifting), and any underlying rust, cracks, or loose enamel.
The inspector records measurements, photographs, and locations of failed coating, assesses adhesion around edges, and notes previous repairs or hardware that may influence preparation and materials selection.
Cleaning to remove soap scum, oils, and mildew
Having documented the damaged areas and noted adhesion issues, the inspector proceeds to remove surface contaminants that will prevent a lasting repair.
Gloves and eye protection are worn. A nonabrasive cleaner and diluted bleach solution address soap scum, body oils, and mildew; soft brushes and microfiber cloths lift residue.
Rinse thoroughly, dry completely, and allow ventilation before proceeding to subsequent preparation steps.
Removing loose or flaking finish safely
Begin by wearing gloves, eye protection, and a dust mask. Then use gentle tools to lift any loose or flaking finish without gouging the underlying surface.
Scrape lightly with a plastic or wooden scraper, collect debris, and vacuum residues with a HEPA-equipped vacuum.
Sand feathered edges with fine-grit paper to smooth edges, wiping surfaces with a tack cloth to remove dust before proceeding to priming or refinishing.
Repairing underlying substrate damage (chips, rust, cracks)
Assess the substrate carefully to identify chips, rust, and cracks that compromise adhesion and waterproofing.
Remove rust to bare metal, sand edges of chips, and clean debris.
Fill holes and cracks with appropriate epoxy or marine-grade filler, feathering to match contours.
Prime repaired areas with rust-inhibiting primer.
Allow full cure before sanding smooth and proceeding with finish application.
Step-by-Step Repair Process for Small to Moderate Peeling (DIY)
The repair process begins with sanding and feathering the damaged edges to create a smooth shift before filling any chips or cracks with a suitable tub filler.
Once repaired areas are shaped and dry, a compatible primer is applied, followed by touch-up paint or the coatings included in a repair kit.
After specified curing times, a clear topcoat is applied when recommended to seal and protect the finish.
Sanding and feathering edges for a smooth transition
Carefully sanding and feathering the damaged area creates a seamless shift between the intact finish and exposed substrate, which is essential for a durable, visually pleasing repair.
Use progressively finer grit sandpaper, keep strokes light and even, and blend edges until no abrupt ridges remain.
Remove dust, inspect for uniformity, and guarantee the surface is ready for primer and subsequent coatings.
Filling chips and cracks with appropriate filler
With the surface feathered and dust-free, attention moves to filling chips and cracks so the repaired area will be level and durable.
Use a two-part epoxy or acrylic filler formulated for tubs, applied in thin layers with a plastic spreader.
Press filler into voids, overfill slightly, allow full cure per manufacturer instructions, then sand smooth to matching contour before priming.
Priming the repaired areas
Begin by ensuring all filled areas and surrounding surfaces are clean, dry, and free of dust or oils so primer will bond uniformly.
Apply a thin, even coat of a bonding primer formulated for tubs, feathering into surrounding glaze.
Allow recommended cure time between coats.
Lightly sand with fine-grit paper after drying if needed, then remove dust before proceeding to the coating stage.
Applying touch-up paint or repair kit coatings
Mix and apply the touch-up paint or repair kit coating following the manufacturer’s instructions, matching viscosity and color before beginning.
Using a small brush or sponge, lay thin, even layers over primed areas, feathering edges to blend with surrounding finish.
Avoid overworking; allow brief tack between passes per directions.
Inspect for uniform coverage and correct minor runs immediately with a damp applicator.
Curing times and when to apply a clear topcoat
How long should the repair sit before a topcoat is added?
The repaired area should cure fully per manufacturer instructions—commonly 24–72 hours at room temperature.
Confirm no tackiness, dust, or moisture. For low temperatures or high humidity allow extra time.
Apply the clear topcoat only after full cure to promote adhesion and durability; cure times may vary with product chemistry and layer thickness.
Final sanding and polishing for a uniform finish
Once the repaired area has fully cured, proceed with final sanding and polishing to blend the repair into the surrounding surface and restore a uniform sheen.
Use progressively finer grits (400→800→1200), keep the surface wet, and feather edges until invisible.
Remove residue, dry thoroughly, then apply a mild polish or rubbing compound.
Inspect under varied light and repeat lightly if needed for seamless results.
Reglazing or Refinishing Larger Peeling Areas (Professional-Level Steps)
For larger peeling areas, professionals must decide between fully stripping the old finish or performing targeted spot repairs to guarantee a stable base.
The surface is then etched and primed to promote adhesion before application of a professional-grade acrylic or epoxy coating, typically sprayed or rolled for an even film.
Finally, controlled curing and thorough quality checks confirm bond integrity, uniform coverage, and a durable finish.
Stripping old finish vs. spot repair
Deciding between stripping the old finish and performing spot repairs hinges on the extent of peeling, underlying damage, and the desired longevity of the repair:
Full stripping and refinishing suits widespread, delaminated surfaces or structural substrate issues, offering uniform results.
Spot repair fits isolated chips or blisters where substrate is sound, enabling faster, lower-cost restoration but with potentially visible changes and shorter lifespan.
Etching and priming for better adhesion
Begin by mechanically abrading the tub surface to remove failed coatings and create a uniformly roughened profile that promotes bonding.
Apply a compatible acid or alkaline etchant per manufacturer instructions, rinse thoroughly, and allow to dry.
Select a high-adhesion primer formulated for the substrate and environmental conditions; apply evenly, inspect for pinholes, and cure fully before any topcoat or further refinishing steps.
Spraying or rolling professional acrylic/epoxy coatings
With the substrate properly abraded, etched, and primed, the refinishing process moves to applying professional-grade acrylic or epoxy coatings using spray equipment or rollers.
Technicians select nozzle size, pressure, and technique for even wet film thickness. Multiple thin passes prevent runs; edges and contours receive careful attention.
Overlap patterns guarantee uniform coverage while avoiding excessive buildup that causes sagging or orange peel.
Post-application curing and quality checks
Allow adequate controlled curing time after application to guarantee the acrylic or epoxy system achieves its specified hardness and adhesion before any handling or reassembly.
During cure, maintain recommended temperature, humidity, and ventilation; avoid contamination and contact.
After full cure, perform visual inspection, adhesion tape test, and hardness measurement.
Address defects immediately: sand, recoat, or strip if adhesion or finish quality fails to meet specifications.
Repair Options by Tub Material
Repair approaches vary by tub material, so matching techniques to the surface is essential.
Porcelain and enamel require different fillers and sanding than acrylic, while fiberglass often needs patch kits and resin work.
Cast iron demands attention to rust prevention and durable coatings or professional refinishing.
Porcelain and enamel-specific techniques
Porcelain and enamel surfaces require targeted approaches because their glaze composition and bond to the metal or cast-iron base respond differently than acrylic or fiberglass.
Repair focuses on stabilizing rust, removing loose glaze, and using high-temperature, ceramic-compatible primers and enamels.
Small chips are filled with enamel repair paste; larger damage may need professional refinishing or porcelain enamel kits that fuse to the original surface for durable restoration.
Acrylic tub repair methods
Acrylic tubs, made from thermoplastic sheets or cast acrylic, require different repair techniques than porcelain or fiberglass because they flex, are prone to surface scratching, and bond differently to fillers and coatings.
Repair focuses on cleaning, sanding with fine grit, using acrylic-compatible fillers or polyester putty, and applying flexible, UV-resistant touch-up paint or lacquer.
Adhesion promoters and gentle curing guarantee durable, low-stress patches.
Fiberglass repair steps
Begin by evaluating the damage: fiberglass tubs typically suffer chips, cracks, or gelcoat crazing, each requiring a specific approach.
Clean and sand the area, remove loose material, and apply a polyester or epoxy filler for structural cracks.
Feather the edges, sand smooth, and apply matching gelcoat or tub refinishing paint in thin layers.
Cure, sand, and polish for a seamless finish.
Cast iron considerations
While cast iron tubs are durable, their enamel finish chips and rust differently than lighter materials. Repairs focus on removing corrosion, stabilizing exposed metal, and restoring the enamel surface.
Assessment includes checking for deep rust, pitting, and structural cracks. Use wire brushing, rust converter, filler for pits, and high-build epoxy primer plus enamel topcoat formulated for cast iron to guarantee adhesion and longevity.
Troubleshooting Common Problems During Repair
Common repair efforts can encounter issues such as blistering or bubbles forming after a new coating and poor adhesion that leads to peeling recurrence.
Attention must also be given to uneven color or texture and techniques for blending patched areas to match the original finish.
Finally, odor levels and incomplete curing can signal problems with surface preparation, materials, or ventilation.
Blistering or bubbles after coating
Blisters or bubbles that appear after applying a tub coating indicate trapped moisture or solvent vapors releasing through the finish, improper surface preparation, or insufficient curing conditions.
To address them, remove affected coating, dry and dehumidify the area, abrade to sound substrate, clean thoroughly, and allow proper ventilation and temperature during recoat.
Use slow-evaporating primers and follow manufacturer cure times precisely.
Poor adhesion or peeling recurrence
Persistence of peeling after a repair signals incomplete adhesion between the coating and the tub surface, often caused by residual contaminants, inadequate surface profiling, incompatible products, or rushed cure times.
To resolve recurrence, remove failed coating, clean with solvent and etch if needed, abrade to proper profile, verify product compatibility, follow manufacturer’s mixing and cure instructions, and allow full cure before use.
Uneven color or texture and how to blend
When a repaired area shows a noticeable mismatch in color or surface texture, the result is usually improper blending rather than a structural failure.
To correct this, feather edges with fine sandpaper, clean thoroughly, and apply thin, even layers of matching reglaze or paint.
Test color on a discrete spot, adjust tint incrementally, and finish with progressive polishing for uniform sheen and feel.
Odor and curing issues
After smoothing and matching surface appearance, attention should turn to odor and curing problems that can undermine both comfort and coating performance.
Strong solvent smells signal inadequate ventilation or excessive coating thickness; increase airflow and allow extended dry times.
Persistent odors after cure may indicate trapped solvents or improper product selection; remove residue, guarantee full cure at recommended temperature, or replace with low‑VOC alternatives.
Maintenance to Prevent Future Peeling
Routine use of mild, nonabrasive cleaners and soft cloths helps preserve the tub’s finish and prevent future peeling.
Owners should avoid abrasive pads, harsh chemicals like bleach-based strippers, and acidic cleaners that can weaken coatings.
Regular inspections and scheduling professional touch-ups or reglazing at the first sign of wear will extend the tub’s lifespan.
Cleaning products and routines to protect finish
Protecting a tub’s finish begins with selecting gentle cleaners and establishing simple habits that avoid abrasion and chemical damage.
Use mild, pH-neutral cleaners and soft cloths; rinse thoroughly after use; spot-clean spills promptly; and dry surfaces to prevent mineral buildup.
Regular, light cleaning preserves coatings and reduces need for repairs.
- Mild pH-neutral cleaner
- Soft microfiber cloths
- Prompt spot cleaning
- Thorough rinsing and drying
Avoiding abrasive tools and harmful chemicals
Moving from gentle cleaners and drying habits, attention must turn to the tools and chemicals that contact the tub: abrasive pads, stiff brushes, and strong acids or bleaches can scrape or chemically attack coatings, leading to peeling over time.
Use soft cloths, nonabrasive sponges, and pH-neutral cleaners. Rinse thoroughly after use, avoid DIY solvent mixtures, and store products safely to prevent accidental damage.
When to schedule professional inspection or reglazing
When should a homeowner call a professional to inspect or reglaze a tub?
A professional inspection is advised when peeling is extensive, underlying cracks or rust are suspected, DIY repairs repeatedly fail, or odors/mold persist.
Reglazing is recommended if surface damage covers large areas or the finish is uneven.
Schedule a pro to guarantee proper surface preparation, lasting adhesion, and warranty-backed results.
When to Hire a Professional and What to Expect
When DIY fixes are insufficient, homeowners should learn how to find and vet tub refinishers or contractors by checking licenses, references, and before-and-after photos.
They should also compare typical warranties, timelines, and costs to set realistic expectations. A short checklist of questions to ask—about surface preparation, products used, cure time, and cleanup—helps guarantee a clear hiring decision.
Finding and vetting refinishers or contractors
How can a homeowner tell whether a DIY repair is sufficient or a pro is required?
Assess scope, underlying damage, and skill required. Seek licensed refinishers with tub-specific experience, insurance, and local references.
Verify portfolios, read reviews, and request detailed quotes outlining surface prep, materials, and ventilation measures.
Ask about cleanup, timelines, and post-job inspection. Trust clear communication and documented guarantees.
Typical warranties, timelines, and costs
If the damage is limited to surface peeling and the homeowner lacks time for extended drying cycles, a DIY patch can be economical, but most full refinishes warrant hiring a pro because of their longer warranties, controlled curing, and quality assurance. Professionals typically offer 1–10 year warranties; jobs take 1–3 days; costs range $300–$1,200 depending on scope and materials.
| Item | Typical Range |
|---|---|
| Warranty | 1–10 years |
| Timeline | 1–3 days |
| Cost | $300–$1,200 |
| Notes | Material, prep, and labor affect price |
Questions to ask before hiring
Why hire a pro instead of attempting a DIY fix? A homeowner should ask about license, insurance, references, and experience with tub refinishing.
Inquire about materials, prep and cure times, warranty specifics, total cost breakdown, and cleanup.
Request a written estimate, timeline, and inspection policy for hidden damage.
Confirm liability coverage and post-service support before hiring.
Estimated Cost Breakdown and Timeframe
An overview compares typical DIY repair costs and timeframes—basic patch kits and sanding often require a few hours to a day and minimal material expense.
Professional repair and reglazing carry wider price ranges, commonly from a couple hundred to over a thousand dollars and often require one to several days including curing.
Consideration of long-term value and expected lifespan after repair helps decide whether a quick fix or a professional refinishing is more economical.
DIY repair cost and time estimates
When budgeting a DIY tub repair, homeowners should expect costs and timelines to vary with the extent of peeling, chosen materials, and skill level.
Typical DIY expenses include sandpaper, cleaners, epoxy or refinishing kits, brushes, respirators, and masking supplies, usually $30–$150.
Small patch jobs take a few hours; full refinishes require 1–3 days including curing.
Labor is homeowner time.
Professional repair and reglazing price ranges
Although costs vary by region and the tub’s condition, professional repair and reglazing typically range from modest patch jobs under $200 to full refinishes between $300 and $900, with high-end or specialty work sometimes exceeding $1,200.
Turnaround usually spans one to three days including curing. Estimates often include surface prep, minor repairs, coatings and labor; additional structural work raises price and time.
Long-term value and lifespan after repair
Durability governs the long-term value of a repaired tub: properly executed repairs and quality reglazing can extend usable life by 5–15 years depending on materials, usage, and maintenance.
Cost amortization favors repairs when remaining lifespan exceeds replacement payback. Expect modest annualized expense for DIY touch-ups; professional reglazing reduces upkeep but raises initial cost.
Plan inspection every 1–3 years to preserve finish and prevent deterioration.
Visual Reference Guide
The article presents a visual reference guide showing common peeling patterns and each repair stage with clear photographs.
Side-by-side examples illustrate the progression from damaged surfaces to completed restorations.
Captions highlight techniques and outcomes so readers can compare their tub to successful results.
Photos of peeling types and repair stages
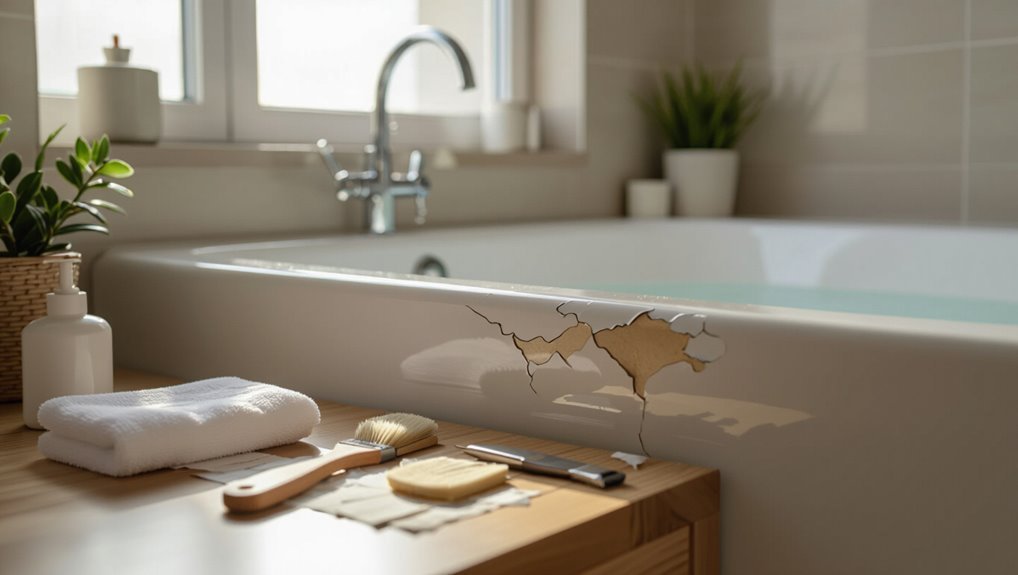
When inspecting peeling tubs, a concise visual guide helps distinguish common failure modes—such as flaking enamel, hairline crazing, blistering from moisture, and edge lift—and maps each to the typical repair stages from surface preparation through primer, fill, and topcoat.
Photos label defect type, highlight required tools and materials, show staged progression (clean, sand, prime, fill), and note inspection checkpoints before final coating.
Examples of successful repairs and finished results

Having reviewed the defect types and staged repairs, the guide now presents concrete before-and-after examples that illustrate successful outcomes.
Photographs show peeled enamel, prepped surfaces, primer application, and cured finishes. Captions note materials, cure times, and common pitfalls.
Comparative shots highlight restored gloss, uniform color, and seamless edges.
Short notes summarize durability tests and homeowner satisfaction metrics for reference.
Conclusion
In the end, the tub—once regal in its glossy armor—returns to civility: sanded, patched, and cloaked in new enamel as if nothing dramatic ever occurred. Ironically, this small domestic resurrection mirrors grander restorations: patience, a few humble tools, and careful touch undoing theatrical decay. The bathroom’s throne quietly accepts its visitors again, water gliding over a surface that looks untroubled by the brief rebellion it once staged, and life resumes, polished and ordinary.