How to Get Rid of Rust Stains in Tub Fast: Proven DIY Methods That Work
To quickly remove rust stains from your tub, use safe DIY methods tailored to the surface. Start by protecting your hands and ensuring good ventilation. For light stains, a paste made from baking soda or a combination of white vinegar and baking soda works well. For tougher stains, try a mixture of lemon juice and salt or a paste of cream of tartar and hydrogen peroxide. Use non-scratch pads with gentle pressure to avoid damage. While strong commercial rust removers are effective, they require careful handling. Keep reading for additional tips on materials and prevention.
How to Remove Rust Stains from a Bathtub Quickly and Safely
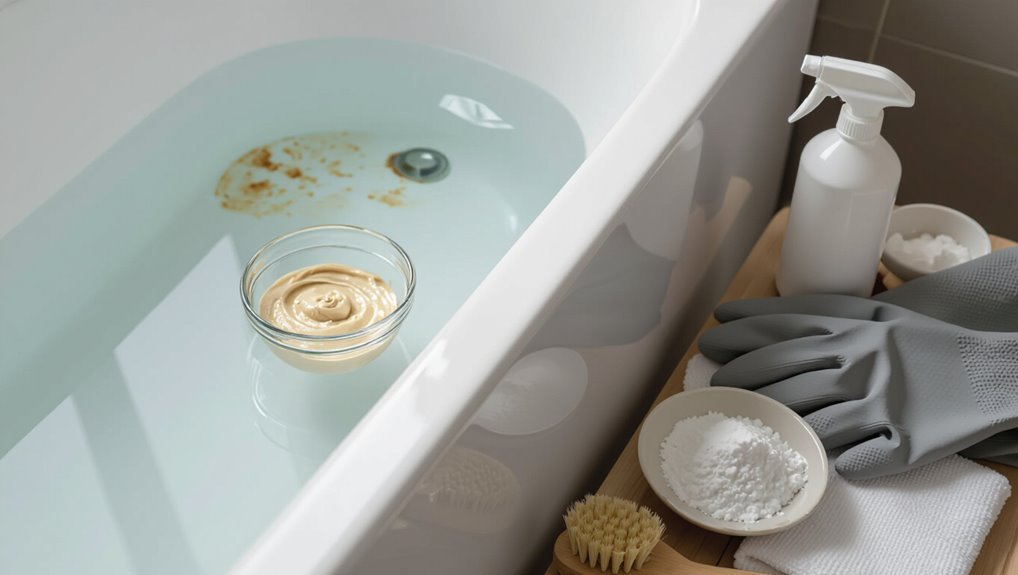
A simple, fast remedy—such as applying a paste of baking soda and vinegar or a commercial rust remover—can often lift fresh stains without scrubbing hard.
If stains persist after a careful, manufacturer‑safe treatment or if the tub surface shows damage, escalation to a stronger chemical or abrasive should be avoided.
In those cases, or when corrosion is extensive, contacting a professional refinisher or plumber is the recommended next step.
Quick, effective solution to try first
Start by applying a simple, household remedy that is fast and safe for most tub surfaces: a paste of baking soda and white vinegar.
Spread over rust stains, let sit 10–15 minutes, scrub with a soft brush, then rinse.
Repeat once if needed.
This method addresses how to get rid of rust stains in tub quickly, minimizing surface damage and chemical exposure.
When to call a professional
When should a professional be contacted to address bathtub rust stains?
A professional is advised when stains persist after safe DIY attempts, if damage penetrates the tub surface, or if chemical treatments risk harming plumbing, finishes, or health.
Call a pro for extensive corrosion, enamel flaking, unclear stain sources, or when rust recurs despite remedial efforts to guarantee proper repair and prevention.
What Causes Rust Stains in Tubs
Rust stains in tubs typically originate from corroding metal sources such as old pipes, faucet fixtures, or iron-rich water supplies.
Elevated iron content in the water and acidic or hard water conditions promote oxidation, making stains form more quickly.
Surface damage to the tub finish—scratches, chips, or worn protective coatings—allows rust particles to adhere and intensifies visible staining.
Common sources of rust (pipes, fixtures, water supply)
Several common sources contribute to rust stains in tubs: corroding iron pipes, aging fixtures, and iron-rich water supplies.
Corrosion flakes from old galvanized or cast-iron plumbing settle on tub surfaces. Leaky, rusting taps and drains drip iron-laden particulates.
Well water or municipal supplies with high dissolved iron deposit reddish-brown stains when oxidized.
Regular monitoring and targeted repairs reduce recurrence.
How water chemistry and surface damage accelerate staining
Beyond the physical sources of iron, the chemical makeup of water and the condition of the tub surface determine how quickly stains form and how firmly they adhere.
Hard water minerals, low pH and dissolved oxygen promote iron oxidation and deposits.
Porous, scratched or worn finishes trap oxidized particles, resisting cleaning.
Preventive maintenance and water treatment reduce staining frequency and severity.
Preparing Your Tub for Rust Removal
Before starting rust removal, gather necessary tools and materials such as gloves, eye protection, scrubbing pads, and the chosen cleaner.
Confirm proper ventilation and follow safety precautions to avoid inhaling fumes or irritating skin.
Test the cleaner on a small, inconspicuous area to verify it does not damage the tub finish before treating the full stain.
Tools and materials you’ll need
A few basic tools and common household materials are sufficient to tackle most tub rust stains: gloves, eye protection, a non-abrasive scrub brush or sponge, white vinegar, baking soda, a commercial rust remover (phosphoric- or oxalic-acid based) for stubborn stains, plastic scraper, and clean rags or paper towels.
- Gather cleaners: vinegar, baking soda, rust remover.
- Collect tools: scrub brush, scraper, rags.
- Wear protection: gloves, eye protection.
Safety precautions and ventilation
Safety matters when removing rust from a tub: protective gloves and eye protection should be worn to prevent chemical or particulate exposure, and long sleeves are advisable to protect skin.
Work in a well-ventilated area, opening windows and using fans to disperse fumes. Avoid inhaling dust or spray; consider a respirator for strong cleaners.
Keep children and pets away.
Testing a small area before full treatment
One clear step before treating the whole surface is to test a small, inconspicuous patch to guarantee the chosen cleaner and method won’t damage the tub’s finish.
Select a hidden corner, apply the cleaner per instructions, wait the recommended dwell time, then rinse and dry.
Inspect for discoloration, etching, or softening. If unchanged, proceed; if harmed, stop and try an alternative.
Proven DIY Methods That Work
The article outlines five proven DIY approaches for removing tub rust stains, ranging from mild household remedies to stronger commercial products.
For light discoloration, white vinegar with baking soda or lemon juice with salt can lift stains.
Meanwhile, cream of tartar combined with hydrogen peroxide targets more stubborn spots.
When those fail, oxalic- or hydrochloric-acid rust removers and careful use of abrasive pads for enameled tubs provide effective alternatives.
Method 1 White vinegar and baking soda (for light stains)
For light rust stains, the recommended materials are plain white vinegar and baking soda mixed in roughly a 1:1 paste or used sequentially with vinegar applied first.
The method outlines applying the paste or vinegar, allowing it to sit for a short period, gentle scrubbing, and thorough rinsing.
Expected results typically show stain lightening within 15–30 minutes, with complete removal after repeating the process once or twice if needed.
Materials and ratio
A simple kit of household items and exact proportions guarantees consistent results: distilled white vinegar, baking soda (sodium bicarbonate), a spray bottle, a non-abrasive sponge or soft brush, and a small bowl for mixing.
Use a 1:1 ratio by volume when making a paste (1 tablespoon vinegar to 1 tablespoon baking soda) for light stains; keep extra vinegar undiluted in the spray bottle.
Step-by-step application
Several simple steps guide the vinegar-and-baking-soda treatment for light rust: dampen the stain, sprinkle baking soda to form a thin paste, then pour or spray white vinegar slowly to fizz.
Allow the reaction to work for several minutes, scrub gently with a soft brush or nonabrasive pad, rinse thoroughly, and dry the area.
Repeat once if residue persists.
Expected results and timing
Most light surface rust should noticeably fade after a single vinegar-and-baking-soda treatment, with stains becoming paler or breaking into smaller specks that lift during scrubbing.
Full removal often requires one to three applications spaced 15–30 minutes apart. Heavier or porous stains may need repeated cycles over several days; results depend on rust age, metal source, and surface porosity.
Method 2 Lemon juice and salt (natural acid method)
The lemon juice and salt method uses common kitchen ingredients—fresh lemon juice mixed with enough salt to form a paste—to target rust stains.
Instructions cover applying the paste, letting it sit, scrubbing, and rinsing, with attention to protective steps for delicate finishes.
This approach is most effective on fresh or light surface rust and on porcelain or enamel tubs rather than deep, pitted corrosion.
Materials and ratio
For the lemon-and-salt method, gather fresh lemons (or bottled lemon juice), fine table salt, and a small bowl or spoon for mixing; a clean cloth or soft scrub brush and gloves are also recommended.
Use about one tablespoon of salt per two tablespoons of lemon juice (paste consistency). Prepare enough to cover the stain; have paper towels and a rinse container nearby.
Step-by-step application
Start by rinsing the stained area with warm water and drying it so the lemon-salt paste will adhere; then put on gloves to protect skin.
Apply paste, covering the rust completely. Let sit 30–60 minutes, checking periodically.
Scrub gently with a soft brush or cloth until rust lifts. Rinse thoroughly and repeat if residue remains.
Dry the surface to finish.
When this works best
After completing the paste application and gentle scrubbing, effectiveness is highest on fresh, surface-level rust stains caused by iron deposits or fading metal fixtures.
It works best on non-porous tub surfaces (porcelain, enamel, acrylic) and small areas.
Older, deep-set stains or pitted surfaces may require stronger commercial removers or professional refinishing.
Rinse thoroughly and repeat if traces remain.
Method 3 Commercial rust removers (oxalic or hydrochloric acid products)
Commercial rust removers containing oxalic or hydrochloric acid can be highly effective but must be matched to the tub material to prevent etching or discoloration.
Proper application includes following label directions, using protective gear, and thoroughly neutralizing and rinsing the surface afterward.
Strong chemical removers should be avoided on porous, older, or damaged finishes and when safer alternatives can achieve the same result.
Choosing the right product for your tub material
Selecting the right rust remover depends on the tub’s material and the product’s active ingredient—oxalic acid is gentler on porcelain and fiberglass, while hydrochloric acid (muriatic) is effective on heavy cast-iron or concrete surfaces but can damage enamel, acrylic, and some metals.
Choose oxalic-based formulas for delicate finishes and light stains; reserve stronger hydrochloric products for robust, chemically resistant tubs and severe corrosion.
Safe application and neutralization
With the appropriate product chosen for the tub surface, focus next on safe application and proper neutralization to protect both finish and user.
Apply remover sparingly, follow label dwell times, ventilate, and wear gloves and eye protection.
Rinse thoroughly, then neutralize acid-based residues with a baking soda solution or manufacturer-recommended neutralizer.
Dispose of runoff per local regulations and inspect the surface before reusing.
When to avoid strong chemicals
Many tubs should not be exposed to strong acid-based rust removers—especially those with porous, delicate, or chemically sensitive finishes like worn enamel, unglazed stone, natural stone, or older painted surfaces.
In such cases, strong acids risk etching, discoloration, or structural damage.
Opt for milder chelators, test a hidden area first, or consult a professional before using oxalic or hydrochloric acid products.
Method 4 Cream of tartar and hydrogen peroxide (for stubborn spots)
For stubborn rust spots, a paste of cream of tartar and hydrogen peroxide is mixed to a thick, spreadable consistency and applied directly to the stain.
The mixture should be left to sit for a specified dwell time before being rinsed away, and the area inspected for remaining discoloration.
If stains persist, the treatment can be repeated until the rust is removed.
Mixing, application, and dwell time
Combine cream of tartar and hydrogen peroxide into a paste by mixing about two tablespoons of cream of tartar with enough 3% hydrogen peroxide to achieve a spreadable, toothpaste-like consistency.
Apply directly to rust spots with a cloth, sponge, or small brush. Press gently to guarantee contact.
Allow the paste to sit for 15–30 minutes for oxidation to lift stains before proceeding further.
Rinsing and repeat treatment
Rinse the treated area thoroughly with warm water to remove all residue of the paste and loosened rust particles.
Inspect the surface for remaining discoloration and dry with a clean cloth.
Repeat the cream of tartar and hydrogen peroxide application on persistent spots, allowing adequate dwell time.
After final rinse, polish and ventilate the area to guarantee stains are fully removed and the tub is clean.
Method 5 Abrasive pads and gentle scrubbing (for enameled tubs)
Abrasive pads can remove rust from enameled tubs when chosen and used correctly.
Non-scratch or white nylon pads are generally safe, while coarse steel wool and dark-colored scouring pads can etch the finish and should be avoided.
Gentle, circular strokes with light pressure and frequent rinsing help lift stains without damaging the enamel.
Which pads are safe vs which will scratch
When choosing pads for an enameled tub, select ones labeled non-scratch or safe for porcelain to avoid surface damage.
Soft microfiber cloths, melamine sponges, and non-abrasive nylon pads remove rust gently.
Avoid steel wool, metal scouring pads, and coarse abrasive pads; they can etch enamel and expose metal beneath.
Test any new pad on an inconspicuous area first to confirm safety.
Technique to avoid damaging the finish
Apply light, controlled pressure and short back-and-forth motions to lift rust without grinding into the enamel.
The cleaner should be applied sparingly and tested in an inconspicuous spot. Rinse frequently to check progress and prevent residue buildup.
Work in small areas, replacing pads when they clog or fray.
Finish with a soft cloth and mild polish to restore shine and protect the finish.
Tailoring the Method to Tub Material
Different tub materials require distinct approaches to avoid damage while removing rust stains.
Porcelain enamel needs nonabrasive cleaners and caution with scrubbing pads.
Fiberglass and acrylic respond best to mild, nonabrasive cleaners and soft cloths.
Cast iron with enamel may tolerate stronger treatments but calls for rust-specific care to protect the finish.
The following guidance outlines best practices and warnings for each material.
Porcelain enamel tubs best practices and cautions
Porcelain enamel tubs require gentle, nonabrasive care because the glossy coating chips and scratches more easily than solid porcelain or acrylic. Abrasive powders, steel wool, and harsh alkaline cleaners can damage the finish and expose the underlying metal, which accelerates rusting.
Use mild acidic or oxygen-based stain removers, soft cloths or nonabrasive pads. Test in an inconspicuous spot, rinse thoroughly, and dry to prevent recurrence.
Fiberglass and acrylic tubs safe cleaners and tools
Many fiberglass and acrylic tubs respond best to mild, nonabrasive cleaners and soft tools that remove rust without dulling or scratching the gel coat.
Use diluted white vinegar, baking soda paste, or a gentle commercial gel-coat cleaner. Apply with microfiber cloths, soft sponges, or a nylon-bristled brush.
Rinse thoroughly and avoid bleach, steel wool, harsh acids, or abrasive pads that can etch or craze.
Cast iron tubs with enamel special considerations
While fiberglass and acrylic tubs require nonabrasive cleaners and soft tools, cast iron tubs with an enamel finish demand a different approach because the hard coating tolerates more aggressive stain removal but can chip if handled roughly.
Use vinegar, baking soda paste, or diluted oxalic acid sparingly; apply with soft cloth or nonmetal brush. Rinse thoroughly and avoid steel wool, harsh scrapers, or acidic overexposure.
Troubleshooting Common Problems
Persistent rust often signals underlying metal corrosion or water-iron sources and should be addressed with source removal and preventive coatings.
If stains resist standard treatments, escalation steps such as stronger cleaners, poultices, or professional restoration are appropriate.
When cleaning leaves scratches or dulling, appropriate polishing compounds or refinishing kits can restore the surface.
Rust that keeps coming back root causes and solutions
Repeated rust stains in a tub usually indicate an ongoing source of iron or metal corrosion rather than a one-time spill; diagnosing that source is the first step toward a lasting fix.
Common causes include rusty pipes, corroding fixtures, broken enamel exposing metal, or iron-rich water.
Solutions: repair or replace plumbing/fixtures, install a sediment filter or water softener, and seal exposed surfaces promptly.
Stains that won’t budge escalation steps
Start by acknowledging that some rust stains resist routine cleaning and require a systematic escalation to avoid surface damage or wasted effort.
Progress from milder to stronger treatments: soak with vinegar or lemon, apply a paste of baking soda, use oxalic or oxalic-acid cleaners per instructions, then a commercial rust remover if necessary.
Test hidden areas, protect finishes, rinse thoroughly between steps.
Surface scratches or dulling after cleaning restoration tips
Address surface scratches or a dulled finish promptly to prevent minor damage from becoming permanent; after aggressive rust treatments, the tub’s finish can lose luster or show fine abrasions that need careful repair.
Use nonabrasive polish or fine automotive rubbing compound, working gently with a soft cloth.
For deeper scratches, consider professional refinishing or a tub-specific repair kit to restore uniform gloss and protection.
Preventing Future Rust Stains
Preventing future rust stains begins with a regular maintenance routine that quickly removes early discoloration and checks for problem areas.
Addressing plumbing issues and replacing corroded fixtures reduces metal sources that cause staining.
Considering water treatment options such as filters or softeners can limit iron content and further protect tub surfaces.
Regular maintenance routine
A simple, consistent upkeep schedule greatly reduces the chance of rust stains forming in a tub by catching mineral buildup and metal corrosion before they become visible.
- Wipe and dry surfaces after use to prevent standing water and mineral deposits.
- Weekly clean with a mild, nonabrasive cleaner to remove early discoloration.
- Inspect caulking and drain areas monthly; remove surface rust with a gentle cleanser promptly.
Fixing plumbing issues and replacing rusty fixtures
Fix leaky valves, corroded pipes, and failing fixtures promptly to eliminate the common sources of iron-rich water that causes rust stains.
Inspect supply lines, showerheads, and faucet aerators for corrosion; replace brass or steel parts showing pitting.
Use stainless steel or chrome-plated fixtures and epoxy-coated fittings.
Tighten or replace worn seals and mounting hardware.
Schedule professional inspection for hidden pipe deterioration.
Water treatment options to reduce rust (filters, softeners)
While addressing plumbing and fixtures removes many sources of iron, treating incoming water directly reduces dissolved and particulate iron before it reaches the tub. Options include point-of-entry whole-house filters with catalytic media, sediment filters, and ion-exchange water softeners.
Professional water testing guides selection. Proper maintenance—media replacement, backwashing, resin regeneration—keeps systems effective, preventing recurring rust stains and protecting plumbing and fixtures.
Comparing DIY Solutions and Products
A brief comparison of common DIY remedies and commercial rust removers highlights differences in effectiveness, safety, cost, and best use cases. The following table sketches contrasts at a glance to guide practical choice. Recommendations will follow based on specific tub materials and stain severity.
| DIY Remedies | Commercial Products |
|---|---|
| Generally cheaper | Typically more expensive |
| Variable effectiveness | Formulated for consistency |
| Often gentler but limited | Stronger, may require precautions |
| Lower immediate cost | Higher upfront cost, less labor |
| Best for light stains and safe surfaces | Best for stubborn stains and durable finishes |
Effectiveness, safety, cost, and recommended use cases
Effectiveness, safety, cost, and recommended use cases determine which rust-removal approach is most appropriate for a given tub and user.
Mild abrasives and citric or vinegar solutions suit porcelain and light stains—low cost, low risk.
Oxalic acid or commercial rust removers remove heavy stains but require PPE and ventilation.
Mechanical methods work on durable surfaces; avoid abrasives on coated or aged tubs to prevent damage.
Aftercare and Long-Term Maintenance
After cleaning, the tub surface should be protected with a nonabrasive cleaner and periodic application of a wax or sealant recommended for the finish to minimize staining and wear.
Regular inspections for chips, persistent discoloration, or recurring rust will indicate when professional reglazing is warranted.
If damage is extensive or the finish cannot be restored, replacement of the tub may be the most durable solution.
How to protect tub finish post-cleaning
Protecting the tub finish once rust has been removed preserves the cleaning effort and prevents rapid recurrence.
Apply a non-abrasive, pH-neutral polish or wax recommended for the tub material to add a protective layer.
Rinse after each use, dry with a soft cloth, avoid metal scrubbers, and use sink strainers to catch debris.
Inspect periodically and spot-clean early to maintain the finish.
When to reglaze or replace the tub
If routine care and protective measures fail to stop staining, pitting, or coating loss, it becomes necessary to evaluate whether a reglaze or full replacement will better serve the bathroom long-term.
Reglazing suits cosmetically damaged but structurally sound tubs, extending life affordably.
Replacement is justified for deep corrosion, recurring leaks, or compromised substrate.
Consider cost, expected lifespan, and resale value when deciding.
Real-World Examples and Quick Case Notes
Several brief cases illustrate practical approaches and their outcomes for removing tub rust stains.
Each note highlights the method used and the condition of the surface afterward. Readers can compare results to choose a suitable approach.
- Vinegar and baking soda: light surface stains removed after 15 minutes of paste application and gentle scrubbing.
- Commercial rust remover: deep orange spots faded after two treatments, with protective sealing recommended.
- Pumice stone on porcelain: stubborn marks lifted with careful rubbing, no damage reported when kept wet.
Short success stories and what worked in each scenario
A handful of brief case notes illustrate practical approaches homeowners and caretakers used to remove tub rust stains, each entry focusing on the stain source, treatment applied, and outcome.
One used vinegar paste on faucet drip marks — stain lifted.
Another applied commercial rust remover to shower-floor rings — near-total removal.
A renter scrubbed with baking soda and lemon — faint trace remained but tub restored.
Conclusion
Rust stains yield to simple action, regular upkeep, and sensible prevention. By choosing the right cleaner, applying steady patience, and protecting vulnerable surfaces, tubs regain brightness. By addressing water sources, replacing rusty fixtures, and scheduling quick spot treatments, stains are minimized. By learning material-specific techniques, testing products first, and keeping tools on hand, future marks become rare. Consistent care, informed choices, and prompt responses preserve both appearance and longevity.