How to Prevent Outdoor Faucets From Freezing: 9 Simple, Effective Methods
To prevent outdoor faucets from freezing, it’s crucial to eliminate standing water, which can lead to ice formation and pipe bursts. Here are nine effective methods:
- Install Frost-Free Spigots: These are designed to prevent freezing by keeping the water supply away from the cold.
- Add an Indoor Shutoff with Drain: This allows you to easily turn off the water supply and drain the line before winter.
- Fit Insulated Faucet Covers: These help trap heat and protect against freezing temperatures.
- Wrap Exposed Pipes with Foam: Insulating foam can shield pipes from cold air.
- Use Heat Tape: This electrical tape warms the pipes to prevent freezing.
- Enclose Spigots in Insulated Housings: Creating an insulated barrier can help maintain warmth around the faucet.
- Recess or Relocate Lines into Heated Space: Moving pipes inside can provide extra protection.
- Maintain Insulation and Covers Annually: Regular checks can ensure ongoing protection.
- For Immediate Freezes: Shut off the indoor valve, drain the line, and apply gentle heat to thaw any ice.
Following these steps will help keep your outdoor faucets functional all winter long.
Why outdoor faucets freeze and why prevention matters
When temperatures drop, water left in spigots and supply lines can freeze and expand, forming ice plugs that block flow and stress fittings.
Frozen faucets increase the risk of pipe bursts, resulting in water damage and often costly repairs.
The problem is most likely in cold climates, on exposed or poorly insulated walls, and with non-winterized or sillcock-style faucets.
How freezing occurs inside spigots and supply lines
Cold forms inside outdoor spigots and supply lines when stagnant water cools below freezing and crystallizes, expanding as it turns to ice.
Ice blocks flow, raises internal pressure, and can split fittings.
Thermal conduction from cold soil and wind chills vulnerable exposed sections.
Understanding this mechanism explains why insulation, proper shutoff, and drainage are central to how to prevent outdoor faucets from freezing.
Risks of frozen faucets: pipe bursts, water damage, repair costs
Frozen outdoor faucets pose serious risks beyond a momentary inconvenience: expanding ice can burst pipes, leading to significant water damage inside walls and foundations, costly emergency repairs, and higher insurance claims.
Leaks may go unnoticed until thawing, worsening mold, structural decay, and ruined belongings.
Repair bills include pipe replacement, drywall restoration, and possible heating system strain, so prevention saves money and disruption.
When and where freezing is most likely (climate, exposure, faucet type)
After outlining the damages and costs of burst outdoor faucets, it helps to identify where and under what conditions freezing is most likely to occur.
Freezing risk rises in cold climates, during prolonged subfreezing spells, and with night-time radiative cooling.
Exposed, poorly insulated sillcock and hose bib designs, shallow or unprotected supply lines, and wind-exposed locations are most vulnerable, especially without shutoff or drainage.
Quick-action measures to stop a faucet from freezing right now
When a faucet is at immediate risk of freezing, quick-action steps can reduce damage and restore flow.
First, locate and close the indoor shut-off valve and drain the outdoor line to prevent trapped water from expanding.
If the spigot is exposed, temporarily wrap it with insulation and, if already frozen, apply gentle heat with a hair dryer or a properly positioned heat lamp while following safety precautions.
Shut-off and drain procedure for indoor shut-off valves
Locate the indoor shut-off valve that controls the exterior faucet and close it fully to stop water flow.
After closing, open the outdoor spigot to relieve pressure and drain remaining water.
If present, open any inline drain or bleeder valve to guarantee the line is empty.
Confirm no residual flow, then leave the outdoor spigot slightly open or capped per local guidance.
Temporarily wrapping and insulating an exposed spigot
With the indoor valve closed and the outdoor spigot drained, immediate steps can be taken to shield an exposed exterior faucet from freezing.
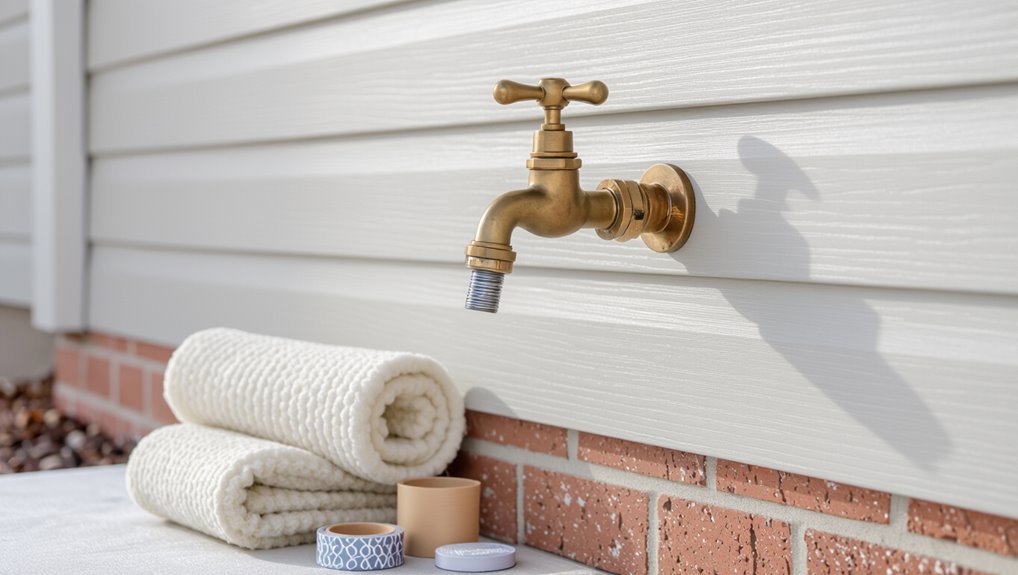
Wrap the spigot and attached pipe with insulating foam, pipe wrap, or several layers of heavy-duty towels secured with tape.
Add a plastic bag or tarp to keep moisture out.
Check and replace insulation after severe weather to maintain effectiveness.
Using a hair dryer or heat lamp safely to thaw a frozen faucet
Apply controlled external heat to thaw a frozen outdoor faucet quickly and safely, using a hair dryer or a heat lamp as temporary measures.
Maintain a safe distance, move the heat source steadily, and avoid open flames or direct contact with insulation or plastic.
Monitor for leaks, shut off indoor water if pipe damage is suspected, and discontinue heating once flow resumes to prevent overheating.
9 effective methods to prevent outdoor faucets from freezing
Preventing outdoor faucets from freezing requires a mix of hardware upgrades and simple insulation techniques tailored to the site and climate.
The most reliable approaches include replacing exposed spigots, isolating and draining exterior lines, and applying thermal protection where pipes or faucets are vulnerable.
The following list highlights four practical measures that form the core of a broader nine-point strategy.
- Install frost-free (freeze-proof) spigots and explain how the extended valve seat keeps water inside the heated wall.
- Use an indoor shut-off valve and properly drain the outdoor line to remove standing water.
- Add high-quality faucet covers or insulated caps to trap warmth around the spigot.
- Apply foam pipe insulation to supply pipes and protruding spigots; consider heat tape or heat cable with safe installation practices.
1. Install frost-free (freeze-proof) spigots and how they work
Install frost-free (freeze-proof) spigots to reduce the risk of outdoor faucets freezing by relocating the valve mechanism well inside the heated interior of a building.
These spigots extend a long stem so water drains away from the exterior when closed, minimizing trapped water and ice.
Proper selection, correct length to reach indoor warmth, and professional installation guarantee reliable freeze protection.
2. Use an indoor shut-off valve and properly drain the outdoor line
Shut off the outdoor water at an indoor valve and drain the exterior line to eliminate standing water that can freeze and burst pipes.
After closing the valve, open the outdoor spigot and any inline drain to release residual water.
Verify downstream low points and clear trapped pockets.
Insulate indoor valve access and periodically test the shutoff before winter to confirm reliable operation.
3. Add high-quality faucet covers or insulated caps
After the indoor shut-off and drain procedure is complete, adding a high-quality faucet cover or insulated cap provides a second line of defense against freezing.
These covers, typically rigid plastic shells with foam liners or insulated neoprene caps, trap heat and block wind. They are simple to install, inexpensive, weather-resistant, and should be secured firmly each autumn and inspected for tears before winter.
4. Apply foam pipe insulation to supply pipes and protruding spigots
Wrap foam pipe insulation around exposed supply lines and any spigot necks to reduce heat loss and block cold air.
Choose closed-cell foam with adhesive seams or secure with waterproof tape. Fit snugly, covering joints and bends, and trim gaps.
Inspect annually for compression or damage; replace deteriorated sections promptly to maintain thermal protection and prevent freezing-related ruptures.
5. Heat tape or heat cable installation and safe usage guidelines
Install heat tape or heat cable along exposed supply lines and on the spigot neck to deliver targeted warmth where freezing is most likely.
Choose thermostat-controlled, UL-listed products, follow manufacturer spacing and fastening instructions, and keep cables free of overlap.
Use a dedicated outdoor-rated GFCI circuit, inspect annually for damage, and disconnect or replace faulty tape to prevent fire hazards and guarantee reliable freeze protection.
6. Enclose exterior faucets with insulated boxes or housings
Alongside heat tape, enclosing an outdoor faucet in an insulated box or housing provides passive, reliable protection by trapping warmth and blocking cold air.
Durable insulated housings—rigid foam, plastic covers with foam liners, or custom wooden boxes—reduce freeze risk, shield from wind, and allow easy access for maintenance.
Secure mounting and weatherstripping around pipe entries prevent drafts and moisture intrusion, improving winter resilience.
7. Maintain a slow drip during extreme cold and when to use it
Maintain a slow drip from an outdoor faucet during prolonged extreme cold to keep water moving and reduce the chance of freezing in the pipe.
This tactic is recommended when temperatures stay below freezing for extended periods, insulation or heat tape are insufficient, or a leak-free, controlled flow is acceptable.
Monitor water use and restore full shutoff when conditions improve to conserve water.
8. Improve exterior wall insulation and sealing around plumbing
Improving exterior wall insulation and sealing around plumbing reduces heat loss and limits cold air infiltration that can freeze outdoor faucets and the pipes feeding them.
Install or upgrade wall cavity insulation, add rigid foam or spray foam around pipe penetrations, and seal gaps with caulk or foam gaskets.
Confirm vented areas are blocked and insulating access panels are weatherstripped to maintain consistent pipe temperatures.
9. Relocate or recess spigots into conditioned space during remodels
Relocate or recess outdoor spigots into conditioned space during remodels to keep supply lines within the home’s heated envelope and greatly reduce the risk of freeze damage.
Positioning faucets inside wall cavities or utility rooms shortens exposed pipe runs, simplifies insulation, and allows easier access for shutoffs and maintenance.
Coordinate with contractors to maintain drainage, frost-proofing, and code compliance while minimizing future freeze-related repairs.
Step-by-step installation and maintenance instructions
The section outlines clear, step-by-step procedures for swapping a standard spigot for a frost-free model, mounting and testing heat tape, and insulating pipes while sealing wall penetrations.
It also provides a concise seasonal checklist for pre-winter preparation and safe spring re-opening.
Each set of instructions emphasizes safety, required tools, and simple tests to confirm proper operation.
How to replace a standard spigot with a frost-free model
Begin by gathering the required tools and a frost-free spigot sized to the existing supply line; a proper installation reduces the risk of freezing and future leaks.
Shut off and drain the supply, remove the old spigot, inspect and repair pipe threads or solder joints, apply proper sealant, thread or solder the frost-free unit to the correct depth, secure mounting, test for leaks, and restore supply.
How to install heat tape and test for safe operation
Install heat tape carefully following manufacturer instructions and local codes, ensuring power is disconnected before work begins.
Measure pipe length, select appropriate tape, and lay it along the pipe without overlapping. Secure with approved tape or clips, add frost-resistant insulation over the tape, then reconnect power.
Test operation with a multimeter and verify warm, even heat; inspect monthly and replace damaged sections promptly.
How to insulate pipes and seal wall penetrations correctly
Prepare a clear work area and gather closed-cell foam pipe insulation, pipe wrap, foam sealant, exterior-grade caulk, insulation tape, and basic tools before starting.
Measure pipe lengths, cut insulation to fit snugly, and secure seams with insulation tape.
Wrap fittings and valves with flexible pipe wrap.
Inject closed-cell foam into wall penetrations, allow curing, then finish gaps with exterior-grade caulk for a weatherproof seal.
Seasonal checklist: pre-winter preparations and spring re-opening
When temperatures start to drop, homeowners should follow a clear seasonal checklist to winterize outdoor faucets and then reverse the steps safely in spring.
This guarantees valves, hoses, and wall penetrations remain protected from freezing and moisture damage.
Drain hoses, disconnect and store them, shut off and bleed exterior shutoff valves, install insulated covers, inspect seals, and document repairs.
Reverse sequence after frost risk passes.
Choosing the right products and materials
Selecting appropriate faucet covers, insulation, and heat cables is essential for reliable freeze protection and long-term durability. A concise comparison of product types and clear specifications for frost-free faucets and heat cables helps homeowners match solutions to climate and usage. The table below summarizes key options and recommended specs to guide selection.
| Item | Recommendation |
|---|---|
| Faucet cover | Rigid insulated cover rated to local wind loads; water-resistant seal |
| Insulation type | Closed-cell foam or foam wrap with vapor barrier for wet locations |
| Heat cable | Self-regulating cable, 120V, GFCI-protected, rated for outdoor use |
| Frost-free faucet spec | Brass body, ¾” inlet, slope to interior, winterized packing gland |
Comparison of faucet covers, insulation types, and heat cable options
Several practical options exist for protecting outdoor faucets—covers, passive insulation, and electrically powered heat cables—each with distinct performance, installation, and cost profiles. Selection depends on climate, exposure, and maintenance. Durable covers suit mild freezes; foam or wrap insulation offers low cost; self-regulating heat cables give reliable protection but require power and proper installation.
| Option | Cost | Suitability |
|---|---|---|
| Cover | Low | Mild freeze |
| Foam wrap | Low–Medium | Moderate freeze |
| Heat cable | High | Severe freeze |
Recommended specifications for frost-free faucets and heat cables
After weighing covers, passive insulation, and heat cables, the next step is choosing specific frost-free faucets and heat-trace products that match site conditions.
Specify faucets rated for frost depths exceeding local frost line, brass or stainless construction, and reliable shutoff seals.
Select self-regulating heat tape with UL listing, appropriate wattage per foot, GFCI protection, and weatherproof jacketing for outdoor use.
Cost, time, and difficulty comparison of prevention methods
A side-by-side comparison of prevention options highlights upfront costs versus long-term savings to help choose the most cost-effective approach.
It also clarifies which measures are suitable for DIY and which warrant hiring a plumber.
Finally, each method is rated for estimated time and required skill level to set realistic expectations.
Upfront costs vs long-term savings
Choosing a prevention method involves balancing upfront costs against long-term savings, with each option differing in purchase price, installation time, and maintenance difficulty.
Low-cost solutions (insulation, covers) require minimal investment but may need frequent replacement.
Mid-range choices (frost-free faucets, heat tape) cost more initially yet reduce repair risks.
High-end systems offer durability and lower lifetime expense despite higher installation outlay.
DIY vs professional installation: when to hire a plumber
Weigh practical skills, budget, and risk when deciding between DIY and hiring a plumber for freeze-prevention work.
DIY suits basic steps—insulation, hose removal, faucet covers—saving money but requiring careful execution.
Hire a plumber for valve replacements, frost-free faucet installation, or inaccessible piping to avoid leaks and code issues.
Consider warranty, long-term reliability, and potential repair costs when choosing.
Estimated time and skill level for each method
Time and skill requirements vary widely by method: simple steps like draining hoses and installing foam faucet covers typically take 10–30 minutes per faucet and require only basic hand tools and minimal DIY experience.
In contrast, tasks such as adding pipe insulation around inaccessible runs or replacing an indoor shutoff valve can take 1–4 hours and demand intermediate plumbing skills, proper seals, and sometimes permit knowledge.
Installing a frost‑free sillcock or rerouting exterior piping is the most time‑consuming and technical, often requiring several hours to a full day, specialized tools, and professional expertise to guarantee code compliance and leak‑free results.
Common mistakes and how to avoid them
Common mistakes often undo prevention efforts, including improper use of heat tape or relying on cheap covers that offer little protection.
Many homeowners install an indoor shut-off valve but then neglect to drain the outdoor line, leaving water that can freeze and burst the pipe.
Small wall leaks and unchecked air gaps around the faucet also permit cold air intrusion and should be sealed during winterization.
Incorrect use of heat tape or inexpensive covers
Misapplying heat tape or relying on cheap faucet covers often creates a false sense of security that leads to frozen pipes; typical mistakes include using non–weatherproof tape, leaving heat tape powered continuously without following manufacturer spacing and overlap guidelines, and choosing thin foam covers that don’t seal against wind-driven cold.
Additionally, improper installation, damaged wiring, and neglecting thermostat-rated products reduce effectiveness and increase fire risk.
Failing to drain the line after installing a shut-off valve
After addressing heat-tape and cover errors, attention should turn to what happens upstream of the outdoor spigot: installing an interior shut-off valve without draining the exterior line leaves trapped water that can freeze and burst the pipe.
Homeowners should open the exterior faucet after closing the interior valve, drain residual water, and optionally blow out the line or insulate exposed sections to prevent ice damage.
Overlooking wall leaks and air gaps that allow freezing
When gaps around pipe penetrations, deteriorated siding, or poorly sealed utility chases are ignored, cold air can funnel directly to the supply line and freeze water that would otherwise remain above freezing inside the house.
Inspect exterior walls, seal gaps with foam or caulk, repair damaged siding, and insulate cavities.
Regular checks before winter prevent hidden drafts that compromise outdoor faucet protection.
Troubleshooting frozen or leaking outdoor faucets
The section outlines how to recognize whether a frozen outdoor faucet has burst or sustained other damage, including visible cracks, puddles, or loss of pressure.
It then describes safe methods to thaw and test a spigot and temporary repair options for minor leaks.
Guidance concludes with clear criteria for replacing parts and when to call a professional plumber.
Signs a frozen faucet may have burst or developed damage
Several clear indicators can reveal whether a frozen outdoor faucet has burst or sustained internal damage.
Visible water pooling around the foundation, ice buildup inside the spout, or wet insulation suggest leaks.
Cracked or bulging pipe sections, unusually low water pressure at fixtures, and persistent dripping after thawing indicate ruptures.
Rust-colored water or sudden surges when other taps open also signal internal compromise.
Safe steps to thaw, test, and temporarily repair a leaking spigot
Noticing signs of a burst or damaged outdoor faucet should prompt careful action to thaw, test, and, if necessary, temporarily repair the spigot before committing to permanent fixes.
Gently apply heat (hair dryer or warm towels), open the valve to relieve pressure, inspect for leaks, tighten packing nuts, wrap with plumber’s tape or a hose clamp and rubber patch, then monitor for continued seepage.
When to replace parts versus call a professional
When should a homeowner attempt a DIY repair and when is it time to call a professional?
A homeowner can replace worn washers, packing, or frost-proof faucet cartridges if comfortable with basic tools and shutting off water.
Call a plumber for extensive corrosion, damaged shutoff valves, persistent leaks after repairs, frozen pipes inside walls, or when unsure of leak source to prevent water damage and code violations.
Long-term strategies to protect exterior plumbing
Long-term protection of exterior plumbing begins with strategic faucet placement during new construction or remodels to minimize exposure and allow indoor access when possible.
Homeowners should consider upgrading insulation and exterior cladding to reduce heat loss around pipes and wall-mounted fixtures.
A routine inspection schedule and active monitoring during cold snaps help detect vulnerabilities early and guarantee preventive measures remain effective.
Planning faucet placement in new construction or remodels
A well-considered layout for outdoor faucets during new construction or a remodel reduces freeze risk and future maintenance costs.
Position faucets on sheltered walls, near heat sources and above frost lines when possible. Minimize exposed pipe runs and route supply lines through interior walls.
Locate shutoff valves inside the heated envelope for easy winter drainage.
Coordinate placement with landscaping and hardscape to prevent cold exposure.
Upgrading home insulation and exterior cladding for freeze protection
Improve freeze resilience by upgrading insulation and exterior cladding to reduce thermal bridges and keep supply lines within the building’s warm envelope.
Adding continuous exterior insulation, sealing gaps, and insulating rim joists limits cold intrusion.
Relocating or boxing-in pipes behind insulated sheathing, using water-resistant cladding, and improving attic and wall air sealing provide durable protection, lowering freeze risk and energy loss without relying on temporary measures.
Routine inspection schedule and monitoring during cold snaps
Regularly scheduled inspections and active monitoring during cold snaps form the backbone of a reliable freeze-prevention plan for exterior plumbing.
Homeowners should check faucets, hose bibs, insulation, and shutoff valves monthly in fall and more frequently when forecasts predict subfreezing temperatures.
Use temperature sensors, visual checks for frost or condensation, and document findings.
Promptly address damage, tighten fittings, and replace compromised insulation to prevent freezes.
Seasonal supplies list and installation tools
A concise list of seasonal supplies and tools helps homeowners prepare outdoor faucets for freezing weather.
The list separates essential items every homeowner should have from optional upgrades suited to high-risk climates.
Practical installation tools and weatherproofing supplies are highlighted to guide action during pre-winter maintenance.
- Foam faucet covers, insulated hose bib covers, and frost-free faucet conversion kits
- Pipe insulation, heat tape, and exterior shutoff valves for higher-risk areas
- Basic tools: adjustable wrench, screwdriver set, pipe cutter, and plumber’s tape
- Optional: thermostatically controlled heat cables, professional-grade insulation panels
Must-have items for homeowners
Several essential items help homeowners winterize outdoor faucets efficiently: insulated faucet covers, frost-proof hose bibs or replacement heads, foam pipe insulation, shut-off valves or vacuum breakers, and quality outdoor-rated hose storage.
Also recommended are basic hand tools, plumber’s tape, silicone caulk, a drill with appropriate bits, pipe clamps, and a thermometer to verify effectiveness.
Proper gloves and safety glasses complete the kit.
Optional upgrades for high-risk climates
Homeowners in regions prone to prolonged subfreezing temperatures may opt for upgrades beyond the basic kit to reduce freeze risk and simplify seasonal maintenance.
Recommended seasonal supplies include insulated faucet covers, heat tape with thermostat, hose bib covers, pipe wrap, and replacement frost-proof spigots.
Essential installation tools: adjustable wrench, pipe cutter, plumber’s tape, wire stripper, and a GFCI-tested portable heater for emergency thawing.
Closing checklist: what to do before the first freeze
Before the first hard freeze, a brief closing checklist helps verify outdoor faucets are shut down and insulated. The steps guarantee water is drained, valves are secured, and covers or insulation are in place to prevent pipe bursts.
A quick routine saves time and avoids costly repairs.
- Turn off the outdoor water supply and open faucets to drain remaining water.
- Close any interior shutoff valves leading to exterior lines.
- Install insulated faucet covers or wrap exposed pipes with foam.
- Check for leaks, loose fittings, or gaps that allow cold air in.
Quick verification steps to ensure outdoor faucets are protected
A simple checklist helps verify that outdoor faucets are ready for freezing conditions: confirm shutoff valves are closed, drain any remaining water from spigots and lines, install insulated covers, and test for residual flow with a quick faucet turn.
Then inspect insulation integrity, guarantee no drips remain, secure hose bibs and remove hoses, label interior shutoffs, and schedule a seasonal recheck before hard freezes.
Conclusion
As winter approaches, homeowners recognize that protecting outdoor faucets prevents costly damage and keeps household routines intact. Simple measures—insulation, shutoffs, and timely maintenance—make a real difference. Who wants to face a frozen, burst pipe on a bitter morning? With basic supplies and seasonal checks, exterior plumbing remains reliable and repairs stay rare. Thoughtful preparation now preserves comfort and savings throughout the cold months.