How to Extend an Outside Water Faucet: Step-by-Step Guide for Easy, Leak-Free Extensions
How to Extend an Outside Water Faucet: A Step-by-Step Guide
Extending an outside water faucet is essential for improving access and preventing freeze or foundation issues. To start, shut off the water supply and relieve any pressure in the line. Inspect the existing threads and measure the size needed for the extension. You can choose from several methods: a threaded extender for quick fixes, copper or PEX for durable through-wall extensions, or frost-free sillcocks if you live in a cold climate.
Follow these steps for a successful extension:
- Clean the Threads: Ensure that the existing threads are free of debris.
- Apply PTFE Tape or Pipe Dope: This helps create a watertight seal.
- Hand-Start the Extender: Begin threading the extender onto the faucet by hand.
- Tighten Carefully: Use a wrench to ensure a snug fit, but avoid overtightening.
- Test Under Pressure: Turn the water supply back on and check for leaks.
- Install a Vacuum Breaker: This is crucial for preventing backflow.
For detailed materials, troubleshooting tips, and further guidance, continue reading the step-by-step instructions.
How to Extend an Outside Water Faucet Safely and Leak-Free
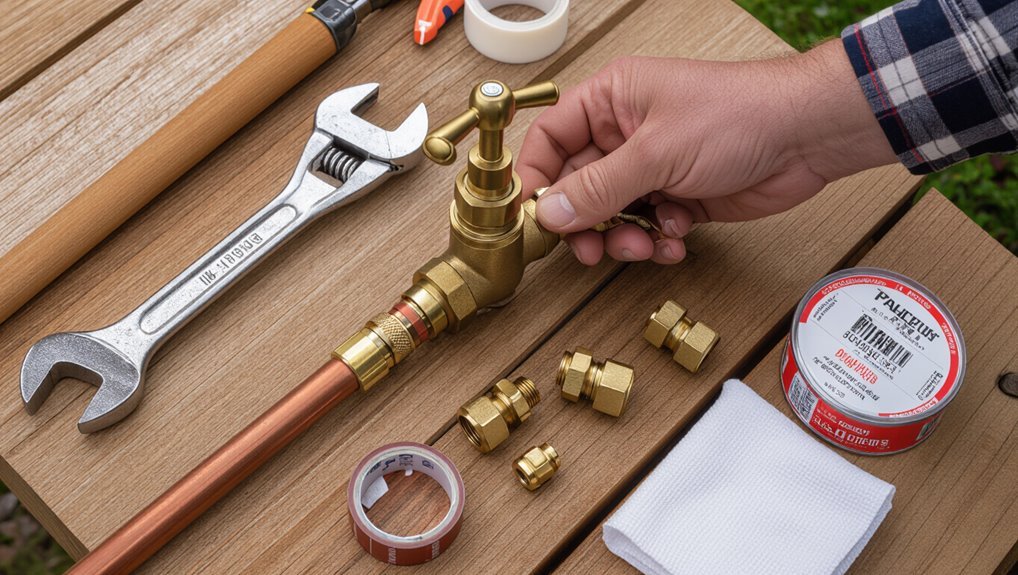
Many homeowners extend outdoor faucets to improve access, reach distant hose areas, or replace corroded spouts.
Common solutions include screw-on extenders, rigid pipe extensions with shutoff valves, and flexible hoses with freeze-proof fittings.
Each option varies in difficulty from simple hand-tool installs to moderate plumbing work requiring soldering or threaded connections.
Overview of common reasons to extend an outdoor faucet
Because outdoor water access often needs to adapt to changing landscaping and use patterns, homeowners commonly extend faucets to improve functionality and convenience.
Typical reasons include reaching distant garden beds, supplying water to new irrigation or hose reels, avoiding basement wall damage, and preventing frost-prone shutoffs.
Guidance on how to extend an outside water faucet focuses on safe routing, proper fittings, and minimizing leaks and heat loss.
Quick summary of the extension options and expected difficulty
Evaluating extension options involves choosing between simple surface-mounted hose connections, inline copper or PEX extensions through exterior walls, and installing a frost-free replacement spigot or an underground-insulated run to a new hose bib.
Surface-mounted fittings are easiest but less durable; PEX or copper through-wall runs require moderate skills and tools.
Frost-free or underground relocations are most complex, often needing trenching, permits, and professional help.
Tools and Materials Needed
A concise list of essential tools—wrenches, pipe cutters, tape measures, pipe thread tape, and a torch or soldering kit if using copper—prepares the project.
Material choices and fitting types (compression, threaded, soldered, push-fit) determine the connection method and compatibility.
Recommended pipe options—copper, PEX, and PVC/CPVC—should be compared for durability, freeze-resistance, cost, and ease of installation.
Tools list
Before beginning work on extending an outside water faucet, gather the specific tools and materials required for the job so the project proceeds efficiently and safely.
Essential tools include pipe cutters, adjustable wrenches, thread sealant, PTFE tape, and a drill with bits. Select tools compatible with chosen pipe type and accessible workspace.
- Pipe cutter/pipe saw
- Adjustable wrench/set
- Drill and bits
Materials and fitting types to choose
Selecting appropriate materials and fittings is essential for a durable, leak-free faucet extension; decisions hinge on pipe type, connection method, and local water chemistry.
Choose fittings compatible with existing threads or soldering, and consider corrosion resistance and temperature tolerance.
Guarantee proper seals (PTFE tape, thread sealant) and correct clamp or compression types for hose adapters.
- Match connection style
- Prioritize corrosion resistance
- Use proper sealing method
Recommended pipe materials and pros/cons
Having chosen compatible fittings and sealing methods, the next decision is which pipe material to use for the extension. Common options balance cost, durability, ease, and freeze resistance.
| Material | Quick pros/cons |
|---|---|
| PVC | Cheap, easy; not for hot water, brittle in cold |
| Copper | Durable, corrosion-resistant; costly, harder to solder |
| PEX | Flexible, freeze-resistant; UV-sensitive, fittings needed |
Assessing Your Existing Faucet and Water Line
Before beginning an extension, the homeowner should identify the faucet’s thread type and size to guarantee compatible fittings.
They should locate the nearest shutoff valve and briefly test water pressure to confirm flow and detect leaks.
Finally, they must check for any backflow prevention devices and verify local code requirements that could affect the installation.
How to identify faucet thread type and size
How can one tell what thread type and size an outdoor faucet uses?
Examine the spout: measure outer diameter with calipers or a ruler, count threads per inch (TPI) over one inch or measure pitch metric.
Identify male versus female.
Compare against common standards (garden hose thread GHT, NPT, BSP).
Photograph and note markings; consult fittings chart to confirm correct matching.
Locating the shutoff valve and testing water pressure
A practical first step is to locate the nearest shutoff valve and verify water pressure at the outdoor faucet.
Identify indoor valves (basement, crawlspace, utility room) or an exterior isolation valve.
Close it, open the outdoor spigot to drain remaining water, then turn it on to check flow and static pressure.
Record pressure and note any weak flow or leaks for repair planning.
Checking for backflow prevention and code requirements
Confirm whether the existing outdoor faucet has backflow prevention and whether local plumbing codes apply by inspecting the spigot and nearby fittings for built-in vacuum breakers, air gaps, or separate backflow devices.
Document device type, condition, and accessible markings.
Verify local code requirements for backflow prevention, installation height, and permitted materials.
Plan replacement or permit submission if noncompliant, prioritizing meter-protected systems and potable water safety.
Choosing the Best Extension Method
Choosing the best extension method depends on site conditions, budget, and skill level.
Options range from a simple threaded faucet or hose-bib extender to adding a short run of copper or PEX with an inline shutoff, or installing a frost-free sillcock for cold climates.
A clear comparison of cost, durability, and required workmanship helps determine the most appropriate choice.
Use a threaded faucet extender or hose bib extension
Consider thread-on faucet extenders and hose-bib adapters when the goal is a simple, reversible extension that preserves existing plumbing.
These devices screw onto existing threads, adding reach or a male/female adapter for hoses, sprayers, or quick-connect fittings. They require minimal tools, provide a temporary or seasonal solution, and rely on proper thread sealant (PTFE tape) to prevent leaks and guarantee reliable operation.
Install a short length of copper or PEX with a shutoff
Install a short length of copper or PEX with a shutoff when a more permanent, weather-resistant extension is desired that still allows isolation for maintenance or winterization.
A brief run of pipe provides durability and cleaner appearance; soldered copper or crimped PEX fittings guarantee reliable joints.
Include a nearby ball valve for quick shutoff and test for leaks before final insulation or clamping.
Add a frost-free sillcock for winter climates
For cold climates, a frost‑free sillcock provides a reliable, long‑term solution by locating the valve mechanism well inside the heated building where it stays above freezing.
It replaces standard spigots with a long stem that drains toward the interior when shut.
Installation requires proper mounting, correct wall penetration length, and an interior shutoff; professional fitting guarantees pitch, seal integrity, and freeze protection.
Comparison of extension methods by cost, durability, and skill
Several practical options exist for extending an outdoor faucet, each with distinct trade-offs in cost, durability, and required skill. Homeowners should weigh quick, cheap hose extensions against longer-lasting copper or PVC runs and professional sillcock replacements. Match budget, climate, and DIY ability to method choice.
| Method | Best for |
|---|---|
| Hose extension | Temporary, low cost |
| Copper/PVC run | Durable, moderate skill |
Step-by-Step: Installing a Threaded Faucet Extender
Before beginning, the existing outdoor faucet should be shut off and its threads cleaned to guarantee a proper seal.
The installer then applies plumber’s tape or pipe dope correctly, threads on the extender, and tightens it to the appropriate torque without over‑stress.
Finally, the connection is tested under pressure for leaks and adjusted as needed.
Preparing the existing faucet (cleaning threads, shutoff)
Shut off the water supply at the outdoor valve or the home’s main shutoff and relieve pressure by opening the faucet until flow stops; this prevents leaks while work proceeds.
Inspect exposed threads for corrosion, mineral buildup, or damaged tape remnants. Clean threads with a wire brush and cloth, removing debris and old sealant.
Dry thoroughly and check for cracks or loose mounting before proceeding.
Applying plumber’s tape or pipe dope correctly
With the threads cleaned, dried, and inspected for damage, the next step is to apply thread sealant so the extender seals properly and resists leaks.
For PTFE tape, wrap three to four clockwise turns starting at the end, smoothing over threads.
For pipe dope, apply a thin, even coat to male threads only. Remove excess; avoid contaminating female threads.
Attaching the extender and tightening to the right torque
Hand-thread the extender onto the faucet by aligning the male and female threads and turning clockwise until finger-tight.
Then use an adjustable wrench or strap wrench to finish tightening to the specified torque, taking care to avoid cross-threading or over-tightening.
Hold the faucet body steady to prevent stress on the plumbing, apply steady torque in small increments, and stop once the manufacturer’s torque spec is reached.
Testing for leaks and adjusting
Begin by slowly turning the water supply back on and observing the connection for any signs of dripping or moisture.
If a leak appears, tighten the nut incrementally or reseat the washer/pipe tape.
Run the faucet full blast and check after a few minutes.
Recheck joints and hose threads; replace faulty parts if seepage persists.
Confirm dry, steady flow before finishing.
Step-by-Step: Extending with Pipe (Copper or PEX)
Before beginning, the water supply is shut off and the outdoor line is drained to prevent spills.
The required pipe is measured and cut, fittings prepared, and connections are made using appropriate methods—soldering for copper or crimp/pop for PEX—while observing safe working practices.
Finally, a shutoff valve and the new faucet or hose bib are installed, then the system is pressure-tested and checked for leaks.
Shutting off water and draining the line
Shut off the water supply to the outside faucet at the house shutoff valve or main shutoff, then confirm the line is off by opening the exterior faucet until flow stops.
Relieve remaining pressure by opening any upstream indoor faucets and a hose bib downstream.
Drain trapped water from the exposed pipe and low points.
Cap or plug the cut end temporarily to prevent contamination and residual leaks.
Measuring and cutting pipe; preparing fittings
Measure the required length of pipe from the capped or drained stub to the desired faucet location, allowing an extra 1–2 inches for fittings and any necessary overlaps.
Record the measurement and transfer it to the new copper or PEX tubing using a permanent marker.
Use a square-cut pipe cutter or PEX tubing cutter for clean ends.
Deburr copper, inspect PEX ends, and gather appropriate fittings, unions, and support clamps.
Joining copper (soldering) or PEX (crimp/pop) connections safely
Begin by choosing the joining method that matches the pipe material and local code: soldering for copper or crimp/pop for PEX.
For copper, clean surfaces, flux, assemble fittings, heat evenly until solder flows, then cool and wipe.
For PEX, cut squarely, insert fitting fully, crimp or use a push‑to‑connect ring/pop tool per manufacturer, then inspect joints for proper seating and secure fit.
Installing a shutoff valve and final faucet/hose bib connection
Install the shutoff valve and hose bib as the final step, ensuring isolation and a weatherproof exterior connection.
Mount a quarter-turn shutoff near the wall on the new run, secure with appropriate fittings (sweat/crimp or push-fit).
Then attach the frost-resistant hose bib using thread sealant or soldered/coupled joints.
Anchor the assembly, insulate exposed pipe, and fasten the bib to the siding for stability.
Pressure testing and leak checks
With the shutoff valve and hose bib secured, attention shifts to verifying the integrity of the new run through pressure testing and systematic leak checks.
Open the main supply slowly, pressurize to normal operating pressure, and inspect all joints, sweat or crimp connections, and fittings.
Use soapy water for bubbles, feel for moisture, and monitor pressure for several minutes to confirm no drops or hidden leaks.
Installing a Frost-Free Sillcock Extension
A frost-free sillcock is recommended when the existing spigot is prone to freezing or when a long wall penetration can place the shutoff point well inside the heated envelope.
The old faucet must be removed, the hole inspected and sized, and the new sillcock positioned, secured, and sealed at the exterior wall while the interior connection is insulated.
After mounting and sealing, the installer should verify slope for drainage, insulate any exposed piping, and perform winterization checks to confirm the valve shuts off and drains properly.
When to choose a frost-free sillcock
When outdoor plumbing must stay operational through freezing temperatures, a frost-free sillcock becomes the preferred option. It prevents water from remaining in the exposed valve area by locating the shutoff deeper inside the heated wall.
Choose one when outdoor taps are used year-round, when freezes risk pipe bursts, or when wall insulation is limited.
Prioritize models sized for existing supply lines and local frost depths.
Removing the old faucet and preparing the wall penetration
Begin by shutting off the water supply and opening a nearby faucet to relieve pressure; then remove the old exterior faucet by loosening the mounting hardware and disconnecting the supply line.
Inspect pipe condition, cut back corroded or damaged sections squarely, deburr and clean the pipe, and check for adequate clearance and slope through the wall.
Clear debris and measure penetration for the new sillcock.
Mounting, sealing, and insulating the sillcock
With the wall opening cleaned and the old sillcock removed, attention shifts to mounting and weatherproofing the new frost‑free sillcock so it will operate reliably through freezing temperatures.
Position and level the sillcock, secure flange screws, and tighten supply connection with appropriate thread sealant.
Backfill gap with expanding foam or low‑expansion insulation, cover with flashing and exterior caulk, and tighten trim for a weatherproof, insulated seal.
Winterization steps after installation
After the extension is secured and sealed, prepare the frost‑free sillcock for winter by draining, insulating, and testing its shutoff performance to prevent freeze damage.
Close interior shutoff, open exterior valve to drain lines, detach hoses, and operate valve to verify no flow.
Add foam insulation around stub and sill, seal any gaps, and check again after a cold snap for leaks or refreeze.
Common Problems and How to Fix Them
Common issues after extending an outside faucet include leaks at threaded joints, persistent dripping, reduced flow or pressure, and damaged or corroded fittings.
Each problem has targeted fixes such as re-taping or replacing threads, replacing worn washers or cartridges, cleaning or clearing obstructions, and repairing or swapping out corroded components.
The following section outlines diagnostic steps and repair options for these common failures.
Dealing with leaks at threaded joints
Tighten or reseal threaded connections promptly when a drip appears at a joint, because most leaks stem from worn or improperly sealed threads rather than from the valve itself.
Inspect threads for damage, disassemble, clean debris, apply plumber’s tape or pipe thread sealant evenly, then reassemble and test under pressure.
Replace heavily corroded fittings to guarantee a durable, leak-free connection.
Fixing dripping after extension installation
When a newly added hose bib extension drips, the issue usually stems from an imperfect seal, misaligned fittings, or insufficient thread sealing rather than from the faucet body itself.
Inspect connections, tighten fittings evenly, and reopen to test.
Replace damaged washers or O-rings, apply fresh PTFE tape or pipe joint compound to threads, and verify the extension seats squarely to stop persistent drips.
Addressing low flow or pressure loss
After resolving leaks at the extension connection, attention should turn to low water flow or pressure loss, which more often arises from obstructions, kinks, or supply-side restrictions than from the extension itself.
Inspect hoses and tubing for kinks, flush the extension and faucet to clear debris, check supply valves for partial closure, and test pressure at the source before replacing components.
Repairing damaged threads or corroded fittings
Corroded fittings and stripped threads are common culprits that compromise a secure connection between an outdoor faucet and its extension, causing leaks or making removal difficult. Diagnosing which issue is present guides the repair method.
For corroded fittings, apply penetrating oil, heat if safe, then replace with brass or stainless parts.
For damaged threads, chase with a tap/die or replace the fitting and use PTFE tape for a reliable seal.
Safety, Local Codes, and Backflow Prevention
Proper backflow prevention is essential; hose bib vacuum breakers or other approved backflow devices protect potable water from contamination.
Local codes often specify required devices, installation methods, and when permits are needed for altering outdoor plumbing.
If code requirements, complex fittings, or pressurized-system work are uncertain, a licensed plumber should be consulted.
Importance of hose bib vacuum breakers and backflow devices
Because outdoor faucets connect directly to a potable water supply, installing a hose bib vacuum breaker or other approved backflow device is essential to prevent contaminated water from being sucked back into the household system.
These devices protect health, comply with many local plumbing codes, and reduce liability from cross-connections. Properly selected, installed, and maintained backflow preventers guarantee one-way flow, minimize contamination risk, and are inexpensive insurance for potable water safety.
Typical local code considerations and when to get a permit
When should a permit be obtained and what local rules apply to extending an outdoor faucet?
Local jurisdictions often require permits for altering potable plumbing, trenching, or adding backflow prevention.
Codes may mandate vacuum breakers, frost protection, and material approvals.
Verify municipal plumbing and building codes, utility locates, and inspection requirements before work.
Failure to comply can result in fines or forced remediation.
When to call a licensed plumber
Call a licensed plumber if the task involves safety risks, code-sensitive work, or backflow prevention requirements that exceed basic DIY scope.
A professional handles permit-related inspections, guarantees correct backflow devices and air gaps, and prevents cross-connections.
Hire one for frozen-pipe repairs, complex rerouting, or when local codes mandate certification.
This minimizes liability, assures compliance, and protects potable water quality.
Maintenance and Winter Care for Extended Faucets
A concise maintenance plan helps guarantee an extended outdoor faucet remains functional and leak-free.
The author recommends a routine inspection checklist covering connections, insulation, and valve operation, plus specific steps for winterizing extended spouts to prevent freezing.
Long-term care advice focuses on corrosion protection, periodic seal replacement, and addressing slow leaks before they worsen.
Routine inspection checklist
Although extended outdoor faucets are designed for durability, regular inspections prevent small issues from becoming leaks or freeze damage.
A concise checklist helps owners spot wear, corrosion, or loose fittings early. Inspect seals, mounting stability, and hose connections; note drips and mineral buildup; schedule repairs. Follow this routine monthly during active seasons.
- Check seals and joints for leaks.
- Verify mounting and support.
- Inspect for corrosion and buildup.
How to winterize extended outdoor faucets
Prepare outdoor faucets for freezing temperatures by fully draining and insulating extended spouts to prevent burst pipes and valve damage.
Shut off interior supply, open exterior valve to release trapped water, then close. Detach hoses and drain them.
Fit foam covers or insulated jackets over the extended section and valve assembly.
Check seals and fasteners; replace any brittle components before freeze onset.
Long-term care to prevent leaks and corrosion
When cared for regularly, extended outdoor faucets remain leak-free and resist corrosion far longer than neglected ones.
Inspect joints and hoses seasonally, tighten fittings, replace worn washers, and apply plumbing-specific lubricant to threads.
Flush lines before winter, drain residual water, and insulate exposed piping.
Use corrosion-resistant materials for replacements and address minor leaks promptly to prevent larger failures.
Cost Estimates and Time Required
Typical cost ranges vary by extension method, from a few dollars for a simple hose bib adapter to $100–$300 for added pipe and fittings, and $500+ if a professional plumber is hired.
Estimated time and required skill level also differ: a basic adapter can be installed in 10–30 minutes by a homeowner, while running new copper or PEX lines may take several hours and intermediate plumbing skills.
These factors should guide whether to attempt the work DIY or hire a contractor.
Typical cost ranges by extension method
Installations and materials for extending an outdoor faucet vary widely in price depending on the chosen method, from simple add-ons to full pipe reroutes. Typical ranges reflect parts and potential contractor fees; DIY parts are cheaper. See common estimates below.
| Method | Typical Cost Range |
|---|---|
| Hose bib extension | $10–$50 |
| Flexible connector | $15–$80 |
| PEX line add-on | $50–$200 |
| Full reroute | $200–$1,200 |
Estimated time and skill level for each method
Although some extensions are quick weekend tasks, the time and skill required vary by method: simple hose-bib add-ons and flexible connectors can be completed in under an hour by a homeowner with basic tools and plumbing knowledge.
PEX line add-ons typically take a few hours and require comfort with cutting, crimping, or push-fit fittings.
A full reroute often demands a skilled tradesperson and a half-day to full-day (or longer) depending on wall or slab access and permit work.
Quick fixes suit DIYers; moderate jobs need intermediate skills and specialty tools; complex reroutes require licensed plumbers and inspection scheduling.
Practical Tips and Best Techniques
The section reviews practical choices that reduce future leaks, such as selecting compatible fittings and quality materials.
It also outlines tools and maneuvers for working in tight spaces, including extensions, swivels, and access tricks.
Finally, common installation mistakes and their prevention are summarized to help guarantee a reliable extension.
Choosing fittings to minimize future leaks
Select durable, properly sized fittings to reduce the risk of future leaks, prioritizing materials and connection types suited to outdoor, freeze-prone conditions.
Use brass or stainless fittings with compression or threaded flare connections where possible.
Match pipe diameter precisely, apply appropriate thread sealant or PTFE tape, and favor unions or isolation valves for maintenance.
Avoid cheap plastic connectors that crack under temperature changes.
Tools and tricks for tight spaces
Many homeowners find that a handful of compact, specialized tools makes work in cramped outdoor valve areas far easier. Right-angle adapters, short-handle wrenches, stubby pliers, and flex-head ratchets increase access.
Use braided supply lines, silicone tape for temporary seals, and magnetic parts trays to prevent drops. Proper lighting, a mirror or inspection camera, and steadying clamps reduce fumbling and speed precise connections in tight spots.
Preventing common installation mistakes
Avoiding common installation mistakes starts with understanding where leaks, cross-threads, and frozen valves most frequently occur and addressing those points methodically.
The installer should check thread alignment, use proper tape or sealant, and winterize connections. Test under pressure and inspect for drips. Document torque settings and part compatibility to prevent stress failures.
- Align and hand-start threads
- Use correct sealant
- Pressure-test and winterize
Conclusion
To sum up, the homeowner confidently completes the careful connection, creating a clean, continuous conduit that conserves water and curbs costly complications. With methodical maintenance, mindful measures against mineral matter and freezing, and modest monitoring for minor moisture, the extended exterior faucet performs precisely. By prioritizing proper parts, plumbing prudence, and periodic preventative practices, users secure seamless supply, sidestep seepage, and sustain sturdy service season after season.