How to Repair a Water Heater Recirculating Pump: Step-by-Step Troubleshooting and Fixes
To repair a water heater recirculating pump, start by cutting off the power and water supply. Then, inspect the wiring, valves, and impeller for any visible issues. Use a multimeter to check for voltage, look for seized motors, and flush out any debris from strainers. Tighten or replace leaking unions and seals as needed. If you find that the bearings or motor are faulty, consider replacing the thermostatic bypass cartridges or the pump itself. Regular maintenance can prevent most problems. The following steps will provide detailed tests, guidance on part selection, and when to seek professional help.
How to Repair a Water Heater Recirculating Pump: Quick Overview
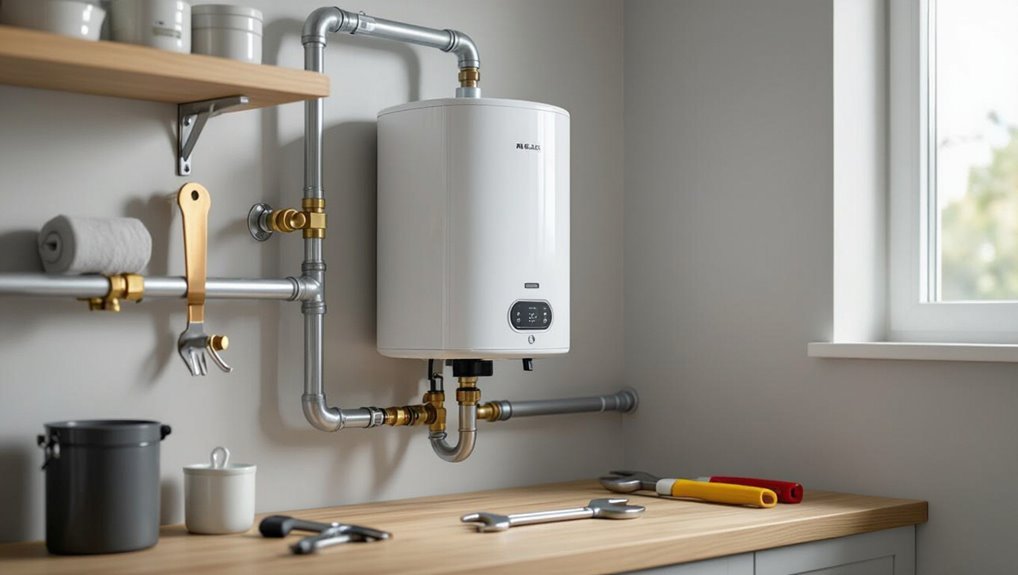
A recirculating pump maintains instant hot water by moving heated water through the plumbing and back to the heater. Common failure signs include loss of circulation, unusual noise, leaks, or erratic cycling.
The overview will outline basic diagnostic checks—power, wiring, valves, and impeller condition—that a homeowner can perform safely.
If the problem involves complex electrical faults, sealed components, or inaccessible piping, a professional should be contacted.
What a recirculating pump does and common symptoms of failure
Circulating quietly behind the scenes, a recirculating pump keeps hot water moving through a home’s plumbing loop so faucets receive near-instantaneous hot water and tank heat loss is reduced.
It maintains flow and temperature balance; failures cause lukewarm or cold taps, noisy or vibrating units, constant motor run, or leaks.
Guidance on how to repair water heater recirculating pump targets these symptoms methodically.
When to attempt a DIY repair versus calling a professional
When should a homeowner tackle a recirculating pump repair and when should they call a professional?
Homeowners may handle simple tasks: tightening connections, replacing a relay, cleaning debris, or swapping a cartridge if comfortable with basic plumbing and electricity.
Call a professional for persistent leaks, motor failure, electrical hazards, complex piping, warranty concerns, or uncertain diagnosis to guarantee safety and code compliance.
Safety Precautions and Required Tools
Before beginning work on a water heater pump, a clear safety checklist should confirm power is off, water supply is shut, and the tank temperature has cooled.
Essential tools and materials—wrenches, pliers, replacement seals, thread tape, and a multimeter—should be gathered and inspected.
Recommended personal protective equipment includes gloves, safety glasses, and protective footwear to prevent injury.
Safety checklist before starting (power, water, temperature)
A brief but thorough safety checklist must be completed prior to any pump repair: confirm power to the pump is turned off at the breaker and verify with a tester.
Shut off water supply valves and relieve system pressure by opening a drain or hot faucet.
Allow the heater and lines to cool to safe handling temperature.
Wear appropriate PPE and post a warning sign.
Tools and materials list
Several essential tools and materials are required to safely and effectively repair a water heater pump. A concise kit speeds diagnosis and minimizes risk.
Include quality replacements, basic plumbing and electrical hand tools, sealants, and testing devices. Recommended items:
- Multimeter, voltage tester
- Adjustable wrenches, pliers, screwdrivers
- Replacement seals, gaskets, pump parts, thread sealant
- Bucket, towels, corrosion inhibitor, plumber’s tape
Recommended personal protective equipment
Proper personal protective equipment (PPE) is essential when repairing a water heater pump to prevent electrical shock, burns, chemical exposure, and eye or hand injuries.
Recommended PPE includes insulated gloves, safety goggles or a face shield, flame-resistant clothing, and slip-resistant footwear.
Additionally, hearing protection and a dust mask or respirator are advised when cutting, soldering, or disturbing insulation or sediment.
Identify Your System Type and Pump Components
The technician first determines whether the installation is a dedicated recirculating loop, a demand/triggered system, or a smart system that uses sensors and timers.
Next, the pump’s visible components—the motor, impeller, check valve, union, and any timer or control module—are inspected to understand functionality and service points.
Finally, common pump locations, in-line check valves, and any thermostatic bypass near the water heater are identified so proper troubleshooting and repairs can follow.
Types of recirculating systems (dedicated loop, demand/triggered, smart systems)
Understanding the recirculating system type is essential before inspecting or repairing a water heater pump.
Dedicated loop systems circulate continuously via a return line.
Demand or triggered systems activate when a button or flow sensor calls for hot water.
Smart systems integrate timers, sensors, or apps to optimize operation.
Identifying which category governs operation aids diagnosis, part selection, and repair approach.
Pump anatomy: motor, impeller, check valve, union, timer/controls
A recirculating pump comprises several distinct components—motor, impeller, check valve, union, and timer/controls—each with a specific role in moving and regulating hot water.
The motor drives the impeller to circulate water. The impeller creates flow and pressure. The check valve prevents backflow. The union allows disassembly.
Timers or controls schedule or respond to demand, governing operation and efficiency.
Locating pump, check valves, and thermostatic bypass on common installations
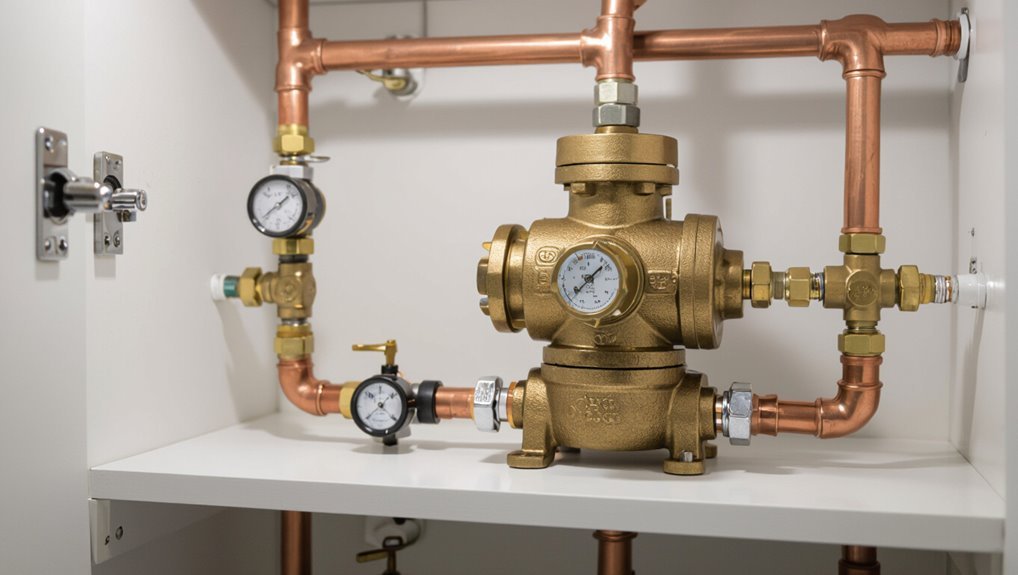
Having identified the pump’s motor, impeller, check valve, union, and controls, the next step is locating those components on the actual installation by recognizing common system layouts.
Inspect near the water heater for in-line pumps on return lines, check valves at return-to-supply junctions, and thermostatic bypass valves near shower branches or mixing tees.
Note unions for service access and timers or sensors mounted nearby.
Preliminary Diagnostics: Quick Tests to Narrow the Problem
A quick set of preliminary diagnostics helps narrow whether the issue is electrical, mechanical, or hydraulic.
The technician first verifies the power supply and circuit breaker, then listens for humming, feels for vibration and excessive heat, and observes water flow and return temperature.
If electrical faults are suspected, the pump motor and contacts are tested with a multimeter.
Verify power supply and circuit breaker
Begin by confirming that the pump receives power and that the circuit breaker feeding its circuit is intact.
Inspect the breaker panel for tripped switches, reset if necessary, and verify any inline disconnects.
Use a multimeter to check voltage at the pump terminals and at the breaker output.
Document readings, ensuring correct voltage and continuity before proceeding to further diagnostics.
Listen and feel tests: humming, vibration, heat
With power confirmed, proceed to simple sensory checks that quickly indicate mechanical or electrical issues: listen for abnormal humming, feel for excessive vibration, and note any unusual heat at the motor housing or terminals.
Persistent hum suggests electrical overload or failing bearings. Strong vibration indicates misalignment, loose mounts, or damaged impeller. Excessive heat at terminals or windings signals electrical fault or stalled motor requiring further inspection.
Checking water flow and hot-water return temperature
Measure the system’s flow and return temperature to quickly narrow whether the problem is hydraulic or thermal rather than electrical.
Technicians check flow at faucets and the pump inlet, noting low flow, airlocks, or clogged screens. They record return temperature at the recirculation line; a cool return suggests mixing, bypass valve faults, or heat loss.
Document readings before adjustments.
Testing the pump with a multimeter
Using a multimeter, a technician can quickly determine whether the pump has electrical continuity, proper voltage at the terminals, or a motor fault before moving to more invasive checks.
The technician measures supply voltage, verifies continuity across windings, checks resistance against manufacturer specifications, and tests for short to ground.
Recorded readings guide whether repair, capacitor replacement, or pump replacement is required.
Common Problems and Step-by-Step Fixes
The section lists frequent failures—no power to the pump, a humming motor that won’t start, weak or absent flow, leaks at unions or seals, and air or noisy operation—and provides targeted fixes for each.
For each problem, the guide outlines quick checks, safe disassembly steps, and common repairs or parts to replace.
Safety precautions and when to call a professional are noted alongside troubleshooting steps.
Problem: Pump not receiving power
When a water heater pump fails to power up, the first steps are to inspect wiring, switches, and any timer or control connections for loose wires, corrosion, or tripped breakers.
If the control display or timer shows faults or fails to cycle, testing and replacing a faulty timer or thermostat control may restore power to the pump.
Safety precautions, including shutting off the circuit and verifying no voltage, should be observed before touching electrical components.
Inspecting wiring, switches, and timer/controls
Several quick checks can often reveal why a pump isn’t getting power: a tripped breaker, a blown fuse, a loose connection, or a faulty timer or switch.
Inspect junctions for corrosion, burnt insulation, or loosened terminals.
Test continuity with a multimeter, verify voltage at the motor and switch, and confirm timer outputs while powered.
Record findings and isolate faults before repairs.
Replacing a faulty timer or thermostat control
If initial checks confirm that breakers, fuses, and wiring are intact but the pump still receives no power, attention should shift to the timer or thermostat control unit.
Verify control settings, test output with a multimeter, and disconnect power before removing the unit.
Replace with manufacturer-compatible module, restore wiring per schematic, secure connections, and verify operation through a full cycle to guarantee restored power to the pump.
Problem: Motor hums but doesn’t run
A humming motor that fails to start often indicates a seized shaft or worn bearings.
The technician first inspects and frees a stuck rotor, applying lubricant or gently turning the shaft to restore motion.
If bearings are damaged or the motor remains unresponsive, replacement of the bearings or the entire pump is recommended.
Checking for seized shaft and freeing the rotor
Inspecting the pump for a seized shaft begins with visual and manual checks to confirm that the motor hums but the rotor will not turn.
Power is disconnected, coupling and housing are removed, and the rotor is gently rotated by hand or with a soft tool.
Light penetrating oil is applied to bearings and shaft, allowed to soak, then retested for free movement.
Replacing motor bearings or entire pump
Proceed to assess whether bearing replacement or full pump replacement is required by comparing the cost, availability of parts, and extent of internal damage observed after freeing the rotor.
Worn, noisy, or visibly scored bearings typically justify replacement, while extensive corrosion, cracked housings, or seized components often make replacing the entire pump more practical and reliable.
If bearings are replaceable, source correct sizes, press out old bearings, install new ones, reassemble, and test.
Problem: Low or no flow
When a pump delivers little or no flow, the cause is often restricted passages such as clogged strainers, fouled check valves, or closed bypass valves.
The technician inspects and clears these components first, then flushes the line to remove accumulated debris.
Restoring unobstructed flow typically resolves the problem without replacing the pump.
Clearing clogs: strainers, check valves, and bypass valves
If low or no flow is present, the most common culprits are clogged strainers, stuck check valves, or a jammed bypass valve; each restricts circulation in distinct ways and requires a targeted approach.
Inspect and isolate components, remove and clean strainers, test check valves for free movement and replace if seized, and verify bypass valve position and operation.
Reassemble and test flow.
Flushing the line and removing debris
After inspecting and clearing strainers, checking valves, and verifying bypass operation, attention should turn to flushing the line to remove residual sediment and debris that can continue to impede flow.
Isolate pump, attach hose to drain or service port, open downstream fixtures, and run water until clear.
Use low-pressure compressed air or mechanical snake only if flushing fails.
Recheck flow and reinstall fittings.
Problem: Leaks at unions or seals
Leaks at unions or seals often stem from loose fittings or worn gaskets and O-rings.
The recommended actions include tightening or replacing unions and gaskets and, when necessary, replacing pump seals and O-rings.
Simple inspections and parts swaps typically stop the leaks and restore proper pump operation.
Tightening or replacing unions and gaskets
Begin by isolating the source of the leak at the union or gasket, since most pump drips originate where two fittings meet or where a seal has deteriorated.
Drain and depressurize the line, then hand-tighten the union nut; use a wrench only for a quarter turn if needed.
Replace warped gaskets or silicone-faced washers with exact-size replacements and retest for leaks.
Replacing pump seals and O-rings
Inspect the pump housing and union interfaces to pinpoint worn seals and O-rings, since these components commonly fail from age, chemical exposure, or improper installation.
Drain and isolate the circuit, disassemble the union, remove old seals with care, and clean seating surfaces.
Select compatible replacement materials, lubricate lightly with manufacturer-approved grease, reassemble evenly, torque to spec, and pressure-test for leaks.
Problem: Air in the system or noisy operation
Air trapped in supply lines or the recirculation loop often causes sputtering and loud pump operation, and it can be resolved by bleeding the lines and purging the loop.
Persistent noise may indicate cavitation or vibration from improper flow, worn impellers, or loose mounting, which requires adjusting flow, replacing damaged parts, or securing the pump.
The following steps outline how to safely remove air and diagnose vibration-related faults.
Bleeding air from lines and purging the loop
When trapped pockets of gas enter the circulation loop, they can cause sputtering, loud knocking, and reduced pump performance.
Bleeding the lines and purging the loop removes these pockets and restores smooth, quiet operation.
Isolate pump power, open manual air vents and purge valves at high points, run pump briefly while monitoring flow, close vents when steady water emerges, repeat until noise stops.
Fixing cavitation and vibration issues
Diagnose cavitation and vibration by listening for rhythmic rattling or low-frequency knocking and observing fluctuating flow or pressure readings at the pump inlet.
Isolate air sources: tighten fittings, purge trapped air, and guarantee correct loop elevation.
Check impeller wear, shaft play, and worn bearings; replace components if scored.
Verify suction piping size, remove restrictions, and install anti-vibration mounts or a dampening base.
Problem: Check valve or non-return valve failure
A failed check valve or non-return valve can allow backflow or prevent proper circulation, reducing heater efficiency and causing system noise.
The technician should first test valve operation and replace any that leak or stick.
If present, the thermostatic bypass valve may require adjustment or replacement to restore correct flow balance.
Testing and replacing check valves
Inspecting the check valve is an essential step when a water heater pump shows signs of backflow, humming, or reduced pressure.
The technician isolates the valve, observes flow direction markings, and performs a flow test or manual actuation.
If sticking, leaks, or reverse flow occur, the valve is removed, replaced with a compatible non-return valve, and the system rechecked for proper sealing and operation.
Adjusting or replacing thermostatic bypass valves
When a failed check or non-return valve causes temperature swings or backflow, attention turns to the thermostatic bypass valve, which mixes hot and cold to protect the pump and maintain set temperatures.
Technicians verify its calibration, check for sticking or debris, and determine whether adjustment or full replacement is required before restoring normal circulation.
They depressurize the line, clean or replace the cartridge, test operation, and confirm stable flow.
How to Remove and Replace the Recirculating Pump
The section outlines a clear step-by-step procedure for removing the recirculating pump, from isolating and draining the line to unbolting and extracting the unit.
It then covers how to choose a correctly sized replacement and confirms specifications for proper installation and torque.
Finally, it provides the electrical reconnection and grounding checklist required to restore safe operation.
Step-by-step pump removal procedure
Several clear steps guide the safe removal and replacement of a recirculating pump, beginning with shutting off power and isolating the hot-water supply to prevent flow.
Drain the loop, relieve pressure, and tag electrical connections.
Disconnect wiring, remove mounting bolts, and detach inlet/outlet fittings.
Inspect seals and flange faces.
Lift the pump straight out, replace gaskets, and reverse steps to install and test for leaks.
Sizing and selecting a replacement pump
Once the old unit is removed, selecting a replacement requires matching the pump’s flow and head characteristics to the system’s demands, electrical specifications, and physical connections.
Consider system requirements, verify voltage and amperage, confirm pipe size and fittings, and choose corrosion-resistant materials.
- Flow rate (GPM)
- Head (feet/meters)
- Electrical match (V, Hz, A)
- Physical compatibility
Proper installation steps and torque specs
Before starting, verify power and water to the heater are fully isolated and the system is depressurized to prevent injury or damage; this establishes a safe baseline for removing and replacing the recirculating pump.
Remove mounting hardware, note pipe orientation, replace gaskets and seals.
Install pump, tighten flange bolts evenly to manufacturer torque (typically 15–25 ft·lb), support piping to avoid strain.
Electrical reconnection and grounding checklist
After the pump is secured and flange bolts torqued, attention shifts to restoring electrical connections and verifying grounding to confirm safe operation.
Reconnect wiring per schematic, matching color codes and tightening terminals to spec.
Install or verify grounding conductor continuity with a multimeter.
Ascertain strain reliefs, junction box covers, and GFCI or breaker settings are correct.
Perform power-up tests and monitor for faults.
Post-Repair Testing and Calibration
After reassembly, a thorough leak test and system pressure check should be performed to confirm all connections are secure.
The technician then verifies proper flow and temperature at representative fixtures to guarantee the pump circulates as designed.
Finally, timers, sensors, and any smart controls are adjusted and tested to restore correct operating schedules and responses.
Leak test and pressure check
Begin the leak test and pressure check by isolating the repaired pump, reintroducing system water slowly, and observing pressure behavior and connection points for any sign of leakage.
Monitor gauge readings for stability, watch fittings, seals, and unions, and inspect the pump body and piping.
Cycle system pressure gently, note any drops, tighten or reseal as required, then retest to confirm integrity.
Verifying proper flow and temperature at fixtures
Once the system is pressurized and leak-free, confirm proper flow and temperature at representative fixtures by running them sequentially and measuring both volumetric flow and outlet temperature.
Record baseline readings, compare to manufacturer specifications and design targets, and note any lag or variability.
Inspect aerators, check valve orientation, and verify return line flow.
Repeat after adjustments to ascertain consistency across fixtures.
Adjusting timers, sensors, and smart controls
Calibrate timers, sensors, and smart controls to restore coordinated operation and energy-efficient performance after pump repairs.
Verify timer schedules match household usage, adjust sensor thresholds for accurate flow and temperature detection, and re-sync smart controllers with the pump.
Test automatic cycles, confirm override/manual modes function, log settings, and monitor performance for 24–48 hours to guarantee stability and energy savings.
Maintenance Schedule and Preventive Measures
A concise maintenance schedule helps prolong pump life and prevent failures by outlining a regular inspection checklist for valves, seals, electrical connections, and performance metrics.
Seasonal maintenance and winterization tips reduce freeze and corrosion risks, especially in unheated or exposed installations.
Clear indicators—persistent noise, loss of pressure, repeated leaks, or costly frequent repairs—signal when replacement is more economical than continued repair.
Regular inspection checklist
Regular inspections should occur on a consistent schedule to catch wear, leaks, and performance declines before they escalate into failures.
A concise checklist guides routine assessment and timely repairs.
- Verify pump operation, flow rate, and noise levels.
- Inspect fittings, seals, and visible piping for leaks.
- Check electrical connections and timer/controls.
- Clean strainers, vents, and access panels; note wear.
Seasonal maintenance and winterization tips
Seasonal maintenance and winterization protect pumps from temperature extremes, corrosion, and freeze-related damage by aligning inspections and preventive tasks with local climate cycles.
Quarterly checks should include valve and seal inspection, flushing lines, and verifying insulation integrity.
Before freezing weather, drain or add anti-freeze to low-use loops, insulate exposed piping, and test pump operation under cold-start conditions to guarantee reliable winter performance.
Signs that pump needs replacement rather than repair
Several clear indicators signal when a water heater pump should be replaced rather than repaired: persistent unusual noises, frequent tripping of circuit protection, repeated seal or bearing failures, reduced flow despite correct system settings, and visible corrosion or cracking on the housing.
Additional signs include intermittent operation, overheating, persistent leaks, and age beyond manufacturer lifespan; replacement prevents recurring downtime and potential safety hazards.
Troubleshooting Scenarios and Solutions
The following troubleshooting scenarios present common fault patterns and targeted checks for repair.
First, intermittent hot water at fixtures requires step-by-step diagnostics of thermostats, thermostatic mixing valves, and localized flow issues.
Next, when the entire house warms slowly inspect circulation, pump speed and bypass valves, and for newly installed noisy pumps follow a concise calibration and mounting checklist.
Scenario: Intermittent hot water at fixtures diagnostic steps
When fixtures deliver hot water inconsistently, a focused diagnostic sequence isolates common causes quickly.
Check recirculation pump operation and timer/settings, confirm one-way check valve function, inspect thermostatic bypass or mixing valve for sticking, test for airlocks by bleeding lines, verify supply and return temperatures at affected fixtures, and examine individual fixture shutoffs and aerators for partial blockage before replacing major components.
Scenario: Entire house slow warm-up where to look first
Start by confirming system-wide symptoms to distinguish slow warm-up from localized issues: verify that every fixture shows delayed rise to set temperature, note whether the delay is consistent or varies by time of day, and check for simultaneous complaints from occupants.
Then inspect recirculation pump operation, check controller settings and timers, evaluate check valve function, and confirm adequate supply temperature and boiler/water heater output.
Scenario: Newly installed pump still noisy calibration checklist
Confirm that the noise persists under controlled conditions and proceed through a focused calibration checklist:
verify pump mounting and isolation to rule out structural vibration,
guarantee correct pump model and rotation for the system,
check for air entrainment and proper priming,
inspect coupling and shaft alignment,
confirm recommended speed/curve settings and any inverter drive parameters,
and review piping support and expansion considerations that can transmit or amplify noise.
Subsequent steps document findings and implement corrective adjustments.
Cost Estimates and When Replacement Is More Economical
Typical repair costs for a water heater pump generally range from modest parts-and-labor fees to higher charges for complex motor or seal replacements.
Full replacement typically runs considerably higher depending on unit size and model.
Expected remaining lifespan after repair versus replacement should be weighed, since an older pump nearing end-of-life may offer only short-term savings if repaired.
Energy-efficiency differences and potential long-term operating cost reductions from a newer, more efficient unit can make replacement the more economical choice.
Typical repair vs. replacement cost ranges
Repairing a water heater pump usually costs considerably less than full replacement, but the gap narrows when major components or extensive labor are involved. Typical single-component repairs run $75–$300; complex rebuilds reach $300–$700. Full replacement commonly costs $400–$1,200 depending on unit and labor; warranties affect value judgments.
| Service | Typical Cost | Notes |
|---|---|---|
| Minor repair | $75–$150 | Seals, fittings |
| Moderate repair | $150–$300 | Motor, controls |
| Replacement | $400–$1,200 | New pump, labor |
Lifespan expectations and energy-efficiency considerations
How long should a water heater pump last, and when does its age make replacement the more economical choice?
Typical lifespans range from 8–15 years depending on quality and usage.
Older, inefficient pumps increase energy use and maintenance costs; if annual repairs exceed 30–40% of replacement cost or efficiency drops considerably, full replacement generally yields lower lifetime cost and better energy savings.
Resources, Parts References, and When to Call a Pro
The section explains how to read pump model numbers and part codes to match replacements accurately.
It lists recommended spare parts to keep on hand for common failures.
It also outlines clear signs—such as persistent leaks, electrical faults, or failed safety devices—when a licensed plumber or electrician should be called.
How to read pump model numbers and part codes
While identifying a pump by its model number may seem technical, understanding the structure of those codes and where to find them is essential for sourcing correct parts and knowing when professional help is needed.
Decipher prefixes (manufacturer), numeric series (capacity, flow), suffixes (voltage, material), and date codes on nameplates or manuals.
Cross-reference OEM charts; record full codes before ordering or consulting a technician.
Recommended spare parts to keep on hand
A basic inventory of spare parts saves time and prevents service delays by enabling immediate swaps for common failures:
- Replacement motor/cartridge compatible with identified model.
- Seals, O-rings, and shaft gaskets in assorted sizes.
- Check valves, union fittings, and mounting brackets.
- Electrical connectors, inline fuse, and a compatible thermostat or control module.
Signs it’s time to hire a licensed plumber or electrician
Keeping a small inventory of spare motors, seals, and fittings covers many routine failures, but certain symptoms indicate professional attention is warranted.
Persistent leaks, electrical arcing, tripped breakers, burnt smells, or motor humming without startup require a licensed plumber or electrician.
Complex piping alterations, inaccessible installations, or failed check valves also merit pro service to guarantee code compliance, safety, and reliable operation.
Conclusion
To summarize, the guide empowers homeowners to diagnose and often repair recirculating pump issues, reducing wasted water and energy. Considering that the average household wastes 10,000 gallons annually from inefficient hot water systems, this practical knowledge feels urgent and tangible. With basic precautions, routine maintenance, and awareness of common faults, many interruptions are avoidable; yet professionals remain essential for complex electrical or boiler-integrated problems that exceed DIY scope.