How to Plumb a Dishwasher Drain: Step-by-Step Guide for DIY Success
To plumb a dishwasher drain, you’ll need basic tools and some caution. Start by turning off the power and water supply. Remove any old drain hose and attach a new one to the dishwasher outlet. Ensure the hose is routed in a high loop or connected to an air gap, then secure it to the garbage disposal or sink tailpiece using clamps and seals. Always check local plumbing codes, test for leaks, and run a full cycle to ensure everything is working properly. For detailed steps, tools, and troubleshooting tips, continue reading.
Quick Overview: Can You Plumb a Dishwasher Drain Yourself?
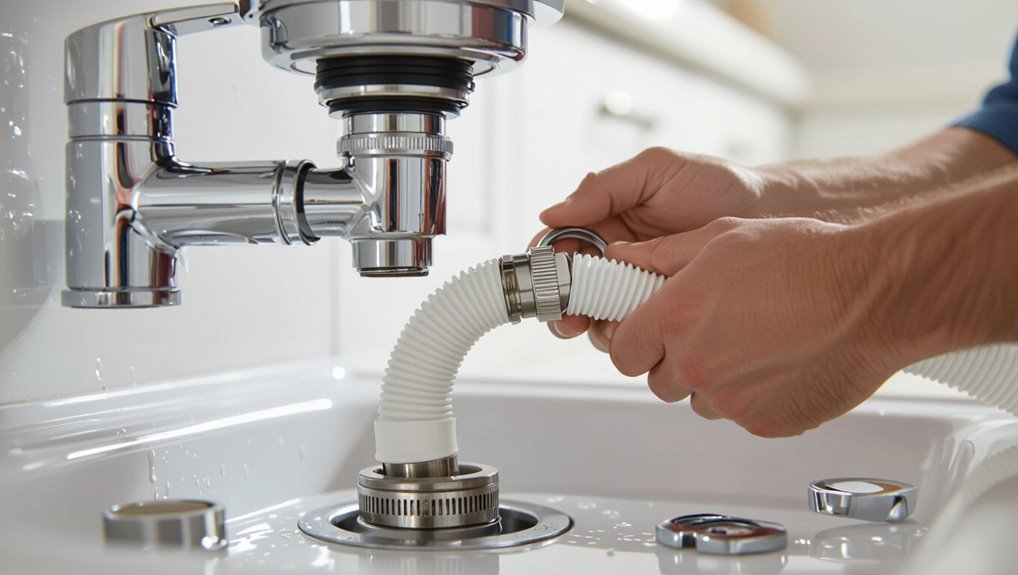
This guide states that many homeowners can install a dishwasher drain themselves for straightforward fittings and minor adjustments.
It outlines the basic steps, necessary tools, and common pitfalls covered here. A professional is recommended for complex layouts, code compliance issues, or when existing plumbing requires major alteration.
Short answer and scope of this guide
Assess whether plumbing a dishwasher drain is a task within a homeowner’s skill set by weighing tools, local code, and comfort with basic plumbing work.
Short answer: many homeowners can learn how to plumb dishwasher drain with common tools and clear instructions.
This guide covers required parts, step-by-step installation, common pitfalls, and basic testing—focused on standard residential setups, not complex remodels or code variances.
When to call a professional vs. DIY
When should a homeowner tackle dishwasher drain plumbing alone and when is a pro required?
Homeowners may handle straightforward installs: replacing hoses, attaching air gaps, and connecting to disposer or sink tailpiece with basic tools and patience.
Call a licensed plumber for code compliance, leaking within cabinets, complex rerouting, hard-to-access connections, or unfamiliar electrical or garbage disposal integrations to avoid damage and fines.
Tools, Materials, and Safety Precautions
A concise inventory of tools—adjustable wrench, pliers, screwdrivers, tubing cutter, and a basin wrench—prepares the reader for the installation steps.
The discussion will also list common parts and fittings such as hose connectors, clamps, a high-loop bracket or air gap, and plumber’s tape.
Finally, essential safety steps—shutting off water and power, clearing the work area, and using eye protection—are highlighted before work begins.
Tools required for installing a dishwasher drain
Several basic tools and a few specialty items are needed to install a dishwasher drain safely and correctly.
Essential tools include a basin wrench, adjustable pliers, screwdriver set, tubing cutter, and a drill with bits. Use leak-detecting towels and a flashlight.
Follow safety: shut off water and power, wear gloves and eye protection, and keep workspace ventilated.
- Basin wrench
- Adjustable pliers
- Screwdrivers
- Tubing cutter
Common parts and fittings you’ll need
Essential parts and fittings for a dishwasher drain include the drain hose, tailpiece or air gap adapter, high-loop bracket or mounting clip, hose clamps, and appropriate pipe fittings and adapters to connect to the sink drain or disposer.
Common extras: hose fittings, rubber gaskets, PVC or metal adapters, and a disposal knockout plug.
Typical items:
- Drain hose
- Air gap or tailpiece adapter
- High-loop bracket
- Hose clamps
Safety steps and preparation before you start
Before beginning any work, the installer should gather the required tools and materials, verify power and water are shut off, and review the workspace for hazards such as sharp edges, standing water, or unstable cabinetry.
- Wear gloves, eye protection, and knee pads.
- Confirm circuit breaker and shutoff valves are off.
- Clear and dry the area.
- Keep a bucket, towels, and flashlight nearby.
Understanding Dishwasher Drain Types and Local Codes
The section compares the two common built-in dishwasher drain methods—air gap and high-loop—and explains their functional differences.
It then outlines how dishwashers typically connect to garbage disposals, sink tailpieces, or branch drains.
Finally, it summarizes typical local code requirements and directs readers to verify specific rules with municipal plumbing authorities.
Built-in dishwasher drain options: air gap vs. high-loop
Several common methods exist for routing a built-in dishwasher drain to prevent backflow into the appliance, chiefly the air gap and the high-loop; each achieves the same basic goal—protecting the dishwasher from sewage or sink water—but they differ in installation, visibility, and code acceptance.
An air gap mounts visibly at the sink and meets many codes; a high-loop hides under the countertop but may be disallowed locally.
How garbage disposals, sink tails, and branch drains connect
Moving from methods that prevent backflow, attention shifts to where the dishwasher drain ties into the household plumbing—commonly a garbage disposal, the sink tailpiece, or a dedicated branch drain.
Connections use a stub-out inlet on disposals, a knockout fitting on tailpieces, or a wye/tee into a branch drain.
Proper clamps, gaskets, and secure hose routing prevent leaks and guarantee gravity-assisted discharge.
Typical local code requirements and how to check them
How should a homeowner verify that a dishwasher drain installation meets local requirements?
The homeowner should consult the municipal plumbing code, review appliance and disposal manufacturer instructions, and confirm required air gap or high-loop configurations.
Contacting the local building department for permit and inspection rules, or hiring a licensed plumber to interpret codes and obtain permits, guarantees compliance and avoids fines or rework.
Pre-Installation Checks and Measurements
Before beginning installation, measurements and inspections guarantee the drain hose will reach the sink connection without kinking and that proper routing is possible.
The dishwasher inlet and existing sink plumbing should be examined for compatibility and any signs of damage or corrosion.
Finally, water supply shutoffs and the electrical circuit must be verified as accessible and correctly rated for the appliance.
Measuring drain hose length and reach
Accurate measurement of the dishwasher drain hose length and reach guarantees a leak-free, code-compliant connection and prevents strain on fittings.
Measure from the dishwasher outlet to the sink drain or air gap, following the hose path including bends and mounting clips.
Allow 6–12 inches extra for slack and service access.
Confirm hose does not kink or rub against sharp edges.
Inspecting the dishwasher inlet and sink plumbing
A brief visual and tactile inspection of the dishwasher inlet and nearby sink plumbing guarantees connections will be secure and code-compliant.
Check inlet threads, valve bodies, and hose fittings for corrosion, stripped threads, or brittle seals.
Confirm supply and drain outlets align without strain and that sink trap, air gap, or high loop locations are accessible.
Note any leaks or required part replacements.
Verifying water supply and power connections
With inlet and trap conditions confirmed, the installer moves on to verify water supply and electrical connections to guarantee compatibility and safety.
They confirm shutoff valve function, measure supply line size and pressure suitability, and inspect for corrosion or leaks.
Electrical checks include confirming dedicated circuit, correct voltage, proper ground, and secure junctions.
All discrepancies are documented and corrected before installation proceeds.
Step-by-Step Dishwasher Drain Installation
The following section outlines the sequential actions required to install a dishwasher drain safely and correctly.
It begins with shutting off power and water and preparing the workspace.
Then it covers removing an old hose if present and securing the new hose to the dishwasher outlet.
Routing the hose to form a high loop under the cabinet and connecting it to the garbage disposal or sink tailpiece completes the procedure.
Step 1 Turn off power and water; prepare workspace
Before any plumbing or electrical work begins, power to the dishwasher should be switched off at the circuit breaker and the water supply shut at the isolation valve; this reduces risk of shock and flooding while the workspace is prepared.
Protective gloves and safety glasses are recommended.
Clear cabinetry area, place towels and a bucket under connections, and guarantee good lighting and firm access to the dishwasher base.
Step 2 Remove old drain hose (if replacing)
Disconnecting the old drain hose begins by sliding the dishwasher out just far enough to access the hose connection at the sink tailpiece or garbage disposal.
Place towels and a bucket to catch water.
Loosen the clamp or quick-connect fitting, then pull the hose free.
Inspect and clean the connection, remove corrosion or debris, and dispose of the old hose per local regulations.
Step 3 Attach drain hose to dishwasher outlet securely
Slide the new drain hose onto the dishwasher outlet until the fitting seats fully, then secure it with the specified clamp or crimp ring to guarantee a watertight seal.
Tighten the clamp evenly, avoiding overcompression that could damage the hose. Verify alignment to prevent kinks.
After securing, gently tug the hose to confirm firmness and inspect the connection for gaps or misfits before proceeding.
Step 4 Route hose under cabinet and create a high loop
Route the drain hose neatly under the cabinet, keeping it as straight and free of kinks as possible while maintaining access for future inspection.
Secure hose with clips or zip ties to cabinet underside, forming a high loop as close to the cabinet base as feasible.
Confirm loop height exceeds adjacent sink rim to prevent backflow, and trim or adjust slack for a tidy, stable installation.
Step 5 Connect to garbage disposal or sink tailpiece
Begin by identifying whether the dishwasher will tie into a garbage disposal or the sink tailpiece and gather the correct fittings: a disposal inlet knockout plug removal tool or a tailpiece adapter, plus a hose clamp.
Remove the knockout plug if using a disposal, secure the dishwasher hose to the disposal inlet or tailpiece adapter with a clamp, tighten evenly, and check for alignment and secure, leak-free connections.
Step 6 Install an air gap (if required) and connect hoses
Install an air gap when local codes require or when the sink setup lacks a high loop. Then connect the dishwasher drain hose to the air gap inlet and the waste outlet to the disposal or tailpiece using corrosion-resistant clamps.
Make certain the air gap body seats firmly in the sink or countertop hole, tighten mounting hardware, and confirm all hose connections are aligned, straight, and free of kinks.
The installer routes hoses without twisting, trims excess length, secures clamps snugly, and verifies that the air gap vent remains unobstructed.
Step 7 Secure connections, clamps, and check slope
Once hoses and fittings are seated, the installer systematically tightens all clamps and fasteners, starting at the dishwasher connection and working toward the disposal or tailpiece to guarantee even compression and avoid over‑torquing.
Each clamp is hand‑snugged then given a quarter turn with a screwdriver. Connections are inspected for alignment, the drain hose slope is confirmed (downhill toward drain), and brackets secured.
Step 8 Restore power/water and run test cycle
With clamps tightened and the drain hose slope verified, power and water can be restored to prepare for a test cycle.
The homeowner reconnects electrical power and opens the water supply slowly, checking for leaks at each joint.
A short diagnostic or quick wash cycle is run while observing under-sink connections, garbage disposal junctions, and drain flow to confirm proper operation and watertight seals.
Common Connection Scenarios and How to Handle Them
This section summarizes typical dishwasher drain hookups and the practical choices they require.
It compares connecting to a garbage disposal (with or without removing the knockout plug), attaching to a sink tailpiece when no disposal is present, and solutions for long hose runs or distant drains.
It also outlines the differences between installing an air gap and using a high loop, with key pros and cons for each.
Connecting to a garbage disposal with and without knockout plug
Plumbing a dishwasher drain to a garbage disposal requires determining whether the disposal has its dishwasher inlet knockout plug removed. If the plug remains, it must be drilled out or the disposal replaced to allow a secure hose connection.
Meanwhile, a removed plug calls for a proper hose clamp and high loop or air gap to prevent backflow.
- Verify knockout presence.
- Remove plug safely.
- Fit hose with clamp.
- Confirm high loop/air gap.
Attaching to sink tailpiece without a disposal
Several common scenarios arise when a dishwasher must be tied into a sink tailpiece without a garbage disposal: an existing branch tailpiece with a dishwasher inlet, a tailpiece that requires adding a branch tee, or a sink setup needing an adapter for a slip-joint connection.
Install a proper dishwasher branch tee or adapter, guarantee correct trap orientation, use hose clamps and plumber’s tape, and test for leaks and air gaps.
Dealing with a far-away drain or long hose runs
When a dishwasher must reach a drain that sits several feet away—such as a remote sink, floor drain, or utility standpipe—the installer must account for hose length limits, routing, and proper slope to prevent siphoning or backups.
Use manufacturer-approved extension kits, avoid sharp bends, secure the hose along joists or cabinets, maintain continuous downhill pitch, and locate accessible junctions for future service or leak inspection.
Installing an air gap vs. using a high loop: pros and cons
Although both an air gap and a high loop prevent wastewater backflow into a dishwasher, they differ in installation, code acceptance, and effectiveness:
An air gap is a mechanical, code-required device in many jurisdictions that provides an open, visible break in the drain line, while a high loop relies on routing the hose above the sink rim and is simpler but may not meet local plumbing codes or provide the same protection against siphoning.
An air gap offers superior, inspected protection; a high loop is cheaper and easier but potentially noncompliant and less reliable.
Troubleshooting Drain Problems
Troubleshooting drain problems begins with a simple, stepwise diagnosis to confirm whether the issue is a clog, a faulty hose or disposal connection, or backflow from the sink.
Inspectors should check hose crimps, clamps, and the disposal inlet for leaks, and verify the high loop or air gap to prevent sink water from entering the dishwasher.
If there is slow drainage or unusual noise, the cause is often a partial clog in the trap, hose, or pump that requires cleaning or component replacement.
Dishwasher not draining stepwise diagnosis
Begin by confirming whether the dishwasher completes its drain cycle and whether water remains pooled in the tub.
Check filter and sump for debris, inspect the drain hose for kinks or clogs, and verify the air gap or high loop is intact.
Test the drain pump by listening for operation and measuring continuity.
Note error codes and repeat cycle to confirm resolution.
Leaks at hose or disposal connection where to check
Several common leak points exist where the dishwasher drain hose meets the air gap, sink tailpiece, or garbage disposal. Each should be inspected systematically for loose clamps, cracked fittings, or split hoses.
Check hose clamps for tightness, examine hose ends for splits, inspect disposal inlet and tailpiece gaskets for wear, and confirm the hose routing avoids kinks or chafing against sharp surfaces.
Backflow or sink water entering dishwasher fixes
After checking hose and disposal connections for leaks, attention should turn to situations where sink water flows back into the dishwasher.
Check for proper high loop or air gap; raise or install if absent.
Inspect and replace a faulty check valve.
Verify garbage disposal knockout plug removed and tailpiece alignment allows upward hose routing.
Test by running sink to confirm backflow resolution.
Noisy drain or clog causing slow drainage
Investigate noisy drains and slow emptying by isolating common causes: partial clogs in the dishwasher filter, debris trapped in the drain hose, or obstructions at the garbage disposal inlet or sink tailpiece.
Technicians recommend cleaning the filter, detaching and flushing the hose, and inspecting disposal knockout plugs.
If noise persists, check for kinks, venting issues, or failing pump motor; replace faulty components as needed.
Maintenance Tips to Prevent Drain Issues
A simple maintenance routine prevents most dishwasher drain problems: schedule regular cleaning, avoid pouring grease or large food scraps down the drain, and inspect hose routing for kinks.
Minor clogs can often be cleared safely with a basket strainer, a manual snake, or by flushing with hot water and a mild, non-corrosive cleaner.
Replace the drain hose or worn clamps at the first sign of cracks, persistent leaks, or deterioration.
Regular cleaning schedule and what to avoid
Regularly scheduled maintenance prevents most dishwasher drain problems by removing buildup before it causes clogs or odors.
A simple routine extends lifespan and avoids costly repairs.
- Run a monthly hot-water empty cycle with vinegar.
- Wipe seals and filter weekly.
- Inspect and clear the air gap monthly.
- Avoid grease, fibrous scraps, and harsh chemical drain cleaners.
How to clear minor clogs safely
Once routine cleaning has reduced most buildup, homeowners can address minor clogs safely with a few simple techniques that avoid damage to the dishwasher or plumbing.
Remove and inspect the filter and sump, clear debris by hand or with a soft brush, and flush with warm water.
Use a mild, enzyme-based drain cleaner if needed; avoid harsh chemicals and excessive force.
When to replace the drain hose or clamps
Inspect the drain hose and clamps at least annually and whenever leaks, odors, or sluggish draining occur, since deterioration or loose fittings are common causes of failures.
Replace cracked, bulging, hardened, or flattened hoses and any corroded or stripped clamps.
Also swap components after persistent leaks, visible kinks, or after major repairs.
Use appropriately sized, heat-rated hose and stainless-steel worm clamps for reliable sealing.
Cost, Time Estimates, and When to Hire a Pro
Typical DIY costs for plumbing a dishwasher drain often include a tailpiece, hose, clamps, air gap or high loop materials, and basic fittings, with parts generally totaling a modest sum.
Installation time ranges from about 1–3 hours for straightforward replacements to half a day for more involved runs or cabinet modifications.
Persistent leaks, backflow, inadequate drainage after installation, or unfamiliarity with local codes are clear signs a licensed plumber should be called.
Typical DIY cost breakdown and parts list
A clear cost breakdown and concise parts list help a homeowner decide whether a dishwasher drain hookup is a viable DIY job or better left to a professional. Typical parts: tailpiece, air gap/loop, hose, clamps, fittings. Minor tools may be rented.
| Item | Typical Cost | Notes |
|---|---|---|
| Hose & clamps | $15–$30 | |
| Air gap/loop | $10–$40 | |
| Fittings/tools | $5–$30 |
Estimated time for common installation scenarios
Many installations fall into a few predictable time ranges depending on the setup: simple hose-to-disposal hookups often take 30–60 minutes.
Adding an air gap or high loop to an existing drain adds 45–90 minutes.
Routing new drain lines through cabinets or walls can take 2–4 hours or more.
Permit needs, tight cabinet access, or unforeseen repairs can extend these estimates; plan buffers.
Signs that indicate you need a licensed plumber
When visible leaks, persistent clogs, electrical faults, or sewage odors accompany a dishwasher drain issue, hiring a licensed plumber becomes prudent; such symptoms often signal underlying problems—damaged drain lines, failed disposals, or compromised house plumbing—that exceed routine DIY scope.
A pro assesses scope, provides cost and time estimates, secures permits if needed, and prevents code violations, water damage, and costly rework.
Checklist Before You Finish
Before closing up, a final set of checks should confirm there are no leaks, the drain flows freely, and the dishwasher completes a full cycle without issues.
The installer should record warranty details and any parts used, and take photos of the finished connections for future reference.
These steps protect the installation and simplify any future service or warranty claims.
Final leak, drain, and function checks
Conduct a systematic final inspection to confirm the dishwasher and its drain operate correctly and remain leak-free.
Run a full cycle and observe connections, switches, and pump noise. Verify water drains completely and disposal/discharge fittings are secure.
Check for hidden dampness under cabinet.
- Inspect visible joints for drips.
- Monitor drain flow speed.
- Listen for abnormal sounds.
- Scan for moisture.
Documentation, warranty considerations, and photos for records
Document the completed work with clear records: note installation date, model and serial numbers, replaced or new parts, torque or clamp settings, and any deviations from standard procedure.
Photographs of connections, routing, and mounting provide visual proof. Retain receipts, part numbers, and instruction revisions for warranty claims.
Register the appliance per manufacturer guidelines and file copies (digital and physical) for future service or resale documentation.
Conclusion
Tools set aside like ships at harbor, the finished drain runs like a quiet river beneath the sink. The homeowner steps back, watching water travel its new course—smooth, deliberate—each connection a small bridge holding steady. Confidence settles as neatly as a folded towel; routine becomes less uncertain. With careful measurement, code-minded choices, and patience, a once-daunting task becomes a practised bend in the kitchen’s daily flow, ready for the next spill or celebration.