How to Roto-Rooter a Toilet: Step-by-Step Guide to Unclogging Like a Pro
To “Roto-Rooter” a toilet means using a mechanical auger to effectively clear stubborn blockages that a plunger can’t handle. Start by shutting off the water supply and donning gloves and eye protection. Position a closet auger at the bowl rim, gently feed the cable into the drain, and rotate to either break up or retrieve the obstruction. Afterward, retract the cable and sanitize your tools. Test the toilet by flushing; if the issue persists, repeat the process with caution. Avoid mixing chemicals with mechanical methods, and consider calling a professional if you notice ongoing problems or signs of sewer line issues. Additional steps and tips are provided below.
What “Roto-Rooter a Toilet” Means and When to Use It
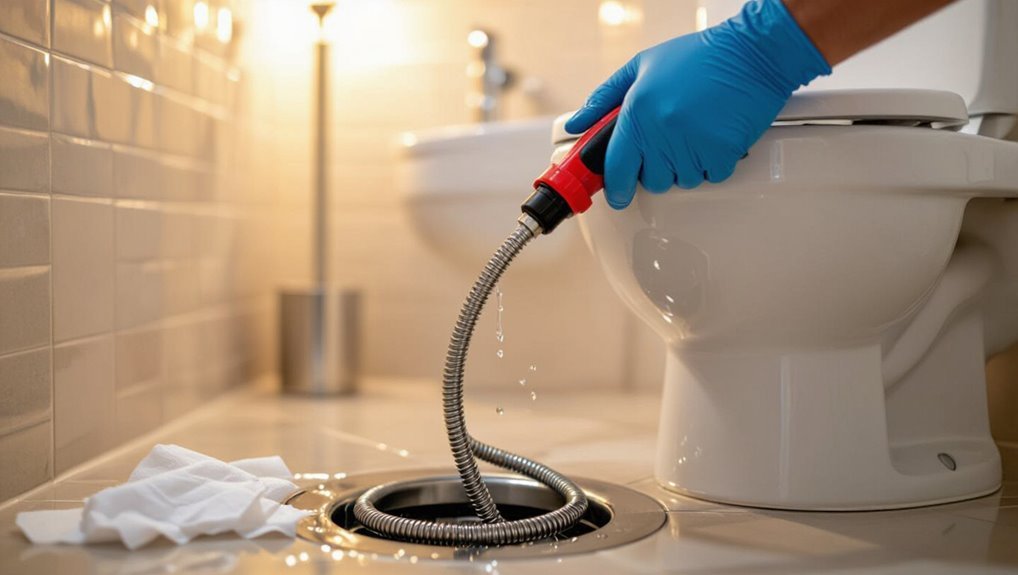
“Roto-Rooter a toilet” refers to using a mechanical auger or powered drain tool to break up or extract blockages beyond the reach of a plunger.
It is typically needed when water remains slow or backed up after plunging, when waste or non-flushable items are suspected deep in the trap or drain, or when repeated clogs occur.
Before beginning, appropriate protective gear, containment of splashes, and basic sanitation steps should be taken to reduce health and plumbing risks.
Definition and scope of Roto-Rooter-style toilet clearing
Clearing a toilet with Roto-Rooter-style methods refers to using mechanical or powered drain-cleaning tools—such as augers, snakes, or motorized cutters—to remove blockages from the bowl, trap, and immediate waste line rather than relying solely on plunging or chemical cleaners.
The scope covers manual and powered augering, cable-fed cutters, and targeted obstruction removal, explaining how to roto rooter a toilet safely and effectively without full sewer excavation.
Common signs you need a mechanical auger versus a plunger
Recognize the difference between a clog that yields to a plunger and one that requires a mechanical auger by observing water behavior, sound, and response to initial plunging.
Slow drainage after several effective plunges, gurgling in other fixtures, persistent high water level, or a plunger that fails to alter pressure indicate a deeper or rigid blockage best addressed with a mechanical auger.
Safety and sanitation considerations before starting
When plunging fails and signs point to a deeper obstruction, the next step is to prepare for a mechanical auger—commonly called “Roto-Rootering” a toilet—which means using a powered or manual snake to break up or retrieve the blockage.
Wear gloves, eye protection, and old clothing; ventilate the area; remove pets and children; shut off water if necessary; disinfect tools and surfaces afterward to prevent contamination.
Tools and Materials Needed
A clear list of tools and materials helps guarantee the roto-rootering process is safe and effective.
Recommended augers (motorized through-wall models or hand-held toilet augers with coated cables) and their key features will be covered, along with supplementary items such as plungers, gloves, a bucket, towels, a small toothbrush and mirror for inspection.
The section also outlines necessary protective equipment and cleaning supplies to protect the user and sanitize the work area.
Recommended toilet augers (types and features)
For clearing clogs effectively, choose a toilet auger designed for curved traps and porcelain rims: closet augers with a 3–6 foot cable, a protective vinyl sleeve, and a curved, rigid shaft are the standard choice; for deeper, main-line issues a longer drum or drum-style sewer auger is appropriate, while handheld power augers and disposable plastic snake kits serve for occasional light blockages.
- Closet auger: 3–6 ft, vinyl sleeve, ergonomic handle.
- Drum sewer auger: 25–50 ft, durable cable, feed reel.
- Power auger: compact, motorized feed, safety clutch.
Additional tools: plungers, gloves, bucket, towels, toothbrush, mirror
Beyond selecting the right auger, a handful of basic tools guarantees the job stays controlled and sanitary.
The technician equips a high‑seal plunger, disposable gloves, a spill bucket and absorbent towels. A small toothbrush and mirror assist with inspection and scraping in tight spaces.
Essential, compact items minimize mess and speed assessment.
- Plunger, bucket, towels
- Gloves, toothbrush
- Mirror, inspection tools
Protective equipment and cleaning supplies
Safety takes precedence when tackling toilet clogs, so the technician assembles a compact kit of protective equipment and cleaning supplies before beginning work.
Personal protective gear, disinfectants, and disposal items are selected for efficiency and hygiene. Inspection and post-service cleanup materials guarantee safe handoff to the homeowner.
- Nitrile gloves, safety goggles, mask
- EPA‑registered disinfectant, enzymatic drain cleaner
- Trash bags, paper towels, scrub brush
Preparing the Area and the Toilet
Before beginning work, the water supply should be shut off at the shutoff valve and the bowl drained to prevent overflow.
The surrounding bathroom should be cleared of rugs and personal items, with floors protected by towels or a waterproof mat.
A quick inspection of the toilet and visible drain area should be made to note any obvious obstructions or damage.
How to turn off water and prevent overflow
Locate and close the toilet’s shut-off valve and relieve tank pressure to stop the water supply and reduce the risk of overflow.
After closing the valve, flush once to lower tank level; hold the handle if necessary to prevent refilling.
Inspect for double valves or hidden stops.
If the valve leaks or is inaccessible, shut off the house main and notify a plumber before further work.
Clearing the bathroom and protecting floors
Once the supply is secured, clear the bathroom to create an unobstructed workspace: remove rugs, towels, toiletries, and any decorative items that could be damaged or contaminate the area.
Lay down waterproof drop cloths or old towels around the base of the toilet and along traffic paths.
Elevate or bag nearby electronics and store cleaning supplies safely away from splashes and tools.
Inspecting the toilet and drain for visible blockages
With the workspace cleared and floors protected, attention shifts to the toilet and drain to identify visible obstructions.
The technician dons gloves and uses a flashlight to inspect the bowl, rim jets, and trap for paper, hygiene products, or foreign objects.
The drain opening and exposed flange are checked; any visible debris is removed with pliers or gloved hands before attempting mechanical clearing.
Step-by-Step Guide to Using a Toilet Auger
The procedure begins with positioning the auger at the bowl rim and gently feeding the cable into the trap while keeping the protective sleeve in place.
The operator uses controlled rotation to either break the obstruction apart or hook and retrieve it, monitoring water flow and drum feel to judge when the line is clear.
Afterward the cable is retracted, rinsed, and disinfected before stowing.
Positioning the auger and inserting the cable
Position the auger so its curved end aligns with the toilet bowl’s trap inlet, steadying the head at roughly a 45-degree angle to prevent scraping the porcelain.
Grip the handle firmly, hold the sheath steady against the rim, and snug the boot to form a seal.
Begin inserting the cable slowly, maintaining alignment and keeping tension controlled to avoid kinking or sudden slips.
Techniques for feeding the cable through the trap
Begin feeding the cable slowly into the trap, turning the handle clockwise in steady, controlled increments.
The operator advances while maintaining light forward pressure to prevent kinking. Periodically retract slightly to clear resistance, then continue.
Use gentle back-and-forth motions to navigate bends, keeping the cable centered.
Stop if unusual resistance or metal-on-porcelain contact occurs to reassess alignment and avoid damage.
Breaking up vs pulling out the clog: rotation and retrieval methods
Once the cable is seated through the trap and moving freely, attention shifts to deciding whether to break the obstruction apart or extract it whole.
The operator tests resistance: firm, localized resistance favors rotation to fragment buildup; softer, hooked resistance suggests careful retrieval.
Controlled clockwise rotations bite material; reverse and withdraw to capture debris on the auger head.
Proceed slowly to avoid pipe damage.
How to know when the clog is cleared
A successful clear is indicated by a sudden easing of resistance and free, steady water flow when the auger is withdrawn or the toilet is flushed; the operator should notice the cable turning without binding and hear the normal sound of water draining rather than gurgling or struggling.
Continued smooth rotation, unobstructed bowl movement, and absence of slow draining confirm the passage is cleared and functional.
Proper removal and cleaning of the auger
Retract the cable slowly and steadily, keeping the auger head centered to prevent scraping the porcelain; this controlled withdrawal minimizes splatter and reduces the chance of damaging the bowl or the cable.
Once clear, drain excess water back into the bowl, then extend the cable and rinse with clean water.
Sanitize the cable and head with disinfectant, dry thoroughly, and store coiled to prevent kinks.
Alternative Methods If Auger Fails
If the auger does not clear the clog, attention turns to other practical options such as using a flange plunger properly or attempting a second pass with the same or a different auger.
Chemical or enzyme treatments can be considered for organic buildups but should be used sparingly and according to safety instructions.
For stubborn blockages, a wet/dry vacuum may remove debris if proper precautions are taken to avoid damage or contamination.
Using a flange plunger effectively
When a toilet auger fails to clear a blockage, using a flange plunger can often restore flow by creating a stronger seal around the trap.
The user positions the extended flange into the bowl’s outlet, establishes a watertight seal, then applies steady, controlled thrusts and pulls.
Repeat several times, checking progress; replace seal and retry if suction is lost.
Enzyme and chemical drain treatments: when and how to use safely
Although a roto-rooter auger and plunger are often first-line tools, enzyme and chemical drain treatments provide useful alternatives for blockages that resist mechanical clearing.
Enzymatic cleaners suit organic clogs, require hours to act, and are safe for plumbing and septic systems.
Chemical solvents work faster but risk pipe damage, fumes, and hazardous reactions; follow label instructions, ventilate, wear PPE, and avoid mixing products.
Wet/dry vacuum method steps and precautions
Use a wet/dry vacuum to extract standing water and dislodge clogs when a plunger or auger cannot clear the toilet.
Empty the tank, seal vents, fit a rigid hose with a toilet adapter, and vacuum water and debris.
Avoid household vacuums; wear goggles and gloves.
Sanitize the vacuum and work area afterward.
Monitor for slow drainage or leaks.
When to attempt a second auger pass or try a different auger
Assess the situation before committing to another auger pass or swapping tools: if the obstruction responded slightly to the first attempt (water level lowered, partial flow returned) a second, careful pass with the same auger is reasonable.
If there was no movement, repeated attempts risk damaging the bowl or plumbing and a different auger type (longer cable, smaller diameter, or a rotating head) should be considered.
Proceed slowly, monitor changes.
Preventing Future Toilet Clogs
Preventing future toilet clogs focuses on simple habits, scheduled maintenance, and a few reliable products.
Recommendations include clear rules about what not to flush, routine checks and cleanings to keep drains clear, and specific items—such as enzyme-based cleaners and hair traps—that reduce buildup.
Following these steps minimizes blockages and the need for emergency augering.
Best practices for what not to flush
A compact list of items and habits that should never be flushed can greatly reduce the risk of future toilet clogs.
Advise discarding wipes, paper towels, feminine products, dental floss, cotton balls, and cigarette butts in the trash.
Avoid pouring grease, paint, medications, or solids down the toilet.
Encourage educating household members and posting a brief reminder near the bathroom to prevent improper disposal.
Routine maintenance tips to keep drains clear
Building on clear guidelines about what not to flush, routine maintenance helps keep small issues from becoming stubborn clogs.
Regularly inspect visible seals and tank components, run a monthly flush test, and clear slow drains with a plunger or plumber’s snake before buildup worsens.
Encourage minimal paper use, address leaks promptly, and schedule professional inspections annually to catch hidden problems early.
Product recommendations to reduce clogs
Several simple products can greatly reduce the frequency of toilet clogs when used correctly and consistently.
The guide recommends targeted solutions that minimize buildup and blockages while supporting routine maintenance.
- Enzymatic drain cleaner: breaks down organic waste safely over time.
- Mesh sink strainer: captures hair and debris before entering pipes.
- Toilet-safe wipes disposal bin: prevents flushing non-degradable items.
Troubleshooting Difficult or Persistent Clogs
When a toilet remains slow or repeatedly backs up, it can indicate a sewer line problem or a deeper blockage beyond the bowl.
The homeowner should inspect the trap for visible objects and remove them carefully, using gloves and appropriate tools to avoid pushing debris further.
If the obstruction persists or signs point to the main line (multiple fixtures affected, sewage smell, or wet spots in the yard), a professional plumber should be called and may perform camera inspection, snaking, or sewer-line repair.
Signs of sewer line issues or deeper blockages
How can one tell if a clog is confined to a toilet or indicates a sewer-line problem?
Persistent backups in multiple fixtures, gurgling drains, slow drains housewide, sewage odors, wet spots in yard or near foundation, and sudden sink or tub reversals suggest a mainline obstruction.
Professional inspection with a camera and prompt excavation or hydro-jetting may be required to resolve deep blockages.
How to check and remove objects lodged in the trap
Inspect the toilet trap next: this curved section immediately behind the bowl often catches toys, excessive paper, or broken parts and is a common culprit for stubborn clogs that resist plunging.
Drain bowl, don rubber gloves, remove excess water with a cup.
Use a flashlight and a hooked grabber or toilet auger to retrieve or break up lodged items gently; recheck flow and sanitize.
When to call a professional plumber and what to expect
If removing visible debris from the trap and using a toilet auger fail to restore proper flow, it may be time to call a professional plumber.
A plumber assesses causes (deep blockages, line damage, sewer issues), uses cameras and motorized augers, and advises on repairs.
Expect diagnostic fees, clear explanations, cost estimates, and recommended fixes; authorize work only after understanding scope and price.
Safety, Sanitation, and Cleanup After Clearing a Toilet
After clearing a toilet, attention turns to thorough disinfection of the bowl, tools, and surrounding surfaces to prevent bacterial spread.
Contaminated materials and waste should be bagged securely and disposed of according to local regulations to minimize health risks.
A brief inspection for cracks, worn seals, or damaged components helps determine whether parts need repair or replacement.
Disinfecting the toilet, tools, and surrounding area
Sanitize all exposed surfaces and tools immediately to prevent bacterial spread and odors: the operator dons gloves and eye protection, applies an EPA-registered disinfectant to bowl, handle, seat, floor, and any tools used, allowing proper contact time.
Rinse and air-dry cleaned items; wipe adjacent surfaces.
Remove gloves, wash hands thoroughly.
Inspect for residual stains or odors and reapply disinfectant if necessary.
Proper disposal of waste and contaminated materials
When dealing with waste and contaminated materials from a cleared toilet, the technician follows strict containment and disposal procedures to protect health and prevent cross-contamination.
Biohazardous solids are bagged in heavy-duty, leak-proof bags; disposable PPE and contaminated rags are sealed separately.
Fluids are absorbed with approved materials, disposed per local regulations.
Documentation and transport follow municipal guidelines to licensed disposal facilities.
Inspecting for damage and when to replace components
With waste contained and contaminated items removed, the technician conducts a focused inspection of the toilet and surrounding plumbing to identify damage that could compromise function or hygiene.
They check seals, wax rings, bolts, flanges, tanks, and supply lines for cracks, corrosion, or leaks.
Replace components showing wear, persistent leaks, or structural faults; document findings and recommend immediate replacement when integrity is uncertain.
Cost, Time, and When to Hire a Pro
Typical outlays for a DIY clog—tools and supplies—are compared with professional service fees to help readers gauge cost-effectiveness.
Estimated time frames for simple blockages, partial clogs, and deep sewer issues give a realistic sense of how long each approach may take.
Key questions to pose to a plumber—such as licensing, guarantees, and itemized pricing—are suggested to inform hiring decisions.
Typical costs for DIY versus professional service
Cost comparisons between DIY unclogging and hiring a professional Roto-Rooter technician hinge on equipment, time, and scope of the problem. DIY often costs $10–$75 for tools and materials; professionals range $100–$400+ depending on severity. Consider skill, warranty, and risk when choosing.
| Option | Typical Cost | Notes |
|---|---|---|
| DIY basic | $10–$30 | Plunger, snake |
| DIY advanced | $30–$75 | Auger, chemicals |
| Professional | $100–$400+ | Service call, repairs |
| Emergency | $200–$600+ | After-hours, major work |
Average time required for common clog scenarios
Most common toilet clogs can be categorized by severity, and each category has a predictable time range:
minor blockages (toilet paper, small debris) typically clear in 5–20 minutes with a plunger;
moderate clogs (larger debris, partial drain) require 20–60 minutes using auger or hand methods;
severe obstructions or sewer-line issues often take 1–3+ hours and may necessitate professional equipment and inspection.
Questions to ask a plumber before hiring
When should a homeowner call a plumber, and what should they ask about price and timeline before committing?
A homeowner should call when basic methods fail or damage looms.
Ask for an estimate, hourly versus flat rates, diagnostic fees, parts and disposal costs, expected completion time, and availability for emergencies.
Confirm licensing, insurance, warranty, and references before hiring.
Common Mistakes to Avoid
The writer warns against using excessive force or the wrong tools, which can damage the toilet or seals.
They note that combining chemical cleaners with mechanical tools risks dangerous reactions and equipment failure.
They also caution that ignoring signs of larger plumbing problems can turn a simple clog into a major repair.
Using excessive force or the wrong tools
Apply caution: using excessive force or the wrong tools can damage toilet components and plumbing lines, turning a simple clog into a costly repair.
Professionals recommend matching tool type and size to the fixture, avoiding metal hooks, improvised implements, or overzealous plunging.
Gentle, controlled technique preserves seals, porcelain and pipes; when resistance persists, stop and consult a plumber to prevent escalation.
Misusing chemical cleaners with mechanical tools
How should chemical drain cleaners be handled around mechanical tools to avoid harm?
They must be fully flushed and ventilation guaranteed before using augers or power snakes. Residual caustics can corrode equipment, generate toxic fumes, or react violently when agitated.
Protective gear and clear labeling prevent accidental mixing. If recent chemical treatment occurred, delay mechanical intervention and inspect for residues first.
Ignoring warning signs of larger plumbing problems
If subtle signs like slow drains, recurring clogs, or unexplained gurgling are dismissed as isolated annoyances, small issues can mask failing pipes, compromised seals, or sewer line backups that demand prompt attention.
Ignoring these warnings risks extensive damage, higher repair costs, and health hazards. A prompt inspection, proper diagnosis, and professional intervention prevent escalation and safeguard home plumbing integrity.
Quick Reference Checklists
A set of concise checklists helps guarantee consistent, safe, and effective toilet augering.
One checklist covers pre-job safety and preparation, another guides the step-by-step auger procedure, and a final list addresses cleanup and client follow-up.
These quick references serve as practical aids for both novice and experienced operators.
Pre-job safety and prep checklist
Before beginning any roto-rooter work, the technician verifies safety, containment, and access to minimize hazards and protect the property.
The checklist confirms PPE, utilities, and clearance; secures work area; and prepares containment for wastewater. Documentation and communication with occupants are completed before any tool deployment.
- Confirm PPE, gloves, goggles, mask
- Shut off water/electric as needed
- Set up containment and signage
Step-by-step action checklist for auger use
Begin by positioning the technician and equipment for efficient, safe auger operation: confirm the toilet bowl is partially drained, the auger cable and head are inspected and lubricated, and PPE is worn.
The technician then follows a concise action sequence to feed, clear, and verify flow without forcing or causing damage.
- Feed cable steadily, control rotation.
- Break obstruction, retract slowly.
- Flush to confirm clearance.
Post-job cleanup and follow-up checklist
Once flow is confirmed and the auger is retracted, the technician moves into post-job cleanup and follow-up tasks to restore the area and document the service.
Surfaces are disinfected, tools cleaned and inspected, and client communication completed with recommendations and warranty notes. A concise checklist guarantees consistency.
- Sanitize area and dispose of waste.
- Clean, inspect, store tools.
- Record work, advise client.
Conclusion
After wrestling the beast with a trusty auger, one might stand back admiringly as the once-proud toilet resumes its humble duty. Ironically, triumph smells faintly of bleach and regret, and the hero’s hands bear the modest trophies of victory. The lesson is obvious: plumbing prowess wins brief glory, until the next clog arrives to humble expertise, patience, and the comforting hope that someone else will answer that midnight call.