
How to Remove a Stuck Faucet Aerator: Simple Steps to Loosen and Clean It
To remove a stuck faucet aerator, first shut off the water supply and protect your sink’s surface. Use a cloth for better grip and attempt to turn the aerator by hand. If it remains stuck, apply penetrating oil or white vinegar to break down mineral deposits, letting it sit for a while. Then, employ an adjustable or strap wrench, applying gentle counterclockwise pressure. Once removed, disassemble the aerator to clean the screens, gaskets, and passages. Inspect all parts for damage and replace any that are worn. Follow these steps for effective cleaning, inspection, and reinstallation of your aerator.
What to do when a faucet aerator is stuck: quick solution overview
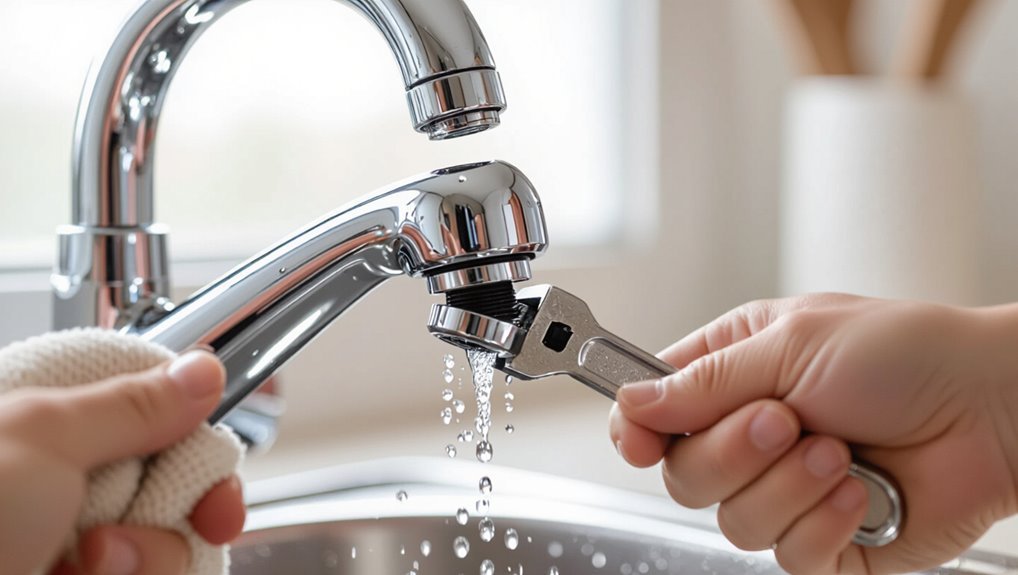
A concise procedure begins with applying penetrating oil, using a strap wrench, and gently tapping the aerator to free seized threads without damaging the fixture.
If the aerator still resists after careful attempts or if the fitting shows signs of cracking or corrosion, further force should be avoided.
In those cases, the task should be handed to a professional to prevent leaks or costly repairs.
Fast, safe method to loosen a stuck aerator
Use steady, controlled force and basic household tools to free a stuck aerator without causing damage.
Begin by wrapping the aerator with a cloth, fitting an adjustable wrench gently, and turning counterclockwise.
If resistance persists, apply penetrating oil, wait briefly, then try again.
For plastic aerators, use pliers with rubber protection.
These steps show how to remove faucet aerator that is stuck safely and quickly.
When to stop and call a professional
After several careful attempts to loosen a stuck aerator—wrapping it, applying controlled wrench pressure, and trying penetrating oil—there are clear signs that further DIY effort risks damage or injury.
Stop if metal deforms, threads strip, leaks worsen, or tools slip.
Contact a licensed plumber to prevent costly repairs, guarantee proper replacement, and address underlying valve or corrosion issues safely and efficiently.
Why aerators get stuck and what to check first
Aerators commonly seize from mineral buildup, corrosion, cross-threading, or degraded washers.
The first checks are to identify the aerator type and threading—male versus female—and inspect visible deposits or damage.
Before attempting removal, assemble basic tools and materials such as adjustable pliers or a strap wrench, penetrating oil, soft cloths, and replacement seals.
Common causes of a stuck aerator
Corrosion, mineral buildup, and overtightening are the most common reasons an aerator becomes stuck; each creates a different kind of resistance at the threads or between the housing and faucet.
Other causes include trapped debris, degraded rubber washers that swell or stick, damaged threads from cross-threading, and paint or sealant applied during installation.
Cold water mineral deposits and long periods without use exacerbate seizing.
How to identify aerator type and threading
Knowing why an aerator is stuck helps determine what to inspect first: its type and threading.
Identify whether the aerator is female (screws onto spout) or male (screws into spout) and note visible thread pitch and diameter.
Check for built-in flow restrictors, irregular shapes, and fragile decorative housings.
Document markings or brand stamps before attempting removal.
Tools and materials to have on hand
A few basic tools and a handful of small replacement parts cover most stuck-aerator jobs, so gather a cloth, adjustable pliers or a strap wrench, needle-nose pliers, a small flathead screwdriver, replacement washers and O-rings, and penetrating lubricant before beginning.
Corrosion, mineral buildup, or overtightening are common causes; inspect threading and gasket condition first.
- Check for mineral deposits
- Inspect threads and gaskets
- Protect finishes with cloth
- Test lubricant penetration
Step-by-step: how to remove a stuck faucet aerator
Before attempting removal, the work area should be prepared and nearby fixtures protected to prevent scratches or damage.
First, hand-loosen using proper grip techniques, then try a rubber pad, cloth, or pliers with jaw protection if needed.
If it remains stuck, apply penetrating oil and allow appropriate dwell time before using an adjustable wrench, strap wrench, or basin wrench with controlled force.
Prepare the workspace and protect fixtures
Clear the area around the sink, remove nearby items, and lay down a towel or small bucket to catch parts and water; this minimizes mess and prevents lost pieces when the aerator is removed.
Turn off water supply if needed, place a rubber mat to protect finishes, wrap the aerator with tape or cloth before using tools, and guarantee good lighting and steady footing for safe, controlled work.
Step 1 Try hand loosening and proper grip techniques
Start by attempting to loosen the aerator by hand, using steady, even pressure to prevent rounding the edges.
The person grips the aerator firmly with fingertips, turning counterclockwise. If initial resistance occurs, pause and reposition for better leverage.
Small alternating twists and sustained pressure often break mineral deposits.
Avoid jerky motions; maintain control to prevent damage to threads or surrounding finish.
Step 2 Use rubber grip, cloth, or pliers with protection
If hand grip fails, employ a rubber jar opener, a folded cloth, or pliers wrapped with tape or a rag to increase friction and protect the aerator’s finish.
Position tools squarely, apply steady, even pressure, and turn counterclockwise. Avoid slipping or squeezing too hard to prevent damage.
For chrome or brass finishes, use softer coverings and gentle force until movement is felt.
Step 3 Apply penetrating oil safely and appropriate dwell time
When extra leverage and protective padding fail to free the aerator, applying a penetrating oil can loosen mineral deposits and corrosion holding it in place.
Choose a non‑caustic, plumber‑safe lubricant; apply sparingly to threads and crevices. Allow the product to dwell per label instructions—typically 10–30 minutes—reapplying if needed.
Wipe excess before attempting removal to avoid slipping and contamination.
Step 4 Use adjustable wrench, strap wrench, or basin wrench techniques
Grip the aerator housing with a suitable tool and apply steady, controlled force to break the remaining seal. An adjustable wrench fits metal housings; protect finishes with cloth. A strap wrench grips plastic without marring.
For tight access, employ a basin wrench’s angled head. Maintain alignment to avoid cross-threading, increase leverage gradually, and reassess grip if slipping occurs to prevent damage.
Step 5 Tap gently to break mineral deposits (how to tap and where)
After attempting steady turns with the wrench, attention shifts to loosening mineral buildup that binds the aerator.
One recommends tapping the aerator body lightly with a wooden or rubber mallet to avoid marring finishes.
Deliver firm, controlled taps around the circumference—not directly on fragile screens—while supporting the faucet to prevent stress.
Periodically check for incremental movement and stop once loosened.
Step 6 Use heat safely to expand metal threads (warnings and method)
Apply controlled heat to the aerator body to gently expand the metal threads and break the mineral bond, taking care to protect nearby finishes and plastic parts.
Use a hair dryer or heat gun on low, moving continuously for one to two minutes.
Allow cooling while attempting removal with pliers wrapped in cloth.
Avoid overheating, open flames, and prolonged exposure that could damage seals.
Step 7 Last-resort methods (pipe vise, vice grips, cutting options) and safety
If heat and gentle twisting fail to free the aerator, more forceful measures may be required.
Use a pipe vise or protective jaws on vice grips to avoid damaging finish; clamp the fixture securely and apply steady pressure.
As a last resort, carefully cut the aerator housing with a hacksaw or rotary tool, then file sharp edges.
Always wear eye protection and turn off water first.
How to clean, inspect, and reinstall the aerator
Once removed, the aerator should be disassembled and each screen, gasket, and housing cleaned of mineral buildup and debris.
Parts must be inspected for cracks, stripped threads, or excessive wear to decide between replacement and reassembly.
When reinstalling, appropriate lubricants or thread tape/anti-seize should be used and the aerator aligned and tightened to the proper torque to avoid leaks or damage.
Disassembling the aerator and cleaning parts
Begin by preparing a clean workspace and laying out tools and a small container to hold parts; this prevents loss and keeps debris from returning to the aerator.
Then carefully unscrew components, noting order and orientation.
Rinse screens and housing, scrub mineral deposits with a soft brush and vinegar, blow out passages, dry thoroughly, reassemble parts in original order, and test for proper flow and sealing.
Identifying damage vs. replaceable wear
Examine each cleaned component under good light to distinguish minor wear from damage that warrants replacement: small mineral stains, slight surface pitting, or compressed but intact O-rings are typically serviceable, whereas cracked screens, torn or flattened gaskets, bent housings, or corroded threads indicate the aerator or specific parts should be replaced.
Note thread integrity, seating surfaces, and filter alignment; replace compromised parts.
Lubricants, thread tape, and anti-seize options for reinstallation
After determining which parts can be reused, attention shifts to preparing the threads and seals for reinstallation with appropriate lubricants and anti-seize measures.
Apply a small amount of silicone grease to O-rings and rubber seals. For metal threads, choose plumber’s PTFE tape or a light anti-seize compound compatible with potable water.
Avoid petroleum-based greases that can degrade seals; wipe excess before assembly.
Proper torque and alignment when reinstalling
Reinstalling the aerator requires careful alignment and controlled torque to protect threads, seals, and internal screens.
The aerator should seat squarely, hand-threaded first to avoid cross‑threading. Tighten gradually with a wrench only until snug; overtightening risks stripping threads or crushing gaskets.
Use a torque indicator or a consistent light touch—typically a quarter to half turn past hand‑tight—then test for leaks and proper flow.
Preventing future stuck aerators
Preventing future stuck aerators begins with a simple regular maintenance schedule that includes periodic removal, cleaning, and inspection to catch buildup before it bonds.
Selecting aerators and fittings made from corrosion-resistant materials reduces the risk of seizing.
Where mineral-heavy water is present, basic treatment options—such as a water softener, point-of-use filters, or occasional vinegar soaks—help limit scale accumulation.
Regular maintenance schedule and cleaning tips
Establishing a simple maintenance schedule greatly reduces the chance of an aerator seizing up: inspect and run a quick clean every three months, or more often in areas with hard water, and perform a deeper soak-and-scrub every six to twelve months depending on mineral buildup.
- Rinse and brush aerator screens monthly
- Soak parts in vinegar for 30–60 minutes as needed
- Reassemble with new washers when worn
- Document dates and observations to track buildup
Choosing corrosion-resistant aerators and materials
Choosing corrosion-resistant aerators and materials greatly reduces the risk of a stuck faucet by minimizing mineral adhesion and galvanic corrosion.
Select stainless steel or brass aerators with protective coatings and avoid mixed-metal assemblies that promote electrochemical reactions.
Look for NSF/ANSI-certified finishes and replace plastic screens with metal where possible.
Durable seals and thread lubricants rated for potable water further extend service life and ease future removal.
Water treatment options to reduce mineral buildup
Several practical water treatment options can markedly reduce mineral buildup on aerators and extend their service life.
Installing a whole-house water softener replaces calcium and magnesium with sodium or potassium, reducing scale.
Point-of-use filters, reverse osmosis units, and scale-inhibiting chemical feeders also help.
Periodic maintenance and monitoring water hardness guarantee treatment effectiveness and minimize recurring aerator clogging.
Troubleshooting common complications
The troubleshooting section addresses typical problems that can arise when removing a stuck aerator, starting with options for repairing or replacing stripped threads and rounded corners.
It then provides a concise diagnostic checklist for identifying and stopping leaks after reinstallation.
Finally, it outlines repair paths and approximate costs if aerator removal damages the faucet spout.
Stripped threads or rounded corners repair and replacement options
When threads are stripped or corners rounded on an aerator or faucet spout, options shift from simple cleaning to repair or replacement. Evaluating the extent of damage determines whether a patch, rethreading, or full replacement is required.
Small fixes, inserts, or epoxy can restore function briefly. Severely damaged spouts need replacement or professional rethreading.
- Thread repair kits
- Helical inserts
- Epoxy patches
- Full spout replacement
Leaks after reinstallation diagnostic checklist
After repairing or replacing damaged threads and reinstalling the aerator, persistent leaks may signal installation errors, mismatched parts, or unnoticed damage.
Inspect the seat and washer for debris or twists, confirm proper gasket orientation and seating, verify thread compatibility and tightness without overtightening, test water pressure, and check for hairline cracks in the aerator body or spout finish that allow seepage.
When aerator removal damages the faucet spout repair paths and costs
Forceful or improper aerator removal can nick threads, deform spouts, or strip finish, creating repair needs that range from simple parts replacement to full spout or valve assembly swaps.
Consequences include leaks, poor aerator seating, and accelerated corrosion.
Professional assessment estimates costs: small thread repairs or new aerator seats are inexpensive; spout replacement or valve work incurs higher labor and parts expenses.
Comparison of removal tools and methods
A concise comparison of common removal tools and methods helps readers weigh tool effectiveness, safety, and recommended use cases. The table below summarizes key differences to guide selection based on the situation. The following discussion will clarify which options suit delicate finishes, corroded aerators, or quick DIY fixes.
| Tool/Method | Effectiveness | Best Use Case |
|---|---|---|
| Adjustable wrench | High on accessible fittings | Stubborn but undamaged aerators |
| Rubber strap/allen key | Moderate, low-scratch | Finished fixtures or light corrosion |
| Penetrating oil & patience | Variable, non-invasive | Severely corroded or seized aerators |
Tool effectiveness, safety, and recommended use cases
Compare common removal tools—rubber strap wrench, adjustable wrench, pliers with cloth, aerator key, penetrating oil, and heat—by effectiveness, risk, and ideal situations.
Rubber strap wrench: gentle, low risk, ideal for finished fixtures.
Adjustable wrench: strong grip, risks marring.
Pliers with cloth: useful but higher damage risk.
Aerator key: precise, safest when available.
Penetrating oil: good for corrosion.
Heat: last resort; can harm finishes and seals.
Quick reference: checklist and safety reminders
Before beginning work on a stuck faucet aerator, review a short checklist and key safety reminders to prevent injury and damage.
The technician confirms tools, water shutoff, and workspace readiness, then follows safety steps.
- Turn off water and relieve pressure
- Use appropriate tools and padding
- Wear gloves and eye protection
- Avoid excessive force; inspect threads afterward
Conclusion
When a faucet aerator refuses to budge, patience and the right approach win the day. The homeowner should treat the stuck aerator like a stubborn jar lid—gentle persistence, proper tools, and care loosen the grip. After removal, a quick clean, inspection, and correct reinstallation restore flow and prevent repeat problems. With simple maintenance and mindful use, future jams become unlikely, turning a recurring annoyance into a minor, manageable chore.
