How to Change a Toilet Flapper Quickly: Step-by-Step Guide for Beginners
To quickly change a toilet flapper, follow these simple steps: shut off the water supply, drain the tank, unhook the old flapper and chain, then attach a new compatible flapper to the valve seat. Adjust the chain for a proper seal with slight slack, restore the water, and test the flush. If you encounter leaks or chain issues, basic troubleshooting tips are provided below.
What a Toilet Flapper Is and Why It Matters
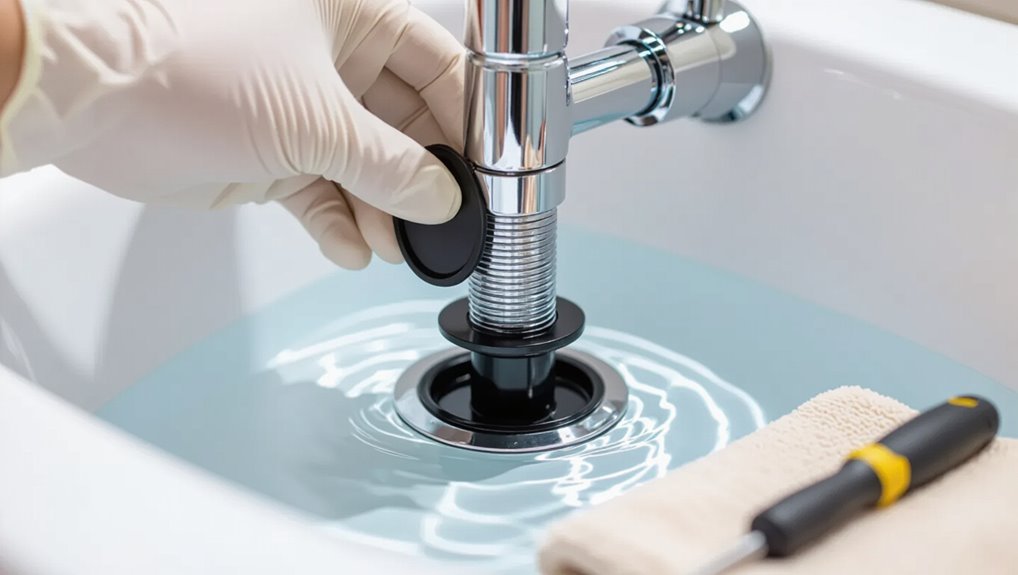
A toilet flapper is a valve at the base of the tank that lifts during a flush to release water into the bowl and then seals to stop the flow.
Common signs it needs replacement include a constantly running toilet, slow tank refill, or visible warping and mineral buildup on the seal.
Flappers come in rubber, longer-lasting silicone, and universal designs to fit different flush mechanisms.
Function of the flapper in the flush mechanism
Lifting and sealing with precise timing, the flapper controls water release from the tank to the bowl during each flush.
It lifts when the flush lever pulls the chain, permits a measured surge, then reseats to stop flow and allow refill. Proper seating guarantees efficient siphon initiation and prevents loss.
Knowing how to change a toilet flapper helps restore reliable operation.
Common signs the flapper needs replacement
Several clear signs indicate when a toilet flapper needs replacement, and recognizing them prevents wasted water and recurring clogs.
Persistent running after a flush, frequent refills, or weak flushes suggest poor sealing.
Visible warping, cracking, or stiffness when pressed signals material failure.
Sudden noises, such as hissing, and higher water bills also point to a leaking or deteriorated flapper needing replacement.
Types of flappers and materials (rubber, silicone, universal)
Toilet flappers come in several common materials—rubber, silicone, and universal blends—each affecting durability, seal quality, and compatibility with different flush mechanisms.
Rubber is affordable and flexible but degrades faster. Silicone resists chemicals and heat, offering a longer lifespan and tighter seal.
Universal blends balance cost and performance, fitting various tanks but sometimes sacrificing ideal fit for specific models.
Quick Overview: How to Replace a Toilet Flapper in Under 20 Minutes
A concise checklist lists the basic tools and materials—new flapper, adjustable pliers, sponge or towel, and optional replacement chain or clip—needed for a quick swap.
The task is typically rated easy and can be completed in about 10–20 minutes by a homeowner with minimal DIY experience.
Prior to starting, the tank should be drained, the water supply valve turned off, and hands or work surfaces protected to prevent mess or accidental damage.
Tools and materials needed for a fast replacement
For a fast flapper replacement completed in under 20 minutes, gather a few basic tools and the correct replacement part: an adjustable wrench or pliers, a pair of slip-joint pliers or scissors for trimming the chain, a flat-head screwdriver, and a replacement flapper (universal or model-specific) plus any required refill tube and flapper chain.
- Replacement flapper, chain, refill tube
- Adjustable wrench, slip-joint pliers, screwdriver
- Optional gloves and towel for spills
Estimated time and difficulty level
Most homeowners can expect to complete a flapper replacement in 15–20 minutes, with straightforward steps and minimal tools required.
Difficulty is low for someone with basic DIY experience; tasks include draining the tank, removing the old flapper, and attaching the new one.
Occasional complications—corroded parts or unusual fittings—may extend time and raise difficulty to moderate, but most jobs remain simple.
Safety and preparation checklist
With an estimated 15–20 minute timeframe and low difficulty established, attention now turns to safety and preparation before beginning the flapper replacement.
Gather tools: new flapper, adjustable wrench, sponge, bucket, gloves, and towel.
Turn off water at the shutoff valve and flush to drain the tank.
Confirm good lighting and clear workspace.
Wear gloves and protect flooring from spills.
Step-by-Step Replacement Guide
The following steps guide the replacement process from shutting off the water and draining the tank to final adjustments.
First, the old flapper and chain are inspected and removed.
Then a compatible new flapper is prepared, installed, and its chain attached and adjusted.
Turn off the water supply and drain the tank
Shut off the toilet’s water supply by turning the shutoff valve clockwise until it stops, then flush to empty as much water from the tank as possible.
Hold the flush lever down to expel extra water. Use a sponge or towel to remove remaining moisture.
Place a small bucket beneath the valve in case of drips. Confirm the supply line is fully closed before proceeding.
Inspect the old flapper and chain connection
Before removing the old flapper, the technician inspects its condition and how the chain connects to the flush lever to determine whether replacement or simple adjustment is needed.
He checks for cracks, warping, mineral buildup, and soft or hardened rubber.
Chain length, slack, and any rusted or twisted links are noted.
Proper attachment points and lever movement are evaluated for smooth operation.
Remove the old flapper
Begin by turning off the water supply to the tank and flushing to lower the water level so the flapper is exposed; this prevents spills and gives clear access for removal.
Disconnect the chain from the flush lever, unhook the flapper from the overflow tube ears or pegs, and gently lift it free.
Inspect the seat for debris, wiping it clean before proceeding.
Choose and prepare the new flapper
Select a flapper that matches the toilet’s model and the tank’s outlet size, then check material and style for compatibility.
Confirm whether a universal, two- or three-inch flapper is required.
Inspect included attachments and replacement parts for defects.
If adjustable, set initial lift and chain length per manufacturer guidance.
Clean sealing surfaces and seat area to guarantee proper fit before installation.
Install the new flapper and attach the chain
With the tank clean and the new flapper sized and adjusted, the replacement process moves on to installing the flapper and securing its chain.
The flapper’s ears or hooks seat over the flush valve pegs or slide onto the valve stem.
Attach the chain to the flush lever arm clip, ensuring smooth movement without tangles.
Confirm the flapper sits centered and seals around the valve.
Adjust chain length for proper seal and flush
Check the chain length to verify the flapper can close fully yet lift easily when flushed.
Adjust by shortening or lengthening the chain so there is minimal slack—about 1/2 inch slack at rest—preventing snagging beneath the flapper or preventing a full seal.
Reattach to a different hole on the flush lever if needed.
Guarantee smooth, unobstructed movement for reliable sealing and lift.
Turn the water back on and test multiple flushes
After confirming the chain allows the flapper to seat and lift properly, the water supply can be opened slowly to refill the tank.
Observe for proper fill level and listen for unusual sounds.
Perform several full flushes, noting flapper response and refill timing.
Verify consistent flush strength and that the flapper reseats each time.
Stop and adjust chain or flapper position if issues appear.
Final leak and seal checks
Begin by inspecting the flapper, seat, and surrounding connections for any signs of water seepage or misalignment; small drips at the seal or a wet tank base indicate an incomplete seal or loose fittings.
Verify chain slack, confirm flapper seats evenly, and tighten any loose nuts or clips.
Run several flushes, observe for slow leaks, and re-seat or replace parts until dry.
Quick Troubleshooting After Installation
After replacing the flapper, a quick check can identify common issues such as a persistent leak, a sticking handle, or a flush that fails to complete.
Attention should be paid to the chain length and routing—chains that are too tight, too loose, or snagging often cause problems.
If those checks show no fault, the fill valve or overflow tube should be inspected as the likely source.
Flapper still leaks common causes and fixes
Check the flapper and surrounding components systematically when leaks persist despite a recent installation.
Inspect the seat for mineral buildup and clean with vinegar or a brush.
Verify the flapper seals evenly; replace if warped or cracked.
Guarantee chain tension allows full closure without slack.
Confirm refill valve height and float adjustment; correct overflow alignment.
Tighten or replace worn bolts and gaskets.
Handle sticks or flush fails to complete
If the handle sticks or a flush starts but doesn’t finish, inspect the trip lever, chain, and flapper alignment to identify the most common mechanical causes quickly.
Confirm the trip lever moves freely and the chain clears the overflow tube without snagging.
Verify the flapper seats squarely and the flush valve rim is clean.
Tighten any loose handle nut and retest for smooth operation.
Chain issues: too tight, too loose, or snagging
A short chain length or excessive slack can both prevent a proper flush, so inspect the connection between the trip lever and flapper right away.
Adjust chain length so there’s a slight slack when the flapper rests but no tangles when lifted. Reattach to a different hole on the flapper if snagging occurs.
Replace corroded clips or chain for smooth operation.
When the problem is the fill valve or overflow tube instead
When flapper adjustments don’t solve persistent running or slow fills, attention should shift to the fill valve and overflow tube as likely culprits.
Inspect the fill valve for debris, worn seals, or improper float height; replace or clean as needed.
Make sure the overflow tube isn’t cracked, improperly set, or allowing water to spill into it.
Adjust water level and test for leaks.
Choosing the Right Replacement Flapper
Choosing the right replacement flapper requires weighing universal versus model-specific options, as fit and performance can vary by toilet make.
Material choice—rubber for elasticity or silicone for longer life—along with correct size and seat type compatibility, should guide selection.
Reasonable brands and price ranges are noted to help balance reliability and cost.
Universal vs. model-specific flappers
One important decision in replacing a toilet flapper is whether to select a universal design or a model-specific part. Universal flappers fit many tanks and simplify inventory.
Model-specific flappers guarantee exact fit and performance for certain valves. Consider compatibility, ease of installation, and longevity when choosing.
- Compatibility across brands
- Precise fit for original valves
- Installation complexity and time
Material pros and cons: rubber vs. silicone
Material composition plays a key role in flapper performance and lifespan: rubber and silicone offer distinct advantages and trade-offs that affect seal reliability, chemical resistance, and flexibility over time.
Rubber provides firm seals, is inexpensive, but degrades faster with chlorine and hard water.
Silicone resists chemicals and UV, retains elasticity longer, and costs more.
Choice balances budget versus durability.
Size, seat type, and compatibility considerations
When replacing a flapper, matching its size, seat type, and compatibility with the toilet model is essential to verify a proper seal and reliable operation.
Measure the flush valve diameter (commonly 2″ or 3″), note flat or contoured seats, and check for specific flush-valve designs (tank-to bowl coupling, canister).
Confirm chain length and overflow tube alignment to guarantee smooth function.
Recommended brands and price ranges
Several reputable manufacturers produce reliable toilet flappers at predictable price points, making it easier to balance quality and cost.
Recommendations favor known brands for compatibility, durability, and warranty coverage.
Budget, midrange, and premium options offer varying materials and lifespans; selection depends on toilet model and usage frequency.
- Fluidmaster: $5–$15, widely compatible
- Korky: $8–$20, durable options
- Toto: $15–$30, premium fit
Preventive Maintenance and Longevity Tips
Regular inspection of the flapper every six months and prompt replacement every 3–5 years, or sooner if wear appears, helps prevent leaks.
Simple maintenance—cleaning the seal, checking chain length, and removing mineral buildup—can noticeably extend service life.
Attention to water chemistry and environmental factors, such as hard water and high chlorine levels, informs maintenance frequency and choice of more resistant materials.
How often to inspect and replace the flapper
How often should a toilet flapper be inspected and replaced to prevent silent leaks and inefficient flushes? A flapper should be visually inspected every 3–6 months for wear, warping, or mineral buildup. Replace it annually or sooner if signs of deterioration, slow leaks, or frequent adjustments occur. High-use or older toilets may require replacement every 6–12 months.
Simple maintenance steps to extend flapper life
Perform basic care to prolong a toilet flapper’s service life: keep the tank clean, clear mineral deposits, confirm the flapper seats properly, and check chain length and alignment.
Inspect for cracking or warping, replace degraded parts promptly, lubricate rubber with manufacturer-recommended protectant if needed, verify refill valve operation, and avoid prolonged flapper slack.
Regular short checks prevent leaks and extend functional life.
Water chemistry and environmental factors affecting flapper lifespan
Beyond routine inspections and minor adjustments, the chemical makeup of toilet water and surrounding environmental conditions play a large role in flapper degradation.
Hard water deposits, chlorine, acidic cleaners, and mineral buildup accelerate rubber hardening and cracking. High humidity, temperature swings, and UV exposure (in daylight basements) also shorten lifespan.
Regular water treatment, gentler cleaners, and stable ambient conditions extend flapper service life.
Mistakes to Avoid When Replacing a Flapper
Common beginner errors—such as misaligning the flapper seat or cutting the chain too short—are noted and paired with simple preventative steps.
The discussion also covers DIY pitfalls that can allow leaks to persist despite replacement.
Guidance is provided on when the problem warrants a professional plumber rather than further home repairs.
Common beginner errors and how to prevent them
While replacing a toilet flapper seems straightforward, several predictable mistakes can lead to leaks, poor sealing, or the need for repeated fixes. Recognizing these errors early saves time and prevents water waste.
Beginners often choose wrong-size flappers, overtighten chains, ignore seat debris, reuse brittle parts, or misalign the flapper.
Prevent these by measuring, testing chain slack, cleaning the seat, replacing degraded components, and confirming a full seal.
DIY pitfalls that lead to continued leaks
Recognize that small installation errors often cause persistent toilet leaks even after a flapper replacement.
Misaligned or damaged seat seating, incorrect chain length, using the wrong flapper type, or failing to clean the flush valve seat permit water seepage.
Overstretching or twisting the chain, neglecting gasket inspection, and reusing worn components commonly undo repair attempts and prolong leakage.
When to call a professional plumber
Repeated attempts to fix a leaking toilet can expose when a flapper replacement is no longer a simple DIY task.
If leaks persist after correct installation, the flush valve seat or overflow tube is damaged, multiple components fail, or water usage spikes, a professional plumber should be called.
Persistent noises, corrosion, or unclear causes also warrant expert diagnosis and repair.
Comparison Table: Replacement Options and When to Use Them
A concise comparison table helps readers choose the right flapper type for common scenarios. The table below provides a quick-reference summary for fast decision-making. Use it to match performance, compatibility, and cost with the toilet’s needs.
| Option | Best Use | Notes |
|---|---|---|
| Standard Rubber Flapper | Most residential toilets | Affordable, widely compatible |
| Adjustable/Universal Flapper | Varied sizes or unknown model | Flexible fit, tunable seal |
| Ballcock/Float-Type Flapper | Older or high-flow systems | Matches legacy mechanisms |
| High-Efficiency/Perforated Flapper | Water-saving or dual-flush | Conserves water, may need fine-tuning |
Quick-reference summary for fast decision-making
Summarize replacement options side-by-side to speed selection: list standard rubber flappers, adjustable universal flappers, float-cup assemblies, and seal-replacement kits, and note key factors—compatibility, durability, cost, ease of install, and typical failure symptoms—so readers can match a fix to the problem at a glance.
- Standard rubber: cheap, simple, wears fast.
- Universal adjustable: versatile, slightly costlier.
- Float-cup/seal kits: for persistent leaks or fill issues.
Conclusion
A calm close finds the reader relieved, as the flapper rests in place and water obeys again. Coincidentally, the simple part saved time and the house saved patience; coincidence supplies a quiet rhythm—step, lift, snap—and repairs feel ordinary, almost ceremonial. One visit to the tank, one small change, and the problem is gone. The modest task repeats itself across homes, each instance a tiny victory and a reminder that maintenance matters.