
How to Fix Hot Water in Shower: Quick DIY Troubleshooting and Solutions
If your shower isn’t producing hot water, start by checking other hot taps in your home to rule out a broader issue. Next, inspect the water heater’s power or pilot light, and ensure that the hot and cold shutoff valves are open. Run the shower on hot for a minute to listen for any heater cycling, and check the pressure-balancing or thermostatic valves for any faults.
For electric heaters, consider resetting the breakers, replacing heating elements, or flushing out sediment. For gas heaters, relight the pilot, check the thermocouple, and inspect the venting system. If the water heater is aging or if cartridges are faulty, those may need replacement. Follow these steps for a comprehensive troubleshooting guide, including part lists and safety tips.
Why Your Shower Isn’t Producing Hot Water
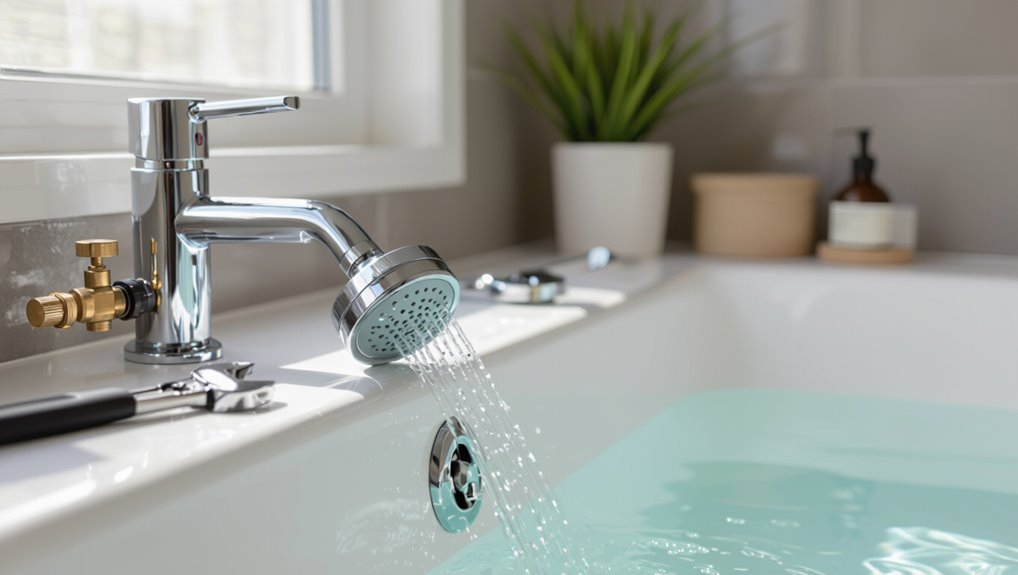
Symptoms such as lukewarm flow, intermittent heat, or sudden cold bursts often point to issues with the water heater, thermostat, or plumbing.
Simple checks—running other hot taps, inspecting the pilot light, or testing water temperature at the heater—quickly reveal whether hot water is available.
If basic troubleshooting fails or the problem involves gas, electrical connections, or tank repairs, a licensed technician should be called rather than attempting complex fixes.
Common symptoms and what they indicate
A cold or lukewarm shower can signal several distinct problems—each symptom points toward different causes such as a malfunctioning water heater, sediment buildup, plumbing cross-connections, or a failing mixing valve.
So observing temperature behavior, timing, and related signs helps narrow the diagnosis quickly.
Short bursts of heat suggest capacity or thermostat faults; gradual cooling implies sediment or dip tube issues.
Low pressure often indicates valve or supply problems related to how to fix hot water in shower.
How to quickly test hot water availability
Several quick checks can establish whether hot water is available before disassembling fixtures: run the shower on hot for a minute to see if temperature rises, test hot tap water at the nearest sink, listen for the water heater cycling, and briefly open other hot outlets to determine if the issue is localized.
Note water heater noises, pilot status, breaker position, and any sudden cold-water interruptions.
When to call a professional versus DIY
When should a homeowner tackle a cold-shower problem alone and when should a professional be called in?
Simple fixes—resetting breakers, relighting pilot lights, clearing aerators, or adjusting thermostats—are suited for DIY.
Call a professional for gas smells, complex plumbing, persistent leaks, suspected water heater faults, electrical issues, or inability to restore hot water after basic checks.
Safety and code compliance justify hiring experts.
Quick Troubleshooting Checklist
A quick troubleshooting checklist helps isolate whether the problem is local to the shower or systemic.
One should verify hot water at other fixtures, confirm the water heater’s power source and temperature settings, and inspect the shower valve and handle for proper operation.
Additionally, testing pressure-balancing or thermostatic valves and checking for visible leaks or pipe damage can pinpoint common causes.
Verify household hot water elsewhere (sinks, dishwasher)
Is the lack of hot water limited to the shower or affecting the whole house?
One should test hot taps in sinks, run a dishwasher or washing machine cycle, and note temperature and duration.
Consistent cold across multiple fixtures indicates a central supply or heater problem; isolated cold points suggest local valve, cartridge, or plumbing issues.
Record observations for repair steps.
Check water heater power source and settings
Check the water heater’s power source and settings to quickly rule out simple causes of no hot water.
Verify the breaker or fuse isn’t tripped for electric units and that gas supply and pilot light are on for gas models.
Inspect thermostat temperature (typically 120–140°F) and reset buttons on tankless or electric heaters.
Note any error codes and consult the manual.
Inspect shower valve and handle operation
Once power and thermostat settings have been verified, attention should shift to the shower valve and handle to determine whether the problem is localized to the fixture.
Inspect for loose, stiff, or misaligned handles and visible leaks. Remove the handle to check cartridge or stem movement, mineral buildup, and worn seals.
Note any unusual resistance or free play that suggests internal wear or blockage.
Test pressure-balancing and thermostatic valves
Begin by verifying whether the shower uses a pressure-balancing or thermostatic valve, since each responds differently to temperature and flow changes; identify the valve type from the handle style or manufacturer markings before proceeding.
For pressure-balancing valves, test by running another fixture to observe temperature shifts.
For thermostatic valves, cycle temperature settings and check for consistent setpoint control; note irregular responses for replacement or cartridge service.
Look for visible leaks or pipe damage
Inspect the visible plumbing and shower enclosure for signs of leaks or physical damage, focusing on joints, supply lines, the valve escutcheon, and the area around the shower pan or tub.
Note damp spots, corrosion, mineral buildup, or warped surfaces. Trace stains to sources, check for dripping during operation, and document loose fittings.
Replace or tighten damaged sections promptly to prevent heat loss and water damage.
Fixes for Electric Water Heaters
When an electric water heater fails to deliver hot water, common fixes include resetting tripped breakers and high-limit switches and replacing burnt-out heating elements.
Routine maintenance such as flushing sediment buildup and safely adjusting thermostat settings can restore efficiency and temperature control.
Persistent issues—frequent trips, rusty water, or leaks—indicate the unit may need replacement.
Resetting tripped breakers and high-limit switches
A tripped circuit breaker or a triggered high-limit (reset) switch is a common, straightforward cause of no hot water in electric water heaters and should be checked early in troubleshooting.
Inspect the breaker panel for tripped switches and reset them.
Access the heater’s reset button (usually red) on the thermostat housing, press once; if it trips repeatedly, seek professional diagnosis due to thermostat, wiring, or safety faults.
Replacing burnt-out heating elements
Start by confirming that the heating element has failed: common signs include lukewarm water, uneven temperature, or no heat from an electric water heater despite power being present.
Turn off power, drain tank below element level, remove access cover and insulation, test element with a multimeter, replace with matching wattage/resistance part, reseal with new gasket, refill, restore power, and check for leaks and proper heating.
Flushing sediment buildup to restore efficiency
After replacing a failed heating element, attention should turn to sediment buildup, which commonly accumulates on the tank bottom and around elements, reducing heat transfer and causing uneven or noisy operation.
Draining and flushing the tank removes grit: shut power, attach hose to drain valve, open a hot faucet, drain until clear, flush with cold water, then refill and restore power.
Adjusting thermostat settings safely
Several precise thermostat adjustments can restore consistent hot-water delivery while minimizing scald risk and energy waste.
Technicians or informed homeowners should turn power off, remove access panel insulation, and use a calibrated screwdriver to set both upper and lower thermostat dials to 120°F (49°C).
Verify with a thermometer at a tap, reseal panels, and restore power.
Recheck temperature after one hour.
Signs the unit needs replacement
Age, recurring failures, and performance declines are key indicators that an electric water heater may need replacement.
Persistent leaks, rusty or discolored water, frequent thermostat or element failures, and insufficient hot water despite repairs signal internal degradation.
Increasing energy bills and corrosion around the tank or fittings suggest imminent failure.
When multiple issues coincide, replacement is more cost-effective and reliable than continued repairs.
Fixes for Gas Water Heaters
Next, gas water heater issues are addressed, starting with relighting the pilot light and verifying the thermocouple.
The section then covers inspecting burner operation and venting, flushing sediment and checking the dip tube, and adjusting the gas valve and thermostat.
It closes with clear guidance on when to hire a licensed gas technician.
Relighting the pilot light and checking thermocouple
When a gas water heater fails to produce hot water, the pilot light and thermocouple are common, easily checked components that often resolve the issue.
Verify pilot presence, follow manufacturer relight steps, and observe steady flame.
Inspect the thermocouple for soot, looseness, or corrosion; tighten or replace if it fails to generate voltage.
Test heater function after relighting.
Inspecting burner operation and venting
Inspect the burner assembly and venting to confirm proper combustion and safe exhaust flow before assuming more complex failures.
Visually check burners for corrosion, soot, or yellow flames indicating incomplete combustion. Verify burner ignition and consistent flame pattern while the thermostat calls for heat.
Ascertain vent pipe connections are secure, unobstructed, and sloped correctly to prevent backdrafting.
Replace damaged components and clean as needed.
Flushing sediment and checking dip tube
Begin by flushing the tank to remove sediment that reduces heating efficiency and can cause noisy, lukewarm showers.
Drain several gallons until water runs clear, then close and refill.
Inspect the dip tube for cracks or detachment; a failed dip tube delivers cold water to the top, causing insufficient hot output.
Replace a damaged dip tube and retest hot water performance.
Adjusting gas valve and thermostat
Adjust the gas control and thermostat settings to guarantee the burner produces sufficient heat and the pilot remains stable.
Inspect the control knob for correct position, then raise temperature in 5°F increments, allowing system recovery between changes.
Verify pilot flame size and color; a weak or yellow flame indicates combustion issues.
Confirm thermostat wiring and secure connections.
Recheck water temperature after adjustments.
When to call a licensed gas technician
Call a licensed gas technician when problems exceed routine checks or when any sign points to a potential gas, combustion, or safety hazard.
A professional is required for persistent pilot or ignition failures, gas smells, CO detector activation, leaks, unusual burner flame color, repeated pressure or temperature fluctuations, or complex valve and venting repairs.
DIY attempts in these cases risk safety and code violations.
Troubleshooting Shower Valves and Mixers
When shower temperature is inconsistent or fails to reach the desired heat, the valve and mixer assembly are common culprits.
Technicians often inspect and replace cartridges, stems, seals, or pressure‑balancing parts, and service anti‑scald or thermostatic mechanisms to restore proper mixing.
If parts are unavailable immediately, temporary workarounds such as bypassing balance valves or adjusting water heater output can provide short‑term hot water while a proper repair is arranged.
Replacing cartridge, stem, or seals
Start by identifying the symptom—persistent leaks, uneven temperature, or a stiff handle—since these usually point to worn cartridges, stems, or seals.
Turn off water, remove trim, and note model details.
Extract the cartridge or stem with proper tools, replace seals and O-rings, and install exact replacement parts.
Reassemble, restore water, and test for leaks and temperature stability.
Cleaning or replacing pressure-balancing components
After addressing worn cartridges, stems, or seals, attention should turn to the pressure‑balancing components that regulate hot and cold flow to maintain stable temperature.
Inspect the spool, sleeve, and spring for mineral buildup or corrosion; clean with vinegar or a descaler.
Replace damaged parts or full balance assemblies if cleaning fails.
Reassemble, test for consistent temperature, and check for leaks.
Fixing anti-scald or thermostatic valve issues
If anti-scald protection or a thermostatic cartridge fails to maintain set temperatures, the shower can alternate between scalding and cold water; diagnosing these assemblies first saves time and prevents injury.
Check for debris, mineral buildup, or stuck temperature stops. Test cartridge operation and replace if inconsistent.
Verify correct installation, calibrate temperature limit stops, and confirm inlet pressures match manufacturer specifications to restore safe, stable mixing.
Temporary workarounds to get hot water
When immediate repairs are not possible, temporary workarounds can restore usable hot water long enough to schedule a proper fix. These measures prioritize safety and minimize scald risk while addressing common valve and mixer symptoms.
Suggestions include reducing thermostat temperature, partially closing the cold supply to raise mix temperature, using a single-handle to lock desired position, and installing a shower-head flow restrictor until professional repair.
Pipe and Plumbing Issues Affecting Hot Water
Pipe and plumbing faults can reduce hot water flow or cause temperature problems and should be checked early.
Common issues include blocked or narrowed hot lines, cross-connections that mix cold into the hot supply, and heat loss from poorly insulated pipes.
Corrosion or frozen sections also produce distinct signs and often require targeted repair or replacement.
Identifying blocked or narrowed hot water lines
Blocked or narrowed hot water lines often reveal themselves through reduced flow, inconsistent temperature at fixtures, or unusual noises within the plumbing system.
Inspect visible piping for corrosion, mineral buildup, kinks, or pinhole leaks.
Test multiple fixtures to localize the restriction.
Check shutoff valves and mixer cartridges for partial closure or blockage.
Consider sediment in water heater and scale in older metal pipes.
Detecting cross-connection with cold water
Detecting a cross-connection with cold water requires systematic testing because the symptom—unexpectedly cool or fluctuating shower temperature—can mimic other failures.
Inspect visible piping and shutoff valves, then isolate hot and cold feeds.
Test fixture temperatures with both supplies closed and open sequentially.
Use dye or pressure gauges to confirm backflow.
Document findings and label the problematic connection for targeted repair.
Repairing insulation and preventing heat loss
Repairing insulation addresses the common cause of lukewarm showers by reducing conductive and convective heat loss along hot-water lines.
Technicians or DIYers should insulate exposed pipes with foam sleeves or wrap insulation, seal gaps at fittings and joints, and add attic or crawlspace insulation where pipes run.
Proper insulation maintains temperature, improves delivery, reduces standby heat loss, and increases system efficiency.
When corrosion or frozen pipes are the culprit
When corrosion or freezing affects supply lines, hot-water delivery can become erratic or stop entirely as scale, pinhole leaks, and ice restrict flow and damage fittings.
Inspect exposed pipes for rust, bulges, or frost; listen for dripping.
Flush, descale, or replace compromised sections; thaw frozen runs safely with heat tape or warm air.
Call a licensed plumber for severe corrosion or hidden damage.
Water Heater Maintenance to Prevent Future Problems
Regular maintenance of the water heater can prevent many shower hot-water issues by addressing sediment buildup, corrosion, and temperature control.
Recommended tasks include flushing and inspections on a yearly or biennial schedule, checking and replacing the anode rod according to manufacturer guidance, and setting the thermostat for both safety and efficiency.
Seasonal checks—such as pre-winter inspections and summer pressure reviews—help catch problems early and extend appliance life.
Recommended flushing and inspection schedule
Maintenance schedules provide a simple framework for preventing buildup and detecting early signs of failure in water heaters.
Recommended cadence balances frequency and practicality: annual inspections, biennial flushes for moderate mineral levels, and more frequent action in hard-water areas.
Typical plan:
- Annual visual and pressure-relief valve check.
- Flush every 2 years; yearly if sediment present.
- Inspect fittings and thermostats annually.
Anode rod checks and replacement intervals
Beyond inspections and flushing, attention turns to the anode rod, the sacrificial component that protects the tank from corrosion.
Periodic checks—every 1–3 years depending on water quality—reveal depletion, pitting, or coating. Replace when more than 50% consumed or heavily corroded.
Use compatible material (magnesium, aluminum, or zinc) and document replacement dates to prevent tank failure and maintain heating performance.
Best thermostat settings for safety and efficiency
Set the water heater thermostat to a temperature that balances scald prevention, bacterial control, and energy use. A common recommendation is 120°F (49°C) for most households; raise to 130°F (54°C) only if Legionella risk exists, using anti-scald valves at fixtures.
Lower settings save energy but monitor comfort. Verify thermostat accuracy periodically and document changes for safety and efficiency.
Seasonal maintenance tips
After confirming and documenting the thermostat setting, seasonal checks help prevent failures and extend the heater’s service life.
Inspect for leaks, corrosion, and proper venting; drain a few gallons to remove sediment; test the pressure relief valve; verify insulation and pipe heat tape; clear nearby combustibles; and schedule professional inspection annually.
Record maintenance dates and any corrective actions for future reference.
Cost, Tools, and Safety Considerations
A brief review of basic tools and commonly replaced parts—wrenches, screwdrivers, replacement cartridges, and heating-element kits—helps readers assess DIY readiness.
Estimated costs for parts and labor are compared so homeowners can weigh a low-cost DIY against professional service fees.
Clear safety precautions for electrical, gas, and scald hazards are highlighted to determine when to stop and call a licensed technician.
Basic tools and parts for common DIY fixes
Several common tools and a handful of replacement parts cover most DIY shower hot-water problems, and understanding their costs and safety implications helps homeowners plan repairs effectively.
Essential items include basic hand tools, replacement cartridges, and sealing materials; safety gear prevents burns and injuries.
Recommended:
- Adjustable wrench, screwdriver set, pliers.
- Valve cartridges, O-rings, washers.
- Plumber’s tape, silicone sealant, gloves.
Estimated costs for DIY vs professional repair
One clear calculation homeowners should make is whether the time and upfront cost of a DIY repair outweigh the expense of hiring a professional. DIY parts often cost $20–$200; labor savings vary. Consider complexity, warranty, and potential for escalation.
| Option | Typical Parts | Typical Cost Range |
|---|---|---|
| DIY | Valves, cartridges | $20–$200 |
| Pro | Parts + labor | $150–$800 |
| Hybrid | Parts DIY, pro install | $80–$400 |
Safety precautions for electrical, gas, and hot-water work
Choosing between DIY and professional repair should factor in the safety risks tied to electrical, gas, and hot‑water systems.
Proper precautions include shutting power and gas at mains, ventilating spaces, using insulated tools, and wearing PPE.
Only qualified electricians or gas technicians should handle wiring, pilot assemblies, or combustion appliances.
Mistakes risk electrocution, fire, carbon monoxide, and scalding; call a pro when unsure.
When Replacement Is the Best Option
When frequent breakdowns, rusted tanks, or leaking connections appear, replacement may be more economical than repeated repairs.
The decision should consider correct capacity and fuel type to match household demand and installation constraints.
Selecting an energy-efficient model can reduce operating costs and often offsets upfront expense over time.
Signs your water heater is past repair
A failing water heater shows clear, measurable problems that indicate repair is no longer practical.
Persistent leaks, rusted tank, repeated thermostat or element failures, and inability to maintain temperature despite multiple repairs signal end of serviceable life.
Frequent cold-water dips, rising energy bills, and age over 10–15 years further justify replacement.
Safety risks like gas smells or corroded fittings demand immediate replacement.
Choosing the right size and type of replacement
Once replacement is determined necessary, selecting the correct size and type of water heater requires matching household hot-water demand, available fuel source, and installation constraints. Consider tank versus tankless, capacity, and location access. Compare recovery rates and venting needs. Visualize options:
| Type | Capacity | Venting |
|---|---|---|
| Tank | 40–80 gal | Chimney/Direct |
| Tankless | Flow-based | Direct/Power |
Energy-efficient models and long-term savings
Many homeowners can recoup the higher upfront cost of an efficient water heater through lower energy bills and reduced maintenance over time.
Energy-efficient models—tankless, heat pump, or high-efficiency storage units—deliver consistent hot water, lower operating costs, and longer lifespans.
Calculating payback period, available rebates, and fuel type guarantees replacement yields measurable savings and improved household comfort.
Step-by-Step Repair Examples
The section provides concise, step-by-step repair examples for common causes of poor shower hot water.
It covers replacing a shower cartridge with required tools and estimated timeline, flushing a tank-style water heater to remove sediment, and relighting a pilot plus inspecting gas components.
Each example outlines key safety checks and expected time to complete.
Replacing a shower cartridge tools and timeline
Gathering the right tools and setting a realistic timeline are the first practical steps before replacing a shower cartridge.
A typical DIY job requires preparation, shutoff, and careful reassembly; expect 45–90 minutes depending on access and experience.
- Tools: adjustable wrench, cartridge puller, screwdriver set.
- Materials: replacement cartridge, plumber’s grease, O-rings.
- Timeline: remove, replace, test.
Flushing a tank-style heater
After completing cartridge work, attention can shift to the water heater where sediment buildup commonly reduces hot-water delivery and shortens appliance life.
Drain the tank by turning off power, attaching a hose to the drain valve, and flushing until clear.
Inspect the anode rod and replace if corroded.
Refill slowly, purge air, restore power, and verify temperature.
- Turn off power and water
- Drain and flush until clear
- Inspect/replace anode and refill
Relighting a pilot and checking gas components
Begin by confirming the gas supply is off at the appliance and the main shutoff.
The technician inspects the pilot assembly, thermocouple, and ignition components, replacing faulty parts.
After repairs, the pilot is relit per manufacturer instructions and leak-tested with a soap solution.
Document findings and restore supply slowly.
- Check thermocouple continuity.
- Verify gas valve operation.
- Test for leaks.
Troubleshooting Scenarios and Quick Solutions
The guide outlines common troubleshooting scenarios and concise fixes for typical hot water problems.
It covers no hot water at any fixture, rapid depletion of hot supply, excessively hot or fluctuating temperatures, and cases where only some fixtures deliver hot water while the shower does not.
Each scenario is paired with quick checks and practical solutions to isolate and resolve the issue.
No hot water at all from any fixture
If no fixture in the home produces hot water, the problem is systemic and requires a focused, step-by-step diagnosis to distinguish between a failed water heater, fuel or power supply interruptions, and widespread plumbing valve issues.
Check the heater’s power or pilot, inspect fuel supply and breaker, confirm main cold/hot shutoff valves are open, examine visible piping for leaks, and call a professional if internal tank or controls fail.
Hot water runs out quickly
Diagnose quickly when hot water runs out fast by identifying whether capacity, temperature settings, or flow issues are responsible.
Check tank size versus household demand; stagger showers or limit simultaneous appliances.
Inspect thermostat for overly low setpoints and test dip tube for leaks in tank heaters.
Reduce high-flow showerheads, repair mixing valves, and consider tankless or larger tank upgrades to restore consistent hot supply.
Water too hot or inconsistent temperature
Adjust settings and inspect components systematically when shower water is dangerously hot or fluctuates during use, because causes range from simple thermostat misadjustments to failing mixing valves or cross-connections.
Check water heater thermostat, test pressure-balance or thermostatic cartridge, and verify anti-scald devices.
Look for cold-water supply interruptions and consult a plumber if cartridges, mixing valves, or pressure regulators require replacement to restore safe, stable temperatures.
Hot water in some fixtures but not the shower
Start by comparing hot-water performance across fixtures to narrow the problem: when sinks and tubs deliver hot water but the shower does not, the issue usually lies in the shower’s valve, cartridge, or localized blockages rather than the water heater.
Inspect the shower valve for leaks, test the cartridge operation, clear mineral buildup, and verify diverter function.
Replace defective components or call a plumber if unfamiliar with repairs.
Preventive Tips to Keep Hot Water Reliable
Routine daily and seasonal habits—such as flushing sediment, checking thermostat settings, and insulating exposed pipes—help maintain hot-water performance.
Upgrades like circulation pumps and better insulation can reduce wait times and temperature swings.
Regular professional inspections, scheduled annually or when performance declines, catch issues before they cause failures.
Daily and seasonal habits to maintain performance
Consistent daily and seasonal habits extend a shower system’s reliability and reduce the chance of sudden cold-water surprises.
Routine checks and simple adjustments preserve performance and identify issues early.
- Inspect fixtures monthly for leaks, mineral buildup, and loose fittings; clean aerators.
- Flush the water heater annually; monitor pressure and temperature settings.
- Winterize exposed pipes and check insulation before cold spells.
Upgrades that improve hot-water consistency (circulation pumps, insulation)
After establishing daily and seasonal habits that reduce failures, homeowners can further strengthen hot-water reliability through targeted upgrades.
Installing a demand or recirculation pump minimizes wait time and temperature swings by keeping hot water near fixtures.
Adding pipe insulation and insulating the tank reduces heat loss, improves recovery, and saves energy.
Prioritize compatible pump models and proper insulation thickness for best results.
When to schedule professional inspections
How often should a homeowner call a professional to inspect a hot-water system depends on the system type, age, and local water conditions.
Generally, schedule inspections every 1–2 years for tank systems and annually for tankless units older than five years or with hard water.
Also call a pro after odd noises, leaks, inconsistent temperatures, or following major plumbing work to prevent failures.
Conclusion
Something is still wrong, and the problem may be closer than one thinks. After checking breakers, pilot lights, thermostats and valves, the solution might reveal itself — or pull back a curtain to a larger fault that demands a pro. Follow the clear troubleshooting steps first; simple fixes often restore warmth quickly. If uncertainty or danger lingers, pause and call a qualified technician before proceeding. The next turn could be relief—or a costly mistake.

