
How to Change Bathroom Faucets: A Step-by-Step DIY Guide for Beginners
Replacing a bathroom faucet is a straightforward DIY task that beginners can easily tackle. Start by gathering the necessary tools and materials. Next, turn off the water supply and measure your sink configuration. Remove the old faucet by disconnecting the supply lines and loosening the mounting nuts. Lift out the old fixture, then install the new faucet by placing it in position, sealing with gaskets, and hand-tightening the mounting hardware. Reconnect the supply lines, turn the water back on, and check for leaks. For tight spaces, a basin wrench can be helpful, and consider replacing worn O-rings or aerators to enhance water flow. Follow this guide for detailed steps, troubleshooting tips, and cost estimates.
How to Change Bathroom Faucets: Quick Overview and Expected Results
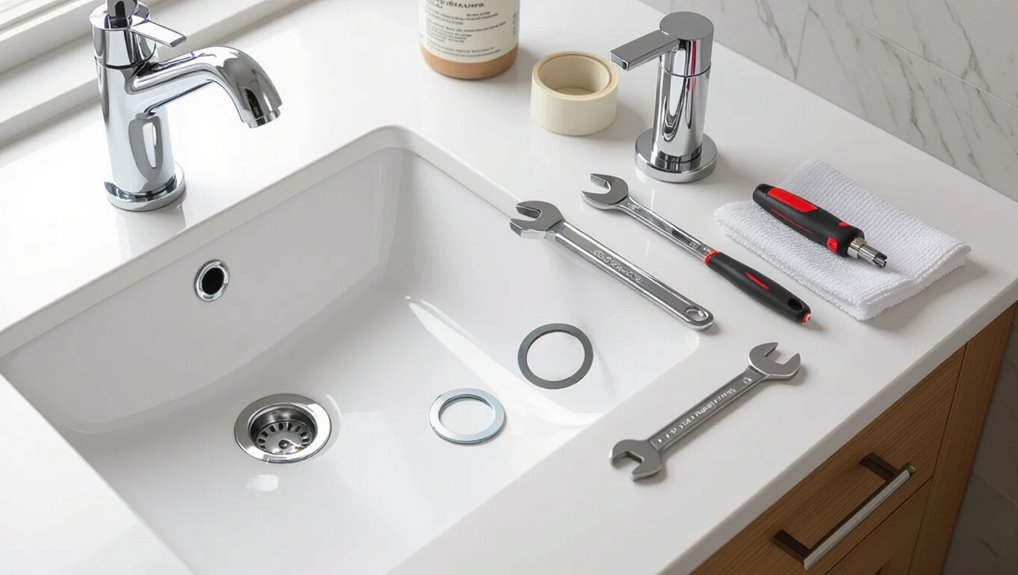
Replacing a bathroom faucet typically improves water flow, updates appearance, and fixes leaks or worn components.
The job usually takes one to three hours, requires basic tools (wrenches, plumber’s tape, screwdriver) and moderate DIY skills, though complexity rises with tight spaces or older plumbing.
Homeowners should attempt straightforward swaps; call a professional for persistent leaks, complex valve work, or if unfamiliar with shutoff and drain procedures.
What replacing a bathroom faucet accomplishes
Swapping a bathroom faucet improves function and appearance while addressing common problems like leaks, low water pressure, and worn finishes.
Replacing a faucet restores reliable seals and smoother operation, updates style to match décor, and can improve water flow or efficiency.
This concise how to change bathroom faucets overview clarifies expected outcomes: reduced maintenance, better hygiene, and renewed sink aesthetics.
Average time, tools, and skill level required
Although skill level varies by fixture type, a straightforward bathroom faucet replacement typically takes a homeowner with basic DIY experience about 60–90 minutes from start to finish.
More complex valve configurations, tight access, or corrosion can extend the job to two to three hours.
Required tools commonly include an adjustable wrench, basin wrench, pliers, plumber’s tape, plumber’s putty or silicone, and a bucket; moderate DIY skill suffices.
When to DIY vs. call a professional
Decide whether to tackle a faucet job based on complexity, time, and risk:
Simple single-hole or centerset replacements with accessible connections and no visible corrosion are well within the abilities of a homeowner with basic tools and 60–90 minutes to spare.
On the other hand, multi-hole widespread faucets, concealed valves, old or seized fittings, or projects involving drywall, tile, or water-line modifications warrant a professional to avoid leaks, water damage, or warranty voiding.
Homeowners should DIY when confident in tools and scope; call a licensed plumber for uncertainty, structural work, persistent corrosion, or if local codes and warranties apply.
Types of Bathroom Faucets and How They Affect Installation
Different faucet styles change both the physical steps and parts needed for a replacement.
Single-handle units simplify mounting and supply connections, while double-handle centerset and widespread models require specific hole spacing and separate valve assemblies.
Wall-mounted faucets demand in-wall plumbing access and precise alignment.
Material and finish choices also affect compatibility with sink or countertop materials and the type of hardware or sealants required.
Single-handle faucets characteristics and installation implications
Single-handle bathroom faucets combine the hot and cold controls into a single lever or knob, offering compact operation and simplified plumbing compared with two-handle models.
They typically require one deck hole, shorter installation time, and fewer supply connections. Cartridge or ceramic-disk valves are common, easing repairs.
Mounting aligns with single-hole sinks; escape routes for access and compatible escutcheons should be verified beforehand.
Double-handle (centerset and widespread) faucets differences and mounting requirements
While single-lever models streamline connections with one deck hole, double-handle faucets introduce additional layout and mounting considerations due to their separated hot and cold valves.
Centerset units combine spout and handles on a 4-inch base, fitting three-hole sinks.
Widespread faucets separate components 8–16 inches, requiring precise hole spacing and stable deck reinforcement; supply lines and alignment become more critical.
Wall-mounted faucets special considerations
Because they mount to the wall rather than the sink or countertop, wall-mounted faucets require planning for in-wall plumbing, precise spout alignment, and sufficient clearance for sink bowls or countertops.
Installation demands locating studs or backing, routing supply lines and shutoffs behind the wall, secure mounting brackets, and correct outlet height.
Access panels or removable trim ease future repairs and pressure balancing.
Faucet materials, finishes, and compatibility with sink and countertop
When selecting a faucet, material and finish determine durability, maintenance needs, and aesthetic compatibility with the sink and countertop.
Brass and stainless resist corrosion; zinc is cheaper but less durable.
Finishes—chrome, brushed nickel, oil-rubbed bronze—affect scratch visibility and maintenance.
Match mounting style and hole spacing to sink/countertop thickness; verify clearances for spouts and handles to guarantee functional, cohesive installation.
Tools, Materials, and Safety Precautions You’ll Need
A concise list of essential and optional tools will be provided to equip a homeowner for faucet replacement.
Common replacement parts—such as supply lines, gaskets, and mounting hardware—are recommended to have on hand in case old components are worn or incompatible.
Clear safety steps, including turning off water at the shutoff valves and basic precautions to prevent leaks and injury, will precede the installation instructions.
Essential tools checklist
Several essential tools and safety items are required to replace a bathroom faucet properly: an adjustable wrench, basin wrench, pliers, plumber’s putty or silicone, Teflon tape, bucket, towels, and safety gloves and eye protection.
The checklist prioritizes basics for shutoff, removal, sealing, and cleanup. Keep items accessible and inspect for wear before starting.
- Shutoff tools
- Sealing supplies
- Fastener drivers
- Cleanup gear
Optional tools that speed up the job
Consider adding a few optional tools to the kit to speed up removal, installation, and cleanup: a cordless drill with screwdriver bits for faster screw removal, a socket set to tackle stubborn nuts more efficiently than an adjustable wrench, and a swivel-head basin wrench for hard-to-reach fittings.
Also useful: a small LED work light, magnetic tray for fastener control, and a compact wet/dry vac for cleanup.
Replacement parts to have on hand (supply lines, gaskets, mounting hardware)
Optional tools make the job faster, but having the right replacement parts on hand prevents delays once work begins.
Recommended spares include braided stainless supply lines sized to the faucet, a variety of rubber and silicone gaskets and O-rings, mounting nuts and washers that match the faucet’s shank, and thread seal tape.
Small replacement cartridges or valve seats may also be useful.
Safety and plumbing shutoff steps
Gather the proper tools and confirm safety before beginning work: a basin wrench, adjustable wrench, screwdriver set, flashlight, bucket, and pliers; materials such as towels, thread-seal tape, and replacement parts; and personal protective equipment like safety glasses and gloves.
Confirm main and local shutoff valves are closed, drain and relieve residual water, verify zero flow, and disconnect supply lines safely before proceeding.
Preparing for the Project: Measurements and Pre-Checks
Before starting the installation, measurements should be taken of sink hole diameters and faucet spread to guarantee compatibility.
The water supply line size and shutoff valves must be checked for proper fit and reliable operation.
The sink and countertop should be inspected for concealed damage so the chosen faucet matches the sink configuration and mounting requirements.
How to measure sink holes and faucet spread
How far apart are the holes and what size are they? Measure center-to-center distance between faucet holes to determine spread (single-hole, centerset ~4″, widespread 8″–16″).
Measure each hole diameter and deck thickness. Note whether holes are in sink or countertop and if an escutcheon is needed.
Record measurements before purchasing a faucet to guarantee compatibility and proper mounting hardware.
Checking water supply line size and shutoff valve function
With hole spacing and deck measurements recorded, attention turns to the water feed and shutoff hardware that will connect to the new faucet.
The installer verifies supply line diameter (typically 1/2″ or 3/8″), measures flexible hose length, and confirms adapter compatibility.
Each shutoff valve is exercised and checked for leaks or stiffness; faulty valves are noted for replacement before installation.
Inspecting sink and countertop for hidden damage
A careful inspection of the sink and countertop reveals issues that could complicate faucet installation or shorten the fixture’s lifespan.
The inspector checks for cracks, soft spots, water stains, mold, and corrosion under and around the basin.
Sealant failure, delamination, or loose mounting clips are noted.
Any concealed damage is documented and repaired before proceeding to prevent leaks and guarantee a secure fit.
Choosing the correct faucet for your sink configuration
Choosing the correct faucet begins by matching the fixture to the sink’s hole layout, deck thickness, and spout reach to guarantee proper fit and function.
Confirm single-hole, centerset, or widespread spacing, measure deck thickness for compatible shank length, and verify spout reach clears the basin edge.
Also check supply line connections, mounting hardware clearance, and any trim or accessory compatibility before purchasing.
Step-by-Step Faucet Removal
The removal process begins with shutting off the water supply and opening the faucet to drain any remaining water.
Next, the supply lines and mounting nuts are disconnected and removed, using penetrating oil or a wrench for stuck or corroded fittings as needed.
Finally, the sink area is cleaned and the mounting surface prepared for the new faucet.
Turning off water and draining remaining water
Locate and shut off the water supply to the faucet by closing the shutoff valves beneath the sink or, if none are present, turning off the house’s main supply.
Open the faucet handles to relieve pressure and drain residual water into a bucket or rag.
Flush lines by briefly operating both hot and cold.
Check nearby fixtures for complete shutoff before proceeding.
Disconnecting supply lines and removing mounting nuts
Begin by laying out a towel and a small bucket to catch any residual water. Then inspect the supply lines and mounting hardware beneath the sink.
Use an adjustable wrench to loosen compression nuts or swivel disconnects on supply lines, then remove lines.
Support the faucet while using a basin wrench to loosen mounting nuts. Remove nuts, lift faucet assembly out, and clear remaining debris.
Dealing with stuck or corroded fittings
When fittings refuse to budge due to mineral buildup or corrosion, apply penetrating oil to the threaded areas and let it soak for several minutes to soften deposits and loosen rusted threads.
Use a properly sized wrench or basin wrench, tapping gently with a hammer if needed.
For stubborn corrosion, alternate penetrating oil and heat cautiously, then pry or cut seized parts as a last resort.
Cleaning the sink area and preparing the mounting surface
Clear the countertop of toiletries and towels, then wipe the sink and surrounding area to remove soap scum, hair, and loose debris that could interfere with work or fall into the drain.
Dry the surface.
Inspect the mounting area for old putty, caulk, or corrosion; scrape and clean with a plastic scraper and mild cleaner.
Guarantee a smooth, dry surface for gasket or sealant application.
Step-by-Step Faucet Installation
The new faucet should be dry-fitted first to confirm alignment and hole spacing before any sealants are applied.
Gaskets, trim, and mounting hardware are set in place and the mounting nuts tightened evenly to secure the fixture without stressing the sink.
Finally, supply lines are connected with appropriate thread sealant or tape and the pop-up drain assembly reinstalled if required.
Dry-fitting the new faucet and layout verification
Place the new faucet components over the sink openings and assemble them without sealing or final tightening to confirm fit and alignment.
Check spacing relative to backsplash, handles, and spout reach. Verify mounting holes line up and supply lines clear obstructions.
Test handle rotation and aerator access. Make minor adjustments to orientation or spacing now; final tightening will occur after gasket and trim steps.
Installing gaskets, trim, and mounting hardware
After confirming fit and alignment during the dry-fit, the installer proceeds to seat gaskets and attach trim and mounting hardware to secure the faucet to the sink.
Rubber or foam gaskets are centered over holes, trim plates aligned, and mounting brackets positioned. Fasteners are started by hand to maintain alignment.
Excess sealant wiped away before final tightening to preserve finish and gasket placement.
Tightening nuts and securing faucet without damaging sink
Carefully tighten the mounting nuts by hand until snug, then use a basin wrench or socket to finish, applying even pressure to avoid stress on the sink surface.
Alternate between nuts, check alignment, and avoid over-torquing. Protect surfaces with tape or a rag. Verify no movement before final tightening.
- Use even, incremental turns
- Cushion metal against porcelain
- Stop when firmly seated
- Inspect for gaps
Connecting supply lines and using thread sealant or tape
Begin by inspecting the faucet tails and shutoff valves for matching thread types and clean, undamaged sealing surfaces; this guarantees a proper mechanical and hydraulic connection before applying any sealant.
Use plumber’s tape on tapered threads, wrap clockwise three to five turns. For compression fittings, avoid tape—ensure ferrules seat properly.
Hand-tighten, then wrench-turn a quarter to half turn; check for leaks.
Reinstalling pop-up drain assembly if applicable
Once the faucet and supply lines are secured, the pop-up drain assembly can be reinstalled to restore proper sink drainage.
Align the flange and rubber gasket in the sink hole, insert the tailpiece, and tighten the locknut from below.
Reattach the pivot rod to the flange clip, adjust for smooth action, lubricate seals if needed, then test for leaks and proper operation.
Testing the New Faucet and Final Adjustments
After reestablishing the water supply, the new faucet is run and all connections are inspected for leaks.
The installer verifies hot and cold alignment and checks handle movement for smooth, correct operation.
Any persistent drips, low flow, or misalignments are then diagnosed and addressed with common troubleshooting steps.
Turning water back on and checking for leaks
Turn the shutoff valves slowly to restore water flow and observe the faucet and all supply connections for any signs of leaking.
Run both handles briefly to pressurize lines while watching beneath the sink.
Tighten any weeping fittings, re-seat supply nuts, or retorque mounting hardware as needed.
Wipe dry areas, recheck after a few minutes, and confirm no drip or moisture remains.
Testing hot/cold alignment and handle movement
Open both handles briefly to verify that hot and cold water correspond to the correct sides and that each handle moves smoothly through its full range without binding or excess play.
Confirm temperature and flow respond predictably, then cycle handles several times to seat cartridges or valves.
Tighten decorative caps, adjust handle set screws if needed, and recheck alignment and operation before final cleanup.
Troubleshooting common issues after installation
Begin by running a thorough functional check: operate each handle and the spout to confirm steady flow, correct temperature response, and smooth movement without leaks or sputtering.
If problems appear, tighten connections, re-seat supply lines, and inspect O-rings and cartridges for debris.
Address aerator clogging, air in lines, or uneven pressure.
Recheck seals and retest until performance is consistent and leak-free.
Common Problems and How to Fix Them
After installation, a few recurring issues may still appear and require targeted fixes.
Common problems include persistent leaks at supply connections, drips from the spout, low or uneven water pressure, and loose handles or mounting instability.
The following section explains the likely causes and straightforward remedies for each.
Persistent leaks at supply connections
Persistent leaks at supply connections often arise from worn fittings, loose compression nuts, or improperly seated ferrules, allowing water to weep steadily under the sink even after the fixture appears installed correctly.
Inspect connections, tighten nuts to proper torque, replace damaged ferrules or use new compression fittings, and apply plumber’s tape where appropriate.
Verify with a pressure test and check again for slow seepage.
Drips from the spout after installation
A slow drip from the spout after installation signals that a valve seat, cartridge, O‑ring, or washer is not sealing properly rather than a supply connection issue.
Diagnosing the exact cause requires isolating the faucet, examining internal components for wear or debris, and testing operation under normal water pressure to determine whether cleaning, lubrication, or part replacement is needed.
Replace worn seals or cartridges, clean seats, and retest to confirm repair.
Low water pressure or uneven flow
Several factors can cause low or uneven faucet flow, including clogged aerators, sediment-filled supply lines, partly closed shutoff valves, damaged cartridges, or variations in household water pressure.
Diagnosing the issue requires systematic checks of the aerator, supply valves, and cartridge while noting whether the problem affects hot, cold, or both sides.
Clean or replace aerators, flush lines, fully open shutoffs, and replace faulty cartridges.
Loose handles or mounting instability
Check the tightness of handles and mounting hardware when a faucet rocks or turns loosely, since vibration, worn fasteners, or degraded mounting gaskets are usually the cause.
Inspect set screws, retaining nuts, and mounting plates. Tighten or replace corroded screws and nuts.
Replace compressed gaskets or use plumber’s putty/washer kits for a secure seal.
Verify stability after reassembly and test for leaks.
Maintenance Tips to Extend Faucet Life
Routine maintenance preserves function and finish, using mild cleaners and soft cloths to avoid corrosion or scratches.
Periodic replacement of cartridges, O-rings, and aerators keeps leaks and low flow from developing and should follow manufacturer guidance on parts and technique.
Seasonal checks for loose fittings, mineral buildup, and frozen-pipe risks prevent larger failures and extend service life.
Routine cleaning without damaging finishes
Protect finishes by using mild, nonabrasive cleaners and soft cloths rather than scouring pads or harsh chemicals that can strip protective coatings.
Wipe regularly to prevent mineral buildup, using vinegar sparingly on chrome or stainless steel and rinsing thoroughly.
Dry after cleaning to avoid water spots.
Test any product on an inconspicuous area first.
Avoid abrasive tools and prolonged chemical contact.
When and how to replace cartridges, O-rings, and aerators
When a faucet begins to drip, stick, or deliver uneven flow, the problem often lies with worn cartridges, deteriorated O-rings, or clogged aerators; replacing these parts restores performance and prevents larger leaks.
Identify model-specific cartridges, shut off water, disassemble handle, remove and inspect O-rings, clean or replace aerator, lubricate new O-rings with plumber’s grease, reassemble and test for proper operation.
Seasonal checks and preventive measures
Because faucets face varying temperatures, mineral buildup, and intermittent use throughout the year, seasonal checks help catch developing issues before they worsen.
Inspect seals, handles, and supply lines each season; clean aerators and remove mineral deposits with vinegar; test for leaks and proper drainage; tighten loose fittings; and replace worn O-rings or cartridges promptly.
Document findings and schedule simple maintenance to prevent major repairs.
Cost Breakdown and Time Estimates
Typical price ranges for faucets and replacement parts vary from economy options under $50 to premium models over $300, with cartridges and seals generally costing $5–$50.
Labor time depends on faucet type and complexity: a simple single-hole replacement can take 30–60 minutes, while widespread replacements or work on older plumbing may require several hours.
Cost-saving strategies—buying mid-range fixtures, reusing compatible parts, and scheduling work during off-peak times—can reduce expenses without sacrificing quality.
Typical price ranges for faucets and parts
A basic single-handle bathroom faucet generally costs between $30 and $150, while mid-range two-handle or widespread models run $150 to $400; high-end designer or specialty finishes can exceed $500. Additional parts—valve cartridges, supply lines, escutcheons—typically add $5–$75. Budget for unexpected small parts replacement.
| Item | Typical Cost | Notes |
|---|---|---|
| Cartridge | $10–$50 | Model-specific |
| Supply lines | $5–$20 | Pair |
| Escutcheon | $10–$40 | Finish match |
| Misc parts | $5–$75 | Washers, O-rings |
Labor time estimates by faucet type and complexity
Once parts and materials are chosen, estimating labor time helps set realistic total costs and scheduling expectations.
Simple single-hole installs typically require 30–60 minutes for an experienced DIYer; widespread or three-hole sinks add 60–90 minutes.
Replacing valves, addressing corroded mounting hardware, or tight access can extend work to 2–4 hours.
Complex wall-mounted or commercial faucets often need professional time and up to a day.
How to save money without compromising quality
Trim costs by prioritizing durability and labor efficiency: choose mid-range faucets with reliable cartridge or ceramic-disc valves, buy a quality mounting kit and basic replacement parts, and plan jobs during off-peak times to reduce contractor rates.
Estimate parts $30–$200, tools $0–$80 if renting, DIY labor 1–3 hours, pro labor $75–$150/hour. Factor contingency 10–20%.
When to Upgrade or Change Faucet Style
Assessment of recurring leaks, outdated internal parts, or chronic performance issues can indicate replacement is more cost-effective than repair.
Style choices should align with the bathroom’s design and planned functionality—single‑handle options for ease, widespread for traditional looks, or wall‑mounts for vanities.
Upgrading also offers a chance to meet current water‑efficiency standards and local code requirements.
Signs it’s time for an upgrade rather than a repair
Recognize that persistent problems, repeated repairs, or outdated function often signal the need for an upgrade rather than another fix.
Visible corrosion, chronic leaks, poor water pressure, incompatible parts, or rising maintenance costs indicate replacement is more cost-effective.
Consider frequent mineral buildup, diminishing performance, or safety concerns like lead content.
When usability or efficiency suffers, upgrading is the prudent choice.
Matching faucet style to bathroom design and functionality
When selecting a new faucet, homeowners should align style and function with the bathroom’s overall design and daily needs.
Consider finish, spout height, and handle type to match fixtures and storage constraints.
Choose a minimalist, wall-mounted model for modern, space-saving baths or a traditional, detailed fixture for classic décors.
Prioritize usability for household members when deciding upgrades.
Water-efficiency and code considerations
Many homeowners choose to upgrade faucets to improve water efficiency and guarantee compliance with local plumbing codes.
Selection should prioritize low-flow models, WaterSense certification, and aerators that reduce gallons per minute without sacrificing performance.
Additionally, installers must verify local fixture requirements, backflow prevention, and permit obligations.
Timely upgrades can lower utility bills, meet regulatory standards, and avoid inspection or resale complications.
Quick Reference: Tools, Parts, and Troubleshooting Cheatsheet
A concise checklist of essential tools, common replacement parts, and quick troubleshooting steps helps streamline faucet replacement and reduces downtime.
This cheatsheet summarizes what a homeowner or technician should have on hand, how to identify worn components, and the immediate fixes for typical problems such as leaks, low flow, or handle stiffness.
- Basin wrench, adjustable wrench, plumber’s grease, sealant
- O-rings, cartridges, aerators, supply lines
- Leak diagnosis, low-flow cleaning, handle lubrication
- Safety: shutoff verification, water catchment, part compatibility
Conclusion
The guide equips a homeowner to replace a bathroom faucet confidently, outlining types, tools, measurements, and stepwise removal while noting maintenance, costs, and upgrade cues. Like a compass guiding a traveler through unfamiliar terrain, it reduces uncertainty and prevents common mistakes. With proper preparation, basic tools, and safety awareness, the task becomes manageable, saving time and expense while improving function and style—encouraging informed, lasting choices for the bathroom’s most-used fixtures.
