How to Clean Kitchen Sink Drain Fast: 7 Safe Methods to Unclog and Deodorize
To quickly clear your kitchen sink drain, follow these safe and effective methods: Start by flushing it with boiling water to dissolve grease. If that doesn’t work, use a plunger to dislodge soft clogs. For a natural fizz, combine baking soda and vinegar, or soak with salt and baking soda before rinsing with hot water. If clogs persist, remove and clean the P-trap or use a hand auger for tougher debris. For organic buildup, enzyme cleaners can help overnight. By following these straightforward steps and maintaining your drain, you can keep it flowing smoothly.
Fast Overview: Quick Ways to Unclog and Deodorize a Kitchen Sink
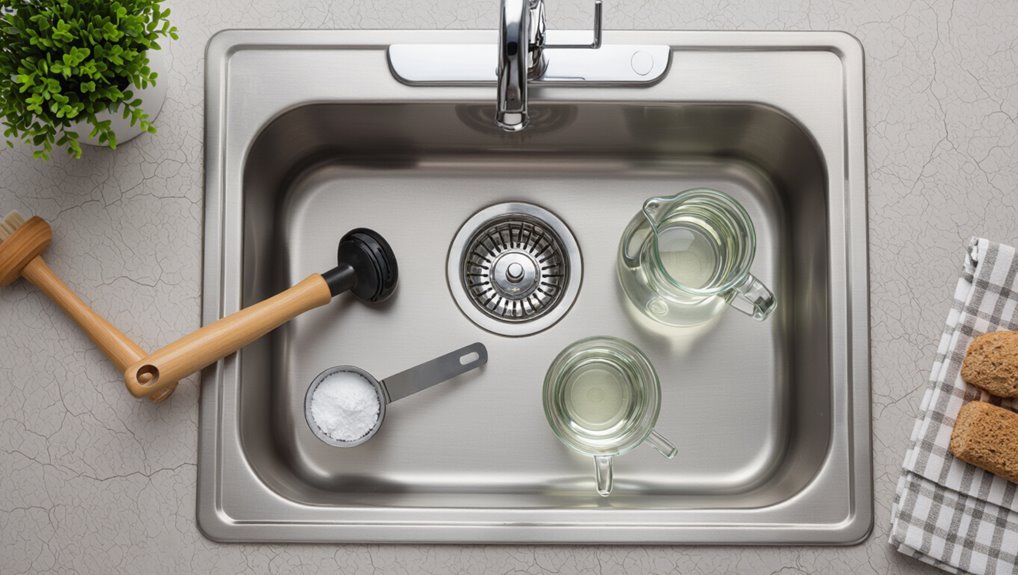
The section lists concise one-sentence solutions for common unclogging and deodorizing methods, each paired with a realistic time estimate.
It compares quick options like boiling water, baking soda and vinegar, a plunger, and a hand auger.
Readers can scan to choose the fastest effective approach for their situation.
One-sentence solution and time estimates for each method
Begin with a concise one-line instruction for each method followed by a clear estimate of how long it takes, so readers can quickly pick the fastest or most thorough option to unclog and deodorize a kitchen sink.
Plunge vigorously — 5–10 min.
Baking soda + vinegar flush — 30–60 min including dwell.
Boil water rinse — 5 min.
Remove trap and clean — 30–60 min.
Enzyme soak — 8–12 hours.
##
Inspecting the drain assembly gives a clear starting point for any cleaning task: noting the type of drain (pop-up, basket strainer, or disposal-connected) and visible buildup helps determine which tools and cleaners are appropriate.
Procedures proceed logically:
- Remove visible debris and test water flow.
- Apply appropriate cleaner or mechanical tool.
- Rinse thoroughly and reassemble, confirming leak-free operation.
What Causes Kitchen Sink Drains to Clog and Smell
Kitchen sink drains commonly clog when grease, food scraps, hair, and soap scum accumulate and form blockages.
Slowed drainage creates standing water that fosters bacterial growth and unpleasant odors.
Persistent or recurring clogs can signal a deeper plumbing problem requiring inspection or professional repair.
Common clogging materials (grease, food scraps, hair, soap scum)
Many everyday materials—grease, food scraps, hair, and soap scum—accumulate in sink drains and form blockages that slow drainage and produce odors.
Grease congeals on pipe walls, trapping particles; food debris compacts into dense masses; hair entangles and binds residues; soap scum combines with minerals to create stubborn films.
These substances often act together, increasing clog severity and frequency.
How slow drainage leads to odors and bacteria growth
Slow drainage creates standing water and wet surfaces that trap food particles and organic residue, providing an ideal environment for odor-causing bacteria and mold to multiply.
As decomposition proceeds, volatile compounds emit unpleasant smells. Reduced flow also limits oxygen, favoring anaerobic bacteria that produce sulfide and other foul odors.
Regular removal of trapped debris and drying prevents microbial buildup and recurring smells.
When a clog indicates a deeper plumbing issue
Detecting persistent or recurring clogs can signal problems beyond routine debris buildup.
Such symptoms may indicate damaged or collapsed pipes, tree root intrusion, severe grease accumulation deeper in the line, or issues with the main sewer connection.
Professional inspection using a camera can pinpoint the cause.
Prompt repair prevents backups, odors, sanitary hazards, and more costly structural or sewer system damage.
Safety Precautions Before You Start
Before beginning any sink maintenance, the reader should assemble basic tools and protective gear such as gloves, eye protection, a bucket, plunger, and plumber’s snake.
Chemical cleaners should be avoided on old pipes, after recent repairs, or when a septic system is present, and their labels must be read carefully.
If the clog is persistent, produces sewage backup, or involves damaged plumbing, a professional plumber should be contacted.
Tools and protective gear to have on hand
Several essential items should be gathered and inspected before any sink-drain work begins.
Recommended tools include a plunger, affordably sized basin wrench, plumber’s snake or hand auger, bucket, and adjustable wrench.
Protective gear: chemical-resistant gloves, safety goggles, and a mask if fumes are possible.
Also keep rags, a flashlight, and a container for removed debris to maintain cleanliness and prevent contamination.
When to avoid chemical cleaners
When should chemical drain cleaners be skipped? They should be avoided for old, corroded, or plastic plumbing, after recent DIY repairs, when a septic system is present, if strong odors or burns were noticed previously, or when children, pets, or sensitive occupants are nearby.
Also skip them for slow drains caused by mechanical blockages or when metal pipes show pitting or leaks.
When to call a professional plumber
If chemical cleaners are inappropriate or have failed to clear a clog, a professional plumber should be contacted rather than continuing DIY attempts.
A plumber assesses hidden damage, identifies sewer-line issues, and safely removes stubborn blockages using specialized tools.
Call when drains repeatedly clog, water backs up into other fixtures, foul odors persist, or leaks, corrosion, or structural concerns are suspected to prevent costly damage.
Fast Method 1 Boiling Water Flush
The boiling water flush requires only a kettle or pot of boiling water and basic protective gloves.
Instructions are straightforward: pour boiling water slowly down the drain in stages, test flow, and repeat as needed.
This method works best for minor grease or soap buildup but is ineffective for stubborn clogs or PVC pipes that may be damaged by high heat.
Materials needed
What is required for the boiling water flush is minimal: a kettle or large pot, a heatproof potholder or gloves, and clear access to the sink drain.
Additional items include a stable surface to set the kettle, a sink stopper or rag to contain water if needed, and a timer or clock.
Protective eyewear is optional for added safety.
Step-by-step application
Begin by bringing a kettle or large pot of water to a rolling boil, using potholders or gloves to handle it.
The person then clears the sink area and removes any visible debris from the drain opening to guarantee unobstructed flow.
Slowly pour the boiling water directly into the drain in two or three stages, pausing between pours to allow heat to loosen grease and residues.
Best situations for this method and limitations
After flushing with boiling water, this quick method works best for fresh, minor grease buildup and slow drains caused by soft organic residue near the sink trap; it is less effective on hair clogs, solid obstructions, or heavy scale.
It suits routine maintenance and emergency softening but fails against deep blockages, PVC joints with adhesive residues, and grease hardened into congealed deposits—professional tools or mechanical removal may be required.
Fast Method 2 Plunger Technique for Kitchen Sinks
Next, the plunger technique is introduced, starting with choosing the correct sink plunger and preparing the workspace for a tight seal.
A clear step-by-step plunging procedure is outlined, including the separate method for paired basins and when to block the opposite drain.
Finally, common troubleshooting tips are provided for persistent clogs and when to escalate to a snake or professional help.
Choosing the right plunger and setup
When tackling a clogged kitchen sink, selecting the proper plungers and arranging them correctly determines how quickly pressure can be applied and released to dislodge the blockage.
Choose a flat or flange cup for sinks; a sink-specific plunger seals better than a toilet plunger.
Confirm a clean rim, a firm grip, and a stable platform; for dual basins, have a second stopper or wet rag ready.
Step-by-step plunging process (including for double sinks)
With the proper plunger and a sealed rim in place, the plunging sequence begins by sealing the opposing basin (if present) with a stopper or a wet cloth to concentrate pressure.
Fill the sink partially with water, position the plunger over the drain, push down firmly then pull up sharply without breaking the seal.
Repeat 12–15 times, then test flow and clear residual debris.
Troubleshooting if plunging doesn’t work
If plunging fails to clear the blockage, the Fast Method 2 technique offers a targeted alternative: combine a tighter seal with alternating pressure pulses to dislodge stubborn clogs.
If resistance persists, check the sink trap for removable debris, inspect the pop-up assembly, and clear overflow or dishwasher inlet lines.
Use a drain snake cautiously; if still blocked, consult a professional plumber to avoid damage.
Fast Method 3 Baking Soda and Vinegar Reaction
This method requires common household materials—baking soda, white vinegar, hot water—and clear proportions (typically about 1/2 cup baking soda followed by 1 cup vinegar).
Instructions should be given step-by-step with timing: pour baking soda, add vinegar, wait 10–15 minutes for the reaction, then flush with hot water.
It is most effective for mild organic buildups and odors rather than stubborn hair or mineral blockages.
Materials and proportions
For the baking soda and vinegar reaction, use 1/2 cup of baking soda followed by 1 cup of white vinegar for a standard kitchen sink; a larger clog may require doubling both amounts. Required materials: baking soda, distilled or regular white vinegar, a measuring cup, a funnel or small scoop, and rubber gloves. Optional: a kettle of hot water for final rinse.
Step-by-step instructions and timing
Start by clearing the sink and removing any standing water.
Then pour 1/2 cup of baking soda directly into the drain using a funnel or scoop; immediately follow with 1 cup of white vinegar and quickly plug the drain to contain the fizzing reaction for 5–10 minutes.
Afterward, unblock and flush with hot water.
Repeat once if needed; use a plunger afterward for persistent clogs.
When this method is most effective
After following the baking soda and vinegar routine and flushing, assessment of results helps determine when the method is most effective.
It works best for mild organic clogs, slow drains from grease or soap buildup, and neutralizing odors.
It is less effective for solid obstructions, tree roots, or mineral scale.
Repeat once; if ineffective, escalate to mechanical cleaning or professional service.
Fast Method 4 Salt and Baking Soda + Hot Water
This method uses common household salt and baking soda in measured proportions, followed by a flush of very hot water to break up grime.
Instructions list exact ratios, how long to let the powders work, and when to run the hot water for best results.
Compared with vinegar-based mixes, the salt and baking soda approach is non-corrosive to plumbing and often better at loosening greasy clogs.
Materials and proportions
For the fast method using salt and baking soda with hot water, gather 1/2 cup of coarse salt, 1/2 cup of baking soda, and about 2–3 cups (500–750 ml) of very hot — ideally just-off-boil — water; measure the dry ingredients separately and have the hot water ready in a heatproof container.
Optional items: a funnel or small scoop, a rubber stopper or plug, and heat-resistant gloves.
Step-by-step instructions
Begin by ensuring the sink is free of standing water and any large debris; then measure out 1/2 cup coarse salt and 1/2 cup baking soda and keep the hot water (2–3 cups, just off boil) within reach.
Pour salt and baking soda down the drain, wait five minutes, then slowly pour hot water to flush.
Repeat once if needed.
Advantages compared to other DIY mixes
After executing the salt-and-baking-soda flush, attention often turns to how that approach stacks up against other DIY options.
It offers quick abrasion to dislodge grime, odor neutralization without harsh fumes, low cost, and minimal equipment.
Compared with vinegar-baking-soda foaming or chemical cleaners, it is gentler on pipes, safer for septic systems, and suitable for routine maintenance.
Fast Method 5 Manual Trap (P-trap) Cleaning
The guide outlines the simple tools and safety steps needed before working on the P-trap.
It then explains how to disconnect, inspect, and clear trapped debris from the trap body.
Finally, it covers reassembly steps and how to run a leak test to confirm a secure seal.
Tools and preparation
Gather necessary tools and prepare the work area before attempting manual P‑trap cleaning to confirm a safe, efficient process.
Recommended items include adjustable pliers, bucket, gloves, safety glasses, rags, a flashlight, and plumber’s tape.
Turn off water supply, clear under-sink storage, lay down absorbent towels, and position the bucket to catch residual water.
Verify good lighting and ventilation before proceeding.
How to remove, inspect, and clean the P-trap
Loosen the slip nuts and remove the P‑trap carefully to avoid spills and preserve parts for reassembly.
Place a bucket beneath, detach trap, and inspect for hair, grease, and debris.
Use a brush and mild detergent or vinegar solution to scrub interior surfaces and trap arm.
Rinse thoroughly, clear obstructions with a bottle brush, and dry parts before preparing to reassemble.
How to reassemble and test for leaks
Reassemble the P‑trap by sliding the cleaned components back into position, aligning the trap arm with the tailpiece and the trap inlet with the wall outlet.
Hand‑tighten slip nuts, verify washers seat flat, then snug with pliers without over‑torquing.
Restore water, run faucet and check all joints for drips.
If leaks appear, tighten slightly or reseat washers; retest until dry.
Fast Method 6 Use of a Drain Snake/Auger
This section outlines common sink augers—manual hand snakes, drum-style units, and small powered models—and their appropriate uses.
It then summarizes step-by-step operation of a hand snake, from feeding the cable through the drain to retrieving debris.
Finally, it lists safety tips to prevent pipe scratching, over-feeding the cable, and injury while working.
Types of augers for kitchen sinks
Several common types of augers are suited to kitchen sink drains, each designed for different clog locations and user skill levels.
Handheld drum augers fit under-sink P-traps for hair and food buildup. Long cable drum snakes reach deeper through horizontal runs.
Toilet augers are inappropriate. Mini power augers speed clearing in stubborn cases but require caution to avoid pipe damage and fixtures.
How to operate a hand snake step-by-step
After selecting an appropriate hand snake based on the previous overview, proceed to operate it methodically:
Wear gloves and eye protection. Remove the sink stopper or disconnect the P-trap if access requires.
Then feed the cable into the drain while turning the handle clockwise to navigate bends and push past the obstruction.
Once resistance is felt, crank and retract to snag debris; repeat insertion and flushing until flow clears.
Safety tips to avoid pipe damage
Many users should inspect pipe material and age before using a drain snake to prevent accidental damage.
Use gentle feed and avoid excessive torque; stop if resistance feels sharp.
Choose the right snake size and avoid powered augers on old PVC or corroded metal.
Wear gloves and eye protection.
Reassemble fittings carefully and test with running water to confirm no leaks or cracks.
Fast Method 7 Enzyme or Biological Drain Cleaners
Enzyme or biological cleaners use microbes and enzymes to break down organic buildup and are best for slow clogs caused by food, grease, and organic residue.
Application typically involves pouring the product into the drain, maintaining recommended dwell time (often overnight), and avoiding rinsing or using harsh chemicals during treatment.
They are safer for pipes and the environment than caustic chemical cleaners but act more slowly and may be ineffective on mineral or severe blockages.
How enzyme cleaners work and when to use them
Activate biological cleaners rely on naturally occurring bacteria and enzymes to break down organic buildup in drains, such as grease, food particles, and hair. They digest complex molecules into simpler compounds, reducing odors and slow clogs. Best used for organic, non-mineral blockages and as preventive maintenance; not effective on inorganic debris, heavy scale, or immediate severe obstructions requiring mechanical or chemical intervention.
Application steps and dwell time
Begin by ensuring the drain area is free of standing water and visible debris so the biological cleaner can contact the organic buildup directly.
Pour or dispense the recommended dose into the drain, following manufacturer instructions.
Allow the product to dwell for the specified period (typically 4–12 hours or overnight).
Rinse with hot water and repeat weekly for maintenance or until odors and slow drainage resolve.
Pros and cons vs. chemical cleaners
While biological drain cleaners work slowly by using microbes and enzymes to break down organic material, they offer distinct advantages and trade-offs compared with chemical cleaners: they are safer for pipes, septic systems, and the environment, produce fewer toxic fumes, and can prevent recurring buildup when used regularly.
However, they act more slowly, are less effective on mineral scale or severe clogs, and require proper dwell time and temperature to be effective.
Enzyme cleaners suit maintenance and organic clogs; chemical cleaners act fast on grease and hair but risk corrosive damage and toxic fumes, demanding cautious use.
Comparing Methods: Speed, Cost, Effectiveness, and Safety
A concise comparison summarizes speed, cost, effectiveness, and safety for the seven cleaning methods.
The table highlights how each option performs on those four criteria to aid selection.
Readers can use the summary to match priorities—fastest results, lowest expense, best long-term effectiveness, or greatest safety.
Quick comparison table of the 7 methods
Several practical methods for clearing a kitchen sink drain are summarized below in a compact comparison that rates each by speed, cost, effectiveness, and safety to help readers choose the best option for their situation.
Plunger: fast, low cost, moderate effectiveness, safe.
Baking soda/vinegar: moderate speed, very low cost, variable effectiveness, safe.
Drain snake: fast, moderate cost, high effectiveness, safe.
Chemical drain cleaner: fast, low cost, high effectiveness, hazardous.
Hot water: slow, free, low effectiveness, safe.
Enzyme cleaner: moderate speed, higher cost, moderate effectiveness, very safe.
##
Prevent build-up by routinely flushing the drain with hot water after each major use to loosen grease and small food particles. Regular maintenance minimizes clogs and extends pipe life. Periodic checks of strainers, gentle brushing, and prompt removal of debris prevent escalation. Simple actions reduce need for aggressive measures and professional service.
| Action | Frequency | Benefit |
|---|---|---|
| Hot water flush | After major use | Loosens grease |
| Strainer check | Daily | Catches solids |
| Brush pipe rim | Weekly | Removes residue |
| Debris removal | As needed | Prevents clogs |
Deodorizing Techniques After Clearing a Clog
After a clog is cleared, attention turns to neutralizing lingering odors with quick fixes like citric acid or a baking soda rinse to freshen the trap and drain lines.
For lasting prevention, routine enzyme treatments break down organic buildup while flushing with cold water helps carry grease past the trap instead of allowing it to congeal.
Combining immediate deodorizing with regular maintenance minimizes recurrence and keeps the sink smelling clean.
Short-term deodorizing (citric acid, baking soda rinse)
A quick, effective way to neutralize lingering odors following a drain unclogging is a citric acid or baking soda rinse; both break down odor-causing residues and leave a fresher scent without harsh chemicals.
To use, dissolve citric acid powder in hot water or sprinkle baking soda, then flush with hot water.
Repeat weekly as needed for immediate odor control.
Long-term odor prevention (regular enzyme treatments, cold water grease flushing)
Maintain consistent maintenance routines to keep sink drains odor-free over the long term: periodic enzyme treatments and deliberate cold-water grease flushing reduce buildup that causes smells.
Monthly enzyme products digest organic residue safely; follow label directions. After greasy use, run several minutes of cold water to solidify fats and push them to the trap for removal.
Combine with occasional mechanical cleaning and proper disposal habits.
Preventive Maintenance to Keep Drains Clear and Fresh
Routine prevention keeps drains working and smelling fresh through simple daily habits like using a sink strainer and never pouring grease down the drain.
A short weekly rinse with hot water and a monthly check of the trap and pipe with a brush or enzyme cleaner can ward off buildup.
Keeping a few basic tools and products—rubber gloves, a plunger, a small drain snake, enzyme drain cleaner, and baking soda/vinegar—under the sink makes prompt maintenance easy.
Daily habits to reduce clogs (strain food, avoid grease)
Several simple daily habits considerably reduce kitchen drain clogs: using a sink strainer to catch food scraps, scraping plates into the trash or compost before rinsing, and wiping greasy pans with a paper towel rather than rinsing oil down the drain.
Rinsing with hot water after washing, disposing of coffee grounds in compost, and avoiding fibrous or starchy waste down the sink prevents buildup and odors.
Weekly and monthly maintenance routine
Daily habits reduce most buildup, but scheduled weekly and monthly checks keep small issues from becoming clogs.
Once a week, rinse drains with hot water and flush with a vinegar–baking soda mix to cut grease and neutralize odors.
Monthly, inspect and clean the stopper, run the disposal with cold water, and check under-sink connections for leaks or slow drainage signs to address early.
Products and tools worth keeping under the sink
A compact kit of a few reliable products and basic tools makes preventive sink care quick and effective.
Include a bottle brush, flexible drain snake, plunger, and rubber gloves for routine clearing.
Keep enzymatic drain cleaner, baking soda, white vinegar, and a citrus deodorizer for freshening.
Store plumber’s tape, replacement washers, and a small flashlight for inspections and minor repairs.
Common Mistakes That Make Clogs Worse
Homeowners often make choices that worsen blockages, such as pouring harsh chemical drain cleaners into systems or repeatedly using boiling water on PVC piping.
Relying solely on extreme measures can damage pipes or push debris deeper into the drain.
Likewise, ignoring a slow drain until it fully clogs typically turns a minor problem into a more difficult repair.
Misuse of chemical drain cleaners
Many people reach for chemical drain cleaners as a quick fix, but improper use often worsens clogs and damages plumbing.
Concentrated chemicals can corrode pipes, ruin seals, and create hazardous residue. Mixing products or using excessive amounts risks toxic fumes and reactions.
They often fail on physical blockages, delaying proper mechanical removal and increasing repair complexity and cost.
Overreliance on boiling water with PVC pipes
After warning about the dangers of harsh chemical cleaners, attention should turn to another common mistake: assuming boiling water is a universal remedy.
Boiling water can soften or warp PVC joints, degrading seals and causing leaks. Repeated thermal shock weakens plastic fittings.
Instead, warm water and enzymatic cleaners or mechanical methods are safer for PVC drains, preserving pipe integrity while addressing buildup.
Ignoring slow drains until they fully clog
Letting a drain slow down without intervention invites bigger problems: what begins as minor pooling and delayed drainage often progresses to complete blockages that require more invasive repairs.
Neglecting early signs lets debris, grease, and soap build up, increasing odor and corrosion risk.
Timely simple measures—mechanical snaking, enzyme cleaners, or routine rinses—prevent escalation and reduce need for costly professional repairs.
Signs You Need Professional Help
Persistent foul odors, recurring clogs, or backups in multiple fixtures signal problems beyond routine cleaning.
Visible leaks, extensive corrosion, or broken piping that require replacement also indicate the need for a licensed plumber.
In such cases, professional assessment and repair are the safest and most effective options.
Persistent smells, repeated clogs, or multiple fixtures affected
Recognize when routine fixes no longer suffice: lingering foul odors despite cleaning, recurring clogs that return shortly after being cleared, or slow drains and backups occurring in more than one fixture all indicate a deeper issue within the plumbing system.
Such patterns suggest blockages in main lines, buildup beyond the trap, or venting problems. Promptly consult a licensed plumber to diagnose and resolve underlying causes.
When leaking or corroded pipes require replacement
If recurring odors, repeat clogs, or multiple fixtures affected point to deeper system problems, attention should next turn to the condition of the supply and drain pipes themselves.
Visible corrosion, persistent leaks, lowered water pressure, discolored water, or soft/crumbling pipe material indicate replacement is likely.
A licensed plumber should assess extent, recommend modern materials, provide cost estimates, and perform safe, code-compliant replacement.
Quick Checklist: Steps to Clear and Deodorize a Kitchen Sink Fast
A concise, ordered checklist guides a 10–30 minute fix to clear and deodorize a kitchen sink drain.
It outlines safe, sequential steps—from removing visible debris and trapping odors to flushing with a cleaning solution and testing flow.
The list is designed for quick execution with common household tools and materials.
Ordered action list for a 10 to 30 minute fix
Start with immediate, practical steps that fit a 10–30 minute window and focus on clearing blockages and neutralizing odors without special tools.
Remove visible debris, run hot water, and try a plunger.
Sprinkle baking soda, pour vinegar, wait five minutes, then flush with boiling water.
Clean the stopper or basket, deodorize with lemon rind, and test drainage.
Repeat if needed.
##
Locating the source of a persistent smell in the kitchen sink drain requires systematic inspection of accessible components and attention to recent changes in use.
The technician checks trap, disposal, and venting, isolates odor sources, and documents findings.
Recommended steps:
- Remove and inspect P-trap for debris.
- Run disposal with cold water and check seals.
- Smell-test vent and drain lines for backups.
Conclusion
Like a small river reclaiming its course after a storm, the kitchen sink returns to clear flow when steady, thoughtful care is applied. Each quick flush, plunge, or deodorizing touch is a pebble dropped into the stream, nudging obstructions onward. With precautions respected and habits changed, the water moves freely and smells fade. When the current resists, a skilled hand—like an experienced ferryman—guides the way, restoring calm to the household’s daily currents.