How to Use a Basin Wrench: Step-by-Step Guide for Tight Faucet Nuts and Plumbing Repairs
A basin wrench is an essential tool for tightening or loosening faucet mounting nuts in tight spaces, particularly under sinks. To use it effectively, start by shutting off the water supply and clearing the area for easy access. Position the wrench’s head behind the nut, engage the spring-loaded jaw, and apply steady counterclockwise pressure for removal. If the nut is stuck, use penetrating oil, and ensure you have good lighting to see your work clearly. For additional guidance, explore tips on different orientations, troubleshooting common issues, and safe removal techniques.
What a Basin Wrench Is and When to Use It
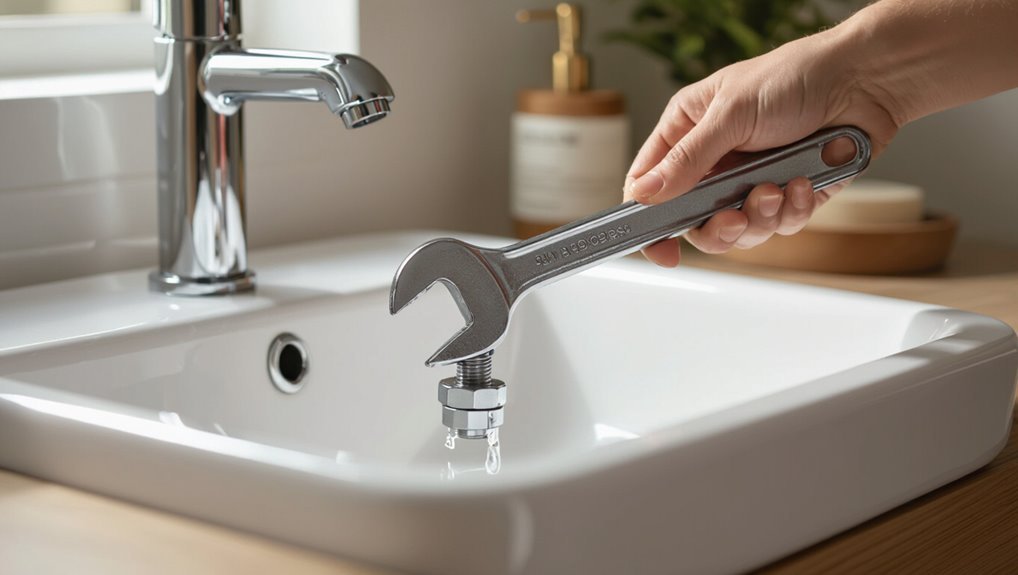
A basin wrench is a long-handled plumbing tool with a pivoting jaw and toothed gripping head designed to reach and turn nuts in confined spaces beneath sinks.
It is commonly used to loosen or tighten faucet mounting and supply line nuts that are inaccessible with standard wrenches.
Variations in head style, handle length, and adjustable jaw size allow selection of the appropriate type and size for different sink configurations and fastener diameters.
Definition and key components of a basin wrench
Basin wrenches are specialized plumbing tools designed to reach and turn fasteners located in tight spaces behind sinks, particularly the mounting nuts that secure faucets.
A typical basin wrench comprises a long shaft, pivoting T-handle, and toothed, spring-loaded jaw allowing access and grip.
Understanding these components helps users learn how to use basin wrench effectively for faucet installation and removal.
Common situations that require a basin wrench
Reach into cramped under-sink spaces to loosen or tighten the hard-to-reach mounting nuts that secure faucets, supply lines, and some sink hardware.
Typical situations include replacing faucets, repairing leaks at faucet bases, installing new supply hoses, adjusting loose mounting nuts after countertop shifts, and removing corroded fasteners.
Useful for tight clusters of fittings where conventional wrenches cannot access or turn nuts effectively.
Types and sizes of basin wrenches
After outlining common under-sink tasks that call for specialized access, attention turns to the different types and sizes of basin wrenches used to meet those challenges.
Three main variants suit distinct needs:
- Standard adjustable jaw for most faucet nuts and tight spaces.
- Long-reach model for deep, recessed fittings.
- Compact swivel-head for cramped, awkward angles.
Quick Overview Can a Basin Wrench Solve Your Faucet Problem?
A basin wrench commonly handles stubborn mounting nuts, hard-to-reach supply line connections, and loose faucet assemblies under sinks.
It is ineffective for seized corroded fittings, stripped fasteners, or tasks requiring large torque, where penetrating oil, nut splitters, or an adjustable wrench may be better.
Readers should match the tool to the specific problem before attempting a repair.
Typical problems a basin wrench fixes
Determines whether a basin wrench is the right tool for a faucet issue by focusing on problems that involve hard-to-reach nuts and confined spaces beneath sinks.
It typically addresses corroded or seized mounting nuts, stripped hex nuts requiring steady grip, loose supply line connections, and tight retention hardware on single- or double-hole faucets.
It excels where depth and limited clearance prevent conventional wrenches.
When not to use a basin wrench and alternative tools
When should a basin wrench be set aside?
A basin wrench isn’t ideal for corroded, rounded, or hard-to-reach nuts that require heat, penetrating oil, or significant leverage.
Use adjustable wrenches, crowfoot sockets, universal joint extensions, or penetrating oil plus a torch for seized fasteners.
For plastic components, choose pliers or strap wrenches to prevent damage.
Seek professional help if unsure.
Tools and Materials You’ll Need Before Starting
Before starting, the writer lists essential items and choice factors to prepare the reader.
- Recommended additional tools and safety gear
- How to choose the right basin wrench for your faucet
- Basic consumables (rags, tape, bucket) to keep on hand.
The following section explains why each item matters and how to match wrench size and jaw type to the faucet.
Recommended additional tools and safety gear
A few extra tools and proper safety gear can make basin wrench tasks faster and reduce the risk of injury or damage. Recommended items include adjustable pliers, strap wrench, penetrating oil, flashlight or headlamp, rags, bucket, and replacement washers.
Safety gear: safety glasses, nitrile gloves, knee pads, and a dust mask. Keep a towel and container for small parts nearby to prevent loss.
How to choose the right basin wrench for your faucet
Which basin wrench fits a given faucet depends on space, fastener type, and access angle.
Select a compact, swivel-head model for tight cabinets; choose a longer-handled wrench when reach is limited.
Confirm jaw compatibility with nut sizes or opt for an adjustable head.
Prefer hardened steel for durability and a comfortable grip for leverage.
Verify reversible rotation for confined maneuvers.
Step-by-Step Guide to Using a Basin Wrench for Tight Faucet Nuts
Before beginning, the workspace should be prepared by shutting off water, clearing the under-sink area, and arranging adequate lighting.
The user should position themselves and the wrench for clear access, then attach and adjust the basin wrench jaws to the nut.
With steady leverage and correct turning technique, the nut can be loosened, removed, and faucet components detached.
Preparing the workspace: shutoff valves, clearing under-sink area, lighting
Several preparatory steps guarantee a safe, efficient workspace: shut off the water supply at the appropriate valves, clear all items from beneath the sink, and position a reliable light source to illuminate the fixture area.
Verify valves by briefly testing flow, drain residual water into a bucket, remove obstructions that impede access, and set a flashlight or headlamp for shadow-free visibility before beginning repairs.
Positioning yourself and the wrench for maximum access
Work from a stable kneeling or seated position with knees or a padded mat supporting the body to minimize movement while reaching under the sink.
Tilt the torso slightly forward, keep shoulders relaxed, and maintain neutral wrist alignment.
Angle the basin wrench head toward the fastener path, slide hands into position, and use controlled short motions.
Reposition body or wrench rather than overextending.
Attaching and adjusting the basin wrench to the nut
The basin wrench should be positioned so its jaws straddle the nut with the toothed pawl engaging the flats; this guarantees a secure grip before any turning force is applied.
The operator adjusts the telescoping shaft to reach, sets the pivot head angle to align with the nut, and tightens the locking collar.
Confirm jaw bite and shaft stability prior to applying leverage.
Proper technique for turning and loosening the nut
With the jaws securely engaged and the shaft locked in place, the operator applies controlled force to turn the nut counterclockwise to loosen (or clockwise to tighten) while keeping the pivot head aligned to prevent slippage.
Hand pressure is steady; sudden jerks are avoided. If resistance is high, slight repositioning and incremental turns reduce stripping risk.
Monitor grip and tool angle throughout operation.
Removing the nut and detaching faucet components
Once the nut turns freely, carefully back it off the thread while maintaining steady support on the faucet to prevent rotation or sudden drops.
Remove the nut completely and slide any washers, spacers, or mounting hardware off the shank.
Gently lower the faucet assembly, disconnect supply lines if not already detached, and set components on a clean surface for inspection, cleaning, or replacement.
Reinstalling or tightening a nut with a basin wrench
Begin by positioning the basin wrench so its jaws straddle the faucet shank and its long handle extends accessibly from beneath the sink.
Align the nut, engage jaws, and turn clockwise to tighten. Use controlled, short strokes; ratcheting feature if present helps.
Periodically check alignment and hand-tighten final turns above sink to avoid overcompressing seals.
Verify no leaks after restoring water.
Visual Tips and Common Hand Positions
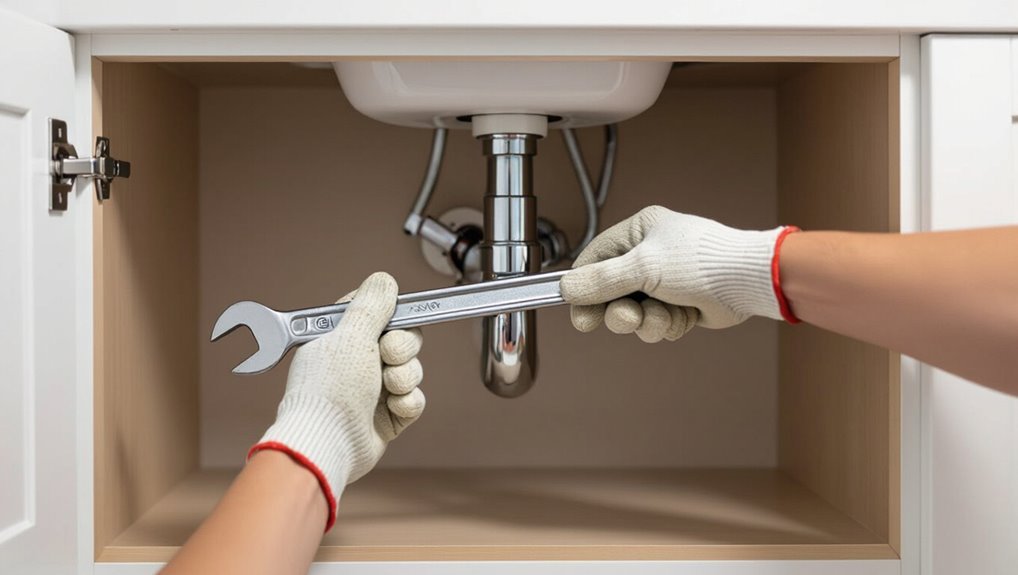
The orientation of the basin wrench jaw determines whether it grips for forward or reverse turns, so the user should show which jaw face engages the nut.
Demonstrating the use of extensions and pivoting handles clarifies how to reach obstructed fasteners and where to place hands for leverage.
Photographs or diagrams that label jaw direction and hand positions help readers replicate the motions safely and accurately.
How to orient the wrench jaw for forward and reverse turns
Positioning the basin wrench jaw correctly is essential for efficient forward and reverse turns: the jaw’s tapered end should face the direction of rotation so its teeth bite into the fastener when torque is applied.
For clockwise tightening, orient the taper toward the right; for counterclockwise loosening, point it left.
Confirm the jaw seats squarely, then apply steady, controlled force.
Using extensions and pivoting handles in tight spaces
Once the jaw is correctly oriented, attention turns to extensions and the pivoting handle for reaching confined fasteners.
The technician slides extensions onto the shank to gain length, angling the pivoting handle to clear obstructions.
Common grips include palm-over and two-finger stabilizing holds.
Small, controlled turns prevent slippage; incremental repositioning accommodates limited swing and preserves jaw engagement.
Troubleshooting When the Basin Wrench Won’t Work
When the basin wrench fails to budge a fastener, the writer recommends evaluating the cause before applying force.
For seized or corroded nuts, penetrating oil, directed heat, or careful tapping can free threads, while stripped nuts often require extraction tools or replacement hardware.
Limited clearance or obstructing pipes may call for alternative approaches such as offset adapters, shorter sockets, or temporarily removing nearby fittings.
Stuck or corroded nuts: penetrating oil, heat, and other methods
Stuck or corroded mounting nuts are a common obstacle that prevents a basin wrench from doing its job; freeing them requires a careful mix of penetrating oil, targeted heat, and mechanical persuasion.
Apply penetrating oil, allow soak time, then tap nut lightly to break corrosion.
Use a heat gun cautiously to expand metal, then try wrenching again.
Protect nearby surfaces and wear safety gear.
Stripped nuts: extraction techniques and replacements
Stripped mounting nuts require different tactics than seized ones because the tool can no longer get purchase on damaged flats or rounded edges. Extraction often relies on bite, grip, or replacement parts rather than brute force.
Options include bolt extractors, tapered easy-outs, cutting a slot for a flathead, drilling then using an extractor, or replacing the nut assembly and coupling with new hardware designed for tight spaces and corrosion resistance.
Dealing with limited clearance or obstructing pipes
Occasionally a basin wrench cannot access a nut because surrounding pipes, supply lines, or the sink’s structure leave too little clearance for the jaw or handle to engage properly.
In such cases, reposition or temporarily disconnect adjacent fittings, use a shorter or flexible-handle basin wrench, or employ swivel adapters.
When obstruction persists, consider removing the faucet or using an alternative tool like a crowfoot wrench with an extension.
Comparing Basin Wrench Alternatives
When a basin wrench proves impractical, alternatives such as an adjustable wrench, strap wrench, or socket wrench offer different trade-offs in access, grip, and risk of damage. The table below summarizes key pros and cons for quick comparison. It is also useful to note when a professional plumber should be hired for stubborn or complex situations.
| Tool | Notable trait |
|---|---|
| Basin wrench | Designed for tight under-sink spaces |
| Adjustable wrench | Versatile but can slip or mar fittings |
| Strap wrench | Gentle on finishes but bulky |
| Socket wrench | Strong torque but limited reach |
Pros and cons of basin wrench vs. adjustable wrench, strap wrench, and socket wrench
Although the basin wrench is purpose-built for hard-to-reach faucet nuts, other tools—adjustable wrenches, strap wrenches, and socket wrenches—offer distinct trade-offs in accessibility, grip, and torque.
Comparing these alternatives clarifies which tool suits a given plumbing task.
Basin wrench: best reach, limited leverage.
Adjustable: versatile, requires clearance.
Strap: non-marring, lower torque.
Socket: high torque, needs straight access and correct socket size.
When to hire a professional plumber
How should a homeowner decide whether to tackle a stubborn faucet nut with a basin wrench or call a professional plumber?
A professional is advised when space, corrosion, or damaged fittings exceed DIY skills, when leaks risk water damage, or when multiple fixtures or older plumbing complicate repairs.
Professionals guarantee proper seals, code compliance, and durable solutions, often saving time and preventing costly mistakes.
Common Mistakes and How to Avoid Them
Common errors when using a basin wrench can lead to leaks, cosmetic damage, or prolonged work.
Common issues to watch for include:
- Over-tightening or cross-threading
- Damaging supply lines or faucet finishes
- Poor lighting and awkward body positioning
Addressing these prevents unnecessary repairs and speeds up the job.
Over-tightening or cross-threading
Over-tightening or cross-threading the mounting nut with a basin wrench can damage fixture threads, warp seals, and create leaks that are difficult to repair.
The user should align threads visually, start by hand, and use gentle, incremental turns with the wrench.
Stop when snug plus a quarter turn; avoid forceful back-and-forth adjustments that strip threads or misalign components, and inspect threads before reassembly.
Damaging supply lines or faucet finishes
Careless use of a basin wrench can easily kink or fracture flexible supply lines and scratch plated faucet finishes, turning a straightforward installation into a cosmetic or functional problem.
To prevent damage, select the correct jaw size, pad contact points with cloth, grip only fittings, and avoid excessive leverage.
Inspect lines for wear and replace damaged hoses promptly to maintain reliable, leak-free connections.
Poor lighting and awkward body positioning
Poor lighting and awkward body positioning make using a basin wrench slower and increase the risk of dropped tools, stripped fittings, or muscle strain.
The technician should illuminate the work area with a headlamp or portable light and adopt a stable, ergonomic stance.
Repositioning the body, using a creeper or stool, and taking short breaks reduces fatigue and improves control, minimizing accidents and damage.
Maintenance and Care for Your Basin Wrench
Proper maintenance extends the useful life of a basin wrench through regular cleaning, periodic lubrication of moving parts, and appropriate storage to prevent rust and damage.
Users should wipe away grime after use, apply a light oil to the pivot and jaws as needed, and store the tool in a dry place or toolbox.
The wrench should be replaced when teeth or jaws show significant wear, the pivot becomes loose beyond adjustment, or corrosion compromises its strength.
Cleaning, lubrication, and storage tips
Regular cleaning, occasional lubrication, and correct storage extend a basin wrench’s service life and guarantee reliable operation.
After use, debris and grime are wiped away with a damp cloth and mild detergent; dry thoroughly.
Apply light machine oil to the pivot and spring mechanism sparingly.
Store the wrench in a dry toolbox or hang it to prevent moisture, corrosion, and misalignment.
When to replace your basin wrench
A basin wrench should be replaced when signs of wear, damage, or compromised performance appear.
Corroded jaws, bent shafts, stripped threads, or a loose pivot reduce effectiveness and risk slippage. If repeated lubrication and adjustments fail to restore secure grip or alignment, replacement guarantees safety and efficiency.
Consider replacement after frequent heavy use or visible structural fatigue to avoid plumbing damage.
Real-World Scenarios and Quick Solutions
The section presents common tasks where a basin wrench proves essential, such as replacing a kitchen faucet retaining nut in cramped under-sink spaces, removing a bathroom faucet with older corroded fittings, and performing an emergency fix when a leak appears after tightening.
It highlights practical adjustments and grip techniques suited to each scenario. Readers are encouraged to compare quick solutions and choose the safest, most effective approach for their situation.
Replacing a kitchen faucet retaining nut under cramped space
Tightening or replacing a kitchen faucet retaining nut in confined under-sink spaces demands precise maneuvering and the right tool selection; using a basin wrench or low-profile socket can prevent stripped threads and avoid damage to supply lines.
The technician works methodically: shutoff water, support the faucet, access nut with extension or swivel head, apply steady torque, replace deteriorated nut, test for leaks, reassemble.
Removing a bathroom faucet on older, corroded fittings
Begin by shutting off the water and clearing the cabinet floor so the technician can work without obstruction.
Older bathroom faucet fittings often seize from mineral buildup and corrosion, requiring penetrating oil, time, and gentle heat to free them without breaking supply lines.
Use a basin wrench with steady leverage, apply penetrating oil, alternate heat and tapping, loosen mounting nuts slowly, and replace corroded hardware and seals before reassembly.
Emergency fix when a leak appears after tightening
If a leak appears immediately after tightening a bathroom faucet, assess the source quickly to determine whether it’s from a supply line, valve seat, or mounting seal.
Small weeps often indicate a misaligned or pinched washer while a steady drip can mean a cracked fitting or damaged thread.
Shut off water, recheck connections, replace washers or tape threads, temporarily clamp or use epoxy for hairline cracks, and call a plumber if unsure.
Summary Checklist Before You Start
Before reaching under the sink, confirm that the water supply is shut off, the work area is clear and well-lit, and the correct basin wrench is on hand; these quick checks prevent common delays and safety issues.
- Verify shutoff valves and relieve residual pressure.
- Gather wrench, flashlight, gloves, and rags.
- Clear under-sink space and plan access path for the wrench.
Conclusion
A basin wrench proves invaluable when space is tight and standard tools fall short, turning awkward, hard-to-reach faucet nuts into manageable tasks. With proper preparation, correct hand placement, and steady, confident motion, most stubborn connections come loose without damage. Users should avoid common missteps, maintain the tool, and have backup parts ready. When everything goes according to plan, the job is a walk in the park — or at least a lot less painful than expected.