How to Clean a Stainless Steel Sink Pipe Line: Step-by-Step Guide for a Clog-Free Drain
To clean a stainless steel sink pipe line and prevent clogs, start by identifying the sink pipe components and shutting off the water supply. Next, place a bucket underneath the sink, and wear gloves and goggles for protection. Remove the P-trap and inspect it for debris. Use a brush or plumber’s auger to clear any buildup, then clean the pipe with vinegar, baking soda, or an enzyme cleaner to tackle organic matter. Reassemble the components carefully, checking for leaks and ensuring proper drainage, then flush the system with hot water. To maintain a clog-free drain, regularly clean the strainer and perform monthly maintenance. For deeper cleaning and diagnostics, follow the additional steps provided.
What a Stainless Steel Sink Pipe Line Is and Why It Clogs
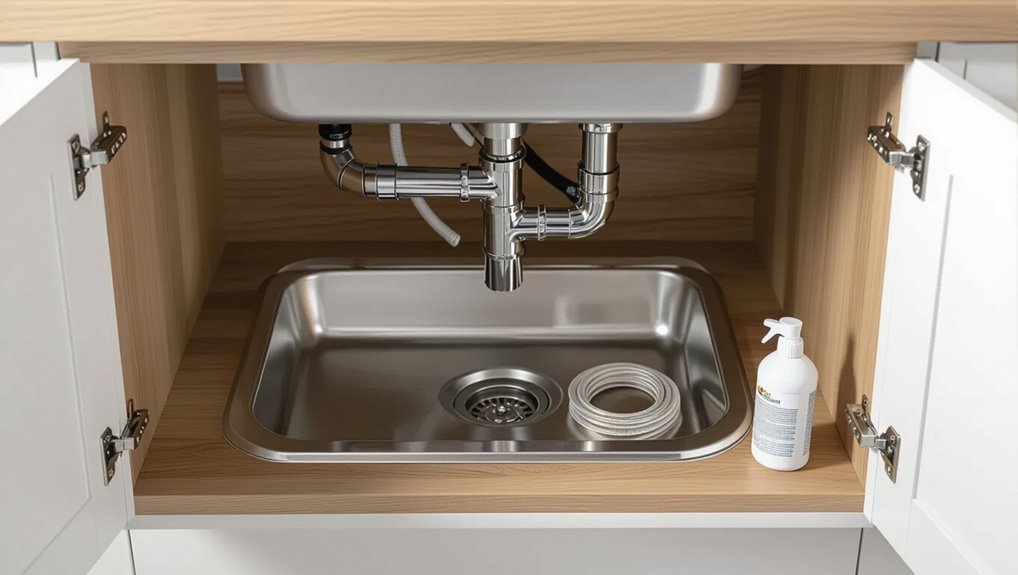
A stainless steel sink pipe line consists of the strainer, tailpiece, trap, and connecting drain pipes that channel wastewater away from the basin.
Clogs commonly form from food scraps, grease buildup, hair, soap residue, and mineral deposits that collect at bends and in the trap.
Slow drainage, gurgling sounds, and unpleasant odors are clear signs the pipe line requires cleaning.
Components of a typical stainless steel sink drain system
Stainless steel sink drain systems consist of interconnected parts that guide wastewater from the basin to the home’s sewer line, and understanding each component clarifies how and where clogs form.
Components include the strainer, tailpiece, trap (P- or S-shaped), trap arm, slip joints, and outlet to the sewer.
Knowledge of each part aids how to clean stainless steel sink pipe line effectively.
Common causes of clogs in stainless steel sink pipes
Many clogs in stainless steel sink pipe lines stem from accumulated debris that narrows flow over time.
Common contributors include grease and fat that solidify, food particles, hair, soap scum, mineral scale from hard water, and foreign objects lodged in traps.
Corrosion is rare but possible where welds or fittings fail.
Improper installation and inadequate venting also promote recurring blockages.
Signs your sink pipe needs cleaning
Watch for subtle changes in performance and sound that indicate a stainless steel sink pipe line is beginning to restrict flow.
Slow draining, gurgling, foul odors, and occasional backups signal buildup.
Water pooling around the basin edge, weak water pressure when multiple fixtures run, and recurring clogs despite temporary fixes also indicate cleaning is needed.
Early detection prevents damage and costly repairs.
Immediate Safety and Preparation Steps Before You Start
Before beginning, the reader should gather a concise tools and materials checklist including gloves, eye protection, a wrench, bucket, pipe brush, and appropriate cleaners.
They should don personal protective gear and follow basic safety precautions to avoid chemical exposure and injury.
Finally, the water supply must be shut off and the workspace cleared and protected to contain spills and allow unobstructed access to the pipe.
Tools and materials checklist
One set of essential items makes cleaning a stainless steel sink pipe safe and effective: adjustable wrench, basin wrench, bucket, rubber gloves, safety goggles, plumbing snake or auger, plumber’s tape, pipe brush, mild degreaser or enzyme cleaner, white vinegar, baking soda, and a supply of clean rags or paper towels.
- Basic hand tools
- Cleaning agents
- Drain-clearing tools
- Containment and cleanup supplies
Personal safety precautions and protective gear
Put on protective gear and prepare the work area to minimize injury and exposure: wear chemical-resistant gloves, safety goggles, and long sleeves to guard against splashes; use a mask if fumes from cleaners are likely; guarantee good ventilation by opening windows or running an exhaust fan; shut off water to the sink and place a bucket under the trap to catch spills; and lay down absorbent rags or a mat to contain drips and protect flooring.
Wear closed-toe shoes, avoid loose jewelry, tie back hair, and keep children and pets away. Maintain a phone nearby for emergencies and read product labels for first-aid and proper use.
How to shut off water and prepare the workspace
Shut off the sink’s water supply at the shutoff valves beneath the sink (or at the main supply if dedicated valves are absent), then open the faucet to relieve pressure and confirm the flow has stopped.
Place a bucket beneath the P-trap, clear surrounding clutter, lay down absorbent towels, guarantee adequate lighting and ventilation, and keep tools and replacement parts within easy reach before proceeding.
Quick Troubleshooting: Determine the Severity of the Clog
The homeowner should first assess whether the clog responds to simple fixes like a plunger or enzyme cleaner or requires a professional to avoid worsening the problem.
Observing where water backs up—only the sink, multiple fixtures, or slow drainage—helps determine if the blockage is in the P-trap, a section of pipe, or the main line.
Testing access points, such as removing the trap or running water in adjacent drains, confirms the clog location before proceeding.
When to try a simple fix vs. call a professional
Evaluating a clog’s severity helps determine whether a homeowner can safely clear it or should call a professional.
Minor slow drainage, isolated sinks, or surface gunk warrant simple fixes: plunging, baking soda/vinegar, or hand auger use.
Persistent backups, foul sewage odors, multiple fixtures affected, repeated recurrence, or visible pipe damage indicate professional intervention to prevent escalation and guarantee proper repairs.
How to identify if the clog is in the trap, pipe, or main line
How can one tell whether a blockage sits in the trap, a section of pipe, or the main line? A trap clog yields slow drainage and odors localized to that sink; clearing the trap often restores flow.
If multiple fixtures drain poorly or gurgling occurs, the obstruction lies farther down the branch or main line, requiring access beyond the trap and possibly professional service.
How to test drain access points
After determining whether the blockage is confined to the trap or likely farther down, a simple set of access-point tests helps locate its severity and exact position.
Remove the P-trap and inspect for debris; run water to check flow.
Open cleanouts or access panels downstream; use a flashlight or small camera.
If water backs up or remains slow, the clog is deeper and may require a snake or professional service.
Step-by-Step Guide to Cleaning the P-Trap (Most Common Clog Location)
The following section outlines removing the P‑trap safely, including support and shutoff steps to prevent spills.
It then summarizes mechanical and chemical cleaning options, guidance for reassembling the trap, and a short leak‑check procedure.
Practical tools and precautions for protecting stainless fittings are also noted.
How to remove the P-trap safely
Loosened connections and standing water make the P-trap both the most accessible and the messiest part to service; remove it carefully to avoid spills and damage.
Place a bucket beneath, wear gloves, and loosen slip nuts by hand or with pliers.
Support the trap while unthreading, gently tilt to drain, inspect for cracks, and transfer debris to a sealed container for disposal.
Cleaning the trap: mechanical and chemical options
With the P-trap removed and drained as described, attention turns to clearing the clog itself using mechanical and chemical methods.
Manual inspection and scraping remove hair, grease, and debris; a bottle brush or plumbing snake dislodges compacted material.
For stubborn buildup, a diluted enzymatic cleaner or biodegradable degreaser breaks down organic residue.
Rinse thoroughly, ensuring all loosened particles exit the trap.
Reassembling the P-trap and leak-check procedure
Reassemble the P-trap by aligning the curved section and slip nuts, then hand-tighten the fittings before giving each nut a quarter- to half-turn with pliers to guarantee a snug, watertight fit.
Restore connections, run water slowly, inspect joints for drips, and check under-sink for leaks.
If seepage appears, tighten incrementally; replace worn washers or re-seat threads until dry.
Tools and tips to avoid damaging stainless fittings
After confirming the P-trap is reinstalled and leak-free, attention shifts to tools and handling techniques that protect stainless fittings during cleaning.
Use nylon or brass brushes, non-abrasive pads, and soft-jawed pliers to prevent scratches. Apply a mild, pH-neutral cleaner and avoid chlorine bleach.
Support joints when loosening nuts, work gently, and inspect fittings for burrs or wear before reassembly.
Cleaning Deeper Sections of the Stainless Steel Pipe Line
For blockages beyond the P-trap, attention turns to tools and chemical options suited for deeper runs, starting with proper use and safety measures for a plumber’s auger.
The text compares DIY-friendly alternatives such as rental hydro-jetting versus professional services, and explains when enzymatic cleaners are preferable to caustic formulas and how to apply each safely.
It also outlines precautions to prevent stainless steel corrosion from mechanical action and chemical exposure.
Using a plumber’s auger (snake): technique and precautions
A plumber’s auger, or snake, provides controlled mechanical reach into deeper sections of a stainless steel sink pipe line to dislodge clogs and buildup that chemical cleaners cannot reach.
The operator feeds the cable slowly, rotates to engage obstructions, then withdraws debris.
Use gloves, eye protection, and a rag to protect fittings; avoid excessive force to prevent pipe damage and backflow into the sink.
Hydro-jetting alternatives for DIY and pros
Consider alternatives to hydro-jetting when access, cost, or equipment limits make high-pressure cleaning impractical: manual flushing with a garden hose and weighted nozzle, rotating drain brushes, motorized drain cleaners with adjustable heads, and localized water-blast attachments that fit standard hoses can reach deep sections of stainless steel lines without industrial pressures.
Professionals assess pipe condition, use camera inspection, select low-pressure mechanical or pneumatic tools, and avoid damage.
When and how to use enzymatic vs. caustic drain cleaners safely
Distinguish enzymatic and caustic drain cleaners by chemistry and application:
Enzymatic products use living or biological catalysts to break down organic residues slowly and are suited for routine maintenance and clogged sections with biological buildup.
In contrast, caustic cleaners rely on strong alkalis (typically sodium hydroxide or potassium hydroxide) to chemically saponify grease and dissolve hair quickly but aggressively.
Use enzymatics for regular care; reserve caustics for severe organic clogs, following label PPE, ventilation, correct dosages, and avoiding mixing with acids or bleach.
How to protect stainless steel from corrosion by cleaners
Protect stainless steel pipe interiors by selecting cleaners and methods that remove deposits without attacking the alloy’s passive chromium oxide layer.
Use pH-neutral, non-chloride formulations; avoid concentrated acids, bleach, and abrasive powders. Rinse thoroughly after treatment and neutralize residues.
For deep sections, apply controlled mechanical cleaning (soft brushes, low-pressure water) and periodic passive-film restoration with mild oxidizers per manufacturer guidance.
Preventive Maintenance to Keep the Stainless Steel Drain Clog-Free
Preventive maintenance focuses on simple daily and weekly habits that minimize grease and grit before they enter the stainless steel drain.
A concise monthly routine using mild, stainless-safe cleaners helps break early buildup without harming the pipe finish.
Properly selected filters, strainers, and sink covers further reduce debris and extend intervals between cleanings.
Daily and weekly habits to prevent buildup
A few simple daily and weekly habits can greatly reduce buildup in a stainless steel sink pipe line, keeping drains flowing and minimizing the need for deep cleaning.
Rinse debris after each use, run hot water briefly, and avoid pouring grease.
Use a sink strainer, clear trapped food daily, and flush the drain weekly with hot water and a baking soda-vinegar rinse to loosen mild residue.
Monthly maintenance routine with safe cleaners
Once each month, homeowners should perform a brief, targeted maintenance routine using mild, stainless-safe cleaners to keep the sink pipe line clear and corrosion-free.
Recommended steps:
- Rinse drain with hot water for one minute.
- Apply a baking soda and vinegar paste, wait 10 minutes.
- Flush with hot water and a mild detergent.
- Inspect visible traps and wipe fittings dry to prevent residue.
Best filters, strainers, and covers to reduce debris
Following the monthly rinse-and-clean routine, attention turns to hardware that stops debris before it enters the stainless steel pipe line: filters, strainers, and covers.
Mesh strainers catch food particles; silicone sink stoppers seal for soaking and prevent solids; basket strainers with removable cups enable easy disposal; magnetic or adhesive hair traps suit bathroom drains.
Choose stainless or silicone for durability and regular cleaning.
Troubleshooting Persistent or Recurring Clogs
When clogs recur despite routine cleaning, the cause may lie beyond the trap—improper venting, a blocked main sewer, or invasive tree roots can all impede drainage.
The article outlines when sections of stainless piping warrant inspection or replacement based on corrosion, deformation, or repeated failures.
Clear signs that a professional plumber is needed include persistent backups, sewage odors, gurgling noises, or failed attempts at mechanical clearing.
Diagnosing hidden causes (venting, main sewer, tree roots)
Diagnosing hidden causes of persistent sink clogs requires looking beyond the trap and P‑trap to the vent stack, main sewer line, and potential root intrusions.
These elements can create recurring slow drains, gurgling sounds, or backups despite apparent local fixes.
A systematic approach uses vent inspection for blockages, cameraing the sewer for collapses or roots, and evaluating neighborhood-wide backups to distinguish municipal issues from on‑site obstructions.
When to inspect or replace sections of stainless piping
If clogs keep returning despite clearing the trap and confirming vent and sewer integrity, it is time to inspect stainless piping sections for corrosion, mineral buildup, or misaligned joints that can harbor debris and restrict flow.
Examine accessible runs for pitting, scale, dents, or sagging; use a bore camera for concealed runs.
Replace sections with irreversible corrosion, heavy scaling, or deformed alignment to restore smooth flow.
Signs you need a professional plumber
How can one tell when homeowner efforts have reached their limit?
Persistent slow drains, recurring clogs after repeated clearing, foul odors despite cleaning, gurgling sounds, water backing into other fixtures, visible pipe corrosion, or leaks indicate deeper issues.
When DIY methods fail or problems recur within days, a professional plumber’s diagnosis and repair are warranted to prevent damage and guarantee lasting solutions.
Comparison of Cleaning Methods and Their Suitability
Different cleaning approaches—mechanical, chemical, enzymatic, and professional—offer distinct trade-offs in cost, effectiveness, and risk when addressing stainless steel sink pipeline issues. The following concise comparison highlights typical uses and limitations to guide method selection. Practical choice depends on clog type, pipe condition, and safety considerations.
| Method Type | Typical Effectiveness | Common Limitations |
|---|---|---|
| Mechanical (snakes, augers) | High for physical blockages | May damage seals if used improperly |
| Chemical (alkaline/acids) | Good for grease and mineral buildup | Can corrode metal and harm finishes |
| Enzymatic & Professional | Gentle enzymatic cleaners for organic clogs; professionals for complex cases | Enzymes are slower; professionals cost more |
Mechanical vs chemical vs enzymatic vs professional services
Several common approaches exist for clearing and maintaining stainless steel sink pipelines: mechanical (snakes, plungers, brushes), chemical (acids, alkalis, commercial drain cleaners), enzymatic (biodegradable enzyme blends), and professional services (hydro-jetting, camera inspection, specialist repair).
Mechanical offers immediate, low-cost removal; chemical is fast but risks corrosion and fumes; enzymatic is safe and preventive yet slower; professionals handle severe, recurring, or inaccessible issues reliably.
Common Mistakes and How to Avoid Them
The section outlines frequent errors that can harm stainless steel pipes, such as using abrasive tools or acidic cleaners that strip protective finishes.
It warns against mixing common household chemicals (for example, bleach with ammonia or acids) that create dangerous reactions.
It also highlights procedural mistakes—like insufficient removal of grease or relying only on temporary fixes—that cause recurring clogs.
Mistakes that damage stainless steel pipes
Avoiding common mistakes preserves the integrity and appearance of stainless steel pipes.
Abrasive pads, steel wool, and harsh scrubbing create scratches that trap grime and encourage corrosion. Improper tool use, overtightening fittings, and neglecting seals cause leaks and misalignment.
Ignoring regular inspection allows minor issues to escalate. Use soft cloths, correct tools, and scheduled checks to prevent lasting damage.
Unsafe chemical combinations to never use
Many household cleaners react dangerously when mixed, producing toxic gases, heat, or corrosive byproducts that can damage stainless steel and harm occupants.
Never combine bleach with ammonia, acids, or drain cleaners. Avoid mixing hydrogen peroxide with vinegar.
Do not pour acid-based descalers into alkaline compounds. If uncertain, rinse thoroughly and use one product at a time, following manufacturer instructions and wearing protective gear.
Errors that lead to recurring clogs
Overlooking small habits and improper maintenance routines often causes recurring clogs in stainless steel sink lines: flushing grease, coffee grounds, fibrous food scraps, or excess paper down the drain, neglecting strainers, and relying on harsh chemical fixes that only displace blockages temporarily all allow buildup to reform.
Regular strainers, hot-water flushes, occasional enzymatic cleaners, careful disposal of waste, and periodic inspections prevent reoccurrence.
Cost and Time Estimates for Typical Cleaning Tasks
The section compares typical costs for DIY cleaning—mainly supplies like gloves, plungers, and cleaners—with professional service fees for inspection, snaking, or replacement.
It also provides estimated time ranges for each method, from a 15–60 minute DIY flush or chemical clean to 1–3 hours for a professional service call.
Readers are given concise benchmarks to help decide between DIY and hiring a plumber.
DIY vs professional service cost breakdown
When weighing whether to tackle stainless steel sink and pipe cleaning personally or hire a professional, cost and time estimates hinge on the severity of buildup, required tools or chemicals, and regional labor rates; a basic DIY flush and mild descaler typically requires 30–60 minutes and under $20 in supplies, while complete pipe disassembly, descaling, or addressing corrosion can take several hours and push DIY costs higher if specialized tools or replacement parts are needed.
| Option | Typical cost |
|---|---|
| DIY basic | <$20 |
| DIY advanced | $20–$150 |
| Professional service | $75–$350 |
| Emergency/complex | $200+ |
Estimated time for each cleaning method
Most common sink and pipe cleaning methods have predictable time ranges based on buildup severity and access: a simple hot-water flush and mild descaler application typically takes 30–60 minutes; vinegar/baking soda treatments or enzymatic cleaners usually require 1–3 hours including dwell time; mechanical snaking or partial disassembly for moderate clogs runs 1–2 hours; full trap removal, deep descaling, or corrosion treatment can take 2–4 hours; and professional inspections or complex repairs, including camera diagnostics or pipe replacement, often require 2–6 hours depending on scope and scheduling.
Time estimates assume typical household tools, average clog complexity, and unobstructed access; preparation and cleanup add 15–45 minutes.
Quick Reference: Safe Products and Recommended Tools
A concise checklist highlights approved cleaners, items to avoid, and the tool types best suited for stainless steel sink pipelines.
The following quick list summarizes key recommendations for safe products and reliable tools:
- Mild dish soap, baking soda paste, and pH-neutral stainless cleaners
- Avoid bleach, abrasive powders, and harsh acids
- Use nylon brushes, flexible drain snakes, and soft microfiber cloths
- Favor reputable brands with corrosion-resistant finishes and clear usage instructions.
Approved cleaners and items to avoid
Select cleaners that are effective against grime yet gentle on stainless steel and plumbing seals.
Recommended: mild dish soap, baking soda, white vinegar (diluted), enzyme drain cleaners, and nonabrasive stainless steel cleaners.
Avoid: harsh acids, oven cleaners, powdered metal scouring pads, bleach mixed with ammonia, and corrosive drain gels.
Use soft cloths, nylon brushes, and caution to protect rubber gaskets and chrome fittings.
Tool brands and types for reliable performance
Following the guidance on safe cleaners and items to avoid, reliable tools make routine maintenance faster and reduce the risk of damage.
Recommended brands include Ridgid and Klein for durable wrenches, OXO for ergonomic brushes, and Sunflex or Cobra for flexible drain snakes.
Use stainless-steel or nylon brushes, rubber plungers, and a hand auger. Avoid cheap plastic tools that deform or shed.
Final Checklist Before Finishing the Job
Before concluding the cleaning, a brief leak test, odor check, and performance test should confirm the pipe line is watertight, free of persistent smells, and flowing normally.
Any used chemicals, rags, and residues must be collected and disposed of according to local hazardous-waste guidelines.
Only after these checks and safe disposal should the work area be declared finished.
Leak test, odor check, and performance test
Begin by visually inspecting all joints and connections for signs of moisture.
Run water at various temperatures and activate fixtures to observe leaks.
Smell around traps and vents for lingering odors; if detected, check seals and P-trap alignment.
Measure drainage speed and listen for gurgles to confirm airflow.
Record any issues, tighten fittings as needed, and retest until normal performance is verified.
Disposal of waste and used chemicals safely
After confirming the system is watertight and free of odors, attention shifts to disposing of collected debris and any chemicals used during cleaning.
Waste is bagged securely; liquids are neutralized or contained. Local disposal regulations are followed; hazardous materials taken to appropriate facilities.
Tools are rinsed and stored.
- Bag and label debris
- Neutralize/contain liquids
- Follow local disposal rules
- Transport hazardous waste
Conclusion
In summary, cleaning a stainless steel sink pipe line need not be intimidating: following safety steps, diagnosing the clog, and addressing the P‑trap or deeper sections yields reliable results. Some may object that DIY risks damaging pipes or voiding warranties; however, using basic hand tools, gentle techniques, and approved cleaners minimizes harm and preserves fittings—professional help remains an option for complex, sealed, or warranty‑sensitive systems, ensuring both safety and longevity.