
How to Remove Plumbing Fittings Quickly and Safely: Step-by-Step Guide
To quickly and safely remove plumbing fittings, first shut off the water supply and drain the lines. Equip yourself with personal protective equipment (PPE), absorbents, and ensure you have a steady footing. Identify the fitting type—such as threaded, compression, or push-fit—and use the appropriate tools like a wrench or pipe cutter. For corroded joints, apply penetrating oil, and consider using heat or cutting as a last resort. Support the piping while loosening fittings, turn counterclockwise on threaded connections, and always test for leaks after reassembly. Follow the step-by-step methods outlined for additional tips and guidance.
Overview of Removing Plumbing Fittings Quickly and Safely
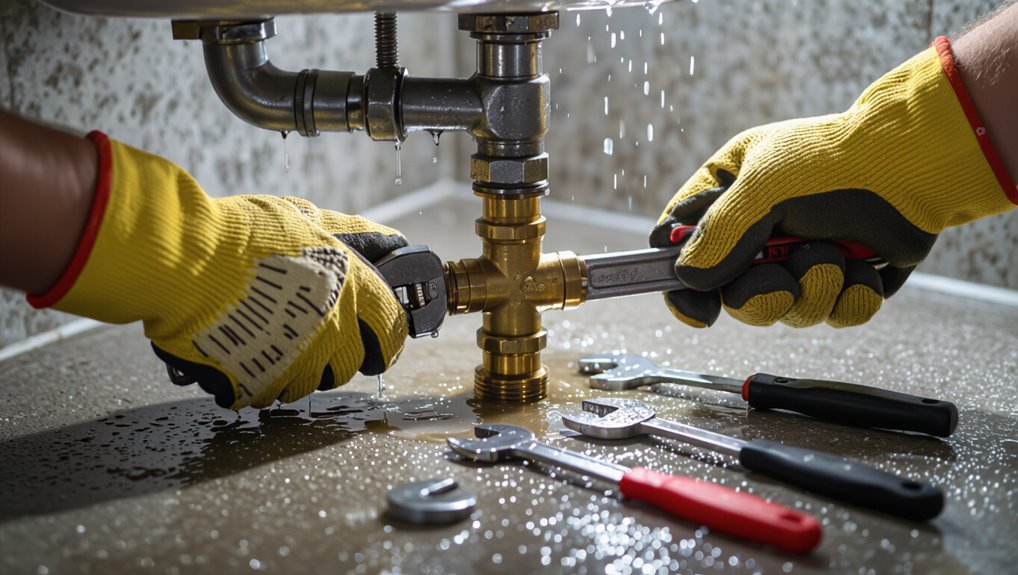
Removing plumbing fittings refers to disconnecting or extracting valves, couplings, and fixtures during repairs, replacements, or remodels. This commonly occurs with leaky pipes, worn components, or fixture upgrades.
Guidance should clarify which jobs a homeowner can tackle—typically straightforward swaps or accessible fittings—and which require a licensed professional, such as complex gas or concealed systems.
A realistic overview outlines typical time, basic tools, and the moderate DIY skill level needed for routine tasks so readers can plan accordingly.
What “removing plumbing fittings” means and common scenarios
When a homeowner or tradesperson disassembles pipe connections, the task involves loosening, detaching, and often replacing fittings such as couplings, elbows, valves, and compression nuts to access lines, stop leaks, or upgrade components.
Typical scenarios include repairing leaks, replacing corroded parts, rerouting plumbing, installing fixtures, or clearing blockages.
Instructions for how to remove plumbing fittings vary by material, joint type, and tool selection.
When to remove fittings yourself vs hire a professional
After outlining typical reasons and methods for taking apart pipe connections, deciding whether to attempt the work personally or call a licensed plumber depends on the job’s complexity, the homeowner’s skill level, and the risk of water damage or code violations.
Simple, low-risk tasks with basic tools may suit confident DIYers; anything involving hidden leaks, gas lines, structural access, or permit requirements warrants professional intervention.
Time, tools, and skill level required for a typical job
A typical residential fitting swap takes about 30 minutes to two hours, depending on access, pipe type, and whether soldering or thread sealing is required.
Tasks demand basic to intermediate skills: shutoff, drain, disconnect, clean, and reinstall.
Essential tools include wrenches, pipe cutters, flux, solder or thread sealant, emery cloth, and safety gear.
Complex jobs may require a licensed plumber.
Quick Safety Checklist Before You Start
Before any fittings are removed, the technician confirms the water supply is shut off and lines are drained to prevent leaks.
The work area and nearby fixtures are protected and PPE is worn while evaluating electrical and other hazards.
If multiple units or main feeds are involved, the decision to shut off building or main water and electricity is made before work begins.
Turning off water supply and draining lines
Shut off the main or local supply valve and verify system pressure is relieved before loosening any fittings.
Then open nearby faucets and drain cocks to flush residual water from lines. Close drain valves after flow stops.
For isolated fixtures, cap branch valves where available.
Confirm no water flow with a quick test before proceeding to disassemble fittings or remove components.
Protecting the work area and nearby fixtures
With water confirmed off and lines drained, attention shifts to containing mess and protecting surfaces and nearby fixtures.
Lay absorbent towels or drop cloths; tape edges to prevent slippage. Shield adjacent cabinetry, flooring, and appliances with cardboard or plastic.
Remove or cover decorative items and clear under-sink storage. Position a bucket for residual drips and keep a towel handy to catch stray moisture.
Personal protective equipment and hazard precautions
Although the water is off and the area is prepared, the person should don appropriate personal protective equipment and follow simple hazard checks to prevent injury and contamination.
Wear gloves, eye protection, and knee pads; use a dust mask if corrosion or old sealant is present.
Verify stable footing, adequate lighting, and clear escape paths.
Keep a first-aid kit and absorbent materials nearby.
When to shut off building or main water and electricity
After PPE and hazard checks are complete, determine whether shutting off the building or main water and electricity is required for the task and how those shutoffs will impact occupants and systems.
Shut mains for major pipe replacements, leak isolations, or when electrical tools risk exposure to wet conditions.
Notify occupants, tag shutoffs, and confirm isolation.
Restore services only after pressure, continuity, and safety checks pass.
Identify the Type of Fitting and Connection
The reader should first identify the fitting type—compression, threaded, sweat (soldered), push-fit, flare, or PEX crimp—to determine the correct removal method.
Material inspection for copper, brass, PVC, CPVC, or PEX and checking for corrosion, seizure, or evidence of prior repairs will inform tools and precautions.
Noting these characteristics up front reduces the risk of damage and unexpected complications during removal.
Common fitting types: compression, threaded, sweat (soldered), push-fit, flare, PEX crimp
Identifying the type of plumbing fitting is the first practical step before removal, because each—compression, threaded, sweat (soldered), push‑fit, flare, and PEX crimp—requires distinct tools and techniques.
Compression fittings use nuts and ferrules; threaded joints show visible threads; sweat fittings are soldered to tubing; push‑fit sockets snap on; flare fittings have conical ends and nuts; PEX crimp rings secure tubing to fittings.
How to recognize material: copper, brass, PVC, CPVC, PEX
How can one quickly tell whether a fitting is copper, brass, PVC, CPVC, or PEX by sight and touch?
Copper is reddish-brown, metallic, cool to touch;
brass is yellow-gold and slightly softer.
PVC is white or gray, lightweight, smooth plastic.
CPVC is creamier, heat-rated and slightly stiffer.
PEX is flexible, typically colored (red/blue/white), with a plastic feel and memory.
Signs of corrosion, seizure, or previous repairs that affect removal
Corrosion, seized joints, and prior repairs leave telltale clues that alter removal strategy: flaking green or white deposits on copper and brass indicate oxidation, rusty crusts and pitted threads signal iron or steel corrosion, and warped or discolored plastic around joints often points to heat damage or solvent-weld failures.
Scars from previous wrenches, epoxy patches, solder blobs, or thread tape guide choice of penetrating oil, heat, cutting, or replacement.
Tools and Materials You’ll Need
A concise list of hand tools, specialty plumbing tools, and appropriate consumables sets the foundation for safe, efficient fitting removal.
The section will also cover necessary safety supplies and common consumables such as thread sealant, plumber’s tape, and replacement washers.
Guidance is provided on when to employ heat, penetrating oil, or cutting tools and the risks and benefits of each.
Essential hand tools and specialty plumbing tools
Several essential hand tools and a few specialty items form the foundation for removing most plumbing fittings. A compact toolkit speeds work: wrenches, pliers, cutters, plus a few purpose-built items for stubborn connections.
Visualize the essentials:
- Adjustable wrench and basin wrench for tight nuts
- Slip-joint pliers and tongue-and-groove pliers for grip
- Pipe cutter and tubing extractor for clean removal
Consumables and safety supplies
When handling plumbing fittings, workers should stock expendable materials—thread sealant tape, joint compound, replacement washers, and spare O-rings—alongside safety supplies such as nitrile gloves, eye protection, and dust masks to prevent contamination and personal injury.
Essential consumables and PPE support efficient, clean work and minimize risks:
- Spare washers and O-rings for leaks
- Thread sealant tape and compound
- Disposable gloves and safety glasses
When and why to use heat, penetrating oil, or cutting tools
Decide whether to apply heat, penetrating oil, or cutting tools based on the fitting material, joint condition, and surrounding components:
Heat loosens soldered copper or seized brass but risks nearby plastic, finishes, and seals.
Penetrating oil eases corroded threads without heat but requires soak time.
Cutting tools (pipe cutter, reciprocating saw) are last resort for irreparable or frozen fittings, allowing controlled removal.
Step-by-Step Removal Procedures for Each Fitting Type
The following section outlines concise, step‑by‑step removal methods for common fitting types: threaded brass and steel, compression, sweat‑soldered copper, push‑fit (e.g., SharkBite), and PEX (crimp and expansion).
Each procedure emphasizes proper sequencing, the tools required, and tips to avoid damage or the need for replacement. Readers will be guided through safe techniques and recognition of when a fitting can be removed intact versus when pipe repair is preferable.
Removing threaded fittings (brass/steel)
Begin by shutting off water supply and relieving pressure in the line to prevent leaks during removal.
Use penetrating oil, select correct wrench sizes, and protect fittings with cloth.
Hold pipe steady, turn counterclockwise, apply steady force, and back off gradually.
If seized, heat or an impact wrench may be used carefully.
- wrench gripping a hex nut
- cloth protecting finish
- slow counterclockwise turning
Removing compression fittings without damaging pipe
After loosening a threaded fitting, attention shifts to compression fittings, which require different handling to avoid deforming the pipe or ferrule.
Use careful steps: support the pipe, hold the compression nut, and back it off slowly. If stuck, apply penetrating oil and gently alternate wrenching.
Visualize:
- Nut loosening with steady force
- Pipe braced against movement
- Ferrule sliding free without scoring
Removing sweat-soldered fittings (copper) safely
Heat, patience, and correct tools are required when removing sweat-soldered copper fittings to prevent pipe damage and avoid fire hazards.
The technician cools jointed areas, applies flux remover, and uses a propane torch with controlled heat. After solder liquefies, fittings are twisted and pulled with pliers; cutting may be needed for stubborn joints.
- glowing soldered seam
- careful torch tip flame
- seized fitting release
Removing push-fit fittings (e.g., SharkBite) without replacement
Remove push-fit fittings without replacement by accessing the release collar and using a proper removal tool or a thin, stiff metal object to depress the retaining teeth while pulling the pipe straight out; this method preserves the tubing and avoids damaging the fitting body, provided the correct technique and steady, axial force are applied.
- Slide tool to collar, feel the teeth yield
- Pull pipe axially, steady pressure
- Inspect seal and re-seat or replace if nicked
Removing PEX fittings (crimp/expansion)
Begin by identifying whether the PEX connection uses a crimp ring or an expansion sleeve, since each requires a different removal method and tools.
For crimp rings, cut the ring and remove with pliers; for expansion fittings, collapse the sleeve and pull the fitting free.
Clean and inspect tubing before reuse or replacement.
- snapped copper crimp ring
- compressed plastic expansion sleeve
- smooth, undamaged PEX end
Removing PVC/CPVC solvent-weld fittings with cutting and replacement
Cut the pipe on both sides of the solvent-weld joint to remove the damaged fitting without disturbing adjacent runs.
Score and cut squarely, deburr ends, and clean with primer before dry-fitting replacement.
Prepare matching coupling and solvent cement; apply evenly, join, and hold per manufacturer cure time.
- Sawing through clean white PVC
- Smoothed, primed pipe ends
- Gloved hands applying cement
Dealing with flared fittings and flare nuts
After addressing solvent-weld PVC/CPVC joints, attention turns to flare fittings and flare nuts, which use mechanical compression rather than adhesive bonding.
The procedure emphasizes securing the line, holding the flare with one wrench and backing the nut with another, then easing the nut off to prevent tubing damage.
Visualize torque and support:
- Two-wrench counterhold
- Flared tubing lip
- Slow, steady nut rotation
Techniques for Stuck or Corroded Fittings
When fittings refuse to budge, technicians often start with penetrating oil and allow appropriate soak times to free seized threads or corrosion.
If lubrication fails, controlled application of heat can soften solder and old sealants, while mechanical options — pipe cutters, reciprocating saws, and extraction tools — provide alternatives for removal.
The decision to keep extracting versus cutting out and replacing hinges on material condition, access, and the risk of further damage.
Using penetrating oil and soaking times
Apply penetrating oil directly to the joint and allow sufficient dwell time for the solvent to seep into corrosion and mineral deposits, loosening the bond between mating surfaces.
Choose a product rated for plumbing use, protect surrounding finishes, and apply sparingly to avoid runoff.
Reapply after 10–30 minutes if needed, testing movement gently; longer soak times (several hours to overnight) improve results on heavily corroded fittings.
Applying heat safely to break solder or loosen thread sealant
Heat can be an effective way to break soft solder joints or soften thread sealant, but it must be used cautiously to prevent burns, damage to nearby materials, or fire.
The technician should clear combustibles, use a regulated torch or heat gun, apply heat evenly, monitor temperature, cool fittings before handling, and have fire suppression ready.
Protective gear and ventilation are essential.
Mechanical removal: using pipe cutters, reciprocating saws, and extraction tools
Mechanically separating stuck or corroded fittings requires the right tools and a methodical approach to avoid further damage to pipes or adjacent systems.
Use pipe cutters for clean, controlled cuts on copper or PVC; reciprocating saws when access is limited, protecting surrounding surfaces and supporting pipe ends.
Employ extraction tools (stud removers, screw extractors) for seized fasteners, working incrementally and checking fit frequently.
When to cut and replace instead of attempting removal
Decide to cut and replace when a fitting shows extensive corrosion, deformation, or thread damage that prevents a reliable seal or risks pipe failure during extraction; this approach minimizes collateral damage and downtime compared with prolonged attempts to salvage a compromised joint.
A technician evaluates accessibility, material type, and system age, then isolates the section, cuts past damaged metal, deburrs, and installs compatible replacement fittings to restore integrity.
Preventing Damage During Removal
When removing fittings, care should be taken to support and protect adjoining pipes and fixtures to prevent strain and accidental damage.
Attention to proper cleaning, thread inspection, and correct sealing methods reduces the risk of leaks after reassembly.
Preserving fittings for reuse requires gentle handling, corrosion control, and prompt labeling or storage to keep parts serviceable.
How to support and protect adjoining pipes and fixtures
Support adjoining pipes and fixtures firmly before loosening any fittings to prevent strain, misalignment, or leaks.
Use adjustable supports, straps, or blocks to stabilize pipes and secure nearby valves, faucets, and appliances.
Cushion contact points with cloth or foam to avoid scratches.
Apply temporary braces where pipe joints are exposed.
Recheck stability after each incremental loosening to maintain alignment and prevent sudden shifts.
Avoiding common causes of leaks after reassembly
After stabilizing adjacent pipes and fixtures, attention turns to preventing common causes of leaks once fittings are reassembled.
Inspect mating surfaces for nicks, clean threads and seats thoroughly, and replace seals or tape as specified.
Torque connections evenly to manufacturer limits, avoid over-tightening, and test under gradual pressure.
Address visible corrosion or misalignment before finalizing assembly to guarantee watertight joints.
Tips for preserving fittings for reuse
Loosen fittings carefully to minimize damage and preserve components for reuse. Use proper wrenches, apply penetrating oil, and back off threads gradually to avoid galling.
Support adjacent pipes to prevent torque stress. Label and bag removed parts, inspect seals and threads, and replace only worn washers or O-rings.
Clean threads gently; avoid excessive force or heat that can warp or crack fittings.
Preparing for Replacement and Reassembly
Before installing new parts, the pipe ends should be inspected, cleaned, and prepared to guarantee a proper fit.
Appropriate replacement fittings and compatible materials must be selected for the pipe type and application.
Sealing methods (thread tape, pipe dope, solder, or solvent cement) should be applied correctly, then the repair tested with pressure and leak checks.
Inspecting and preparing pipe ends for new fittings
Several visible and tactile checks help determine whether pipe ends are ready for new fittings. Surfaces must be clean, free of corrosion, burrs, and old sealant residue.
Cut ends should be square and smooth; file or sand as needed. Measure for proper insertion depth and verify threads are undamaged.
Dry-fit components to confirm alignment before applying sealant or solder.
Choosing compatible replacement fittings and materials
Selecting replacement fittings and materials requires matching the existing system’s pipe type, size, pressure rating, and joining method to guarantee a reliable seal and long-term compatibility.
The technician verifies material compatibility (copper, PEX, PVC, steel), selects correct diameter and wall thickness, and confirms temperature and chemical resistance.
Visualize options:
- Brass coupling beside copper pipe
- Plastic adapter near PVC joint
- Stainless tee with threaded ends
Proper sealing methods: thread tape, pipe dope, solder, solvent cement
Prepare a secure, leak-free joint by choosing a sealing method matched to the pipe material, joint type, and service conditions.
Use PTFE thread tape on tapered metal threads, applying clockwise wraps; pipe dope suits threaded connections needing lubrication or high temperature resistance.
Solder copper joints with proper flux and clean surfaces.
Use solvent cement for PVC/CPVC, following manufacturer cure times and ventilation requirements.
Testing the repair: pressure test and leak checks
Verify the integrity of the repaired joint before restoring full service by performing controlled pressure tests and thorough leak checks.
Isolate the section, pressurize to recommended PSI using water or air with a gauge and monitor for pressure drop.
Inspect all connections, fittings, and soldered or glued seams for visible leaks and dampness.
Repair any leaks and retest until stable.
Common Problems and How to Troubleshoot Them
After reassembly, common issues include persistent leaks, cross-threaded or stripped fittings, and hidden pipe damage discovered during removal.
Quick diagnostics—checking seals, retightening to spec, and isolating the supply—help pinpoint leak sources.
When threads are damaged or pipes are compromised, repair options range from thread chase and replacement fittings to sectional pipe replacement or using approved repair couplings.
Leaks after reassembly: quick diagnostic steps
Inspecting for leaks after reassembly begins with a systematic visual and tactile check of all joints, seals, and connections while the water supply is slowly restored.
Observe for drips, wetness, or pressure loss at fittings; feel for moisture and listen for hissing.
Tighten loose connections incrementally, replace damaged washers or O-rings, and isolate sections to pinpoint the source before full pressurization.
Cross-threading and stripped fittings: repair options
Once leaks are located and isolated, attention often turns to damaged threads and fittings that prevent a secure seal.
Repair options include rethreading with a die or tap, replacing the fitting or adapter, or using thread repair inserts (Helicoil-style) for metal pipes.
For soft or plastic threads, replace components and use compatible sealant or PTFE tape; avoid overtightening to prevent recurrence.
Hidden damage to pipes revealed during removal and how to fix
Removing fittings often uncovers hidden damage—corrosion, hairline cracks, pitting, or compromised solder joints—that can extend beyond the visible leak and weaken surrounding pipework.
Assess extent: probe with a flashlight and feel for soft spots.
Cut back to sound metal, deburr, and replace sections with appropriate fittings or couplings.
Solder, compression, or push-fit repairs restore integrity; replace entire runs if widespread.
Time-Saving Tips and Best Practices
Organizing tools and parts before starting a job reduces downtime and prevents costly mistakes.
Choosing quick-connect replacements can speed repairs when appropriate, while traditional fittings remain better for long-term durability or complex joints.
Regular preventive maintenance minimizes future removal needs by spotting wear early and keeping connections accessible.
Organizing tools and parts for efficient workflow
Lay out tools and parts by task and frequency to streamline the removal process: group commonly used wrenches, cutters, and sealants within easy reach, and keep fittings, adapters, and fasteners in labeled trays or magnetic dishes.
A technician arranges items to minimize movement, protect components, and speed reassembly.
- Tray with labeled fittings
- Magnetic dish for fasteners
- Tool roll sorted by size
When to use quick-connect replacements vs traditional fittings
Choose quick-connect replacements when speed and frequent service outweigh the slight premium in cost; traditional fittings remain preferable for high-pressure, concealed, or code-sensitive installations where proven reliability and soldered or threaded joints are required.
Quick-connects suit temporary, accessible, or retrofit jobs and DIYers; traditional fittings suit long-term, load-bearing, or inspection-prone systems.
Match selection to site constraints, code, and expected maintenance frequency.
Preventive maintenance to minimize future removal needs
Regularly scheduled inspections and simple upkeep reduce the frequency of full-fitting replacements by catching wear, leaks, and corrosion early.
Tasks such as flushing lines, checking seals, tightening accessible joints, and replacing inexpensive sacrificial parts extend service life and save considerable time when maintenance is eventually required.
Establish a checklist, document issues, prioritize corrosion-prone components, and train occupants to report drips promptly to avoid emergency removals.
When to Call a Professional Plumber
When safety, building codes, or manufacturer warranties could be affected, a professional plumber should be consulted rather than attempting DIY repairs.
Complex situations—such as work involving gas lines, the main water supply, concealed piping, or any tasks that threaten structural elements—warrant licensed expertise.
Homeowners should describe the location, material, visible damage, and any past repairs or symptoms to obtain accurate quotes.
Safety, code, and warranty considerations requiring pro service
Assess safety, code, and warranty factors before attempting more than basic plumbing tasks; certain situations require a licensed plumber to avoid danger, legal violations, or voided warranties.
Professionals handle permit-required work, installations affecting system integrity, and repairs tied to manufacturer warranties. They guarantee code compliance, proper documentation, and safe restoration.
When liability, insurance claims, or complex diagnostics arise, hire a licensed plumber.
Complex scenarios: gas lines, mains, concealed piping, structural risks
Recognize that work involving gas lines, the main water supply, concealed piping, or any alteration that could compromise structural elements demands a licensed plumber.
These scenarios carry high safety, legal, and financial risks that exceed typical DIY scope. A professional assesses concealed layouts, isolates mains safely, secures structural penetrations, and holds required certifications and insurance.
Engage a plumber when uncertainty, permits, or hazardous materials are present.
How to describe the problem to get accurate quotes
After determining that a licensed plumber is required for complex or hazardous work, the homeowner should prepare a clear, concise description of the problem to obtain accurate quotes.
Include location, symptoms, duration, visible damage, recent changes, and any DIY attempts.
Note materials, access constraints, and urgency.
Provide photos, measurements, and preferred timelines.
Ask for itemized estimates, warranties, and licensing details.
Quick Reference Cheat Sheet
A concise cheat sheet lists each common fitting with the recommended at-a-glance removal method for quick decision-making.
It also outlines immediate emergency steps to take if a major leak or burst pipe occurs, such as shutting off the water and isolating the affected area.
This section primes the reader for a fast-reference summary that pairs technique with safety actions.
At-a-glance removal method per fitting type
Consult the quick-reference chart below to match each common fitting with the fastest, most reliable removal method; this cheat sheet prioritizes tools, necessary precautions, and one-line steps so a reader can scan and act without sifting through long procedures. It lists fitting, tool, and quick action.
| Fitting | Tool | Quick action |
|---|---|---|
| Compression | Adjustable wrench | Hold nut, turn counterclockwise |
| Soldered | Propane torch | Heat joint, pull apart with pliers |
| Threaded | Pipe wrench | Grip, back off with steady force |
Emergency steps if you cause a major leak or burst pipe
Shut off the main water supply immediately and silence any running fixtures to limit flooding and pressure on the damaged pipe.
Then assess safety: cut power if water nears electrics, evacuate if needed, and contain leaks with towels or buckets.
Call a licensed plumber and, if severe, emergency services.
- Water pooling across floors
- Pressurized spray from a joint
- Burst pipe soaking drywall and insulation
Conclusion
In closing, one might say the task of removing plumbing fittings can be approached with a light touch and measured forethought. By observing basic precautions, selecting the right tools, and following methodical steps, the job transforms from a looming chore into a manageable chorelette. When obstacles linger or confidence wanes, seeking experienced assistance keeps surprises at bay. With these gentle refinements, the process becomes safer, quicker, and rather less troublesome than imagined.
