How to Cut Polybutylene Pipe Safely: Tools, Steps, and Common Mistakes
To safely cut polybutylene pipe, use a sharp tubing cutter or a fine-toothed hacksaw, ensuring the cut is square and precise. First, measure and mark the pipe, then secure it to prevent twisting. Cut slowly to avoid nicks, and after cutting, deburr and smooth the edge. Inspect the pipe for any damage before using the appropriate fittings—crimp, compression, or push-fit—following the manufacturer’s instructions. Always wear gloves and eye protection, and adhere to local codes to prevent leaks and failures. For detailed techniques, troubleshooting tips, and cost information, continue reading.
What Polybutylene Pipe Is and Why Proper Cutting Matters
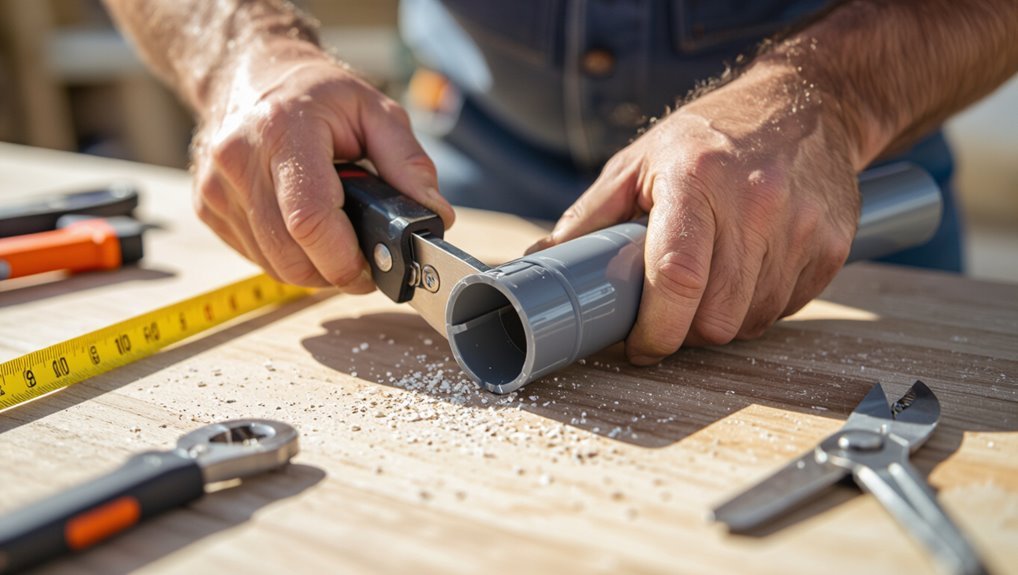
Polybutylene is a flexible, gray plastic piping material once widely used for residential water distribution due to its ease of installation and resistance to freezing.
It is commonly found in supply lines, branch circuits, and retrofit applications where soldered or threaded connections are impractical.
Improper cutting or poor repairs can compromise seals, cause leaks or bursts, and lead to extensive water damage and costly replacements.
Characteristics of polybutylene pipe
A gray, flexible plastic used in many residential water systems during the late 20th century, polybutylene is a lightweight polymer tubing notable for its ease of installation and resistance to corrosion.
It remains soft, somewhat elastic, and susceptible to nicking; smooth, square cuts prevent leaks.
Understanding wall thickness, flexibility, and fitting compatibility informs how to cut polybutylene pipe safely and reliably.
Common uses in plumbing systems
Given its flexibility, wall thinness, and vulnerability to nicking described above, this tubing found widespread use in residential water supply systems, branch lines, and fittings where installers valued fast, low-cost runs.
It also served for cold and hot water distribution, feeder lines to fixtures, and behind-wall routing.
Accessibility for crimps and push-fit connectors made it a common choice in retrofits and quick installations.
Risks of improper cutting and repair failures
Cutting this flexible, thin-walled tubing incorrectly can create stress concentrators, rough edges, or micro-tears that compromise seals and accelerate failure.
Improper cuts, uneven bevels, or debris hinder fittings, causing leaks, water damage, and mold. Repaired sections may delaminate or burst under pressure if joints are insecure.
Long-term reliability demands precise cutting, thorough deburring, and correct coupling techniques.
Quick Answer: How to Cut Polybutylene Pipe Safely
A simple, safe approach is to measure and mark the pipe, secure it, and cut squarely with a fine-toothed saw or a proper plastic pipe cutter before deburring and inspecting the end.
If the pipe is pressurized, brittle, part of a complex manifold, or the cut will affect a structural or difficult-to-access section, a licensed plumber should be called.
This quick answer summarizes the method and when professional help is warranted.
One-sentence summary of safe cutting method
Use a sharp pipe cutter or fine-toothed hacksaw to make a straight, clean cut, then deburr and clamp the pipe before fitting to guarantee a secure, leak-free connection.
Confirm proper measurement, mark the cut, cut squarely, remove burrs with a reamer or file, verify pipe end is clean and undamaged, and align fittings accurately to maintain seal integrity and prevent stress on joints.
When to call a professional instead
If the homeowner is unsure about measurements, lacks the right tools, or encounters damaged, brittle, or pressurized polybutylene runs, hiring a licensed plumber is advisable.
A professional assesses risks, isolates water, uses proper cutters and fittings, and guarantees code-compliant repairs.
Call a plumber for extensive corrosion, hidden routing, multi-connection replacements, or when permits and pressure testing are required to avoid leaks and liability.
Tools and Materials Needed
The section lists the specific tools and materials required to cut and reconnect polybutylene pipe safely.
It covers essential cutting tools (pipe or tubing cutter, hacksaw), supporting items and safety gear (deburring tool, sandpaper, gloves, eye protection), and common replacement fittings (crimp, compression, push-fit).
It also notes which materials and connection types are appropriate based on pressure, temperature, and accessibility.
Essential cutting tools (pipe cutter, tubing cutter, hacksaw)
Proper cutting begins with choosing the right tool: a dedicated pipe cutter, a tubing cutter, or a hacksaw, each suited to different thicknesses, access constraints, and desired finish.
A ratcheting pipe cutter offers clean, square cuts for larger diameters. A compact tubing cutter works well in tight spaces and thin walls.
A fine-tooth hacksaw is versatile for awkward positions but requires steadier control to avoid uneven edges.
Supporting tools and safety gear (deburring tool, sandpaper, gloves, eye protection)
After selecting the appropriate cutting tool, attention turns to supporting tools and personal protective equipment that finish the job cleanly and safely.
A deburring tool removes rough edges; fine sandpaper smooths the cut for proper sealing.
Nitrile or work gloves protect hands from sharp edges and chemicals. Safety glasses shield eyes from chips.
A clean rag completes the kit for final inspection.
Replacement fittings and connection options (crimp, compression, push-fit)
Options for replacing polybutylene pipe include crimp, compression, and push-fit fittings, each requiring specific tools and materials.
Crimp fittings need copper rings and a crimping tool; compression fittings use nuts, ferrules, and wrenches; push-fit connectors require clean ends and sometimes a retaining clip.
Selection depends on accessibility, required seal reliability, and available tools; proper sizing and clean cuts are essential.
Recommended materials by situation (pressure, temperature, accessibility)
Several common scenarios dictate which replacement materials and tools are most appropriate: high-pressure lines benefit from metal fittings and rated PEX or copper.
High-temperature runs require materials with higher heat tolerance such as type L copper or CPVC where allowed.
Tight or hard-to-reach spaces often favor push-fit or compression fittings for ease of installation.
- High pressure: copper or rated PEX with metal fittings
- High temp: type L copper, CPVC
- Tight spaces: push-fit, compression
- Corrosive environments: stainless fittings, appropriate PEX grades
Preparing the Work Area and the Pipe
Before cutting, the water supply must be shut off and the line depressurized to prevent leaks or injury.
The pipe should be inspected for damage, given adequate clearance, and the cut line clearly marked with a permanent marker or tape.
Finally, the pipe must be securely clamped or supported to prevent movement during cutting.
How to shut off water and depressurize the line
When preparing to cut polybutylene pipe, the water supply must be fully shut off and the line depressurized to prevent leaks and injury; this typically involves closing the main shutoff valve, opening nearby faucets to drain residual water, and checking that pressure gauges read zero.
Verify no flow by feeling the pipe and observing fixtures, then cap or plug the section before cutting.
Assessing pipe condition and clearance
Assessment of the pipe and surrounding clearance begins with a visual and tactile inspection to identify cracks, bulges, discoloration, loose fittings, or signs of previous repairs that could affect cutting or sealing.
The inspector checks accessible run length for obstructions, measures clearance for tools and couplings, verifies adjacent electrical or combustible materials are protected, and notes corrosion or stress points requiring repair before proceeding.
Marking the cut line accurately
With the condition and clearance documented, attention shifts to accurately marking the cut line.
Measure twice, note required length from fittings or joints, and use a permanent fine-tip marker or pencil for a clear, thin line.
Rotate the pipe to confirm alignment from multiple angles.
Include allowance for deburring or fittings, and verify measurements before proceeding to cutting.
Securing the pipe to prevent movement
Clamp the pipe firmly to prevent any twist or slide during cutting. A vise with padded jaws or adjustable pipe clamps holds the pipe without crushing it.
Support long runs with additional clamps or a sawhorse to maintain alignment. Confirm the marked cut remains visible and unobstructed.
Verify stability by applying light pressure before cutting to confirm zero movement.
Step-by-Step Safe Cutting Procedure
The following step-by-step procedure outlines the sequence for cutting polybutylene pipe safely, beginning with selecting a cutter suited to the pipe diameter.
It covers proper tool positioning and alignment, making a controlled cut to minimize burrs, and inspecting and deburring the cut end.
Finally, it advises test-fitting the pipe and preparing the joint for connection.
Step 1 Choose the right cutter for pipe diameter
Select a cutter that matches the pipe’s outer diameter and material to guarantee a clean, safe cut.
The technician verifies pipe size, chooses a compatible ratcheting PVC/pipe cutter or fine-tooth tubing saw, and confirms blade condition.
Using an undersized or oversized cutter risks crushing or uneven cuts. Appropriate tooling minimizes deformation and facilitates proper fitting and secure joints during subsequent assembly.
Step 2 Positioning and aligning the tool
Once the cutter is chosen, position the pipe so the cut line is clearly visible and the tool sits squarely perpendicular to the pipe axis.
Support the pipe to prevent rotation or sag. Center the blade or wheel on the mark, align handles for even pressure, and confirm clearance for the cutting path.
Recheck alignment visually before tightening the cutter’s clamp.
Step 3 Executing the cut with minimal burrs
Begin cutting with a steady, controlled motion, applying even pressure so the blade or wheel engages gradually rather than forcing through the material.
Maintain alignment, rotate the cutter or pipe uniformly if applicable, and avoid sudden stops.
Pause briefly if resistance increases, then resume.
Use smooth, continuous strokes to minimize deformation and produce a clean, even cut edge ready for inspection.
Step 4 Inspecting and deburring the cut end
After the cut is complete, the end must be inspected immediately for straightness, burrs, and any deformation that could compromise a seal.
The technician checks the face for concentricity and removes any flash with a deburring tool or fine file, rotating evenly to avoid scallops.
Final inspection guarantees a smooth, square surface free of particles before proceeding to connection preparation.
Step 5 Test-fit and prepare for connection
Fit the mating fitting onto the cut end to verify alignment and seating before any adhesive or compression mechanism is applied.
The technician notes fit tolerance, checks for gaps, and guarantees pipe depth meets fitting specifications.
Clean surfaces, mark insertion depth, and remove debris.
If adjustable fittings are used, confirm compression ring position.
Only proceed when the joint seats squarely and moves freely without binding.
Connection Methods After Cutting
After cutting, suitable connection options for polybutylene include crimp, compression, and push-fit fittings, each with specific installation steps and considerations.
The text will outline how to install crimp, compression, and push-fit connections and highlight differences in longevity, cost, and reliability.
Clear comparisons will help determine the best choice for the specific application and budget.
Overview of compatible fittings for polybutylene
Several common connection methods work reliably with polybutylene pipe, each suited to different repair situations and skill levels.
Push-fit couplings offer quick, tool-free joints.
Conversion fittings adapt polybutylene to copper or PEX.
Threaded adapters permit connections to valves or fixtures.
Compression fittings provide removable joints where space allows.
Adhesive or solvent methods are not recommended for this material.
Using crimp fittings: steps and considerations
Install crimp fittings by sliding a copper or PEX crimp ring over the prepared polybutylene pipe, inserting the appropriate insert or fitting fully, and positioning the ring 1/8–1/4 inch from the pipe end.
Compress the ring squarely with a calibrated crimper, rotate to inspect for uniform deformation, and trim excess.
Confirm leak-free joints by pressure testing per manufacturer specifications before burying or insulating.
Using compression fittings: steps and considerations
Use compression fittings when a non-permanent, tool-minimal connection is preferred or when working with existing polybutylene runs where soldering or crimping is impractical.
The installer must cut square, deburr, slide nut and ferrule on, insert pipe fully, then tighten nut to specified torque.
Check for leaks under pressure, avoid over-tightening which can deform polybutylene, and retighten after initial settling.
Using push-fit fittings: steps and considerations
Push-fit fittings provide a quick, tool-minimal option for joining polybutylene after cutting, relying on an internal O-ring and metal teeth to create a sealed, grip-style connection.
Inspect pipe end, deburr and square the cut, mark insertion depth, push firmly until seated.
Verify the O-ring is clean and undamaged, test for leaks at low pressure, and avoid twisting during insertion.
Comparing longevity, cost, and reliability
When choosing a connection method after cutting polybutylene, homeowners and tradespeople should weigh longevity, upfront and lifecycle cost, and reliability under typical operating pressures. Comparison favors crimped or compression fittings for durability; push-fit trades convenience for higher material cost; solvent-weld is less common. Selection depends on access, expected pressure cycles, and maintenance tolerance.
| Method | Note |
|---|---|
| Push-fit | Convenient, pricier |
| Crimped | Durable, tool-dependent |
| Compression | Reliable, serviceable |
| Solvent-weld | Less flexible, cheaper |
| Adapter | Needed for changes |
Common Mistakes and How to Avoid Them
Common errors when cutting polybutylene pipe include angled or uneven cuts, leaving burrs, using inappropriate tools, and failing to secure the pipe.
Such mistakes often lead to poor seals, leaks, or damaged fittings. Identifying these pitfalls and following proper technique prevents most installation problems.
Cutting at an angle or unevenly
Cutting polybutylene pipe at an angle or producing an uneven edge compromises the seal and increases the risk of leaks or joint failure; precise, square cuts are essential for reliable connections.
Use a pipe cutter or guide to maintain 90° alignment, mark the cut, and rotate steadily.
Verify squareness with a small carpenter’s square before assembly to guarantee proper fit and adhesion.
Leaving burrs or rough edges
Leave the pipe’s interior and exterior free of burrs and rough edges to guarantee reliable seals and prevent premature wear on fittings.
After cutting, inspect edges closely and deburr with a proper reamer or fine file. Remove plastic shavings and smooth both inner and outer surfaces.
Failure to deburr risks leaking joints, damaged O-rings, and compromised long-term integrity of connections.
Using the wrong tool for pipe size or material
Choose tools that match both the pipe’s diameter and its plastic composition to prevent improper cuts, crushed tubing, or excessive stress on fittings.
Using oversized cutters, metal pipe saws, or blunt blades damages polybutylene, causing uneven ends, deformation, or microcracks.
Select a plastic-specific tubing cutter or fine-toothed saw, maintain sharpness, and verify compatibility with pipe wall thickness to guarantee clean, reliable joints.
Failing to properly secure the pipe before cutting
After selecting the correct cutter for polybutylene, attention must shift to stabilizing the pipe before making any cuts.
Failure to clamp or support the pipe allows twisting, pinching, and uneven cuts, risking burrs and leaks.
Use a vise with soft jaws or dedicated pipe clamp, avoid over-tightening, and guarantee clear access to the cutting line to maintain straight, clean cuts and safe handling.
Incorrect fitting selection or installation
Selecting and installing the wrong fittings can compromise a repair before the first joint is made; common errors include using incompatible materials (e.g., brass compression fittings on polybutylene), relying on incorrect-sized couplings, and failing to fully seat or torque push-fit and crimp connections.
Technicians should verify material compatibility, measure pipe OD precisely, use manufacturer-recommended fittings, and perform leak tests after installation to confirm integrity.
Troubleshooting Post-Cut Issues
After cutting and reconnecting polybutylene pipe, the author recommends checking joints for leaks and tightening or reseating fittings as needed.
If ends appear crushed or deformed, they advise trimming back to sound pipe and preparing a clean, square cut before rejoining.
In cases where the pipe cracks during cutting, the suggested response is to replace the damaged section and inspect adjacent material for signs of stress.
Detecting and fixing leaks after reconnection
Begin by pressurizing the repaired section and observing all joints, fittings, and the reconnected pipe for visible drips, wetness, or corrosion stains that indicate slow leaks.
If detected, tighten fittings incrementally, replace faulty seals or O-rings, and re-seat push-fit or compression connections.
Re-test under pressure, monitor for several minutes, and isolate the repair if leakage persists for replacement or professional assessment.
Dealing with crushed or deformed pipe ends
Crushed or deformed polybutylene pipe ends can prevent proper sealing and lead to leaks or fitting failure; diagnosing and correcting these distortions promptly secures a reliable reconnection.
Inspect ends for ovality, kinks, or crushed sections. Trim past damaged material, square the cut, and deburr.
If damage extends beyond a short section, replace the segment or use a repair coupling rated for polybutylene to guarantee integrity.
What to do if the pipe cracks during cutting
If a polybutylene pipe cracks while being cut, stop immediately and assess the damage to determine whether a repair or replacement is required; inspect crack length, depth, and proximity to fittings.
Small, clean cracks away from joints may be repaired with a coupling or crimp sleeve after trimming; extensive or jagged fractures require full section replacement.
Pressure-test the repair before restoring service.
Safety Precautions and Best Practices
Before beginning any cutting work, the author recommends appropriate personal protective equipment and careful, manufacturer-recommended tool handling to minimize injury and damage.
Attention should be paid to local building codes and environmental precautions for disposal or containment of debris and runoff.
Guidance is given on evaluating when sections of polybutylene warrant replacement versus repair and on establishing routine inspection and maintenance schedules to prevent future failures.
Personal protective equipment and safe tool handling
Personal protective equipment and disciplined tool handling reduce injury risk when cutting polybutylene pipe: eye protection prevents chips and chemical splashes, gloves guard against sharp edges and hot surfaces, and hearing protection is recommended for prolonged use of power tools.
Secure workpieces, maintain firm grips, use tools per manufacturer instructions, inspect blades before use, disconnect power when changing cutters, and store tools safely after work.
Environmental and building-code considerations
When cutting polybutylene pipe, attention to environmental impact and local building codes guarantees work is both safe and compliant.
Waste must be contained and disposed of per municipal regulations; recycling options should be checked.
Contractors should verify permits, required fittings, and approved repair methods before starting.
Proper documentation and adherence to water-quality and fire-safety codes prevent violations and protect occupants.
When to replace vs. repair sections of polybutylene
Assess whether to repair or replace polybutylene piping by evaluating damage extent, age, and risk to the system.
Localized, minor cracks or single fitting failures may be repaired with compatible couplings if remaining pipe is sound.
Extensive discoloration, multiple leaks, brittle texture, or long service life justify full replacement to prevent recurrent failure and liability.
Prioritize noninvasive, code-compliant methods.
Recommendations for routine inspection and maintenance
Routine inspection and maintenance of polybutylene piping should follow a consistent schedule and documented checklist to identify early signs of deterioration, leaks, or fitting failures.
Inspect joints, clamps, and visible runs quarterly; check for soft spots, discoloration, or mineral buildup.
Test water pressure and monitor for new moisture.
Record findings, perform timely repairs or replacements, and retain service logs for trend analysis.
Estimated Time, Cost, and When to Hire a Plumber
A basic cut and reconnection of a polybutylene pipe typically takes an experienced DIYer 30–90 minutes, depending on access and fittings required.
Tool and fitting costs usually range from modest DIY expenses (about $20–$100) to professional service fees that can run several hundred dollars or more.
A licensed plumber should be contacted for signs of systemic leaks, corrosion, uncertain connections, or when local codes and warranty concerns apply.
Typical time to cut and reconnect a pipe section
Cutting out and reconnecting a section of polybutylene pipe typically takes between 30 minutes and 2 hours for a single, straightforward repair, depending on access, fittings required, and whether soldering or crimping methods are used.
Time increases for confined spaces, corroded fittings, multiple joints, or drying/pressure-testing intervals.
Novices should allow extra time; complex or uncertain situations warrant a licensed plumber to avoid leaks and code issues.
Cost ranges for tools and fittings vs. professional service
After estimating time, attention turns to costs: homeowners can expect to spend roughly $20–$150 on basic tools and fittings for a simple polybutylene repair—pipe cutters ($10–$40), replacement sections or flexible couplings ($5–$60), and crimp rings or push-fit connectors ($5–$50)—while specialty items like solvent, clamps, or a small torch add $10–$60.
Professional labor typically ranges $150–$500+ depending on complexity and region.
Signs that indicate hiring a licensed plumber is necessary
Several clear indicators mean a licensed plumber should be called rather than attempting DIY repairs: recurring leaks despite temporary fixes, multiple damaged sections of polybutylene, water pressure loss or discolored water suggesting broader system degradation, visible corrosion or fittings that fail under light stress, and any leak located within walls, ceilings, or under concrete where access requires demolition.
A plumber assesses scope, estimates time and cost, obtains permits, and guarantees code-compliant repairs.
Additional Resources and References
The article points readers to manufacturer guidelines and relevant industry standards for specification details and safety requirements.
It also recommends links to step-by-step tool tutorials and video demonstrations to illustrate proper cutting and deburring techniques.
These resources help verify methods and build practical confidence before attempting the work.
Manufacturer guidelines and industry standards
Although manufacturers and industry bodies vary in scope, their published guidelines and standards form the essential framework for safely cutting and repairing polybutylene pipe.
They specify approved tools, joint methods, pressure ratings, and inspection criteria. Consult and follow these documents to guarantee compliance, longevity, and safety.
- Tool and blade specifications
- Approved joint/repair methods
- Pressure and temperature limits
- Inspection and testing requirements
Links to tool tutorials and video demonstrations
Manufacturers’ specifications and industry standards provide the rules and parameters for safe polybutylene pipe work. Practical proficiency is achieved by pairing those documents with visual, step‑by‑step demonstrations.
Curated links direct readers to verified tool tutorials, cutting technique videos, and safety demonstrations, emphasizing reputable sources and versioned content for reference.
- Official tool manufacturer tutorials
- Professional plumber walkthroughs
- Safety equipment demonstrations
- Troubleshooting and common-mistake videos
Conclusion
Cutting polybutylene pipe requires careful preparation and the right tools to avoid leaks, damage, or personal injury. By following step-by-step guidance and observing safety precautions, anyone can make a clean, square cut and prepare the pipe for a reliable connection. If complications arise, troubleshooting tips and knowing when to call a professional help prevent costly mistakes. Who wants to risk a poor repair when a little patience and proper technique guarantee lasting results?