How to Increase Pressure in Pool Pump: 9 Proven Fixes to Boost Flow and Performance
To increase the pressure in your pool pump, start by checking the power supply and clearing the skimmer and pump baskets. Ensure all valves are correctly positioned and the pump lid seal is intact. Clean or backwash the filter, prime the pump, and bleed out any trapped air to eliminate suction leaks. Inspect return lines for blockages, replace any worn seals or O-rings, and consider upgrading to a more efficient impeller or variable-speed pump for enhanced performance. For detailed step-by-step fixes, diagnostics, and maintenance tips, continue reading.
Why Pool Pump Pressure Matters for Flow and Performance
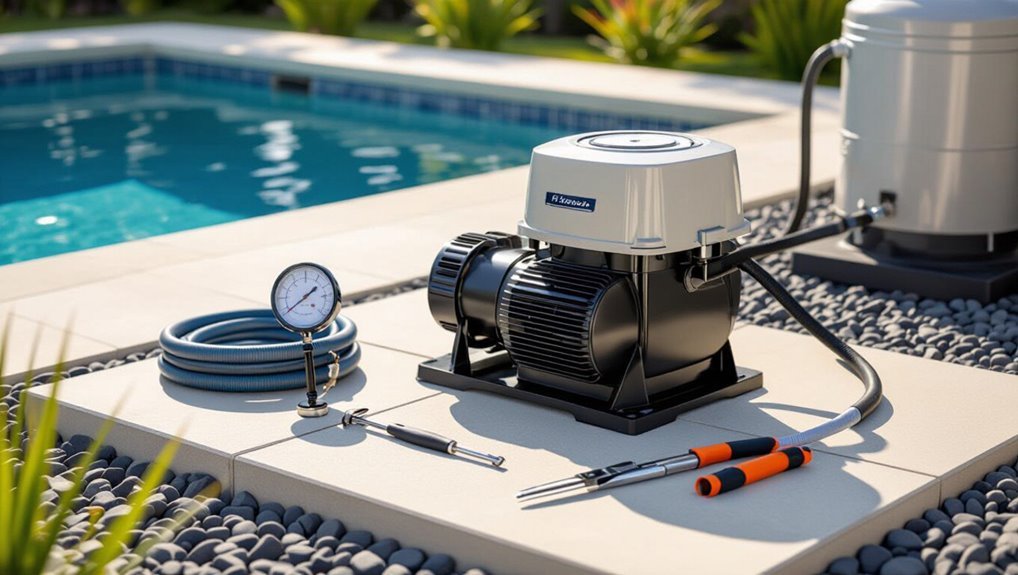
Pump pressure directly controls water circulation, which in turn determines filtration efficiency and even distribution of pool chemicals.
Observable signs such as consistently low or fluctuating pressure often indicate clogged lines, a failing pump, or obstructed returns that compromise water quality.
It is also important to distinguish pressure from flow rate, since high pressure does not always mean adequate flow and misconceptions can lead to improper troubleshooting.
How pump pressure affects circulation, filtration, and chemical distribution
Maintaining proper pump pressure directly governs how water moves through a pool’s circulation system, determines filtration efficiency, and influences the even distribution of chemicals.
Adequate pressure prevents dead zones, forces particulate capture in filters, and guarantees sanitizer contact time.
Guides on how to increase pressure in pool pump focus on reducing restrictions, optimizing pump speed, and maintaining skimmers, return lines, and filter cleanliness.
Signs your pool pump pressure is too low or fluctuating
Several clear indicators reveal when pool pump pressure is too low or erratic: reduced return flow, longer fill times for skimmer baskets, cloudy water, and alarms or warning lights on automated systems.
Other signs include weak jets, increased debris on the floor, rising chemical consumption, noisy or cycling pump behavior, and intermittent filter pressure readings.
Prompt diagnosis prevents equipment strain and water quality decline.
Common misconceptions about pump pressure vs. flow rate
How does pressure relate to the water moving through a pool’s circulation system, and why are the two often conflated?
The article clarifies that pressure is a static measurement within the system while flow rate quantifies volume over time.
Confusion arises because changes in one affect the other via pump curve and system resistance.
Proper diagnosis separates pressure readings from flow measurements to target fixes accurately.
Quick Checklist: Immediate Actions to Boost Pressure
The reader is advised to first confirm that the pump has power and is running properly.
Next, skimmer and pump baskets should be checked and cleaned to remove blockages.
Finally, all valves and return fittings must be inspected and reopened if partially or fully closed.
Confirm power and pump operation
Before troubleshooting more complex parts, verify that the pump is receiving power and running correctly: check that the circuit breaker and any GFCI or disconnect switches are on, confirm the timer or control system is set to operate, and listen for normal motor sound and steady vibration that indicate the motor is turning.
Also confirm pump lid is sealed, no unusual noises, and motor temperature is normal.
Check and clean the skimmer and pump baskets
Inspect the skimmer and pump baskets promptly, since clogged baskets are a common immediate cause of low suction and reduced system pressure.
Remove debris, rinse baskets with a hose, and inspect for cracks or distorted fittings. Reinstall securely and verify proper basket seating.
Repeat this routine weekly during heavy use or after storms to restore flow and prevent pump cavitation or strain.
Inspect and reopen closed valves and returns
Check the pool’s valves and return fittings to guarantee none are partially or fully closed, as restricted routes dramatically reduce flow and pump pressure.
Inspect multiport, ball, and gate valves for position, debris, or corrosion. Reopen or adjust returns, ensuring directional eyeballs are unobstructed.
Verify automatic valve actuators operate. After changes, run the pump and monitor pressure and circulation for improvement.
9 Proven Fixes to Increase Pool Pump Pressure
The next section presents nine proven fixes focused on restoring and boosting pool pump pressure by addressing common flow restrictions and mechanical issues.
Each fix targets a specific component—from debris-clogged skimmers to air leaks and damaged plumbing—to prioritize effective, practical repairs.
Readers will get concise steps for cleaning, replacing worn parts, priming the pump, and locating suction-side leaks.
- Remove debris from skimmers, baskets, and pre-filters
- Clean or backwash the filter (and know when to replace media)
- Check and replace a worn or leaking pump lid O-ring
- Prime the pump correctly and bleed air from the system; inspect and repair suction-side leaks and cracked plumbing
1. Remove Debris from Skimmers, Baskets, and Pre-Filters
Clearing leaves, hair, and other debris from skimmer throats, pump baskets, and pre-filters is a straightforward first step to restoring proper flow and pressure; clogged intakes restrict water movement and force the pump to work harder while delivering less output.
Technicians should power down the pump, remove and inspect baskets, clear accumulated debris, and reseal lids. Routine checks prevent cavitation and maintain consistent suction.
2. Clean or Backwash the Filter (and when to replace media)
After removing visible blockages from skimmers and baskets, attention should shift to the filter media, since a dirty or clogged filter is a common cause of low pump pressure.
Inspect pressure gauge; backwash sand or DE filters when differential rises 8–10 psi.
Clean cartridge filters regularly and replace cartridges when fibers tear or flow remains poor despite cleaning.
Replace sand every 5–7 years.
3. Check and Replace a Worn or Leaking Pump Lid O-Ring
Inspecting the pump lid O-ring is a quick, high-impact step because a cracked, flattened, or improperly seated O-ring allows air leaks that reduce suction and lower pressure.
Remove the lid, inspect for cuts, deformation, or grit, clean the groove, lubricate with silicone grease, and replace if damaged.
A proper seal restores vacuum integrity and improves pump performance.
4. Prime the Pump Correctly and Bleed Air from the System
Prime the pump correctly and bleed trapped air to restore full suction and consistent pressure.
The technician shuts the system, fills the strainer basket with water, re-seats the lid, then slowly reopens suction valves to avoid air pockets.
Bleed points at high spots and pump lid vents are opened until steady water flow appears.
Proper priming eliminates cavitation and stabilizes pressure quickly.
5. Inspect and Repair Suction-Side Leaks and Cracked Plumbing
Check the suction-side plumbing for leaks and cracks, since even small air or water leaks between the skimmer and pump can considerably reduce suction and lower overall pressure.
Inspect fittings, unions, hose clamps, and pipe joints; tighten, replace O-rings, or reseal with appropriate PVC cement or thread tape.
Replace visibly cracked pipes and test for restored prime and improved pressure before resuming normal operation.
6. Open or Adjust Valves and Ensure Proper Return Orientation
Adjust valves and confirm return fittings are oriented correctly to restore ideal flow and pressure.
Technicians should fully open multiport and isolation valves, balance return valves to equalize flow, and verify return eyeballs point downward and slightly away from walls to promote circulation.
Restricted or misaligned valves reduce head and pump output; simple adjustments often yield measurable pressure improvements without major equipment changes.
7. Upgrade to a Larger or More Efficient Pump Impeller
Swapping to a larger or more hydrodynamically efficient impeller can raise flow and pressure by reducing slip and increasing head at a given motor speed.
Selecting compatible impeller diameters and profiles improves pump performance without overloading the motor.
Inspect for wear, calibrate clearances, and balance accordingly.
Professional sizing guarantees system curves, suction conditions, and plumbing constraints match the new impeller.
8. Install or Clean a Variable-Speed Pump Settings for Optimal Pressure
Enhance pump performance by installing a variable-speed drive or cleaning existing variable-speed pump components to guarantee the motor and impeller operate at pressures suited to the pool’s hydraulic demands.
Technicians should verify programming, update firmware, inspect capacitors and control panels, and clean cooling vents and connectors.
Properly tuned speed schedules balance flow, reduce energy use, and restore ideal pressure without forcing plumbing or risking cavitation.
9. Remove Clogged or Restricted Returns and Clean Return Fittings
Inspecting and clearing clogged return lines and fittings is a direct way to restore proper pressure to a pool pump.
Technicians should shut off the pump, remove return fittings and eyeball skimmers for debris. Use a flexible brush, plumbing snake, or pressure hose to dislodge blockages.
Reassemble seals and test flow. Regular inspection prevents recurrence and maintains consistent circulation and pressure.
Diagnosing Specific Problems and Tailored Fixes
Troubleshooting begins by matching symptoms to targeted checks: air in the pump and low pressure point to suction leaks, while persistent low pressure after cleaning suggests a worn filter that needs replacement.
A high pressure gauge with poor return flow usually indicates a blockage on the return side that must be located and cleared.
Intermittent drops, overheating, or variable speeds point to electrical faults, motor issues, or VFD problems requiring inspection and testing.
Low pressure with air in the pump steps to find and fix suction leaks
Begin by shutting off the pump and clearing the strainer basket.
Then methodically check all suction-side fittings, unions, and the pump lid for hairline cracks, loose O-rings, or improperly seated gaskets that allow air to enter the system.
Tighten connections, replace worn O-rings, lubricate seals, and pressure-test the suction line.
Inspect skimmer and valve seals; repair or replace any damaged plumbing to eliminate air leaks.
Low pressure after filter cleaning when the filter needs replacement
When low pressure persists after a routine filter cleaning, the most likely cause is that the cartridge or sand media has reached the end of its useful life and can no longer pass sufficient water even when free of visible debris.
Replace aged cartridges or perform a sand change; inspect for collapsed pleats or compacted sand.
Reassess pressure and flow after installation to confirm restored performance.
High pressure reading but poor flow troubleshooting blockages on return side
After confirming the filter itself is not the limiting factor, attention shifts to the return-side plumbing where high gauge readings paired with weak circulation usually indicate a downstream restriction.
Inspect returns, valves, and unions for obstructions, collapsed lines, or closed valves.
Check automatic pool cleaners, skimmer baskets, and heater/check valves.
Flush lines and clear blockages; replace damaged piping or fittings as needed.
Intermittent pressure drops electrical, motor overheating, or VFD issues
Intermittent pressure drops often stem from electrical or mechanical issues—loose wiring, a failing motor bearing, thermal overloads, or VFD (variable frequency drive) faults—that cause the pump to lose torque or cycle off under load.
Inspect electrical connections, test motor insulation and bearings, verify correct voltage and phase, monitor motor temperature, and check VFD error logs and settings.
Repair or replace defective components.
Tools and Parts You’ll Need for Repairs and Upgrades
A concise selection of tools and replacement parts makes pump repairs faster and reduces downtime.
The write-up lists essential hand and diagnostic tools for DIY troubleshooting and explains common components that often need replacement and indicators for when to buy new ones.
Knowing which items to keep on hand helps guarantee safe, effective upgrades and repairs.
- Screwdrivers, pliers, adjustable wrench, and Teflon tape
- Multimeter, pressure gauge, and leak detector solution
- Replacement seals, O-rings, and mechanical pump seals
- Impellers, pump baskets, and replacement motors or cartridges
Essential tools for DIY troubleshooting and repairs
Several basic hand tools and a few specialty items are essential for diagnosing and fixing common pool pump issues. A screwdriver set, adjustable wrench, pliers, and socket set handle fasteners.
A multimeter checks electrical faults; a pressure gauge and flow meter verify system performance. Lubricant, Teflon tape, replacement seals, and a wet/dry vacuum aid repairs.
Safety gear completes the kit.
Common replacement parts and when to buy new components
Following the tool list, attention turns to the parts most commonly replaced during pump maintenance and upgrades.
Common items include seals and O-rings, impellers, shaft bearings, pressure gauges, and cartridge or sand filters.
Replace seals and O-rings at leaks; impellers or bearings if noisy or low flow; gauges when inaccurate; filters on reduced performance.
Keep spare seals, a new impeller, and compatible filter media.
When to Call a Professional and What to Expect
If the issue involves electrical faults, gas heaters, major plumbing changes, or local code compliance, a licensed technician should be contacted.
A professional will inspect electrical connections, the pump motor and impeller, seals and plumbing integrity, and may perform pressure testing and flow analysis.
Expect diagnostics and labor to be billed and common repairs—seal replacement, motor repairs, or pipe work—to range widely depending on parts and complexity.
Safety and compliance issues that require pro service
Safety and compliance concerns demand professional attention when tasks exceed routine maintenance—such as diagnosing electrical faults in the pump motor, repairing pressurized plumbing lines, addressing code-related equipment installations, or handling chemical-system integrations that affect backflow prevention and water quality standards.
Licensed technicians guarantee adherence to local codes, proper bonding/grounding, safe chemical handling, and certified backflow solutions, reducing liability and preventing hazardous failures.
What a technician will inspect and typical repair costs
A technician will perform a systematic inspection covering the pump motor, impeller and volute, suction and discharge plumbing, filter condition, pressure gauges, valves and union connections, electrical wiring and bonding, and any chemical or automation interfaces; this focused diagnostic approach identifies leaks, blockages, worn bearings, seal failures, motor electrical issues, and control or pressure-sensor faults that commonly reduce flow.
| Item | Typical Issue | Cost Range |
|---|---|---|
| Pump motor | Worn bearings | $150–$600 |
| Seals/impeller | Leaks/clogs | $50–$250 |
| Controls/gauges | Sensor faults | $75–$400 |
| Plumbing/valves | Leaks/obstructions | $100–$500 |
Preventive Maintenance Plan to Sustain Optimal Pressure
A clear preventive maintenance plan keeps pool pump pressure stable and can prevent most common flow problems. The plan should assign weekly, monthly, and seasonal tasks to inspect and clean components, and should include concise recordkeeping of pressure and flow readings.
Recommended benchmarks and a simple log help identify trends before they become failures.
- Weekly: check skimmer/basket cleanliness, inspect visible plumbing for leaks, and confirm normal pressure on the gauge.
- Monthly: clean/inspect pump strainer, backwash or clean filters as needed, and test flow rates.
- Seasonal: perform full system inspection, replace worn seals or valves, and service the motor/bearings.
- Recordkeeping: log pressure gauge PSI, flow rate (GPM), date, and any corrective actions; target pressure/flow should match manufacturer specs (e.g., typical mid-range PSI and expected GPM for the system).
Weekly, monthly, and seasonal tasks to maintain flow
Regularly scheduled tasks—weekly checks, monthly tune-ups, and seasonal overhauls—are essential to preserving pump performance and consistent water pressure.
Weekly: clear skimmer baskets, inspect strainer lids and seals, verify pressure gauge response.
Monthly: backwash/clean filter, lubricate O-rings, check motor alignment and wiring.
Seasonal: inspect impeller and volute, flush system, winterize or restart per climate, replace worn components.
Recordkeeping: what to track and ideal pressure/flow benchmarks
Following routine weekly, monthly, and seasonal checks, systematic recordkeeping captures trends that predict pressure or flow issues before they escalate.
Log static and operating pressure, pump RPM, flow rate (gpm), filter delta‑P, run hours, valve positions, chemical imbalances, and maintenance actions.
Note ambient and water temperatures.
Benchmarks: typical pressure 10–25 psi, backwash at ≥8–10 psi delta, flow per pump curve; flag deviations.
Energy and Cost Considerations When Increasing Pump Pressure
Raising pump pressure typically increases energy consumption because the motor must work harder to overcome higher head.
The trade-off between improved flow and higher operating costs should be evaluated by comparing expected performance gains to additional power use.
Selecting efficient pump sizes and operating schedules can help balance flow improvements with long-term energy and cost impacts.
How higher pressure impacts energy consumption
Increasing pump pressure directly affects energy use because pump power rises roughly with the cube of flow when overcoming system resistance: small pressure or flow gains can consequently produce disproportionately large increases in electricity consumption.
Higher static pressure increases motor load, raises kilowatt draw and runtime costs, and can shorten equipment lifespan from heat and wear. Operators should quantify expected energy penalties before boosting pressure.
Balancing flow improvements with pump efficiency and operating costs
Although higher flow can improve circulation and filtration, any decision to boost pump pressure must weigh the hydraulic gains against changes in pump efficiency and the resulting operating costs.
Operators should compare flow increases to pump curve performance, evaluate energy consumption at designated speeds, and consider variable-speed scheduling, hydraulic upgrades, or smaller fixtures to optimize net benefit.
Cost-benefit analysis guides sustainable choices.
Real-World Examples and Short Case Scenarios
Two brief case scenarios illustrate common pressure issues and practical remedies.
The first describes restoring normal pressure after winter startup by addressing trapped air, clogged lines, and filter maintenance.
The second outlines swapping a single-speed pump for a variable-speed unit to stabilize pressure while reducing energy use.
Case: Restoring pressure after winter startup
Technicians routinely encounter low pressure after the first startup following winter shutdowns, a problem that often stems from air in the lines, improperly reinstalled equipment, or clogged suction ports.
A typical resolution sequence: purge air via pump bleed or skimmer, verify valve positions and gasket seating, inspect and clear hair and leaf traps, and test for collapsed hoses or frozen debris, restoring normal suction and pressure.
Case: Upgrading single-speed to variable-speed to improve pressure and save energy
Upgrading a pool’s single-speed pump to a variable-speed model often delivers measurable pressure control and substantial energy savings, as demonstrated by multiple field examples where flow adjustments matched filtration and feature demands.
Owners reported steadier skimmer suction, reduced cavitation, and longer filter cycles. Energy bills fell 30–70% after tuning schedules; noise decreased and equipment lifespan improved, validating the retrofit for performance and cost.
Summary Action Plan: Step-by-Step to Restore and Improve Pool Pump Pressure
The summary action plan outlines immediate steps to stabilize pressure, short-term fixes to restore ideal flow within days to weeks, and long-term upgrades and maintenance for sustained performance over months to years.
It prioritizes safety checks and quick remedies first, then scheduled repairs and part replacements, and finally system upgrades and routine servicing.
The goal is a clear, staged pathway from urgent corrective actions to durable improvements.
Immediate steps to take right now
Begin by shutting off power to the pump and inspecting visible components for obvious faults—tightening loose unions, clearing debris from skimmer and pump baskets, and ensuring valves are fully open—so basic, immediate issues that lower pressure are ruled out before further troubleshooting.
Next, check and clear the pump strainer, confirm correct lid O-ring placement, verify suction lines for air leaks, and restart to observe pressure response.
Short-term fixes (days to weeks)
After basic checks and a restart have ruled out obvious causes, attention shifts to short-term fixes that can be completed over days to weeks to restore and improve pump pressure.
Inspect and clean skimmer and pump baskets, backwash or clean the filter, check and tighten all plumbing fittings, replace worn diffuser or O-rings, bleed trapped air, and monitor pressure changes while testing for leaks.
Long-term upgrades and maintenance (months to years)
When planning long-term upgrades and maintenance, owners should prioritize interventions that improve reliability, efficiency, and serviceability over months to years.
Schedule seasonal inspections, replace aging pumps with energy-efficient models sized correctly, upgrade piping and valves to reduce head loss, install variable-speed drives, and plan regular bearing, seal, and motor maintenance.
Track performance metrics and budget for component lifecycle replacement.
Conclusion
Maintaining proper pool pump pressure directly affects circulation, filtration, and chemical balance, so restoring it promptly preserves water quality and equipment life. One striking statistic: poorly maintained pumps can lose up to 30% efficiency within two years, increasing energy costs and wear. By following targeted diagnostics, the nine fixes, and a simple preventive plan, owners can regain ideal pressure, reduce utility bills, and extend pump lifespan while ensuring safer, clearer pool water.