How to Adjust the Float on a Sump Pump: Step-by-Step Fix for Reliable Basement Protection
To effectively adjust the float on your sump pump for reliable basement protection, first, turn off the power and clear the pit. Identify the type of float: vertical rod, tethered, or electronic. For vertical rods, simply move the collar; for tethered floats, adjust the cord length and remove any obstructions; for electronic sensors, modify the sensitivity settings as needed. After adjustments, refill the pit to test the pump’s cycling. If issues persist, consider cleaning or replacing worn parts, and consult a professional for ongoing cycling or wiring problems.
How to Know When Your Sump Pump Float Needs Adjustment
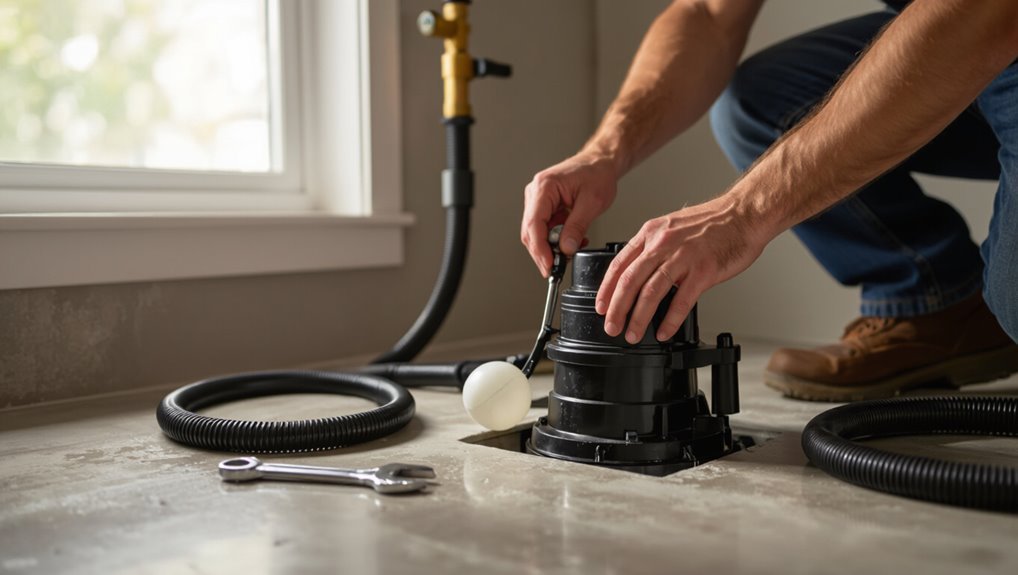
Visible signs such as rapid cycling, failure to activate, or erratic on/off behavior often indicate float-related problems.
These issues can reduce pump efficiency and leave the basement vulnerable to flooding if the float cannot properly detect water levels.
Minor misalignments can be corrected by a homeowner, but persistent or unclear symptoms warrant a professional inspection.
Common symptoms of float-related problems
Several clear signs indicate a sump pump float may need adjustment.
Frequent short cycling, failure to start at rising water, running continuously, or irregular on/off behavior suggest float problems.
Visible obstructions, tangled cords, or a stuck float housing also indicate trouble.
Homeowners searching for how to adjust the float on a sump pump should note these symptoms before attempting corrections or calling a professional.
How float issues affect pump performance and basement protection
Recognize that float problems directly undermine a sump pump’s ability to protect a basement: when the float is misaligned, stuck, or obstructed, the pump may fail to activate at the proper water level or may cycle excessively, both of which increase flood risk and shorten component life.
Consequences include delayed activation, rapid on/off cycling, motor overheating, reduced lifespan, and compromised basement protection requiring prompt adjustment.
When to call a professional versus DIY
Decide whether to call a professional or attempt a DIY adjustment by evaluating the problem’s signs, the homeowner’s skill level, and the potential risks.
Minor misalignments, accessible floats, and basic electrical comfort suit DIY attempts.
Call a professional for persistent cycling, unusual noises, wiring concerns, old or corroded components, high water risk, or uncertainty.
Professionals guarantee safe diagnosis, reliable repair, and warranty protection.
Tools and Safety Precautions Before Adjusting the Float
A concise checklist of tools and materials—adjustable wrench, pliers, replacement float or clips, gloves, flashlight, and a bucket—should be gathered before starting.
Electrical and water safety steps, including shutting off power at the breaker, unplugging the pump, and wearing rubber-soled shoes, must be completed.
The sump pit and pump area should be cleared, drained as needed, and inspected to guarantee safe, unobstructed access.
Tools and materials checklist
Essential tools and materials for adjusting a sump pump float include a screwdriver set (flat and Phillips), adjustable wrench, pliers, replacement float or float arm if needed, corrosion-resistant lubricant, and a flashlight or headlamp.
Additionally, rubber gloves, safety glasses, and a multimeter for verifying power isolation help guarantee safe, accurate work.
- Spare float assembly
- Basic hand tools
- Lubricant and cleaning rags
- Protective gear and lighting
Electrical and water safety steps
With tools and spare parts laid out and protective gear on hand, attention shifts to isolating hazards around the sump pit before adjusting the float.
Power to the pump should be switched off at the breaker and verified with a voltage tester.
Shut off nearby water sources if present, clear standing water using a pump or wet vac, and keep electrical cords elevated and dry.
Preparing the sump pit and pump for access
Begin by clearing the area around the sump pit to create unobstructed access and reduce trip hazards.
Wear gloves, eye protection, and non-slip footwear.
Shut off power at the GFCI or breaker and unplug the pump.
Drain excess water using a wet/dry vac or bucket.
Remove the cover, inspect for debris, and set tools nearby on a dry, stable surface before adjusting the float.
Types of Sump Pump Floats and How They Work
Sump pumps use several float types—vertical rod floats, tethered floats, diaphragm sensors, and electronic sensors—each with distinct activation mechanics.
Vertical rod floats slide along a guide for precise on/off points, while tethered floats swing and require different clearance and adjustment.
Diaphragm and electronic sensors rely on pressure or electronic thresholds and consequently adjust differently than mechanical floats.
Vertical rod floats
A vertical rod float uses a sliding float on a rigid rod to trigger the pump as water rises and falls; the float’s position on the rod determines the cut-in and cut-out levels and is typically adjusted by loosening a clamp and moving the float up or down.
This design offers reliable, compact activation within tight pits; maintenance involves ensuring free vertical travel and secure clamp tightening.
tethered floats
Tethered floats operate with a buoyant switch attached to the pump by a flexible cord, allowing the float to rise and tilt as water levels increase until the switch actuates the motor.
They offer simple, adjustable activation points and tolerate varying basin shapes.
Limited by cord length and potential entanglement, they require correct mounting and periodic inspection to guarantee free movement and reliable cycling.
diaphragm and electronic sensors
Diaphragm and electronic sensors provide alternative activation methods for pumps where space, sensitivity, or durability are concerns.
Diaphragm switches sense pressure changes from rising water; they are sealed, resistant to debris, and require minimal vertical travel.
Electronic sensors use probes or ultrasonic/radar detection to trigger pumps without moving parts, offering adjustable sensitivity and rapid response but sometimes requiring stable electrical grounding and clean water conditions.
How float type changes adjustment method
When pressure-based and electronic detectors are impractical, float switches are the predominant alternative and their physical form directly dictates how they are set and adjusted.
Different float types—vertical stem, tethered, and captive—require distinct adjustments: stem floats slide on a guide, tethered floats use stop collars or cable length, and captive floats alter angle or position.
Each needs secure, free movement and correct cut-in/cut-out points.
Step-by-Step Guide to Adjusting a Vertical Rod Float
The procedure begins by identifying the vertical rod’s adjustment mechanism near the pump head and noting the current rod or nut position.
Next, the operator loosens the fastener, repositions the rod or nut to establish desired on/off heights for efficient cycling, then retightens.
Finally, the system is tested and fine-tuned as needed to confirm correct activation and deactivation points.
Locating the adjustment mechanism
Locate the vertical rod float’s adjustment mechanism by first inspecting the pump column where the rod connects to the switch assembly. The mechanism is typically a small clamp or set screw near this junction that secures the rod’s position.
Note nearby components: electrical conduit, float arm linkage, and mounting bracket.
Identify corrosion, debris, or paint covering the fastener before proceeding to adjustment.
Loosening and repositioning the rod or nut
Begin by powering off and confirming the pump is isolated from its electrical supply.
Loosen the lock nut or set screw on the vertical rod using the correct wrench, avoiding excessive force.
Slide the rod or float sleeve to the desired position, ensuring smooth movement.
Retighten the nut or screw securely, checking that the float moves freely without binding before restoring power.
Setting the on/off heights for optimal cycling
After the rod or sleeve is repositioned and secured, attention turns to setting the on and off heights so the pump cycles efficiently.
The technician measures desired activation and shutoff levels relative to the sump basin, adjusts the float stop or collar accordingly, and locks it in place.
Settings should prevent rapid short cycling while maintaining sufficient clearance to protect the pump from dry running.
Testing and recalibrating after adjustment
Power the pump and run a series of controlled tests to verify the new float settings.
Observe activation and shutoff points, noting water levels and cycle duration.
Adjust the vertical rod incrementally if the pump runs too long or cycles too frequently.
Repeat tests after each tweak until activation is consistent with desired on/off heights.
Record final settings and inspect for obstructions.
Step-by-Step Guide to Adjusting a Tethered Float
The section outlines how to access the tether and secure the pump before making any adjustments.
It then covers safely shortening or lengthening the tether, steps to prevent snagging and false triggers, and how to test pump operation after adjustment.
Clear, sequential instructions guarantee reliable performance and reduce the risk of malfunction.
Accessing the tether and securing the pump
Begin by disconnecting the pump from its power source and clearing debris from the basin so the tether and float are visible and reachable.
With gloves, gently lift the pump to access the tether attachment point. Secure the pump to prevent tipping using a stable brace or weight.
Inspect the tether connection for wear, corrosion, or kinks before proceeding to adjustment steps.
Shortening or lengthening the tether safely
Adjusting the tether requires steady hands and attention to clearance: guarantee the pump remains disconnected, the basin is clear, and the tether is free of twists before changing its length, so the float can move smoothly without catching on the pump or basin walls.
To shorten, pinch and trim excess, reseal any sheath; to lengthen, add a compatible extension or replace tether, secure knots, and test travel.
Preventing tether snagging and false triggers
Preventing tether snagging and false triggers requires inspecting and positioning the float and tether so movement is unobstructed and responsive; this involves checking for twists, debris, or tight contact points, ensuring adequate clearance from the pump housing and basin walls, and securing the tether route to eliminate intermittent catches that can cause premature on/off cycling.
Verify clip placement, remove debris, smooth edges, and add gentle routing to prevent binding.
Testing pump operation after adjustment
After the tether has been set and secured, test the pump operation systematically to confirm reliable activation and deactivation at the designated water levels.
Fill the basin slowly, observing the float rise and noting the activation point. Allow the pump to run until the float drops and it shuts off.
Repeat several cycles, checking for hesitations, leaks, unusual noises, or electrical issues before finalizing the adjustment.
Adjusting Electronic or Diaphragm Float Sensors
The section explains how to locate and identify adjustment controls on electronic and diaphragm float sensors.
It outlines basic steps for reprogramming or repositioning electronic sensors to change activation points.
Common troubleshooting tips for unresponsive or intermittent sensors are summarized to help diagnose wiring, power, or sensor-failure issues.
Identifying sensor adjustment controls
When inspecting an electronic or diaphragm float sensor, a technician first locates the adjustment controls—usually a small potentiometer, set screw, or labeled dial—on the sensor housing or nearby control module.
These controls directly alter activation thresholds or sensitivity rather than mechanical float height. Labels, schematics, or manufacturer markings help identify functions.
Accessible, secured controls may require a small screwdriver or hex key for calibrated adjustments.
Reprogramming or repositioning electronic sensors
Technicians recalibrate or reposition electronic and diaphragm float sensors by accessing the control module or sensor housing and making controlled changes to sensitivity settings, mounting position, or wiring to alter activation points.
They document original settings, adjust trim pots or DIP switches, shift sensor brackets for proper float travel, secure connections, and test activation at several water levels to confirm repeatable engagement without addressing fault diagnosis.
Troubleshooting unresponsive sensors
Begin by isolating power and visually inspecting the sensor assembly for obvious damage, corrosion, loose wiring, or debris that could prevent proper operation.
Test continuity with a multimeter, check voltage at terminals, and confirm correct float travel.
Clean contacts, tighten connectors, and replace worn diaphragms or corroded sensors.
If faults persist, consult manufacturer diagnostics or replace the sensor assembly.
Verifying Proper Pump Cycle and Float Settings
The technician should simulate high water conditions—by pouring water into the pit or using a garden hose—to observe pump activation and shutoff.
They must measure the water levels at which the pump turns on and off to confirm they match the manufacturer’s recommended settings.
While testing, listening for rapid cycling or extended motor run times will indicate short-cycling or overrun that requires adjustment.
How to simulate high water conditions for testing
Simulate high water by gradually introducing water into the sump basin until the float reaches its normal activation point, observing the pump’s response and any delays or hesitations.
Note cycling speed, audible cues, and whether the float moves freely without catching.
Repeat the fill-and-drain sequence to confirm consistent activation and deactivation, documenting anomalies for adjustment or further inspection.
Measuring correct on/off water levels
After confirming the pump responds during simulated high-water conditions, the next step is to measure and record the actual on and off water levels to verify the pump cycle and float settings.
Use a marked stick or ruler at the lowest pit point, note level when float activates and when it shuts off.
Compare to desired setpoints and adjust float arm or clip accordingly.
Listening for signs of short-cycling or overrun
Listen closely at the pump and pit for rapid on/off cycles or prolonged running, as these audible cues indicate short-cycling or overrun that can damage the motor and reduce system reliability.
Technicians confirm cycle patterns by timing intervals, noting frequency and duration. Short cycles suggest float sensitivity or too-small well; continuous run implies high inflow or stuck float.
Adjust settings and retest.
Common Problems When Adjusting Floats and How to Fix Them
Common float adjustment issues include the float becoming stuck from debris or corrosion, the pump short-cycling by running continuously, failing to start as water rises, and intermittent operation often caused by wiring faults.
Each problem has identifiable symptoms that guide simple inspections and fixes. Addressing debris, securing connections, and testing switches typically restores reliable operation.
Float stuck due to debris or corrosion
Many sump pump floats become jammed when sediment, mineral deposits, or rust build up around the float arm or housing, preventing proper movement and causing the pump to run continuously or not at all.
Inspect the pit, remove debris, and clean deposits with a brush and vinegar or mild descaler.
Replace severely corroded arms or floats, and reassemble, ensuring free pivoting before testing.
Pump runs but won’t stop (short-cycling)
When a sump pump runs continuously or cycles on and off rapidly, the float switch is often the culprit.
Incorrect float height, a stuck or sluggish float, or a misadjusted switch can trigger repeated starts and stops (short-cycling) that wear the motor and reduce pump lifespan.
Inspect and free the float, adjust its travel or switch trip point, replace worn components, and test until cycles normalize.
Pump fails to start when water rises
After addressing short‑cycling caused by an overactive or misadjusted float, attention turns to the opposite problem: a pump that does not start as water rises.
Causes include a stuck or obstructed float, incorrect float height, failed float switch, debris around the sensor, or a seized pump.
Inspect and free the float, set proper activation height, clean components, and replace a faulty switch or float assembly.
Intermittent operation and wiring issues
Diagnose intermittent operation and wiring issues by inspecting connections, switches, and float components for loose terminals, frayed wires, corroded contacts, or intermittent continuity that can cause unpredictable pump behavior.
Test continuity with a multimeter, gently wiggle leads to replicate faults, and clean corroded terminals. Replace damaged wires, secure terminal screws, and swap faulty switches or floats.
Confirm stable operation under normal float travel.
Maintenance Checklist to Prevent Future Float Issues
A concise maintenance checklist helps prevent future float problems and extend pump life.
Recommended actions include a regular cleaning and inspection schedule, advised replacement intervals, seasonal checks, and storm-prep tasks:
- Clean and inspect the float and pit monthly.
- Replace floats per manufacturer guidance or every 3–5 years.
- Perform seasonal checks before heavy rain or winter.
- Secure and test storm-prep measures before forecasted storms.
Regular cleaning and inspection schedule
Establishing a regular cleaning and inspection schedule prevents float-related failures by catching wear, debris buildup, and alignment issues before they impair operation.
Technicians should inspect the sump pit, float arm, and switch monthly during wet seasons and quarterly otherwise.
Clean sediment and obstructions, test float travel and switch activation, and record findings.
Promptly address corrosion, fraying cords, or mounting looseness to maintain reliable performance.
Recommended replacement intervals for floats
How often should a sump pump float be replaced to guarantee dependable operation?
Manufacturers typically recommend replacing floats every 3–5 years, sooner if exposed to debris, corrosion, or irregular operation.
Inspect annually and replace immediately if cracks, sticking, or electrical faults appear.
High-use systems or harsh environments may justify more frequent replacement to maintain reliable performance and prevent failures.
Seasonal checks and storm-prep tips
Following the recommended replacement schedule, homeowners should also adopt routine seasonal checks and specific storm-prep steps to catch wear or malfunction before heavy use.
Inspect float movement, clean debris, test activation and backup power, and confirm alarm function.
Before storms, verify discharge lines are clear, add battery backups if needed, secure wiring, and document issues for prompt repair to guarantee reliable operation.
When to Replace the Float or Upgrade Your Sump Pump
When repeated adjustments fail to stop sticking, erratic cycling, or visible wear, replacement of the float should be considered.
Upgrading to smart sensors or adding a battery backup and alarm can improve reliability and provide remote alerts during power outages.
The homeowner should weigh the upfront cost and installation complexity of common upgrades against long-term benefits and reduced maintenance.
Signs that adjustment is no longer sufficient
If routine float adjustments fail to restore reliable cycling, it indicates the problem may be mechanical or electrical rather than positional.
Persistent stalling, rapid on/off short cycling, intermittent power loss, visible corrosion, cracked or waterlogged float, and abnormal noise signal replacement.
Frequent failures during storms or inability to maintain proper water level also justify upgrading the float or the entire sump pump for dependable protection.
Benefits of upgrading to smarter sensors or backup systems
Persistent mechanical or electrical failures often prompt consideration of smarter sensors and backup systems as more reliable solutions than repeated float adjustments.
Upgrading provides improved water-level accuracy, automated alerts, and reduced false trips. Battery or secondary pump backups guarantee operation during power loss.
Cost and complexity comparison for common upgrades
Deciding whether to replace a worn float or invest in upgraded sensors or a backup pump depends largely on cost, installation complexity, and the homeowner’s tolerance for risk. A simple float replacement is low-cost and DIY; smart sensors add moderate expense and wiring; backup pumps are costlier and may need pros.
| Upgrade | Typical cost/complexity |
|---|---|
| Float replace | Low / easy |
| Smart sensor | Moderate / moderate |
| Backup pump | High / advanced |
Quick Troubleshooting Flowchart for Float Problems
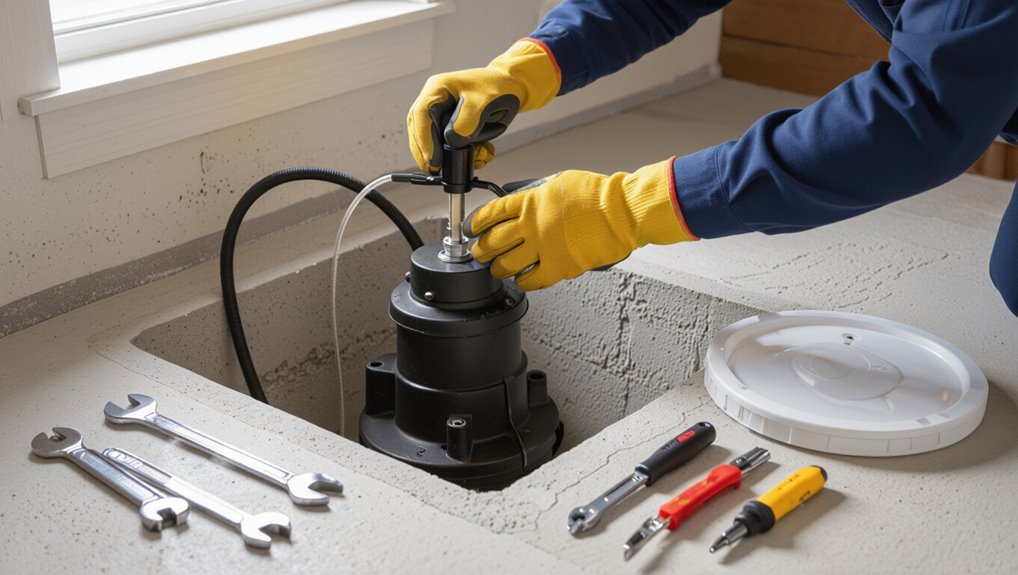
Start by locating the float and visually inspecting its range of motion to identify whether it is free-moving, obstructed, stuck at one position, or unable to trigger the switch.
This quick assessment guides the subsequent branches of the troubleshooting flowchart and determines whether cleaning, repositioning, or replacing components is required.
The flowchart then directs to clean debris, test switch continuity, adjust float stop, secure loose mounts, or replace a faulty float.
Conclusion
Beneath the basement’s quiet hum, the float rests like a buoy in a miniature harbor, ready to lift duty’s weight. With each careful tweak, the pump’s heartbeat steadies, promising dry floors and calmer nights. Small hands-on fixes translate into big protections—no more anxious listening for water’s first whisper. When adjustments are kept current, the sump behaves like a faithful sentinel, turning sudden floods into distant storms remembered only by the shutters’ rattle.