How to Flush an Old Cast Iron Gas Boiler System Step-by-Step (Safe DIY Guide)
Flushing an old cast iron gas boiler effectively removes rust, sludge, and scale, enhancing efficiency and preventing leaks. To start, isolate the gas and power, allow the system to cool, then close the supply and return valves. Attach a drain hose to the boiler draincock and drain each zone one at a time. Flush the radiators and loops until the water runs clear. Reinstall strainers, add a corrosion inhibitor, then repressurize and bleed any air from the system. Finally, conduct safety checks for combustion and leaks. For detailed step-by-step instructions, follow the complete guide provided.
What You Need to Know Before Flushing a Cast Iron Gas Boiler
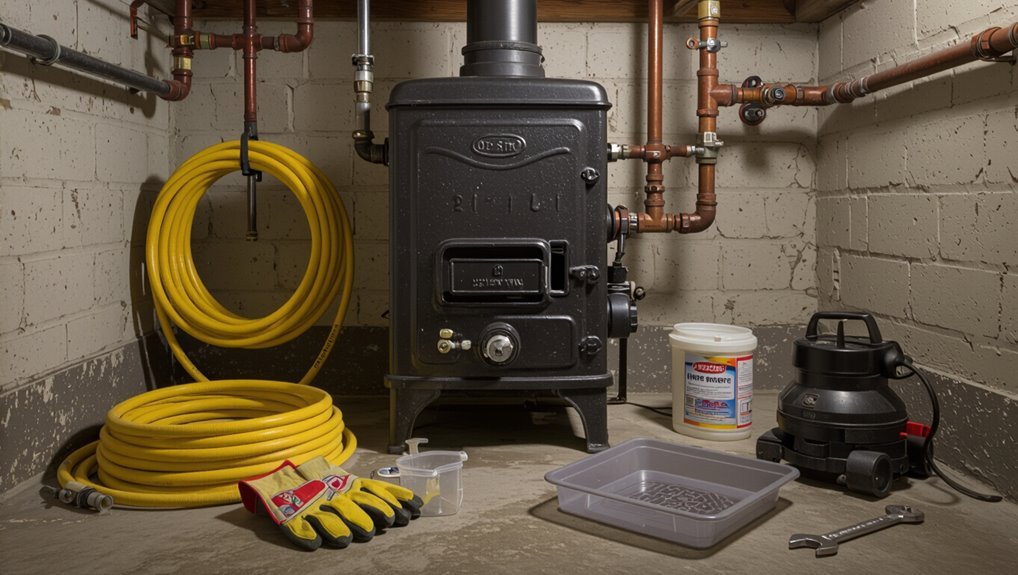
Before flushing a cast iron gas boiler, the homeowner should understand that flushing removes built-up sediment and corrosion that impair heat transfer and efficiency.
Indicators that a flush may be needed include reduced heating performance, unusual noises, frequent kettling, or discolored water from drain valves.
Because flushing involves hot water, pressurized systems, and potential combustion-gas risks, basic safety precautions are required.
A professional should be called when carbon monoxide concerns, complex piping, or uncertain diagnostics are present.
Why flushing is important for cast iron boilers
Flushing a cast iron gas boiler removes accumulated rust, sediment, and mineral scale that impair heat transfer and strain pumps and valves, thereby restoring efficiency and reducing the risk of uneven heating or premature component failure.
Proper flushing preserves cast iron longevity, prevents corrosion-accelerated leaks, lowers fuel use, and reduces maintenance.
Understanding how to flush an old cast iron gas boiler system guarantees targeted, effective cleaning and safer operation.
Common signs your boiler needs a flush
How can an owner tell when a cast iron gas boiler requires a flush? Indicators include reduced heating efficiency, uneven room temperatures, frequent cold spots, increased noise such as rumbling or kettling, visible rust-colored or discolored water at drains or radiators, and quicker accumulation of sludge in filters or strainers.
Regularly monitoring these signs helps determine when flushing is necessary.
Risks and safety considerations (carbon monoxide, scalding, pressure)
While flushing can restore efficiency, it also introduces hazards that demand respect and preparation: carbon monoxide exposure from disturbed venting or burner issues, burn risks from hot water and steam, and overpressure or vacuum conditions if valves and pumps are mishandled.
Confirm working detectors, isolate gas and electrical supplies, use gloves and eye protection, release pressure slowly, and ventilate the area throughout the procedure.
When to call a professional instead of DIY
When should a homeowner defer to a qualified technician? A professional is warranted for gas line work, suspected carbon monoxide, persistent leaks, boiler corrosion, damaged heat exchangers, electrical faults, or if pressure/temperature controls behave erratically.
Also hire a pro when unfamiliar with venting, lack proper tools, or local codes require licensed service.
Safety and warranty preservation justify outsourcing.
Tools, Materials, and Preparations
Before beginning the flush, the technician assembles required tools and equipment, selects recommended chemicals and water treatment products, and verifies availability of personal protective equipment and adequate ventilation.
The work area is cleared and protected while utilities are shut off and isolated according to safety procedures.
These preparations guarantee the flushing process proceeds efficiently and without unnecessary risk.
Required tools and equipment
Proper preparation begins with assembling the specific tools, materials, and safety gear required for flushing an old cast iron gas boiler system.
Essential items include wrenches, hose and pump, drain buckets, and PPE.
Checklist:
- Basic hand tools, adjustable wrenches, pliers.
- Flushing hoses, submersible or power drain pump, buckets.
- Safety gear: gloves, eye protection, respirator, and spill containment.
Recommended chemicals and water treatment products
Having gathered tools and safety gear, attention turns to the chemicals and water-treatment products needed to clean and protect an old cast iron gas boiler system.
Recommended items include scale and sludge removers, corrosion inhibitors, and pH adjusters formulated for closed hot-water systems.
Use manufacturer-recommended dosages and neutralizers.
- Descalers/sludge removers
- Corrosion inhibitors
- pH buffers and neutralizers
Personal protective equipment and ventilation needs
Wear appropriate personal protective equipment and secure adequate ventilation when working on an old cast iron gas boiler system to minimize exposure to chemical cleaners, rust particulates, and combustion gases.
Use gloves, eye protection, and respirators rated for particulates and vapors. Guarantee cross-ventilation and monitor air quality.
- Nitrile gloves
- Safety goggles and face shield
- P100 respirator and ventilation fans
Preparing the work area and shutting off utilities
Clear and secure the immediate workspace before any mechanical or chemical work begins, creating a stable, well-lit area free of trip hazards and combustible materials.
Isolate utilities: shut off boiler gas at the service valve, switch off electrical power at the breaker, and close water supply valves.
Drain lines into approved containers, position spill trays, keep a fire extinguisher nearby, and label isolated valves.
Pre-Flush Inspection and System Assessment
Before flushing, the technician confirms the boiler model, age, and any manufacturer guidance to verify compatibility with cleaning procedures.
A visual inspection notes corrosion, leaks, pipe condition, and checks system pressure, temperature, and expansion tank function.
The layout of radiators and zone valves is documented and zones are isolated for a controlled flush.
Checking boiler model, age, and manufacturer guidance
A concise identification of the boiler’s make, model, and serial number is the essential first step in the pre-flush inspection, since these details determine age, materials, replacement-part availability, and any manufacturer-recommended procedures or restrictions.
Next, consult the manufacturer’s manual or website for service bulletins, sanctioned cleaning methods, gasket and seal compatibility, and warranty implications; record findings before proceeding.
Inspecting visible corrosion, leaks, and pipe condition
When evaluating an old cast iron gas boiler, the technician closely inspects all visible surfaces and joints for corrosion, active leaks, and the overall condition of connected piping to determine whether the system can safely undergo a flush.
Visible pitting, flaking, green or white mineral deposits, solder joint failure, wet insulation, or soft pipe sections indicate repair or replacement before flushing; document findings and photograph defects.
Verifying pressure, temperature, and expansion tank status
Confirm system pressure, boiler temperature, and expansion tank condition to verify safe operating parameters prior to any flush; technicians should record static and running pressures, note temperature readings at the boiler and return, and confirm that the expansion tank retains proper air charge and shows no signs of waterlogging.
Record pressure differential, compare to manufacturer specs, check safety relief setpoint, and validate gauge accuracy before proceeding.
Documenting radiator/zone valve layout and isolating zones
Map the radiator and zone valve layout before any isolation or draining begins to secure targeted flushing and prevent unintended shutdowns of occupied areas.
Document each radiator, valve, thermostat, and bleed location with labels or a sketch.
Identify isolation valves and test their operation.
Plan zone-by-zone shutdowns, noting occupied spaces to avoid, and record valve positions before work to guarantee accurate restoration.
Step-by-Step Drain and Flush Procedure
The following procedure outlines the sequential actions required to drain and flush an old cast iron gas boiler system safely and effectively.
It begins with powering down the unit, shutting off the gas and allowing the system to cool.
Then, it moves to isolating the boiler by closing supply and return valves.
Next steps cover attaching hoses and establishing a drain point, performing an initial system drain, and flushing individual radiators and loops using appropriate techniques.
Step 1 Power and gas shutoff, and cool-down period
Before any work begins, all electrical power and the gas supply to the boiler must be shut off and the system allowed to cool until temperatures are safe to touch and pressure has stabilized.
The technician verifies pilot and main gas valves are closed, isolates electrical breakers, and posts warning tags.
Allow at least one hour for cooling; confirm gauges read normal before proceeding.
Step 2 Isolating the boiler and closing supply/return valves
With power and gas secured and the boiler cooled, attention turns to isolating the unit and closing the supply and return valves to prepare for draining and flushing.
The technician verifies valve positions, shuts both supply and return isolation valves, and tags them closed.
Additional zone valves or bypasses are identified and secured.
Pressure is checked to confirm isolation before proceeding to drain operations.
Step 3 Attaching hoses, setting up a drain point and bucket/sump
Next, a length of hose and an appropriate collection method are prepared to receive the boiler’s drained water. The hose is secured to the boiler draincock or fitting with a clamp, routed to a nearby floor drain, bucket, or temporary sump, and supported to prevent kinks.
Verify the collection container capacity and placement comply with local disposal rules and avoid spills or contamination.
Step 4 Draining the system safely (initial drain)
After securing the hose and positioning the collection container, the technician opens the boiler draincock slowly to begin the initial drain.
Water is allowed to flow until pressure stabilizes and visible sediment exits. The technician monitors gauge and hose connections for leaks, periodically closing the valve to check flow.
Once flow reduces considerably, they stop draining and prepare for targeted radiator flushing.
Step 5 Flushing individual radiators and loops (techniques)
Begin by isolating the first radiator or loop to be serviced by closing its supply and return valves.
Open bleed valves and a drain on that section, then flush with a garden hose until water runs clear.
Repeat for each radiator or loop, flushing both directions if possible.
Reclose drains, refill system slowly, and check for leaks and valve function before moving on.
Step 6 Using a power flush or chemical flush (when and how)
Having flushed individual radiators and loops, attention turns to whole-system cleaning with either a power flush or a chemical flush, chosen based on the severity of scale, sludge, and corrosion deposits.
For heavy buildup, a professional power-flush machine forces high-flow, reversible flushing with debris capture.
For mild-to-moderate fouling, circulate manufacturer-recommended cleaning chemicals, then flush until neutral pH and clear discharge, following safety and disposal rules.
Step 7 Refill procedure and bleeding air from radiators
Restore system pressure and purge trapped air methodically to guarantee even heating and prevent corrosion.
Refill via the mains filling loop until the boiler gauge reaches recommended pressure (typically 1–1.5 bar cold).
Close valves, open radiator bleed valves top-to-bottom, releasing air until steady water flows.
Recheck pressure, top up if needed, then re-secure all bleed points and vent/drain plugs.
Step 8 Restoring power, gas, and checking for leaks
Carefully re-energize the system by turning the boiler controls and gas supply back on.
Then perform a systematic leak and operation check. Observe fittings, valves, and fittings for drips; use a flashlight and paper towel.
Listen for unusual sounds and monitor pilot/flame indicators. Verify electrical components power up.
If any leak or fault appears, shut down immediately and contact a qualified technician before proceeding.
Step 9 Balancing system pressure and running test cycle
Begin by confirming the system’s static pressure and expansion tank condition before initiating a test run:
Adjust fill valve to manufacturer pressure (typically 12–15 psi cold), bleed air from high points and radiators, and isolate zones sequentially.
Start boiler, observe pressure rise, verify differential and relief valve operation, and recheck for leaks.
Log readings and balance zone flow with valves for even heat distribution.
Water Treatment and Corrosion Control After Flushing
After flushing, attention turns to selecting a corrosion inhibitor formulated for cast iron and compatible with any existing glycol or additive.
Proper dosing and verification against target water chemistry—typical pH and conductivity ranges—must be performed and documented.
The system’s expansion tank and pressure relief valve should be inspected and adjusted to guarantee long-term protection.
Choosing the right inhibitor for cast iron systems
Selecting an appropriate corrosion inhibitor for a cast iron boiler system requires matching the product’s chemistry to the system’s materials, pH range, and operational conditions.
The chosen inhibitor should protect iron and steel, control oxygen and electrochemical corrosion, be compatible with seals and paints, and resist thermal breakdown.
Preference should be given to proven formulations for closed-water heating systems and supplier technical data.
How to dose inhibitors and additives correctly
With the appropriate inhibitor chosen, attention moves to correct dosing and additive placement to guarantee long-term protection of the cast iron system.
Dosage follows manufacturer instructions per system volume—measure loop capacity accurately. Introduce inhibitors into the feed/expansion tank or via dosing pot; circulate to distribute.
For sludge dispersants or oxygen scavengers, dose separately and monitor effectiveness.
Record amounts and dates for maintenance.
Long-term water chemistry targets (pH, conductivity)
When establishing long-term targets for pH and conductivity in a flushed cast iron gas boiler system, the goal is to maintain conditions that minimize corrosion and scale while remaining compatible with inhibitors and materials in the loop.
Aim for pH 8.0–9.5 to reduce acidity and passivation.
Maintain low conductivity—typically below 500–1000 µS/cm—via demineralized makeup and periodic testing to control ionic corrosion.
Checking and maintaining the expansion tank and pressure relief valve
Inspect the expansion tank and pressure relief valve as integral components of post-flush corrosion control, since both affect system pressure stability and provide the primary safeguards against overpressure and air-related corrosion.
Verify tank precharge matches static system pressure, check diaphragm integrity by tapping and draining if needed, and test the relief valve for proper opening and reseating.
Replace faulty units promptly.
Troubleshooting Common Problems During and After Flush
Persistent rust-colored water or lingering debris after flushing often indicates incomplete sediment removal or ongoing corrosion and should be assessed before refilling.
Air locks and new noises after refill typically point to trapped air in the system and can usually be resolved by systematic bleeding of radiators and vents.
Unstable system pressure or newly revealed leaks after pressurizing require immediate attention to valves, expansion vessel condition, and joint integrity to prevent damage.
Persistent rust-colored water or debris
If rust-colored water or debris continues to appear after flushing, it indicates remaining corrosion or dislodged sediment in the boiler or pipework that the initial flush did not remove.
Inspect strainers, magnetic filters, and sludge traps; repeat flushing with higher flow or directed jetting.
Consider chemical descaling or professional power flushing if discoloration persists.
Replace heavily corroded components to prevent recurrence.
Air locks and noisy pipes after refill
Air trapped in the heating circuit commonly causes gurgling, banging, or intermittent flow noise after refilling a cast iron gas boiler system.
Bleeding radiators systematically from lowest to highest and opening lockshield valves slightly while running the pump vents trapped air.
Check pump orientation and system slope; intermittent knocks may indicate trapped pockets.
Repeat fills and bleeds until noise ceases and flow stabilizes.
Low or high system pressure issues
Once bleeding and pump checks have reduced noise and restored steady flow, attention should turn to system pressure, since incorrect pressure is a common cause of poor circulation and repeated refills.
The technician verifies static pressure on the gauge (typically 1–1.5 bar cold), adjusts the filling loop to add or release water, and observes response while watching for pressure drift indicating hidden faults.
Leaks discovered after pressurizing
Several common leak sources become apparent when the system is pressurized: weeping radiator valves, loose service unions, compromised pump seals, corroded pipe joints, and failed boiler flanges.
The technician isolates sections, retightens unions, replaces valve packing, and inspects seals. Small drips may require new gaskets; persistent leaks indicate corrosion needing pipe or flange replacement.
Re-pressurize and monitor for stability before finishing.
Safety Checks and Final Validation
A final safety and validation phase confirms the system is safe, responsive, and documented after the flush.
This includes carbon monoxide and combustion checks, verifying proper firing and thermostat response, and capturing photos and service notes.
A recommended follow-up schedule and maintenance checklist should be provided before returning the boiler to regular service.
Carbon monoxide and combustion safety checks
Before restoring service, perform thorough carbon monoxide and combustion safety checks to confirm the boiler operates safely and vents combustion products correctly.
Inspect venting and flue for leaks, blockages, corrosion, and proper slope.
Use a calibrated CO detector at appliance level and nearby occupied spaces.
Measure flue gases for CO and combustion efficiency.
Address any abnormalities before returning the boiler to service.
Verifying proper boiler firing and thermostat response
Confirming proper boiler firing and thermostat response guarantees the system not only produces heat but does so predictably and safely under control signals.
After flushing, observe multiple call-for-heat cycles: thermostat initiates burner, ignition is consistent, flame stable, and modulation matches setpoint changes.
Verify pump activation, zone valves respond, and temperature rise is appropriate.
Log any delays, short-cycling, or erratic behavior for repair.
Documenting completion: photos and service notes
Document the completed flush with clear, timestamped photos and concise service notes that record actions taken, observations, and any irregularities.
Include before-and-after images of sediment, valve positions, and system pressure/gauge readings.
Note parts cleaned or replaced, chemicals used, flush duration, and any anomalies observed.
Sign, date, and store records digitally and with the homeowner for future reference.
Recommended follow-up schedule and maintenance checklist
When the flush is complete and the system stabilized, establish a concise follow-up schedule and checklist to verify ongoing safety and performance: immediate post-service checks at 24–72 hours, a short-term inspection at 1–3 months, and routine maintenance every 6–12 months thereafter.
The technician or homeowner should confirm no leaks, correct pressure, proper burner operation, and visible corrosion control.
- Check for leaks, pressure, combustion.
- Inspect venting, controls, safety valves.
- Annual professional service and water chemistry review.
Alternatives and When to Hire a Professional
The article compares professional power flushing to DIY methods by weighing effectiveness, risk, and equipment needs.
It outlines typical service costs and what homeowners should expect during a technician’s visit.
It also lists clear signs—frequent leaks, persistent corrosion, or repeated failures—when replacement or major repair is more appropriate than another flush.
Pros and cons of professional power flushing vs. DIY
Deciding between professional power flushing and a DIY approach hinges on factors like system condition, available tools, skill level, and budget.
Professionals offer thorough cleaning, warranty-backed work, and safer handling of chemicals and pressure but cost more.
DIY saves money and suits minor flushes, yet risks incomplete debris removal, equipment misuse, and potential damage if the operator lacks experience or diagnostic ability.
Typical costs and what to expect from a service call
Several factors determine the cost of flushing an old cast iron gas boiler system and what a homeowner should expect from a service call. Service calls typically include inspection, flow testing, chemical or power flushing, and brief report. Costs vary by region, complexity, and technician time.
| Item | Typical cost |
|---|---|
| Inspection | $50–$150 |
| Basic flush | $200–$400 |
| Power flush | $400–$1,000 |
| Parts/labor | Variable |
Signs a replacement or major repair is needed
When persistent issues—such as frequent leaks, recurring cold spots, excessive corrosion, or pilot/light failures—appear despite routine maintenance, a homeowner should consider major repair or full replacement; these signs often indicate compromised cast-iron sections, failing heat exchangers, or systemic scale and sediment buildup that flushing alone cannot resolve.
Additional indicators include chronic pressure loss, brown or metallic water, noisy operation, and repeated component failures.
Quick Reference: Step-by-Step Checklist
This quick-reference checklist condenses the essential steps for flushing an old cast iron gas boiler system into a concise, easy-to-follow sequence so a technician or informed homeowner can prepare, execute, and verify the flush safely and efficiently.
- Isolate, drain, and capture system water; shut gas and power.
- Flush with appropriate cleaner, circulate, repeat until clear.
- Neutralize, refill with treated water, purge air, test for leaks and proper operation.
Conclusion
Flushing an old cast iron gas boiler restores efficiency and reduces corrosion risk when done carefully. Studies show neglected hydronic systems can lose up to 20% efficiency from sludge buildup, underscoring the value of regular maintenance. With proper tools, safety checks, and corrosion control, a homeowner can complete a thorough flush; however, persistent issues, heavy rust, or uncertain diagnosis warrant professional service to avoid damage and guarantee long-term system reliability.