How to Check Your Boiler for Hot Water: Quick Steps to Diagnose and Fix No-Heat Issues
To quickly diagnose and fix hot water issues with your boiler, start by checking multiple taps and radiators for cold or lukewarm water. Next, inspect the boiler display and pressure gauge—ideally, it should read between 1 and 1.5 bar—and check the ignition or pilot light status. Listen for the burner operation and note any error codes displayed. If necessary, safely reset the boiler, repressurize it if the gauge is low, and bleed the radiators to release trapped air. Additionally, look for leaks, frozen condensate pipes, or a malfunctioning diverter valve. If these initial steps don’t resolve the hot water problem, further troubleshooting steps are outlined below.
How to Quickly Determine Whether Your Boiler Is Supplying Hot Water
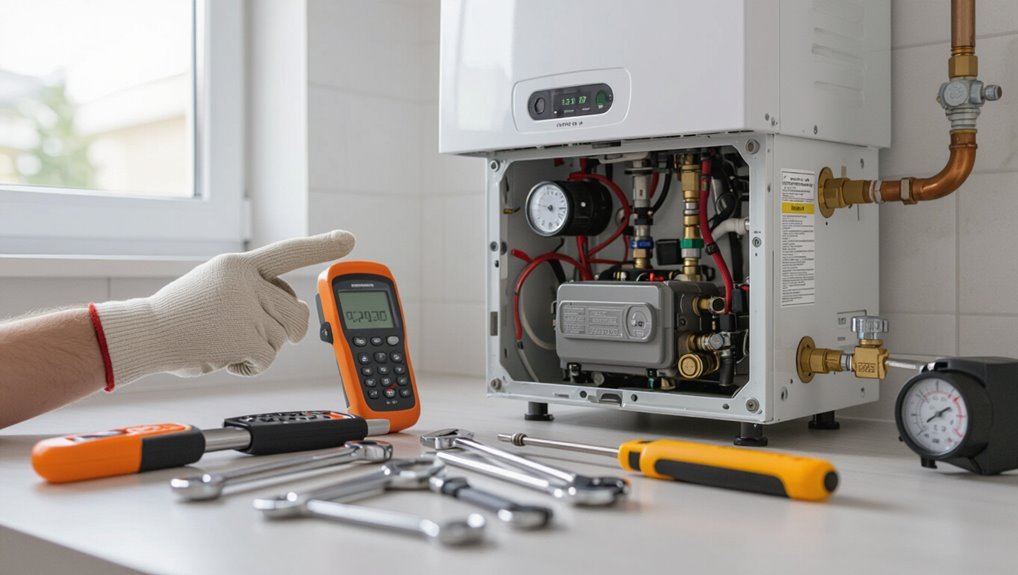
A few quick checks can distinguish a complete no-heat condition from low-heat issues, such as testing multiple taps and noting temperature differences or flow rates.
Observing boiler pressure, pilot or ignition status, and thermostat settings helps narrow the cause.
If there is no hot water at any outlet or signs of leaks, unusual noises, or rapidly falling pressure, a professional should be called immediately.
Simple checks to confirm no-heat vs. low-heat situations
Begin by checking basic indicators that distinguish a complete loss of hot water from reduced heating performance.
Inspect multiple taps and radiators: cold everywhere suggests no-heat; lukewarm or uneven warmth indicates low-heat.
Check boiler display, pressure gauge, and pilot/ignition status.
Listen for burner activity and note recent thermostat settings.
These quick steps explain how to check boiler for hot water effectively.
When to call a pro immediately
If basic checks—taps, radiators, pressure gauge, ignition and thermostat—do not identify the problem or if the boiler exhibits signs of danger, contact a qualified technician immediately.
Immediate professional attention is warranted for gas smells, carbon monoxide alarm activation, persistent leaks, loud banging, or complete loss of power.
Also call a pro if past repairs failed or the boiler intermittently supplies hot water.
Safety Precautions Before Inspecting the Boiler
Before inspecting the boiler, the reader should be reminded to wear appropriate personal protective equipment such as gloves and eye protection.
They should also isolate power and gas supplies, following manufacturer guidance or shutting off main valves and breakers.
If a gas smell is present, the area should be ventilated immediately and occupants evacuated until the source is confirmed safe.
Personal safety gear and precautions
Wear appropriate personal protective equipment and follow basic precautions to reduce the risk of burns, scalds, and inhalation hazards when inspecting a boiler.
Use heat-resistant gloves, safety glasses, and long sleeves; wear a dust mask if residue or soot is present.
Guarantee stable footing, adequate lighting, and clear access.
Keep bystanders and flammable materials away until inspection is complete.
Electrical and gas isolation steps
Shut off all power and gas supplies to the boiler and lock them out to prevent accidental re-energization during inspection.
Verify electrical isolation at the breaker and label switches.
Close the gas cock and use a tagged valve lock.
Confirm isolation with appropriate testers and never rely solely on visual position.
Keep documentation of isolation status before proceeding with any internal checks.
How to safely vent the area if you suspect a leak
If a leak is suspected, immediately establish ventilation by opening windows and doors and activating any exhaust fans to disperse fumes and reduce gas concentration.
Make certain that anyone in the vicinity moves to fresh air and that ignition sources are kept well away.
Then shut off the boiler’s gas supply at the valve, avoid using electrical switches, evacuate nonessential occupants, and call emergency services or a qualified gas engineer without delay.
Tools and Materials You’ll Need
A concise list of basic homeowner tools—screwdrivers, adjustable wrench, pliers, flashlight, and a bucket—prepares one for most boiler checks.
For electrical and pressure diagnostics, a multimeter and a pressure gauge are recommended, while a plug-in CO detector adds a safety check for combustion appliances.
These items streamline troubleshooting and help identify whether a professional is needed.
Basic homeowner toolkit list
Essential tools and materials for basic boiler checks include a few hand tools, safety gear, and common consumables to handle most routine tasks safely and efficiently.
A concise homeowner kit enables simple diagnostics and minor fixes without specialist equipment.
- Adjustable wrench and pliers
- Screwdrivers (flat and Phillips)
- Flashlight and work gloves
- Bucket, rags, and PTFE tape
Useful meter and detector recommendations
Once the basic hand tools are gathered, add a few meters and detectors that provide precise readings for boiler diagnostics.
Recommend a digital multimeter for voltage, continuity, and sensor checks; an infrared thermometer for quick surface temperature spots; a pressure gauge or manifold for system pressure verification; and a combustible gas leak detector for safety.
Choose rugged, calibrated, easy-to-read models.
Step-by-Step Inspection to Diagnose Hot Water Problems
A systematic inspection begins with checking thermostat and control settings to guarantee the boiler is calling for heat.
Next, the technician verifies power and indicator lights, reads the pressure gauge to confirm it is within the correct range, and examines the pilot light or ignition system.
Finally, any displayed error codes are noted and reset procedures are attempted if appropriate.
Check the thermostat and control settings
Begin by inspecting the thermostat and control panel to confirm settings and mode selection are correct.
Verify target temperature, schedule, and any vacation or economy modes are off.
Make sure the thermostat is set to heating or hot water priority and check zone controls for isolation or override.
Note recent changes, replace batteries if applicable, and record settings before adjusting.
Verify boiler power and indicator lights
Several quick visual checks can confirm whether the boiler is receiving power and communicating its status.
The technician inspects the power switch, fused isolator, and LED indicators on the boiler panel. A steady green or blue light typically signals normal operation; flashing or red lights indicate faults.
If lights are off, mains supply or internal fuse issues are suspected before further diagnostics proceed.
Inspect pressure gauge and correct pressure range
Inspecting the boiler pressure gauge is a crucial early step to rule out common causes of no hot water.
The technician notes the gauge reading when the system is cold and when heated. Normal operating pressure typically ranges around 1–2 bar; low pressure can prevent circulation, high pressure risks leaks.
If outside range, repressurize or bleed radiators per manufacturer guidance before further diagnostics.
Examine pilot light or ignition system
After confirming the boiler pressure is within the correct range, the next step is to check the pilot light or the electronic ignition system to verify the burner is actually firing.
For standing pilots, guarantee a steady blue flame and relight per manufacturer instructions if absent.
For electronic ignition, observe attempts to spark or listen for ignition clicks; replace faulty igniters or contact a professional if uncertain.
Check for error codes and reset procedures
Consult the boiler’s control panel and manual for any displayed error codes, as these codes pinpoint faults such as ignition failure, low water pressure, sensor issues, or pump faults.
Note the code, consult the manual’s troubleshooting chart, and follow recommended reset steps.
If a simple reset fails, document codes and contact a qualified engineer; repeated faults require professional diagnosis and repair.
Test radiators, taps, and hot water outlet flow
Begin by systematically checking each radiator, hot tap, and the primary hot water outlet to establish where heat or flow is lacking.
Note which radiators are cold top-to-bottom, which taps deliver weak or no hot water, and whether the main outlet provides consistent pressure.
Record locations and severity to determine if the issue is localized, affects DHW only, or indicates central heating circulation problems.
Bleed radiators and purge air from the system
Release trapped air from the heating system by bleeding radiators and purging circuits to restore proper circulation and heat distribution.
Using a radiator key, open valves until steady water flows, then close securely.
For larger systems, purge via pump or auto air vents following manufacturer guidance.
Monitor pressure and repressurize as needed.
Recheck radiator temperatures to confirm consistent heat and resolved cold spots.
Common Causes of No Hot Water and How to Fix Them
Common failures that prevent hot water are outlined next, with practical checks and straightforward remedies.
Topics include low system pressure and its simple fixes, faulty thermostats or programmers and how to test or replace them, and ignition or pilot light faults with relighting guidance.
Also covered are frozen or blocked condensate pipes and safe thawing, plus airlocks and the correct methods for removing trapped air.
Low system pressure: symptoms and simple fixes
Low system pressure in a boiler often shows up as a lack of hot water or weak heating performance, and it can usually be diagnosed quickly by checking the pressure gauge on the boiler.
If below recommended level (typically 1–1.5 bar cold), re-pressurize via the filling loop per manufacturer instructions.
Also inspect for visible leaks, trapped air (bleed radiators), and confirm expansion vessel integrity before seeking professional help.
Faulty thermostat or programmer: testing and replacement
Test the thermostat or programmer by first confirming its settings and whether the boiler responds when controls are changed; many apparent hot-water failures stem from incorrect schedules, a switched-off hot-water function, or a mistimed central heating priority.
If unresponsive, replace batteries, reset the unit, and verify wiring connections.
Persistent faults warrant replacing the thermostat/programmer or consulting a qualified engineer for diagnostics and safe installation.
Ignition or pilot light failures: relighting and troubleshooting
How did the boiler lose its spark? A failed ignition or extinguished pilot commonly stops heating.
Inspect pilot assembly and thermocouple for dirt, corrosion, or misalignment. Follow manufacturer relighting steps or reset electronic ignition per manual.
If flame is weak or repeatedly dies, replace the thermocouple, check gas supply and pressure, and call a qualified engineer for gas-valve or ignition-module faults.
Frozen or blocked condensate pipe: thawing safely
Check the condensate pipe for ice or debris, since a frozen or blocked line is a common cause of a boiler losing hot water.
If frozen, thaw gradually using warm (not boiling) water, a cloth or low-heat hairdryer, working from the boiler toward the external outlet.
Confirm the outlet is clear, replace damaged insulation, and call a qualified engineer if the blockage persists or pipe is cracked.
Airlocks and trapped air: how to remove
Bleeding the system can clear airlocks, a common reason for intermittent or no hot water when pockets of trapped air block circulation.
Isolate radiators and use bleed keys to release air until steady water flows.
On sealed systems, slightly open the filling loop or use radiator valves to restore pressure first.
Run the system, recheck pressure, and repeat bleeding until heating performance returns.
Leaks in the system: locating and temporary repairs
Locate leaks promptly, since even small drips can drop system pressure and disrupt hot-water circulation.
Inspect visible pipework, valves, radiators and boiler joints for moisture or corrosion.
Apply temporary seals—PTFE tape, hose clamps, or epoxy putty—only to slow drips and as interim measures.
Record locations and schedule professional repair; never operate a boiler with significant or unexplained leaks.
When Boiler Produces Heat But Hot Water Is Inconsistent
When a boiler heats the home but delivers erratic hot water, several system components warrant inspection.
Faulty or sticking diverter valves, problems inside hot water cylinders or tanks, and imbalanced flow rates to radiators are common causes to check.
Each issue can be tested or assessed to pinpoint whether a simple adjustment, part replacement, or professional service is needed.
Diverter valve problems and testing
Inspect the diverter valve as a common cause of intermittent hot water: this component directs heated water either to the central heating or to domestic taps.
A partially stuck or worn valve can produce heat for radiators while limiting flow to hot water outlets.
Check for sticking, listen for motor noise, and test switching between heating and hot water.
Replace or service if movement is sluggish or noisy.
Hot water cylinder or tank issues (if applicable)
A domestic hot water cylinder or storage tank can be the weak link when a boiler provides heating but hot water is intermittent.
Inspect for cold spots, corrosion, leaks, or failed immersion heaters and thermostats.
Check cylinder thermostat settings and any timed controls.
Sediment buildup and faulty unvented components can reduce delivery.
Recommend flushing, thermostat replacement, or a plumber’s inspection for safety and compliance.
Flow rate and balancing radiators
Several factors can restrict flow rate and upset radiator balance, causing a boiler to heat the system while hot water delivery becomes uneven.
Airlocks, partially closed valves, sludge buildup, or incorrect pump speed can divert flow to radiators.
Balancing valves should be adjusted, radiators bled, and the system flushed or power-flushed if needed.
Professional balancing and pump checks guarantee consistent hot water distribution.
Quick Fixes You Can Try Right Now
A few quick checks can resolve common hot-water issues without calling a technician.
First, restarting the boiler and performing a factory or manufacturer-recommended reset often clears temporary faults.
If pressure is low, repressurizing to the correct level and bleeding radiators or adjusting flow valves can restore consistent hot-water delivery.
Restart and reset routines that often work
Power cycling and basic reset procedures often resolve common boiler issues without tools or technical skill.
The user is advised to switch the boiler off at the programmer, wait one minute, then restore power. If a manufacturer reset button exists, press it per label instructions.
After reboot, allow several minutes for fault codes to clear and the system to attempt ignition before seeking professional help.
How to repressurize your boiler safely
If a simple reboot does not restore hot water, low system pressure is a common next cause and can usually be corrected without tools.
Confirm the pressure gauge reads below recommended (typically 1–1.5 bar cold).
Isolate filling loop valves, open slowly until pressure rises to spec, then close.
Bleed any excess air from radiators afterward.
Recheck gauge and secure valves.
Simple bleed and flow adjustments
Check valves and radiator vents for trapped air and uneven flow before calling a technician.
Bleed radiators with a key until steady water flows, collecting drips.
Confirm lockshield valves are partly open to balance circulation; adjust gradually, room by room.
Inspect thermostatic valve positions and the pump speed setting.
Retest system pressure and run the heating to verify restored, even heat distribution.
Troubleshooting Table for Symptoms, Likely Causes, and Actions
Use the table below to quickly match common hot-water symptoms with their most likely causes and the practical actions a homeowner or technician can take.
| Symptom | Likely Cause | Action |
|---|---|---|
| No hot water | Pilot/electrical failure | Check pilot, reset power, call technician |
| Weak flow | Airlock or low pressure | Bleed radiators, top up pressure |
| Intermittent heat | Faulty thermostat | Test/replace thermostat |
Preventive Maintenance to Avoid Future No-Heat Issues
A concise seasonal maintenance checklist helps prevent no-heat incidents by documenting tasks like bleeding radiators, checking pressure, and inspecting vents.
Recommended inspection intervals and professional servicing—typically annual for a technician and seasonal homeowner checks—reduce the likelihood of unexpected failures.
Regular water treatment and corrosion prevention preserve system components and extend service life.
Seasonal maintenance checklist
Seasonal maintenance preserves boiler reliability and reduces the risk of unexpected no-heat emergencies by addressing wear, deposits, and component drift before they cause failures.
A concise checklist helps owners spot issues early and act or call a technician when needed.
- Flush and check for sediment
- Inspect seals and insulation
- Test pressure and safety controls
- Clean burners and vents
Recommended inspection intervals and professional servicing
Following the seasonal checklist items, owners should adopt a clear schedule for inspections and know when to call a qualified technician to prevent future no-heat incidents.
Annual professional inspections are typical; biannual checks suit older systems.
Prompt service is advised after irregular noises, pressure drops, or ignition failures.
Technicians perform safety checks, efficiency tuning, and replace worn parts to reduce unexpected breakdowns.
Water treatment and corrosion prevention
Several measures considerably reduce corrosion and mineral buildup in boiler systems, preserving heat transfer and preventing no-heat failures.
Regular water testing, chemical dosing (oxygen scavengers, pH adjusters, scale inhibitors), and installing magnetic or electronic descalers minimize deposits.
Maintain appropriate inhibitor concentrations, perform periodic blowdown to remove sediments, and replace corroded components.
Professional treatment plans tailored to water chemistry extend equipment life and reliability.
Cost and Time Estimates for Common Repairs
The article outlines when a homeowner can safely handle simple fixes—such as bleeding radiators or replacing a pilot light—versus when a qualified plumber or heating engineer is required for boiler diagnostics and sealed-system work.
It also summarizes typical price ranges for common parts (e.g., thermostats, pressure valves, circulator pumps) and the labor rates and time frames usually charged for repairs.
Readers are encouraged to weigh task complexity, local labor costs, and warranty implications before deciding who should perform the work.
DIY vs. plumber/heating engineer: when each is appropriate
When a boiler issue arises, homeowners must weigh the complexity, safety risks, and potential costs before deciding between a DIY fix and hiring a plumber or heating engineer.
Simple tasks—resetting, bleeding radiators, checking pressure—suit confident DIYers with basic tools.
Any gas, electrical, or sealed-system work, persistent faults, or warranty concerns require a qualified professional to guarantee safety, compliance, and reliable repair.
Typical price ranges for parts and labor
Cost clarity helps homeowners plan repairs without surprises: typical small parts like seals, thermostats, or pressure relief valves often cost £10–£80, while major components such as pumps, heat exchangers, or control boards range from £150–£800 or more.
Labour rates vary by region and complexity, typically £50–£120 per hour; straightforward visits may cost £80–£200 total, complex jobs £300–£900+.
Signs It’s Time to Replace the Boiler
When boilers reach the end of their expected lifespan or show steadily falling efficiency, replacement should be considered.
Frequent breakdowns, recurring fault codes, or repairs that exceed a reasonable portion of replacement cost are clear indicators.
A quick evaluation of replacement options can compare upfront price, projected energy savings, and expected warranty to guide a prompt decision.
Age, efficiency, and recurring fault indicators
Boiler age and efficiency offer the clearest signals that replacement should be considered: units older than 10–15 years commonly lose efficiency, parts become scarce, and repair frequency rises.
Persistent faults—repeated pilot failures, pressure loss, unusual noises, and rising fuel bills—indicate systemic wear.
When repairs recur or efficiency declines despite servicing, replacement often proves more reliable and cost-effective than continued fixes.
How to evaluate replacement options quickly
Having established that age, falling efficiency, and recurring faults often signal the need for replacement, homeowners can quickly evaluate options by focusing on a few measurable criteria: system type (combi, system, or heat-only), required capacity, fuel compatibility, and installation constraints.
Compare efficiency ratings, warranty lengths, and upfront plus lifecycle costs.
Prioritize units matching hot-water demand and site limitations; consult a qualified installer for final sizing.
Resources and Next Steps
Before contacting a technician, the homeowner should note the boiler model, serial number, recent error codes, and a concise history of symptoms and any maintenance performed.
Helpful resources include the manufacturer’s manual, parts diagrams, and authorized service bulletins, plus reputable online forums and troubleshooting guides.
Providing this information and these references will speed diagnosis and guarantee proper replacement parts if needed.
What information to gather before calling a technician
A concise set of details will streamline any technician visit: model and serial numbers, the age of the unit, recent symptoms and error codes, maintenance history, and whether any temporary fixes were attempted.
Also note when the issue began, frequency, water temperature readings, pressure gauge values, recent work on plumbing or electrical systems, photos of displays or labels, and contact and access availability.
Useful manuals, parts diagrams, and online resources
Manuals, parts diagrams, and reliable online resources make troubleshooting and communicating with a technician far more efficient. They provide model-specific procedures, part numbers, and safety notes.
Keep digital copies and bookmark trusted sites. Useful references include:
- Manufacturer service manual and wiring diagram
- Parts exploded-view diagram with part numbers
- Official troubleshooting guides
- Community forums and verified how-to videos
Conclusion
In the end, the boiler—staunch sentinel of suds and showers—gets judged. If it gurgles, clicks, or sulks, a quick checklist, a brave wrench, or a call to a pro will restore domestic warmth and dignity. Ignore it and winter will stage a cold, soggy rebellion. With routine checks, sensible fixes, and a smattering of common-sense pride, the boiler can continue its unglamorous, heroic duty: quietly preventing everyone from discovering how much they actually enjoy cold baths.