How to Tell if Your Condensate Pump Is Bad: 9 Signs and Fixes
If your condensate pump is showing signs of failure, it’s crucial to identify the issues promptly. Look for unusual or grinding noises, visible leaks or pooling, frequent cycling, failure to activate, and backup in the drain pan. To troubleshoot, power down the system, check the float switch, inspect inlet and outlet lines for clogs, and test voltage and continuity. Common causes of failure include clogs, corroded components, motor issues, or electrical faults. The following sections will guide you through fixes, replacement steps, maintenance tips, and when to seek professional assistance.
What a condensate pump does and why it matters
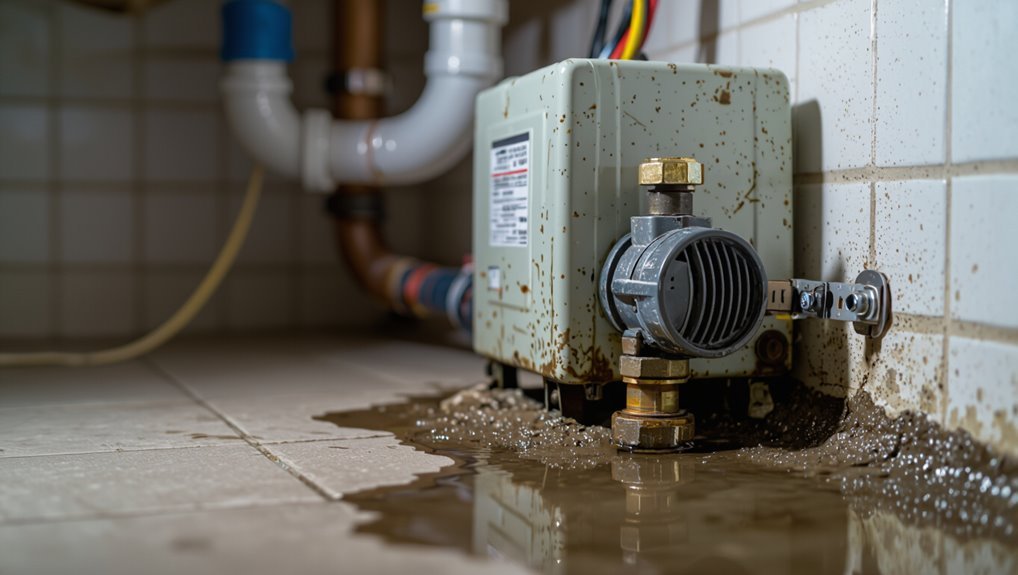
Condensate forms when HVAC and boiler systems cool moist air or exhaust gases, and a condensate pump collects and pumps that wastewater to a drain or disposal point.
Pumps range from small in-line and submersible units to more robust condensate removal assemblies, all typically featuring a reservoir, float switch, motor, and discharge line.
When a pump fails, condensate can back up and overflow, risking equipment damage, system shutdowns, mold growth, and potential safety hazards from blocked drain lines.
How condensate is produced and removed in HVAC and boiler systems
When warm, moist air passes over cooling coils or boiler surfaces, water vapor changes to liquid and collects as condensate. A condensate pump then moves this wastewater from low points in HVAC and boiler systems to appropriate drainage.
Technicians monitor drain pans, lines, float switches, and pump operation to detect issues. Guidance on how to tell if a condensate pump is bad centers on slow drainage, noises, leaks, and frequent cycling.
Types of condensate pumps and common components
A small pump assembly plays a critical role in removing condensate from HVAC and boiler systems, and understanding the different types and common components helps technicians choose, install, and maintain the right unit.
Submersible, pedestal, and float-switch pumps vary by application.
Typical components include reservoir, motor, impeller, float switch, check valve, tubing, and safety switch; materials and capacity determine suitability.
Consequences of a failing condensate pump for equipment and safety
Having reviewed pump types and key components, attention shifts to what can happen when that small but essential assembly fails.
A malfunctioning condensate pump causes water backups, corrosion, HVAC inefficiency, and microbial growth.
Electrical faults risk short circuits or tripped breakers.
Flooding damages ceilings, insulation, and electronics, increasing repair costs and downtime.
Prompt detection and replacement protect equipment, indoor air quality, and occupant safety.
Quick indicators that your condensate pump may be failing
Several clear signs can indicate a condensate pump is failing.
These include loud or unusual noises, visible leaks or pooling, continuous or overly frequent runs, failure to activate, and water backing up in the drain pan or triggering the overflow shutoff.
Noting any of these symptoms promptly helps prioritize inspection and repair.
Loud or unusual noises during operation
When a condensate pump emits loud bangs, grinding, or high-pitched whines during operation, it often signals mechanical wear, misaligned components, or debris interfering with the impeller.
Persistent unusual noises may indicate failing bearings, a warped motor mount, or struggling check valves.
Diagnosis includes visual inspection, listening tests, and isolating vibration sources; timely repair or replacement prevents further mechanical damage.
Visible water leaks or pooling near the unit
Unusual noises can point to internal mechanical failure, but visible water pooling or leaks around the condensate pump offers a more immediate, surface-level warning that the system is not removing condensate properly.
Standing water, damp floors, or dripping at connections indicate clogged lines, failed seals, cracked reservoirs, or misaligned fittings.
Prompt inspection prevents mold, corrosion, and equipment damage; replace or repair faulty components.
Pump runs continuously or too frequently
Frequent or nonstop cycling of the condensate pump is a clear sign that it may be malfunctioning.
Continuous or overly frequent runs indicate stuck float switches, clogged drain lines, incorrect pump sizing, or leaking condensate into the reservoir.
This behavior shortens pump life, increases energy use, and risks overflow.
Prompt inspection and cleaning or replacement prevent further damage and costly water-related issues.
Pump fails to activate when required
Detecting a condensate pump that fails to activate requires attention to a few clear signs: water pooling around the drain pan, a cool HVAC system that shuts down due to safety switches, visible moisture near the pump, or a silent pump motor despite rising condensate levels.
Additional indicators include no audible cycling, stagnant water in the reservoir, and electrical faults such as tripped breakers or blown fuses.
Water backup in drain pan or overflow shutoff triggered
Water pooling in the drain pan or an activated overflow shutoff are immediate signs that a condensate pump is struggling to remove condensate.
These indicators mean liquid is accumulating instead of being expelled, risking corrosion, mold, and system shutdown.
Immediate inspection should check for clogged lines, a full or failed pump reservoir, or float switch issues; replace or repair components to restore reliable drainage.
Erratic or intermittent operation
If pooling or an overflow shutoff has been noticed, attention should next turn to how the pump behaves between cycles.
Erratic or intermittent operation manifests as inconsistent starts, delayed runs, or random silence despite rising condensate. Such patterns suggest clogged float switches, failing control circuitry, or loose wiring.
Record occurrences, check float movement and connections, and replace faulty components to restore reliable cycling.
Motor smells like burning or shows signs of overheating
A burning odor or visible heat around the motor often signals electrical stress or mechanical failure within the condensate pump.
Immediate inspection is warranted: overheated windings, seized bearings, or blocked ventilation can cause burning smells and reduced performance.
Continued operation risks motor damage, melting insulation, or fire.
Power should be disconnected and the unit evaluated and repaired or replaced by a qualified technician promptly.
Electrical issues: tripped breakers or blown fuses
Why is a tripped breaker or blown fuse a red flag for the condensate pump?
Repeated electrical interruptions often indicate internal electrical faults, motor overload, or short circuits within the pump or its wiring.
Consistent trips suggest progressive failure risk and potential safety hazards.
Prompt inspection by a qualified technician can identify faulty components, correct wiring issues, and prevent further damage or system downtime.
Corrosion, rust, or physical damage to pump parts
Electrical faults can accompany or mask other failure signs, but visible corrosion, rust, or physical damage on the condensate pump offers an immediate, non-electrical indicator of impending malfunction.
Pitting, flaking metal, cracked housings, or warped fittings compromise seals and moving parts. Such damage often leads to leaks, reduced flow, or jammed impellers.
Replace or repair corroded components promptly to prevent system failure.
How to safely inspect and test a condensate pump
Before any work begins, the technician guarantees power is shut off and wears eye protection and gloves to prevent electrical shock and contact with contaminated condensate.
A systematic inspection follows: check the pump housing, float and fittings for cracks or corrosion, manually actuate the float to verify switch activation, and probe inlet/outlet lines for blockages.
Basic electrical checks include testing continuity and voltage at the pump motor with a multimeter and verifying that the motor runs when the float closes.
Safety precautions before inspecting the pump
Several basic precautions should be observed to reduce risk when inspecting a condensate pump.
Personnel should disconnect power and wear insulated gloves and eye protection. Allow system to cool and relieve pressure; avoid wet surfaces to reduce slip and electrocution hazards.
Use a voltage tester to confirm power is off. Keep a clear workspace and follow manufacturer lockout/tagout guidance.
Visual inspection checklist for exterior components
One clear, methodical sweep of the pump’s exterior helps catch common faults early: inspect the housing for cracks or corrosion, check for loose or missing fasteners and mounting hardware, verify that access panels and covers are secure and gasketed, and look for signs of coolant or condensate staining that indicate leaks.
Also confirm electrical conduit seals, tubing connections, and unobstructed venting; note unusual odors or residues.
How to manually trigger float switches and check activation
To test a condensate pump’s float switch, a technician should first de-energize the unit and lock out power.
Then access the pump bowl and float mechanism while following manufacturer safety guidance.
Gently lift the float to its trip position and observe pump activation and discharge; listen for mechanical movement, check for binding, clear debris, and confirm smooth return to resting position without applying electrical diagnostics.
Testing electrical connections and the motor (basic multimeter checks)
After confirming the float switch trips and the pump runs mechanically, the next step is to inspect the electrical connections and motor with a basic multimeter to verify safe operation.
Disconnect power, check supply voltage at the pump terminals, and test continuity across motor windings.
Measure resistance against manufacturer specs and verify ground integrity.
Note any burning odor, loose wires, or irregular readings indicating motor failure.
Checking inlet/outlet lines and condensation drains for clogs
When inspecting for clogs, technicians should first isolate power and then follow the condensate path from the appliance to the pump and out through the discharge line, looking for kinks, sediment buildup, or biological growth that can impede flow.
Inspect traps, filters, and access ports. Clear blockages with appropriate tools, flush lines with water or mild cleaner, and reseal fittings to prevent air leaks.
How to test pump discharge head and flow rate
Having verified that inlet and discharge lines are clear, the next step is a safe, methodical evaluation of the pump’s discharge head and flow rate to confirm it can move condensate at the required volume and height.
Measure maximum vertical lift by running the pump into a measured-height hose; time gallons pumped over one minute to calculate flow rate.
Compare results to specifications; note leaks, airlocks, or reduced output.
When to call a professional for diagnostics
Under what circumstances should a homeowner call a professional for diagnostics: if visual inspection and basic tests (clear lines, float switch movement, and measured discharge head/flow) reveal persistent issues, unusual noises, electrical faults, audible airlocks, or leaks that cannot be isolated.
A technician should handle motor or wiring faults, intermittent failures, inaccessible pump locations, complex sealing or condensate disposal problems, and when warranty coverage applies.
Common causes of condensate pump failure and how to fix them
Common condensate pump failures include clogs and algae buildup, faulty float switches, worn motor bearings, damaged check valves or impellers, and electrical or control faults.
Each issue has a straightforward remedy range—from cleaning and preventive treatment for blockages to lubrication or motor replacement for bearing wear, and from simple float switch repairs to full component replacement when needed.
A methodical inspection and basic troubleshooting steps will identify the root cause and indicate whether repair or replacement is appropriate.
Clogs and algae buildup cleaning and preventive treatment
Because condensate lines constantly carry warm, moist air, they frequently develop clogs and algae that impair pump operation.
Mineral deposits, organic growth, and debris can restrict flow, trigger float-switch failures, and cause overflow.
Regular cleaning, vinegar or bleach flushes, and replacing damaged tubing restore function and prevent recurrence.
- Frustration at recurring blockages.
- Relief after thorough cleaning.
- Confidence with scheduled maintenance.
Faulty float switch repair vs replacement
Diagnose the float switch first, since its failure is a frequent and easily corrected cause of condensate pump malfunction: a stuck, misaligned, corroded, or mechanically worn float can prevent the pump from cycling or cause it to run continuously.
Inspect, clean, and realign the float; replace the switch if contacts are corroded or mechanical play persists.
Test operation after repair or replacement.
Worn or seized motor bearings lubrication or motor replacement
Listen for grinding or humming that changes with load: these sounds often indicate worn or seized motor bearings in a condensate pump.
If vibration, heat, or reduced rotation occur, lubrication may restore smooth operation if bearings are serviceable.
When noise persists, bearings are damaged, or motors overheat, replacement of the motor is the safer long-term fix.
Confirm power is disconnected before servicing.
Damaged check valve or pump impeller inspection and replacement
If lubrication or motor replacement fails to resolve unusual noises or poor rotation, attention should turn to the pump’s fluid-moving components: the check valve and impeller.
Inspect for cracks, debris buildup, warped vanes, or a stuck flapper. Clean sediment, replace a damaged impeller or worn check valve, confirm proper seating and flow direction, then retest for leakage and adequate condensate discharge.
Electrical faults and control issues troubleshooting steps
Begin by checking the pump’s electrical and control systems when mechanical fixes don’t restore operation, since wiring faults, failed switches, or control-board issues commonly stop condensate removal.
Verify power at the outlet, inspect wiring for corrosion or loose connections, test float and pressure switches for continuity, and examine relay or PCB signals.
Replace faulty components and retest pump operation.
Improper installation or undersized pump when to upgrade
After electrical and control faults have been ruled out, attention should turn to installation and sizing issues that frequently undermine condensate pump performance.
Incorrectly placed suction lines, excessive lift, long discharge runs or an undersized pump lead to frequent cycling, overheating and premature failure.
Assess system head, flow requirements and piping layout; replace with a properly sized, correctly installed unit to restore reliable operation.
Corrosion and rust repair options and material choices
Examine corrosion and rust early, since prolonged exposure to acidic condensate, moisture and oxygen attacks metal components, seals and fasteners, reducing pump efficiency and causing leaks or seizure.
Assess affected parts; replace heavily corroded housings, impellers, and fasteners.
Apply stainless steel, brass, or corrosion-resistant plastics. Use protective coatings, sacrificial anodes, and regular neutralizing filters.
Reassemble with compatible seals and torque specifications.
Step-by-step replacement guide for a condensate pump
A concise replacement guide begins by choosing a pump with the correct capacity, head, and compatibility for the system and gathering the required tools and materials.
The procedure then covers safely removing the old unit, installing and reconnecting the new pump’s plumbing and wiring, and priming the assembly.
Finally, the pump is tested and the float and electrical settings are adjusted for reliable operation.
Selecting the correct replacement pump (capacity, head, compatibility)
Several key specifications determine the right condensate pump replacement: capacity (GPH), maximum head (vertical lift), and electrical and physical compatibility with the existing system.
Verify required flow based on appliance condensate output, select a pump with equal or higher GPH, guarantee the head exceeds total vertical lift plus friction losses, match voltage, amperage, float type and inlet/outlet sizes, and confirm mounting fit.
Required tools and materials
With the correct pump specifications confirmed, the replacement itself requires a concise set of tools and materials to guarantee a safe, efficient swap.
Essential items include the new condensate pump, compatible tubing and fittings, hose clamps, Teflon tape, wire connectors, a multimeter, screwdrivers, pliers, adjustable wrench, tubing cutter, bucket, rags, and safety gloves and goggles.
Removing the old pump safely
Begin by cutting power to the condensate system at the breaker and confirming the pump is de-energized with a multimeter; this prevents shock and accidental motor start during removal.
Drain the reservoir, disconnect tubing and float switch leads, label wires, and slacken mounting screws.
Remove pump gently to avoid spills, inspect nearby fittings for corrosion, and clean the sump before disposing of the old unit.
Installing the new pump and reconnecting plumbing and wiring
Install the replacement pump by seating it in the cleaned sump, aligning the mounting holes, and securing it with the original or supplied fasteners to guarantee a stable base.
Reattach the discharge tubing with a hose clamp, ensuring a downward slope and no kinks.
Reconnect grounded supply wires to matching terminals, restore the float switch lead, and tighten all fittings securely before restoring power.
Priming, testing, and adjusting float/electrical settings
After reconnecting plumbing and wiring and restoring power, the pump must be primed and its float and electrical settings verified to confirm reliable operation.
Add water until the pump reaches activation level, observe switch travel and cut-in/cut-out points, confirm discharge and check valves, and measure voltage at terminals.
Adjust float height or switch sensitivity per manufacturer specs, then run multiple cycles to verify consistent performance.
Preventive maintenance schedule and tips to extend pump life
Preventive maintenance keeps condensate pumps reliable and prevents disruptive failures through straightforward routines and small investments.
A concise schedule of cleaning, seasonal inspections, water-treatment for lines, and sensor monitoring will greatly extend pump life and reduce emergency repairs. Owners should also keep key spare parts on hand and consider smart alerts to catch issues before they escalate.
- Regular cleaning, seasonal checks, and line treatment
- Monitoring indicators, smart alerts, and overflow sensors
- Recommended spare parts and backup planning
Regular cleaning and flushing routines
Establishing a regular cleaning and flushing routine helps keep a condensate pump operating reliably and reduces the risk of clogs, odors, and premature failure.
Recommended actions: disconnect power, remove and clean reservoir, inspect float and inlet, flush with distilled water and mild detergent, clear tubing with a soft brush, and reassemble.
Perform this every 1–3 months depending on usage and environmental factors.
Seasonal checks and inspection reminders
A seasonal inspection schedule helps catch developing issues before they cause failure, with simple checks timed to HVAC use cycles and local climate.
Inspect pump operation, float switch movement, wiring connections, and reservoir cleanliness at start and end of heavy seasons.
Verify discharge line routing and test alarm function.
Document findings, replace worn parts promptly, and schedule professional service annually.
Treating condensate lines to prevent algae and scale
Regularly treating condensate lines reduces algae and mineral buildup that can clog pipes and shorten pump life.
Technicians recommend monthly visual checks, flushing lines with diluted vinegar or enzymatic cleaners quarterly, and applying approved algaecide tablets in drain pans.
Maintain proper slope and insulation, replace corroded tubing, and document treatments.
Consistent preventative care minimizes blockages, preserves pump efficiency, and extends service intervals.
Monitoring indicators and installing smart alerts or overflow sensors
How can a condensate pump’s remaining lifespan be gauged before a failure occurs? Monitoring float travel, motor current draw, and cycle frequency reveals wear trends.
Install smart alerts for abnormal runtime, high cycle rates, or stalled floats. Overflow sensors with remote notifications prevent floods.
Schedule quarterly inspections, log metrics, and adjust thresholds as components age to extend pump life and avoid surprises.
Recommended spare parts and when to keep backups
Often, technicians keep a small kit of common condensate pump spares—replacement floats, check valves, diaphragm seals, and a compatible motor cartridge—to minimize downtime.
A quarterly parts check aligns with HVAC service. Store extra tubing, strainers, and fuses; prioritize OEM or equivalent parts.
Replace worn components proactively, document serials and install dates, and keep one full backup pump for critical systems to avoid emergency failures.
Cost considerations and when replacement is more economical than repair
Cost comparisons between repairing and replacing a condensate pump often determine the best course of action for both residential and commercial owners. Considerations include typical repair vs replacement prices, expected remaining lifespan and total cost of ownership, and the value of warranties, service plans, and reputable contractor selection. The simple table below illustrates common cost and risk profiles to frame that decision.
| Scenario | Typical Cost Range | Key Consideration |
|---|---|---|
| Residential repair | $75–$300 | Short-term fix if pump is otherwise healthy |
| Residential replacement | $150–$600 | Longer lifespan, lower long-term risk |
| Commercial unit | $500–$3,000+ | Higher capacity and service requirements |
Typical repair costs vs replacement costs (residential and commercial)
When evaluating whether to repair or replace a failing condensate pump, owners should weigh typical labor and parts expenses against the price of a new unit and expected remaining lifespan.
Residential repairs often run $100–$300; replacements $150–$500.
Commercial systems incur higher labor and specialized parts, with repairs $300–$800 and replacements $700–$2,500.
Choose replacement when repair approaches half the new-unit cost or reliability is doubtful.
Factors affecting lifespan and total cost of ownership
Longevity of a condensate pump depends on installation quality, operating environment, maintenance frequency, and component build; each factor directly influences lifetime and accumulated ownership costs.
Corrosion, sediment, cycling frequency, and electrical stress increase failure risk and expense. Regular preventative maintenance reduces operating cost and prolongs service life.
When repair frequency or parts cost approach replacement price, full replacement is usually more economical.
Warranty, service plans, and contractor selection tips
Several key warranty and service-plan details can determine whether repair or replacement is the smarter financial choice for a failing condensate pump.
Review remaining manufacturer warranty, transferable coverage, and service-plan deductibles.
Compare quoted repair costs versus discounted replacement pricing and labor.
Prefer licensed contractors with clear estimates, written guarantees, and references.
Factor emergency fees, parts availability, and expected remaining life when deciding.
Signs that indicate an emergency and immediate actions to take
Major leaks, flooding, repeated overflow shutdowns, or any burning smells or smoke from the condensate pump are signs of an emergency that require immediate attention.
The author recommends shutting down the HVAC system, cutting power to the pump, and taking quick steps to contain water to prevent further damage.
If unsafe conditions persist or smoke is present, professional HVAC support or emergency services should be contacted right away.
Major leaks, flooding, or repeated overflow shutdowns
Any visible pooling, significant dripping, or repeated triggers of the overflow switch signals an urgent condensate pump failure that requires immediate attention.
The homeowner should shut off the HVAC system, isolate electrical power to the pump, and contain water to prevent structural damage.
Call a licensed HVAC or plumbing technician for pump replacement or line repair.
Avoid using the unit until service is complete.
Burning smells or smoke from the pump
Detecting a burning odor or seeing smoke from a condensate pump is a clear emergency indicating electrical failure, motor overheating, or a short circuit that can quickly escalate to fire.
Immediately evacuate the area, cut power to the pump at the breaker if safe, and call emergency services and a licensed HVAC electrician.
Do not attempt repairs while the unit smokes or emits strong odors.
Steps to shut down systems and prevent water damage
After evacuating and cutting power when smoke or burning odors are present, attention should turn to steps that quickly shut down systems and limit water damage from a failing condensate pump.
Close the HVAC condensate drain valve, isolate water supply, and turn off thermostat calls for cooling.
Place buckets under leaks, use towels to protect floors, and clear nearby drains to prevent overflow until a repair is arranged.
When to contact an HVAC technician or emergency services
When should professional help be summoned? Immediate assistance is warranted if there’s flooding, active water contacting electrical components, persistent pump failure despite resets, sewage backup, or mold spreading rapidly.
The technician or emergency responder should be contacted, power shut off, water source isolated, and occupants evacuated if electrical hazards or heavy flooding exist.
Document damage and secure the area until help arrives.
Resources for parts, tools, and professional help
The section outlines how to identify correct replacement parts by matching model numbers and specifications to guarantee compatibility.
It lists key questions to ask a technician—such as experience with the pump model, warranty coverage, and estimated labor—to help evaluate service options.
It also recommends reputable online retailers and local suppliers for pumps, tubing, and accessories to simplify sourcing.
How to find the right replacement parts by model and specifications
How can a homeowner be certain they’re ordering the correct condensate pump parts?
Identify the pump’s make, model number, voltage, flow rate, and discharge size from labels or manuals.
Cross-reference OEM part numbers with supplier databases and verified retailers.
Compare specifications—dimensions, fittings, and electrical ratings.
Keep photos and serials when ordering.
For uncertain matches, consult manufacturer support or authorized dealers.
Questions to ask a technician before scheduling service
Why ask specific questions before scheduling a technician? Homeowners should verify technician licensing, insurance, and experience with condensate pumps.
Ask about diagnostic fees, estimated labor and parts costs, warranty coverage, and expected timeline.
Request references or reviews, confirmation of compatible replacement parts, and whether the technician provides post-service testing and a written estimate or receipt for transparency.
Recommended online and local suppliers for pumps and accessories
Several reputable sources supply condensate pumps and accessories for DIYers and professionals alike.
National retailers (Home Depot, Lowe’s), HVAC specialists (Fujitsu, Taco Comfort Solutions), and online marketplaces (Amazon, SupplyHouse) offer pumps, tubing, fittings, and float switches.
Local HVAC wholesalers and licensed contractors provide tailored parts, installation tools, and warranty support.
Compare prices, reviews, and return policies before purchasing.
Conclusion
Like a small lighthouse guiding a ship through fog, the condensate pump steadies a home’s hidden tides; when its beam falters—drips, clogs, noise—the vessel risks waterlogged decks. Attention, testing, and timely repair restore the light; replacement becomes the new beacon when fixes dim. With routine care as the keeper’s walk, costly storms can be averted, keeping the house anchored and the quiet hum of safe, dry systems faithfully on watch.