How to Install a Shallow Well Water Pump: Step-by-Step Guide for DIY Success
To install a shallow well water pump, first ensure your well depth is within 25 feet and meets your flow requirements. Confirm the static water level and check local codes. Choose a pump that matches your desired gallons per minute (GPM) and pressure. Gather necessary tools, primer, fittings, electrical supplies, and personal protective equipment (PPE). After isolating power, remove the old pump, assemble and prime the new unit, and install the pressure tank, switch, and check valve. Finally, test for leaks and ensure proper cycling. Follow the detailed steps below for a successful installation and troubleshooting tips.
Quick summary: Is a shallow well pump right for your property?
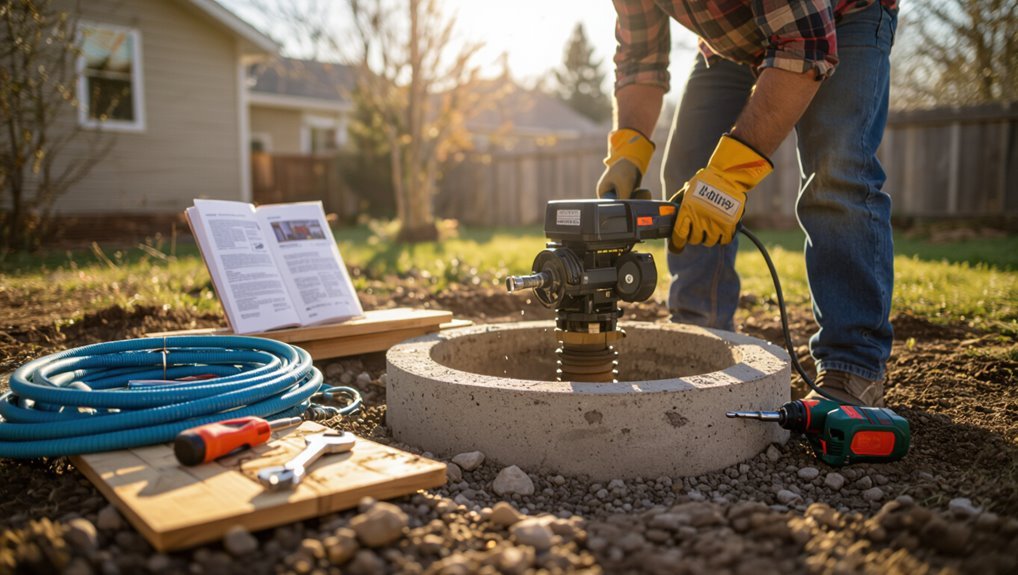
A shallow well pump suits properties with water tables typically within about 25 feet, such as small farms, gardens, and older residential wells.
However, it is not suitable for deep or low-yield aquifers.
It offers simpler installation, lower cost, and easier maintenance compared to deep submersible or jet pump systems.
Property owners should compare well depth, flow needs, and long-term reliability when choosing between shallow, deep, and jet options.
Typical applications and limitations of shallow well pumps
Although shallow well pumps can meet many residential needs, they perform best where groundwater is plentiful and the water table stays within about 25 feet of the surface.
Typical applications include small homes, irrigation, and livestock watering.
Limitations are low suction lift, reduced flow during drought, and sensitivity to sediment.
Consult site data before attempting how to install a shallow well water pump.
Benefits compared to deep well and jet pumps
Choosing the right pump hinges on depth, demand, and budget: shallow well pumps excel for water tables within about 25 feet by offering simpler installation, lower initial cost, and energy-efficient operation for moderate household and irrigation use.
Compared to deep-well submersibles and jet pumps, they require less maintenance, fewer parts, and reduced power, though they lack the lift capacity for deeper sources or high-demand commercial applications.
Tools, materials, and safety gear required
The section lists common shallow well pump types and a concise parts checklist to confirm compatibility and completeness.
It then identifies the essential tools and consumables—wrenches, pipe cutters, sealants, and electrical supplies—needed for a typical installation.
Finally, it outlines required personal protective equipment and basic site safety precautions to reduce risk during the job.
Pump types and parts checklist
Several common shallow-well pump types—jet, centrifugal, and submersible shallow models—serve different site conditions and flow requirements, so identifying the correct type is the first step before gathering parts.
A concise parts checklist includes pump unit, appropriate piping/fittings, pressure switch, check valve, mounting hardware, wiring, and seals.
Consider compatibility, material durability, and warranty.
- Confidence
- Relief
- Assurance
Required tools and consumables
After selecting the appropriate pump type and assembling the parts checklist, attention shifts to the tools, materials, and safety gear required to complete installation.
Essential items include wrench set, pipe cutter, plumber’s tape, PVC primer/solvent, electrical wire, conduit, mounting bolts, check valve, and primer; consumables like sealant and spare fittings guarantee smooth progress.
- Wrenches and cutters
- Pipe, fittings, sealants
- Electrical and mounting supplies
Personal protective equipment and site safety precautions
Wear appropriate personal protective equipment and establish clear site safety measures before beginning any work on a shallow well pump installation.
The installer should use gloves, eye protection, steel-toe boots, hearing protection, and a hard hat as needed.
Secure the area, mark hazards, and have a first-aid kit and emergency contact plan accessible.
- Gloves
- Eye protection
- Hearing protection
Understanding your well: measurements and site assessment
Before installing a shallow well pump, the installer measures well depth and the static water level to determine pump placement and performance margins.
They also check pipe diameter, casing type, and basic water quality to confirm compatibility with the chosen pump and materials.
Finally, they verify local codes, obtain required permits, and call for utility locates to guarantee a compliant, safe installation site.
Measuring well depth and static water level
Measuring the well depth and static water level provides the essential baseline for selecting and installing a shallow well pump.
Technicians use a weighted tape or electric probe lowered to the casing bottom to record total depth, then measure distance from casing top to water surface for static level.
Repeat measurements at different times to account for fluctuations and document results for pump placement and performance calculations.
Checking pipe diameter, casing type, and water quality
Several simple checks determine whether the existing piping and casing will support a new shallow well pump: measure the internal diameter of the drop pipe, identify casing material and condition, and collect basic water-quality data.
Record pipe size to match pump fittings, note corrosion, cracks or loose seals, and sample for bacteria, pH, hardness and sediment.
Use results to select compatible pump and filtration.
Local codes, permits, and utility locates
Although a homeowner can handle many physical checks, compliance with local codes, permits, and utility locates is essential to legally and safely install a shallow well pump.
Contractors, inspectors, or municipal offices should be consulted to determine setback requirements, permit types, inspection schedules, and required documentation.
Utility-locate services must be contacted before digging to prevent hazards and guarantee adherence to regional water and environmental regulations.
Selecting the correct pump and components
Selection of the pump and associated components requires matching pump capacity, delivery pressure, and horsepower to the well’s yield and household demand.
The chosen pump must also be compatible with the pressure tank volume and settings to prevent short cycling.
Appropriate piping, fittings, a reliable check valve, and a correctly rated pressure switch complete the system and guarantee safe, efficient operation.
Shallow well pump capacity, pressure, and horsepower explained
Choosing the correct shallow well pump requires matching capacity, pressure, and horsepower to the household demand and well characteristics.
Capacity (gallons per minute) determines flow rate, pressure (PSI) controls delivery force and system cycling, and horsepower must be sufficient to overcome static lift and friction losses without wasting energy.
Select a pump whose GPM meets peak needs at required PSI, balancing motor size for efficiency and reliable operation.
Matching pump to household demand and pressure tank size
Matching a shallow well pump to household demand and the pressure tank requires evaluating peak flow rates, required pressure range, and the pump’s performance curve so components operate efficiently and minimize cycling. The installer selects pump size, tank bladder volume, and pressure settings to match simultaneous fixtures, run time limits, and recovery needs, reducing short cycling and ensuring steady delivery.
| Parameter | Purpose |
|---|---|
| Peak flow (GPM) | Sizing pump |
| Pressure range (PSI) | Set switch/tank |
| Tank volume (gallons) | Reduce cycles |
| Pump curve | Match head/GPM |
Choosing compatible piping, fittings, check valves, and pressure switch
Several key components—piping, fittings, check valves, and the pressure switch—must be specified to work together under the pump’s flow and pressure conditions.
The installer selects pipe diameter to minimize friction loss, matches fittings and unions to material (PVC, copper, or steel), installs a reliable check valve to prevent backflow, and sets a pressure switch with correct cut-in/cut-out settings aligned to the tank and pump.
Pre-installation preparation
Before any work begins, the installer confirms the site’s electrical supply and circuit requirements to guarantee the pump will have adequate power and proper grounding.
They then plan and prepare the mounting location and pressure tank placement for safe, level support and convenient access.
Finally, the existing system is tested and any old equipment is troubleshooted and documented to avoid repeat failures after installation.
Power supply and electrical requirements
A clear assessment of the pump’s electrical needs is essential: confirm voltage, phase (single- or three-phase), amperage, and motor starting current to size wiring, breakers, and any required motor protection correctly.
Verify circuit capacity, GFCI requirements, and conduit type.
Specify wire gauge and breaker trip characteristics, include voltage drop calculation for run length, and plan for a bonded, weatherproof disconnect and proper grounding.
Preparing mounting location and pressure tank placement
The mounting area and pressure tank site should be selected for firm, level support, easy access for maintenance, and protection from flooding and freezing.
Confirm adequate clearance for valves, gauges, and piping; allow space for tank removal.
Place tank near pump to minimize suction losses and heat exposure.
Install on concrete pad or treated mounting board, anchoring to prevent vibration and shifting.
Testing existing system and troubleshooting old equipment
Inspects the existing system thoroughly to establish baseline performance and identify defective components that could affect a new pump installation.
Measures static and running pressure, flow rate, and voltage.
Checks for leaks, corroded valves, a failing pressure switch, clogged filters, and damaged wiring.
Documents findings, replaces clearly faulty parts, and determines whether pump location or piping require modification before installing the new shallow well pump.
Step-by-step installation guide
The installation proceeds in a clear sequence of tasks to guarantee safety and proper function.
First, power is cut and the water supply isolated before removing the old pump and disconnecting plumbing.
Next, the new pump, foot/check valve, and suction piping are assembled, the unit is primed, then secured to the wellhead with piping properly fastened.
Step 1 Turn off power and isolate water supply
Before any work begins, power to the pump and its control circuitry must be shut off and the water source isolated to prevent electrical shock and unintended flow.
The technician locates the circuit breaker, turns it off, and tags it. Next, the main water valve or well isolation valve is closed and pressure is relieved at a nearby faucet.
Lockout/tagout procedures are applied.
Step 2 Remove old pump and disconnect plumbing
Disconnecting and removing the old pump begins with a methodical sequence: drain remaining pressure, label electrical and plumbing connections, and loosen fittings to prevent damage to piping or the replacement unit.
Then disconnect power at the breaker, detach wiring after confirming no voltage, shut and cap supply lines, unthread mounting bolts, lift the pump clear, and inspect plumbing and wiring for corrosion or needed repairs before proceeding.
Step 3 Assemble pump, foot valve/check valve, and suction piping
Begin by organizing all components—pump, foot valve/check valve, suction piping, clamps, and sealant—on a clean, level workspace to guarantee compatibility and identify any defects.
Attach the foot valve to the suction pipe with appropriate thread sealant, orienting the valve correctly. Securely fasten pipe sections with clamps or couplings, confirm tight, leak-free connections, and mount the pump to its base per manufacturer specifications.
Step 4 Prime the pump (priming procedure)
With the assembled pump, foot valve, and suction piping secured and checked for leaks, attention turns to priming the pump to remove air and establish suction.
Fill the pump casing and suction line with clean water through the priming port.
Close the port, open discharge briefly to vent trapped air, then run the motor briefly.
Repeat filling and venting until steady flow and pressure stabilize.
Step 5 Install pump to wellhead and secure piping
Position the pump assembly on the wellhead flange, aligning the mounting holes and ensuring the base sits level and stable. Secure with appropriate bolts and washers, torqueing evenly to manufacturer specs.
Connect suction and discharge piping using primer/sealant on threads or approved gaskets. Support piping with clamps to prevent strain.
Inspect joints for alignment, tighten fittings, and verify there are no visible leaks before proceeding.
Step 6 Connect pressure tank, pressure switch, and relief valve
Install the pressure tank, pressure switch, and relief valve following the pump manufacturer’s layout to guarantee safe, efficient operation and easy maintenance.
Position the tank on a level pad, connect supply and pump discharge with appropriate fittings, and install the pressure switch per specified cut-in/cut-out settings.
Fit a pressure relief valve near the tank, using threaded or sweat connections and approved sealant, then test for leaks.
Step 7 Complete electrical wiring and grounding (basic wiring checklist)
Begin by verifying that power is fully disconnected at the main breaker before working on any electrical connections.
The installer routes correct-gauge cable from panel to pump, secures conduit, and connects hot, neutral, and ground to the pump motor per wiring diagram.
Install a dedicated circuit, proper overcurrent protection, and a bonding jumper to grounding rod or system.
Follow local codes and label circuits.
Step 8 Start-up, bleed air, and initial adjustments
With power restored and all electrical and plumbing connections verified, the system is energized and the initial start-up sequence is performed to purge air, check flow, and set operating controls.
The operator opens inlet and outlet valves slowly, cycles pump briefly to expel trapped air, monitors pressure gauge and flow, adjusts pressure switch and tank precharge as needed, then stabilizes pump operation.
Step 9 Test run: pressure cycling and leak check
The operator performs a controlled test run to verify pressure cycling and to locate any leaks: they cycle the pump through several on/off sequences while observing the pressure gauge, checking that cut-in and cut-out values match the settings, and watching all fittings, joints, and the tank for signs of leakage or abnormal pressure behavior.
Any leak or miscycle prompts immediate shutdown, tightening, retesting, and adjustment until stable.
Common installation problems and how to fix them
Common installation problems include failure to prime or draw water, low flow or pressure, and rapid cycling of the pressure switch.
Air in the lines and noisy pump operation often indicate leaks, improper priming, or suction issues.
Electrical faults such as tripped breakers or wiring problems should be checked separately and corrected before further troubleshooting.
Pump won’t prime or draw water
Troubleshooting a shallow well pump that fails to prime or draw water requires systematic checks of air leaks, blockages, and incorrect installation, since these issues are the most frequent causes of loss of suction.
Inspect all pipe joints, fittings, and the foot valve for leaks or damage. Remove debris from strainer and suction line.
Verify correct priming procedure, and replace faulty check valves or worn impellers.
Low flow or insufficient pressure
Address low flow or weak pressure by methodically checking installation errors that most often restrict performance: undersized piping, excessive bends, clogged filters or strainers, improper pump sizing, and faulty or clogged foot valves or pressure tanks.
Inspect pipe diameter and routing, clear or replace blockages, verify pump capacity versus demand, test foot valve operation, and confirm tank integrity and precharge.
Correct deficits and retest system.
Rapid cycling of pressure switch
Investigate rapid cycling of the pressure switch promptly, as it signals short, repeated pump starts that strain the motor and reduce system lifespan.
Check for a leaking foot valve, pressure tank bladder failure, incorrect precharge, or a stuck switch contact.
Repair leaks, replace a failed bladder or foot valve, set tank precharge 2 psi below cut-in, and adjust or replace the pressure switch.
Air in the lines and noisy pump operation
Rapid cycling can also accompany or mask problems caused by air in the lines.
So after confirming pressure-switch issues are resolved, a focused check for entrained air and sources of noisy pump operation is warranted.
Inspect intake fittings, suction line joints, and foot valve integrity for leaks or vapor pockets.
Bleed trapped air, secure loose mounts, replace worn bearings or impellers, and verify proper pump priming.
Electrical issues and tripped breakers
Check the electrical system first when a shallow well pump repeatedly trips breakers or refuses to run, since wiring faults and improper protection are common culprits.
Inspect wiring for loose connections, corrosion, or undersized conductors.
Verify correct breaker size, proper grounding, and functional motor overloads.
Test capacitor and motor windings for faults.
Correct deficiencies or consult a licensed electrician to guarantee safe, code-compliant repairs.
Maintenance schedule and troubleshooting checklist
A clear maintenance schedule helps guarantee consistent performance and extends the life of a shallow well pump.
Routine tasks and intervals, seasonal checks with winterization steps, and a concise troubleshooting checklist should guide owners through common issues.
The discussion will also outline criteria for repairing versus replacing the pump to inform timely decisions.
Routine maintenance tasks and intervals
Establishing a regular maintenance schedule prevents unexpected failures and extends the pump’s lifespan by specifying tasks, intervals, and indicators of trouble.
Inspect fittings and pressure switch monthly; clean filters quarterly; test run and check amperage biannually.
Promptly note leaks, noise, or reduced flow. Maintain a log to track actions and trends.
- Monthly checks to avoid surprises
- Quarterly cleaning to restore confidence
- Biannual testing to guarantee reliability
Seasonal checks and winterization tips
Several seasonal tasks prepare a shallow well pump for temperature extremes and changing demand: inspect exposed piping and insulation in fall, verify pressure tank precharge and pressure switch operation in spring, and drain or protect components before hard freezes.
Additionally, test system pressure and flow after seasonal changes, replace brittle hoses, check for leaks, lubricate moving parts as recommended, and record findings for troubleshooting.
When to repair vs replace the pump
After completing seasonal checks and noting any recurring issues, the homeowner must decide whether individual repairs will restore reliable operation or if pump replacement is warranted.
Evaluate age, frequency of failures, repair cost versus replacement, sudden performance loss, leaking seals, noisy bearings, and motor overheating.
Follow a troubleshooting checklist: confirm power, inspect wiring, test pressure switch and tank, measure flow; replace if multiple critical faults or high cumulative repair cost.
Cost estimates and time required
Typical material and labor costs for a shallow well pump installation are summarized to give readers a realistic budget range.
Cost ranges vary by pump type, piping, electrical work, and whether a professional is hired versus a DIY approach.
Estimated DIY time is then broken out by experience level to indicate how long homeowners can expect the project to take.
Typical materials and labor cost ranges
Budgeting for a shallow well pump installation hinges on itemized costs for materials and labor plus time estimates for each task.
Typical materials:
- pump package $150–$700
- pipe and fittings $50–$300
- electrical components $75–$250
- mounting and seal supplies $20–$100.
Labor rates vary $40–$120/hour; total contractor costs commonly range $300–$1,200 depending on complexity and local rates.
Estimated DIY time by experience level
When evaluating time for a DIY shallow well pump installation, experience level strongly influences task duration: a novice can expect 6–12 hours spread over a weekend, an intermediate DIYer typically completes the job in 3–6 hours, and a skilled homeowner or tradesperson often finishes in 1–3 hours.
Variables include site access, plumbing complexity, needed tools, troubleshooting, and permit or inspection waits.
Safety, compliance, and when to call a professional
The article addresses legal and environmental requirements such as backflow prevention and measures to avoid aquifer contamination.
It lists warning signs—persistent low pressure, discolored or foul-smelling water, or system leaks—that warrant licensed intervention.
Guidance is provided on locating and vetting qualified well contractors, including checking licenses, references, and insurance.
Legal and environmental considerations (backflow, contamination)
Several jurisdictions require permits and adherence to plumbing codes before installing a shallow well pump, and failing to comply can create legal liability and public-health risks.
Installers must prevent backflow with approved devices, follow setback and discharge rules to avoid contamination, test water quality periodically, and dispose of chemicals properly.
Documentation and local authority notification guarantee compliance and protect shared groundwater resources.
Warning signs that require licensed help
Few situations demand immediate involvement of a licensed professional: evidence of sewage-tainted or discolored water, persistent low pressure or sputtering pumps, unusual noises or vibrations from equipment, repeated cycling or tripping of electrical breakers, visible corrosion or damaged wiring, and regulatory questions about permits or required backflow devices.
Other urgent indicators include sudden loss of supply, strong chemical or rotten-egg odors, flooding around the well, or suspected contamination.
Finding and vetting a qualified well contractor
Many homeowners will reach a point where a licensed well contractor is the safest, most compliant option for repairs, installations, or complex diagnostics.
A vetted professional guarantees permits, code compliance, and reliable diagnostics.
Verify licenses, insurance, references, written estimates, and warranty terms.
Prioritize safety over savings to avoid contamination or costly failures.
- Fear of contamination
- Relief from uncertainty
- Confidence in compliance
Conclusion
The DIYer pauses at the edge of the freshly installed shallow well, tools laid down like punctuation. Pipes sit ready, wires tucked where they belong, the pump hums its first tentative note—and for a moment the property holds its breath. If measurements were right, permits secured, and maintenance understood, water will follow. If not, subtle failures wait in the quiet plumbing. The choice to proceed or call a pro may be one quiet turn away.