How to Remove a Shut-Off Valve From PEX Pipe: Step-By-Step Guide for DIY Plumbers
To remove a shut-off valve from PEX pipe, start by identifying the connection type—whether it’s crimp, clamp, push-fit, threaded, or sweat. Next, shut off the water supply and relieve any pressure in the system. Use a PEX cutter to trim any damaged pipe, and employ a disconnect tool for push-fit connections, or crimp/clamp tools to remove the rings for crimp or clamp connections. After removing the valve, inspect and prepare the tubing end for a new connection. Finally, install a compatible replacement valve and pressure-test for leaks. For detailed step-by-step procedures, troubleshooting tips, and safety precautions, continue reading.
Why and When You Might Need to Remove a Shut-Off Valve from PEX Pipe
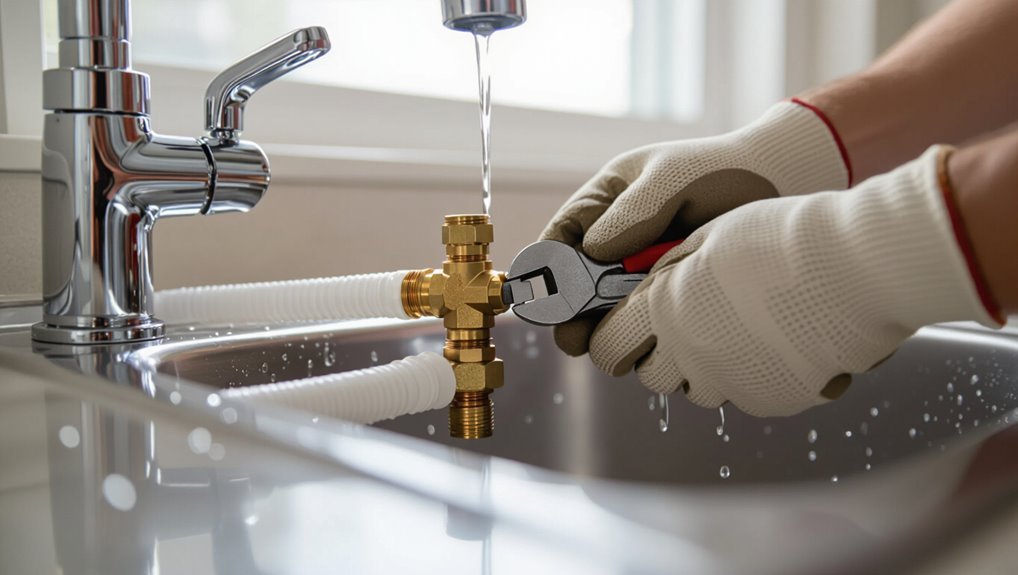
Homeowners may remove a shut-off valve on PEX for common reasons such as replacement, upgrading fixtures, repairing leaks, or during remodeling.
Visible signs that a valve needs attention include persistent dripping, stiffness or difficulty operating, corrosion at fittings, or reduced water flow.
Simple valve swaps can be handled as a DIY by those comfortable with PEX tools, but complex leaks, damaged tubing, or uncertain connections warrant a professional plumber.
Common reasons for removal (replacement, upgrade, leak repair, remodeling)
Removing a shut-off valve from PEX pipe is often driven by practical needs: replacing a worn or malfunctioning valve, upgrading to a more reliable or higher-capacity model, repairing a leak at the connection, or accommodating plumbing changes during remodeling.
Homeowners and tradespeople researching how to remove shut off valve from pex pipe typically do so to restore flow control, prevent water damage, or modernize fixtures.
Signs a valve needs removal or replacement
Detecting when a shut-off valve on PEX requires removal starts with visible and functional indicators: persistent leaks at the connection, corrosion or mineral buildup that impairs sealing, difficulty operating the handle or a valve that sticks, and reduced or inconsistent flow suggesting internal failure.
Additional signs include wetness or staining around fittings, rattling or vibration during use, and age-related deterioration compromising reliability.
When to call a professional vs. DIY
Evaluate the scope and risk of the job before deciding whether to tackle valve removal or call a professional.
Complex situations—corroded fittings, hidden leaks, multi-line manifolds, or unfamiliar tools—favor licensed plumbers.
Homeowners comfortable with basic PEX tools and minor repairs can proceed carefully.
Prioritize water shutoff, leak control, and code compliance; hire a pro if uncertainty, potential damage, or warranty and permit issues arise.
Quick Overview: Can You Remove a Shut-Off Valve from PEX Yourself?
Removing a shut-off valve from PEX is generally a doable DIY task for someone with basic plumbing skills and the right tools.
Before starting, the individual should confirm local code requirements and take precautions for water isolation and pressure relief.
Safety considerations include shutting off main supply, draining the line, and using proper fittings to maintain a code-compliant, leak-free connection.
Direct answer and required skill level
Most homeowners with basic plumbing tools and steady hands can remove a PEX shut-off valve, but the task’s difficulty depends on the connection type and the installer’s experience.
Compression or threaded fittings are simpler; crimp, clamp, or expansion systems require specific tools and technique.
Moderate DIY skill, attention to detail, and patience suffice for most removals; complex or unfamiliar fittings may warrant professional help.
Safety and code considerations to know before starting
Before beginning work, the homeowner should confirm local plumbing codes and safety practices because regulations can dictate permitted connection types, required shutoffs, and whether a licensed pro must perform the alteration.
Verify permit needs, acceptable PEX fittings, and backflow prevention rules.
Use proper PPE, shut off and depressurize the supply, and follow manufacturer instructions; when unsure, hire a licensed plumber to avoid violations or hazards.
Tools and Materials Required
The section lists the essential tools—such as PEX cutters, adjustable wrenches, and a deburring tool—needed to remove a shut-off valve safely.
It also notes optional items like a tubing reamer, crimp or clamp tools, and a small torch that can simplify the job.
Finally, compatible replacement parts and valve options for PEX, including push-to-connect and compression-style shut-offs, are summarized for quick selection.
Essential tools list
A compact set of hand and cutting tools, along with appropriate fittings and safety gear, is necessary to remove a shut-off valve from PEX pipe safely and efficiently.
Essential items include a PEX cutter, adjustable wrench, replacement crimp or clamp fittings, and safety goggles. Proper tools minimize damage and guarantee a secure reconnection.
- PEX tubing cutter
- Adjustable wrench
- Crimp/clamp tool and fittings
- Safety goggles
Optional tools that make the job easier
Consider adding a few optional tools to streamline the removal and reconnection process—examples include a PEX deburring tool for cleaner cuts, a tubing support/expander for certain PEX systems, a small basin wrench for tight spaces, and a flashlight or work light to improve visibility.
These ease tasks, reduce damage, and speed work.
- PEX deburring tool
- Tubing support/expander
- Small basin wrench
- Flashlight/work light
Parts and replacement valve options compatible with PEX
Compatibility hinges on valve type, PEX connection method, and local plumbing codes, so selecting parts that match the pipe size and fitting style is essential.
Recommended replacements and parts include:
- SharkBite push-to-connect ball valve (PEX compatible)
- Crimp-style brass shutoff with PEX crimp ring
- Expansion-style valve with compatible expansion fittings
- Compression-style valve with PEX-compatible compression sleeve and nut
Identifying the Type of Valve and Connection
Common shut-off valves for PEX include crimp, clamp (cinch), push-fit, threaded, and sweat types.
Visual cues—such as crimp rings, stainless clamps, slip-fit bodies, male/female threads, or soldered joints—allow quick identification of the connection method.
The removal approach depends on that connection type, with crimped or clamped fittings typically requiring ring removal.
Push-fit often pulls the valve off with a disconnect tool, and threaded or sweat joints needing unthreading or desoldering.
Common shut-off valve types used with PEX (crimp, clamp, push-fit, threaded, sweat)
When identifying a shut-off valve on PEX, recognize that several distinct connection methods—crimp, clamp (cinch), push-fit, threaded, and sweat—each require different removal tools and techniques.
Crimp and clamp use rings; push-fit relies on internal retention; threaded valves screw onto fittings; sweat valves are soldered to copper adapters.
Knowing the type directs the correct cutter, ring tool, wrench, or heat method.
How to identify the connection method visually
Inspect the valve and its connection points closely to determine the attachment method.
Look for metal crimp rings or copper sleeves, stainless steel cinch clamps, visible O‑rings and a push-fit collar, threaded fittings with visible threads or hex flats, or soldered joints with smooth brass/fitting discoloration.
Note pipe alignment, tool access, and any markings indicating manufacturer or size for confirmation.
How connection type affects removal method
Recognize that the valve’s removal technique depends entirely on the connection type: crimped or cinched fittings require ring or clamp removal.
Push‑fit valves release by collar disengagement.
Threaded valves are unthreaded with appropriate wrenches, and soldered or brazed joints demand cutting and possible re‑soldering or replacement.
The technician assesses fittings, selects tools—crimp ring pliers, clamp cutters, pick for push‑fit collars, wrenches, or tubing cutter—and proceeds accordingly.
Preparation Steps Before Removal
Before beginning valve removal, the main water supply should be shut off and the line drained and depressurized to prevent leaks.
The work area must be protected and containers or towels prepared to collect any residual water.
Finally, the pipe should be inspected for damage and sufficient clearance secured for the required tools.
Shutting off the main water supply
Locate and close the building’s main water shut-off to stop flow to the PEX line before any valve removal begins.
Confirm the shut-off position visually and note its type and access location. Notify occupants of imminent work.
If the main shut-off is stiff or corroded, use appropriate tools or call a professional.
Verify fixtures remain unaffected before proceeding to removal.
Draining and depressurizing the line
Drain and depressurize the PEX line by opening nearby faucets and any downstream shut-offs to let trapped water escape; collect water with a bucket or hose to a drain and leave fixtures open until flow stops.
Confirm pressure drop by gently turning a downstream valve; listen for hissing.
Once flow ceases, close the opened faucets and verify the main remains off before proceeding with valve removal.
Protecting the work area and collecting water
Clear the immediate area and lay down waterproof protection to contain any residual water and protect floors and cabinetry.
Place towels and a shallow tray beneath the valve and pipe joint to catch drips. Set a bucket nearby and have absorbent rags and a wet/dry vacuum ready.
Remove nearby items and guarantee adequate lighting and ventilation for safe, unobstructed access.
Verifying pipe condition and clearance for tools
Before any tool is brought to bear, inspect the PEX pipe and surrounding fittings for visible damage, distortion, or signs of previous repair that could affect removal.
Confirm adequate clearance for wrenches, cutters, and crimp tools; check for nearby insulation, framing, or electrical wiring.
Note pipe orientation and measure reachable working space to guarantee safe, unobstructed access during valve removal.
Step-by-Step Removal Procedures by Connection Type
The following section outlines concise, step-by-step procedures for removing shut-off valves from PEX based on common connection types.
It covers push-fit (SharkBite) fittings, crimped or cinch-clamped joints, threaded valves with PEX adapters, and sweat (soldered) valves attached to PEX adapters.
Each set of steps emphasizes required tools, safe isolation of water, and careful removal to protect the PEX tubing for repair or replacement.
Removing a push-fit (e.g., SharkBite) valve
The section outlines the specific tools and sequential steps required to remove push-fit valves from PEX, including quick-release tools, wrenches, and pipe cutters.
It then explains how to assess whether the push-fit fitting can be reused—checking for damage, O-ring condition, and manufacturer guidance—or whether it must be discarded and replaced.
Practical tips for preserving the PEX end and ensuring a proper new connection conclude the discussion.
Tools needed and step sequence
Gather the correct tools and follow a clear sequence to remove a push-fit (SharkBite) shut-off valve from PEX without damaging the pipe.
Required tools: adjustable wrench, push-fit disconnect clip or tool, cutter, rag, bucket, marker.
Sequence:
- Shut off water.
- Relieve pressure.
- Place bucket.
- Mark pipe.
- Use disconnect tool to depress collet while pulling valve straight.
- Inspect tubing.
- Clean cut.
- Cap or install replacement.
How to reuse vs. discard push-fit fittings
After the valve is removed and the tubing inspected as described above, the installer must decide whether the push-fit fitting can be reused or should be discarded.
Reuse is acceptable if the fitting shows no cracks, the O-ring is intact and lubricated, and insertion depth markings are preserved.
Discard any fitting with damaged teeth, deformed body, corrosion, or unknown service history; replace to guarantee a reliable seal.
Removing a crimped or cinch-clamped valve
The procedure for removing a crimped or cinch-clamped valve begins with safely cutting and removing the metal ring without nicking the PEX tubing.
After the ring is removed, the valve can be separated from the pipe and the tubing inspected for damage or deformation.
If needed, the installer will replace the valve using a new crimp ring or a coupling fitting to restore a secure, code-compliant connection.
How to cut and remove the crimp ring safely
Carefully cutting and removing a crimp ring from PEX requires steady hands, the right tools, and attention to avoid damaging the pipe or valve.
Clamp the valve body, score the ring with a rotary cutter or ring-shear tool, then gently pry the ring open with narrow pliers.
Remove metal fragments, inspect the PEX for nicks, and deburr the edge before proceeding.
Replacing with a new crimp or transition fitting
Begin by selecting a replacement crimp or connection fitting that matches the pipe size and material.
Remove burrs, slide the new fitting fully into the PEX tube, and position a new crimp ring or cinch clamp 1/8–1/4 inch from the pipe end.
Crimp or cinch using the proper tool, verify secure engagement with a go/no-go gauge, then pressure test for leaks before restoring service.
Removing a threaded valve connected to a PEX adapter
When removing a threaded shut-off valve from a PEX adapter, the technician secures the adapter with a wrench while turning the valve counterclockwise to avoid stressing the PEX connection.
After loosening and removing the valve, the technician inspects the adapter threads for damage and removes any old sealant or tape.
If reinstallation is planned, fresh thread sealant or PTFE tape is applied to the adapter before threading on the replacement valve.
How to hold the adapter and unscrew the valve
To start removing a threaded valve from a PEX adapter, secure the adapter with one wrench while using a second wrench to turn the valve counterclockwise; this prevents twisting the PEX fitting and reduces stress on the connection.
Hold the adapter steady at its flats, apply firm steady torque to the valve, and back off slowly.
If resistance is high, pause and reassess tool fit.
Inspecting and replacing thread sealant or tape
After the valve is removed, inspect the male threads on the adapter and the valve stem for old sealant or tape, damage, and contamination.
Remove remnants with a wire brush and solvent, then dry thoroughly.
If threads are intact, apply fresh PTFE tape clockwise or a compatible pipe thread compound evenly.
Reinstall valve, hand-tighten, then torque per manufacturer specs and test for leaks.
Removing a sweat (soldered) valve attached to a PEX adapter
The procedure for removing a sweat (soldered) valve from a PEX adapter emphasizes safe torch use and proven desoldering techniques to free the joint without damaging the PEX or nearby components.
It also outlines criteria for when to replace the adapter with a PEX-specific fitting rather than reusing a soldered connection.
Safety precautions and tool choices are highlighted to minimize heat transfer and guarantee a dependable shift to PEX.
Using a torch safely and desoldering techniques
Begin by isolating the water supply and verifying the line is fully drained before applying heat; this prevents steam or pressurized water from causing injury or damaging fittings.
Use a small, controlled torch flame, heat the joint evenly until solder melts, and pry the valve gently with pliers.
Protect nearby PEX and components with a wet cloth or heat shield.
Ventilate and cool before handling.
When to switch adapters to PEX-specific fittings
Once the sweat joint has been heated, solder removed, and the valve eased free, attention turns to whether the existing adapter should be replaced with a PEX-specific fitting.
The adapter should be switched when the brass shows corrosion, threads or barb damage, or if the original adapter was designed for rigid copper only.
Use PEX-rated crimp, clamp, or push-fit adapters sized to the tubing and pressure rating.
Repair and Replacement Options After Removal
After valve removal, the next steps cover installing replacement shut-off valves on PEX using push-fit, crimp, or clamp connections.
The discussion also addresses when to use connecting fittings to join dissimilar materials or sizes.
Guidance is provided on matching valve size, flow capacity, and orientation to the existing system.
Installing a new shut-off valve on PEX (push-fit, crimp, clamp)
Install a new shut-off valve by matching the replacement type to the PEX connection method—push-fit, crimp, or clamp—and ensuring proper sizing and orientation for flow.
For push-fit, seat pipe fully and test pull-out.
For crimp or clamp, slide ring, position valve, then compress with the correct tool and gauge.
Check for leaks, restore supply, and confirm smooth operation.
Using transitional fittings when necessary
When a shut-off valve is removed and the existing PEX connection does not match the replacement valve or remaining piping, a connecting fitting bridges differing materials, sizes, or connection types to restore a reliable joint.
Connecting fittings include PEX-to-brass, PEX-to-copper, and threaded adapters.
Select corrosion-resistant materials, matched pressure ratings, and compatible connection methods.
Proper installation prevents leaks and preserves flow integrity.
How to match valve size, flow, and orientation
Choosing a replacement valve requires matching the pipe diameter, expected flow rate, and handle orientation to guarantee proper function and clearance; specifying the correct nominal size (e.g., 1/2″ or 3/4″), verifying Cv or flow capacity against system demand, and confirming stem and outlet alignment prevents turbulence, pressure drop, and installation interference.
Additionally, select compatible connection type (crimp, cinch, push-fit), material, and handle swing for access.
Testing and Verifying the New Connection
Next, the new connection must be tested and verified to guarantee a watertight seal.
A pressure test should be conducted while visually inspecting joints and employing leak-detection methods such as soapy water or electronic detectors.
Once tests show no leaks, the line can be re-pressurized and final checks performed before restoring normal use.
Pressure testing for leaks
Begin by isolating the repaired section and connecting a pressure gauge and test pump to the system to confirm a leak-free joint.
Pressurize to the recommended PSI, monitor gauge stability for the prescribed dwell time, and note any drop. Record readings and duration.
If pressure holds, slowly return the system to service; if it falls, depressurize and rework fittings before retesting.
Inspecting joints and using leak-detection methods
Inspect the repaired connection visually and by touch to confirm proper alignment, secure crimps or clamps, and the absence of visible gaps or stray material.
Then employ leak-detection methods—such as applying soapy water to joints, using an electronic leak detector, or performing a pressure decay test—to verify that no slow leaks remain before restoring the system to full service.
Check fittings under varied conditions and document any anomalies.
Re-pressurizing procedure and final checks
Restore system pressure gradually and monitor the new connection for stability before returning the line to full service.
Open the main valve slowly, watching for pressure spikes and immediate leaks.
Check fittings, crimps, and solder joints under light and with leak-detection spray.
Operate the replaced shut-off several times.
Document observations, retighten if necessary, and confirm normal pressure reading and dry fittings before declaring the repair complete.
Common Problems and How to Fix Them
Common problems include stuck fittings that require careful release techniques, damaged PEX ends that may need a splice or section replacement, and leaks that appear after installation.
The text will outline safe methods to free seized fittings, options for repairing or replacing compromised pipe ends, and a step-by-step approach to locating and fixing post-installation leaks.
Practical tips and precautions for each scenario will be provided to minimize further damage.
Difficulty removing stuck fittings and safe solutions
Stuck shut-off valves on PEX systems frequently result from mineral buildup, compressed tubing, or corroded fittings. Addressing them safely requires diagnosing the underlying cause before applying force.
Use gentle heat, penetrating lubricant safe for plumbing, and correct wrenches to loosen fittings. Stabilize PEX to avoid kinks, work slowly to prevent damage, and replace seized hardware rather than forcing removal.
Damaged PEX ends’ repair options (splice, replace section)
When a PEX tubing end is nicked, crushed, or deformed, repair options include splicing the damaged section with a coupling or cutting out and replacing the affected length; the chosen method depends on the extent of damage, access, and the original connection type.
For short damage, use a crimp or clamp coupling; for extensive harm, cut back to sound pipe and install a new length with appropriate fittings, ensuring clean, square cuts.
Leaks after installation and troubleshooting steps
Inspect the system promptly if leaks appear after installing a shut-off valve on PEX: most failures stem from improper fittings, loose crimps or clamps, damaged tubing ends, or debris that prevents a proper seal.
Verify crimp/clamp tension, re-seat and clean tubing ends, replace faulty fittings or O-rings, and cut back to fresh PEX if nicked.
Pressure-test after repairs and monitor for recurrence.
Safety, Code, and Best-Practice Tips
The discussion shifts to code, safety, and maintenance considerations that govern shut-off valve work on PEX.
Readers should be reminded of local plumbing code requirements, safe cutting and torch protocols, and precautions for managing residual water and pressure.
Guidance on regular inspections, lubrication, and timely replacement helps prevent future valve failures.
Plumbing code considerations for shut-off valves on PEX
Why must shut-off valve placement and type on PEX systems conform to plumbing code? Local codes mandate accessible locations, approved valve materials, and compatible connection methods to guarantee leak prevention, system integrity, and serviceability.
Compliance prevents voided warranties and failed inspections.
Installers should verify jurisdictional requirements, use certified fittings, and document installations to meet permit and inspection protocols.
Safety precautions for cutting, torch use, and handling water
Before cutting or applying heat to PEX plumbing, personnel should verify that water is shut off, lines are depressurized, and the work area is clear of combustibles and obstructions.
Appropriate personal protective equipment (gloves, eye protection, and flame-resistant clothing) must be used, and a fire extinguisher rated for class B/C hazards should be immediately available when any torch or soldering tool is present.
Personnel should isolate circuits, use proper cutters, vent residual water, test joints for leaks, and follow local codes for open-flame work.
Long-term maintenance tips to prevent future valve issues
Maintain valves proactively to extend service life and reduce emergency repairs: schedule regular visual inspections for corrosion, mineral buildup, and leaks; exercise movable components quarterly to prevent seizing; confirm packing nuts and compression fittings remain tight without over‑torquing; replace worn washers, O‑rings, or cartridge elements at first sign of deterioration; and keep accurate records of service dates and any parts swapped to guarantee compliance with local plumbing codes and streamline future troubleshooting.
- Replace degraded seals promptly.
- Flush lines to remove mineral deposits.
- Lubricate stems with approved compounds.
- Verify valve operation during seasonal checks.
Cost, Time Estimates, and When Replacement Is Preferable
Typical costs vary from a small DIY outlay for fittings and tools to several hundred dollars for a licensed plumber’s time and parts.
Time estimates range from 15–30 minutes for a simple compression removal to one to three hours for cutting, re-crimping, or replacing multiple fittings.
Full replacement of the valve and adjacent fittings is recommended when there is corrosion, damaged PEX, persistent leaks, or when the existing connection style is incompatible with available repair parts.
Typical cost range for DIY vs. professional service
Costs for removing a shut-off valve from PEX pipe generally fall into two clear bands: a DIY effort typically costs $10–$50 for tools and replacement parts, while hiring a plumber usually ranges from $100–$300 for a straightforward valve removal and reinstall. Choices reflect skill, risk tolerance, and urgency.
| Option | Cost | Feeling |
|---|---|---|
| DIY | $10–$50 | Empowered |
| Pro | $100–$300 | Relieved |
| Replace | $50–$200 | Reassured |
Time estimates by procedure type
Efficiency matters when choosing a method for removing a shut-off valve from PEX pipe.
Quick tasks like cutting and replacing a crimped valve typically take 15–30 minutes for a competent DIYer.
Decompression and deburring add 10–20 minutes.
Removing a stuck compression or soldered valve can take 30–60+ minutes and may require additional tools.
Allow extra time for inspection and cleanup.
Scenarios where full replacement of valve and fittings is recommended
Consider full replacement when the valve, fittings, or surrounding PEX show signs of corrosion, visible damage, persistent leaks, or improper previous repairs that compromise reliability; in such cases replacing the entire assembly often prevents recurring failures, limits future labor on access or rework, and can be more cost-effective than piecemeal fixes once parts, sealants, and labor are factored in.
Replacement is recommended for age-related deterioration, cross-threading, incompatible materials, failed crimp rings, or when access costs make staged repairs impractical.
Typical homeowner cost ranges: $75–$250 for parts and DIY time of 30–90 minutes; professional service often runs $150–$400 including labor.
Quick Reference Checklists
A concise set of checklists helps guarantee each stage of valve removal proceeds safely and efficiently.
Included are a pre-removal checklist to verify tools, shutoffs, and materials; step-by-step removal procedures for common PEX connections; and a post-installation testing checklist to confirm leak-free operation.
These quick references serve as practical reminders for both DIYers and professionals.
Pre-removal checklist
Begin by confirming power, water, and pressure are isolated: shut the main water supply, open downstream faucets to relieve pressure, and switch off any nearby electrical sources if working near powered devices.
Then verify access, gather tools, and prepare containment for residual water.
Follow this quick checklist:
- Protective gear ready
- Correct replacement valve on hand
- Appropriate PEX tools available
- Bucket and towels placed
Step-by-step removal checklist for common connection types
Refer to the following concise checklists tailored to common PEX-to-valve connections—crimp, clamp (cinch), and push-fit—so each removal step is clear, sequential, and tool-specific.
1. Crimp:
shut water,
cut pipe,
remove crimp ring with cutter,
slide off valve.
2. Clamp:
shut water,
cut,
unfasten cinch with pliers or cutter,
slide off valve.
3. Push-fit:
shut water,
depress release collar with tool,
pull valve free.
4. Inspect cut,
deburr,
cap or prepare for new fitting.
Post-installation testing checklist
With the valve removed and pipe ends prepared, attention shifts to verifying the integrity of the restoration or new installation through a focused post-installation testing checklist.
The technician follows a concise sequence to confirm sealing, pressure, and function before finishing.
- Visually inspect joints and fittings for correct seating.
- Pressure-test system per code.
- Check for leaks under load.
- Confirm valve operation and isolation.
Conclusion
Removal of a shut-off valve from PEX can be routine yet revealing: simple pliers meet hidden corrosion, quick cuts confront careful fittings. The DIY plumber balances confidence with caution, swapping a stubborn stop for a smooth repair. Proper tools, correct identification, and methodical prep turn potential mess into orderly work. When complexity or code questions arise, professional help contrasts with DIY pride—practical judgment guarantees safety, compliance, and a lasting solution.